


Configure SAML attributes in Appspace Cloud to map IdP or SCIM user properties to Appspace profiles. This article is for IT administrators who define system and custom profile attributes and use them in user group rules. After you complete these steps, you can add custom attributes, match them to your identity source, and assign users to groups with SAML mapping rules.
For: IT Administrator — Account Owners and admins configuring profile attributes and group mapping
What’s in this article:
Overview
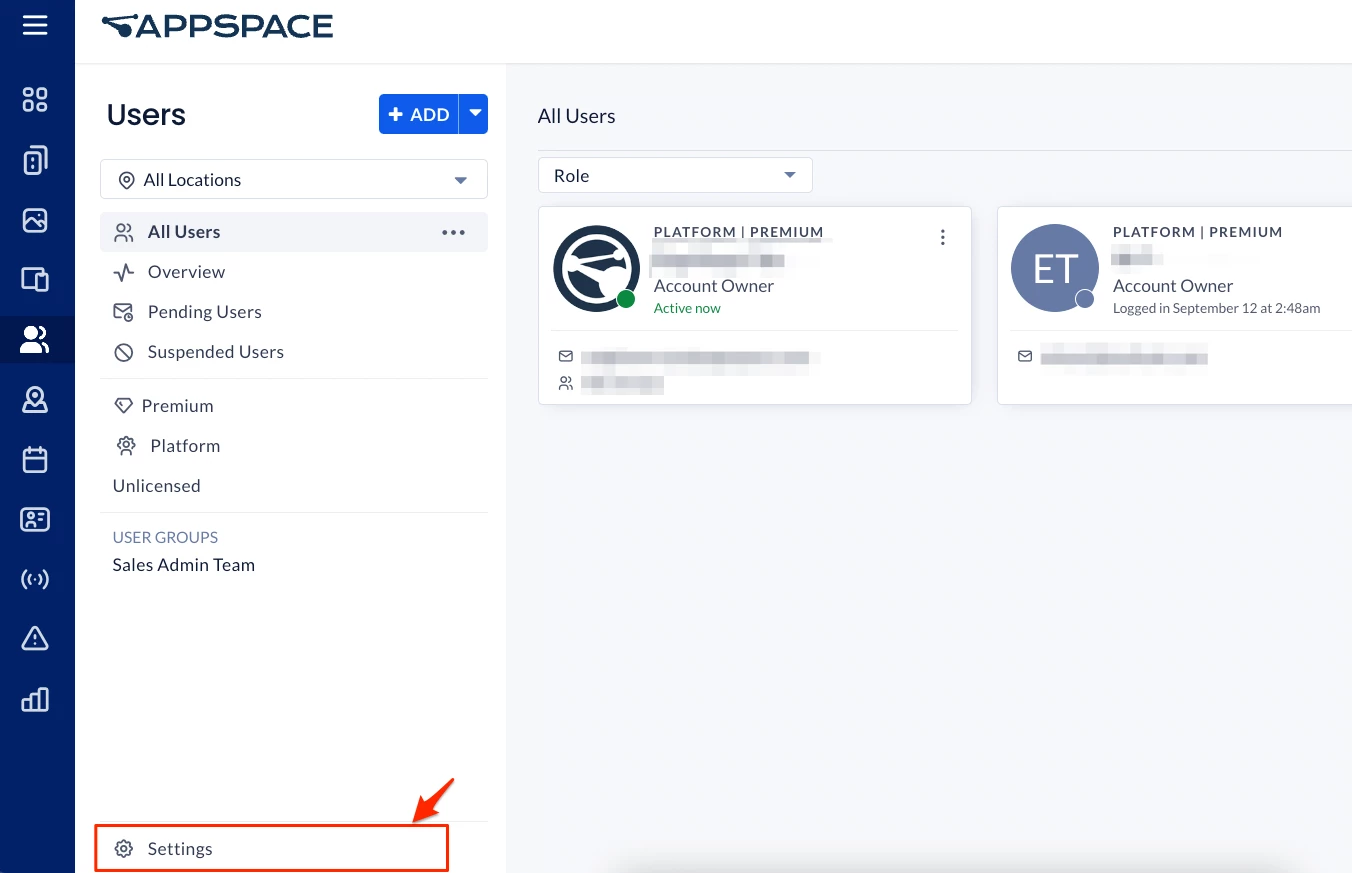
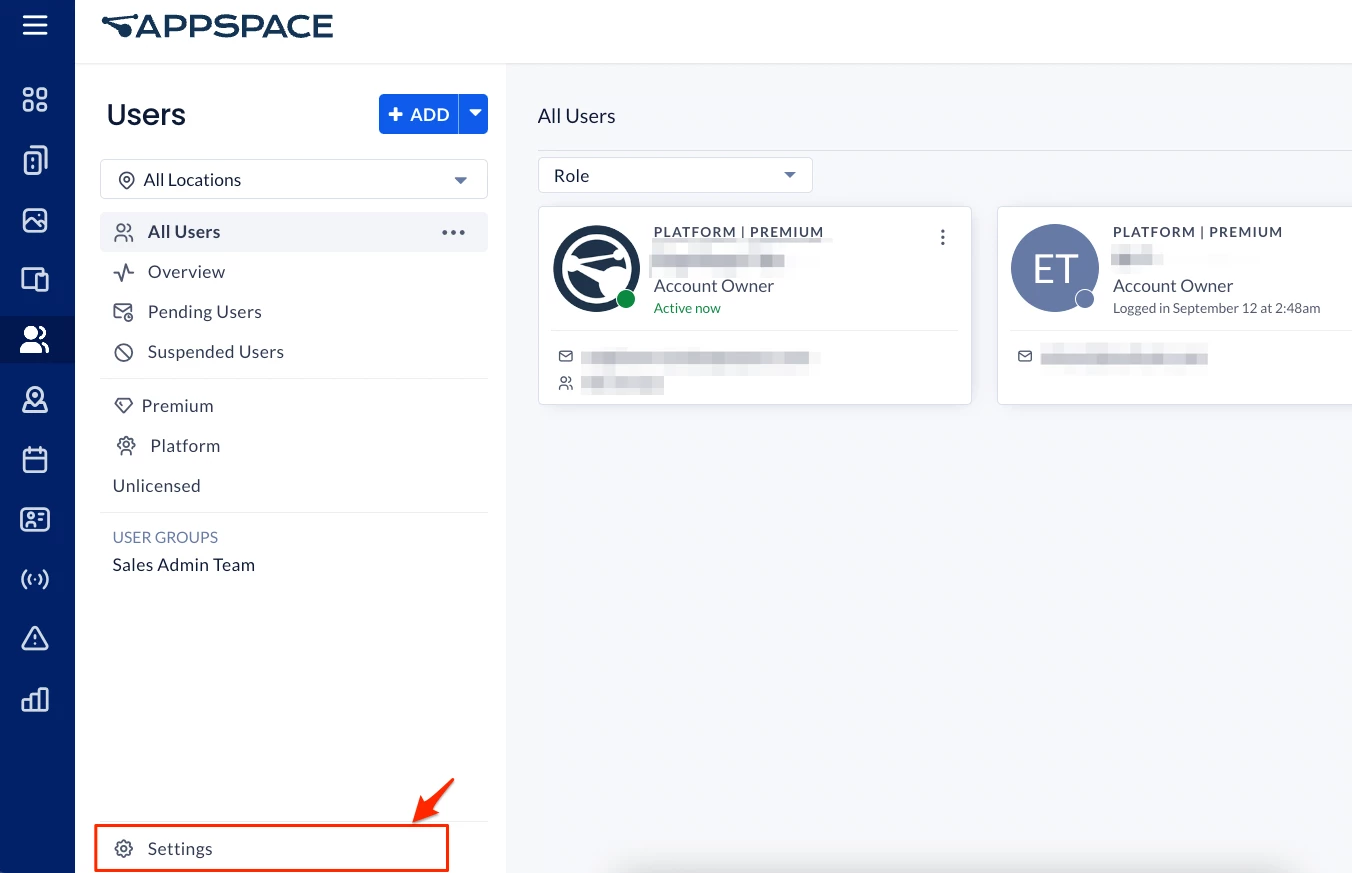
SAML attributes are available under Users from the ☰ Appspace menu, then Settings at the bottom of the left menu.
The Settings page lists system attributes and any custom attributes you add.
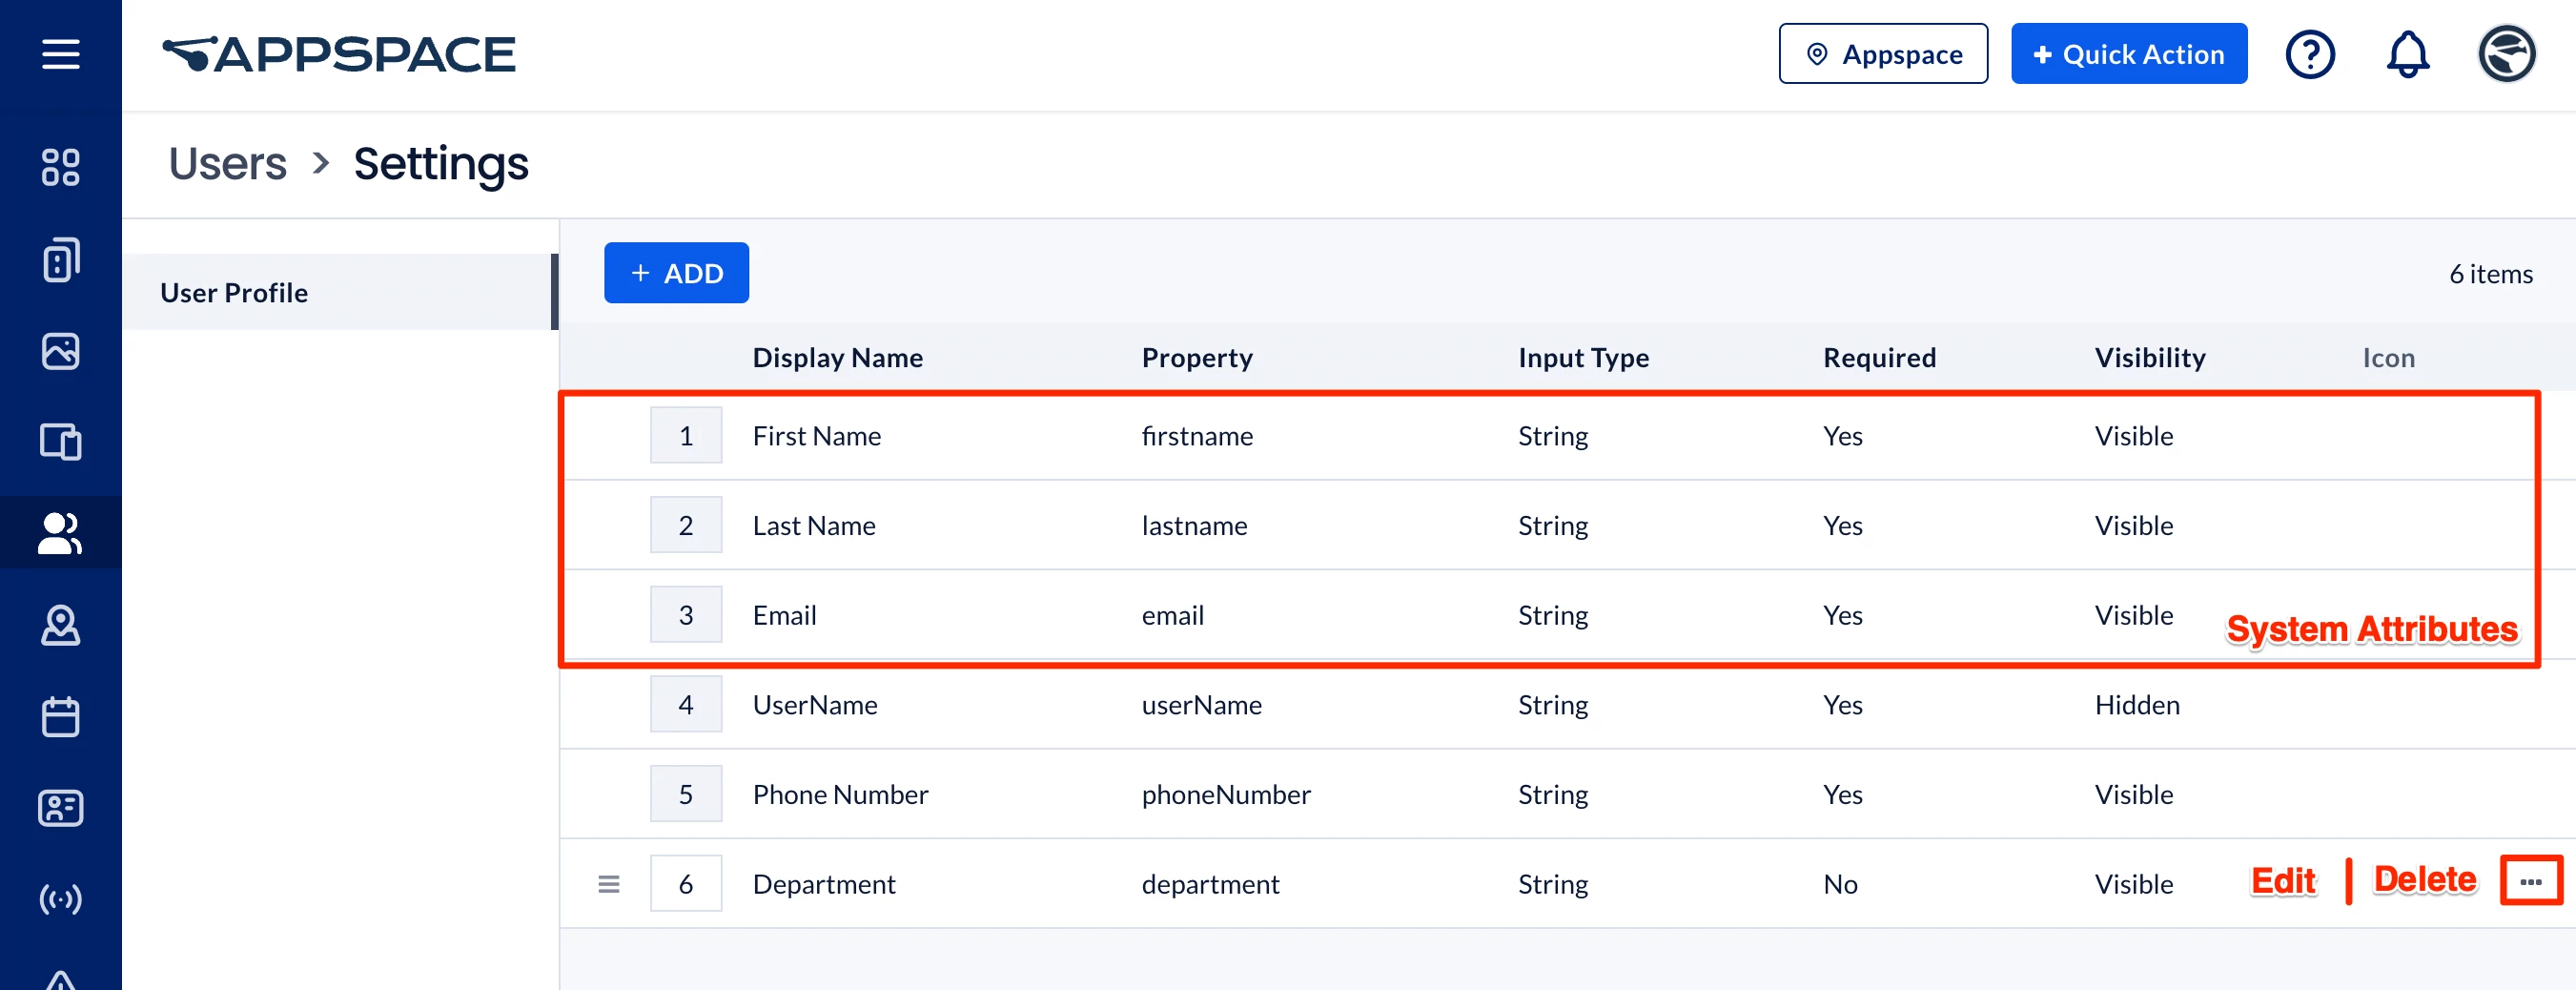
Appspace stores the following system attributes in the user profile. These system attributes cannot be deleted or edited because they are tied to Appspace user provisioning:
| Display Name | Property | Input Type | Required | Visibility |
|---|---|---|---|---|
| First Name | firstname | String | Yes | Visible |
| Last Name | lastname | String | Yes | Visible |
| | | String | Yes | Visible |
| UserName | userName | String | Yes | Hidden |
| Phone Number | phoneNumber | String | No | Visible |
| Manager | manager | String | No | Visible |
| Department | department | String | No | Visible |
| Job Title | jobTitle | String | No | Visible |
Note: Beyond these system attributes, you can add custom attributes as key/value pairs to match properties from your IdP or HRIS. Property names must match your external source exactly (case sensitive). For Org Chart relationships and related fields, see Bring Organizational Clarity to Employees: A Guide to the Org Chart.
Note: SCIM is the standard method for pushing ongoing profile attribute updates into Appspace. If more than one SCIM client writes the same mapped field to Appspace, the most recent update is kept (last write wins). See Configure SCIM User Provisioning with HRIS/IdP for Appspace Cloud.
Use this workflow to configure attributes and user mapping:
-
Configure SSO with Just-in-Time (JIT) provisioning, or enable SCIM user provisioning on your Appspace account.
-
Determine the custom user attributes on your external IdP or SCIM source that will be mapped to Appspace.
-
In the Appspace console, add the custom user attributes. Ensure Property and Input Type values match the external source (case sensitive).
-
Configure SAML Mapping rules for each desired user group in Appspace. You can set multiple custom rules to filter membership.
-
Provisioned users are assigned to user groups based on the custom rules set for each group.
Important: SAML assertions are sent only during a login event. Attribute data created or updated through SSO/JIT is not refreshed until the user signs in again. This may result in out-of-date profile data, delayed SAML-based group membership updates, and no updates for users who access Appspace only from the mobile app without another login event. For ongoing updates without relying on login events, use SCIM. For high volumes of mobile-only users without SCIM, you can also update values through the Appspace API when changes occur in the source system.
Prerequisites
-
Appspace Portal Admin, Account Admin, or Account Owner user role.
-
Just-in-Time (JIT) provisioning with SSO, or SCIM provisioning enabled on the Appspace console. SSO is not required when you use SCIM alone.
-
System and custom attribute field names in the external IdP or SCIM source match (case sensitive) the attributes configured in Appspace.
Configure SAML Attributes in Appspace
Follow the instructions below to add a custom attribute in Appspace that matches an attribute from your IdP or SCIM source.
-
Log in to the Appspace console.
-
Click the ☰ Appspace menu, and select Users. Click Settings at the bottom of the left menu.
-
On the SAML Attributes dashboard, click the + ADD button to add an attribute.
-
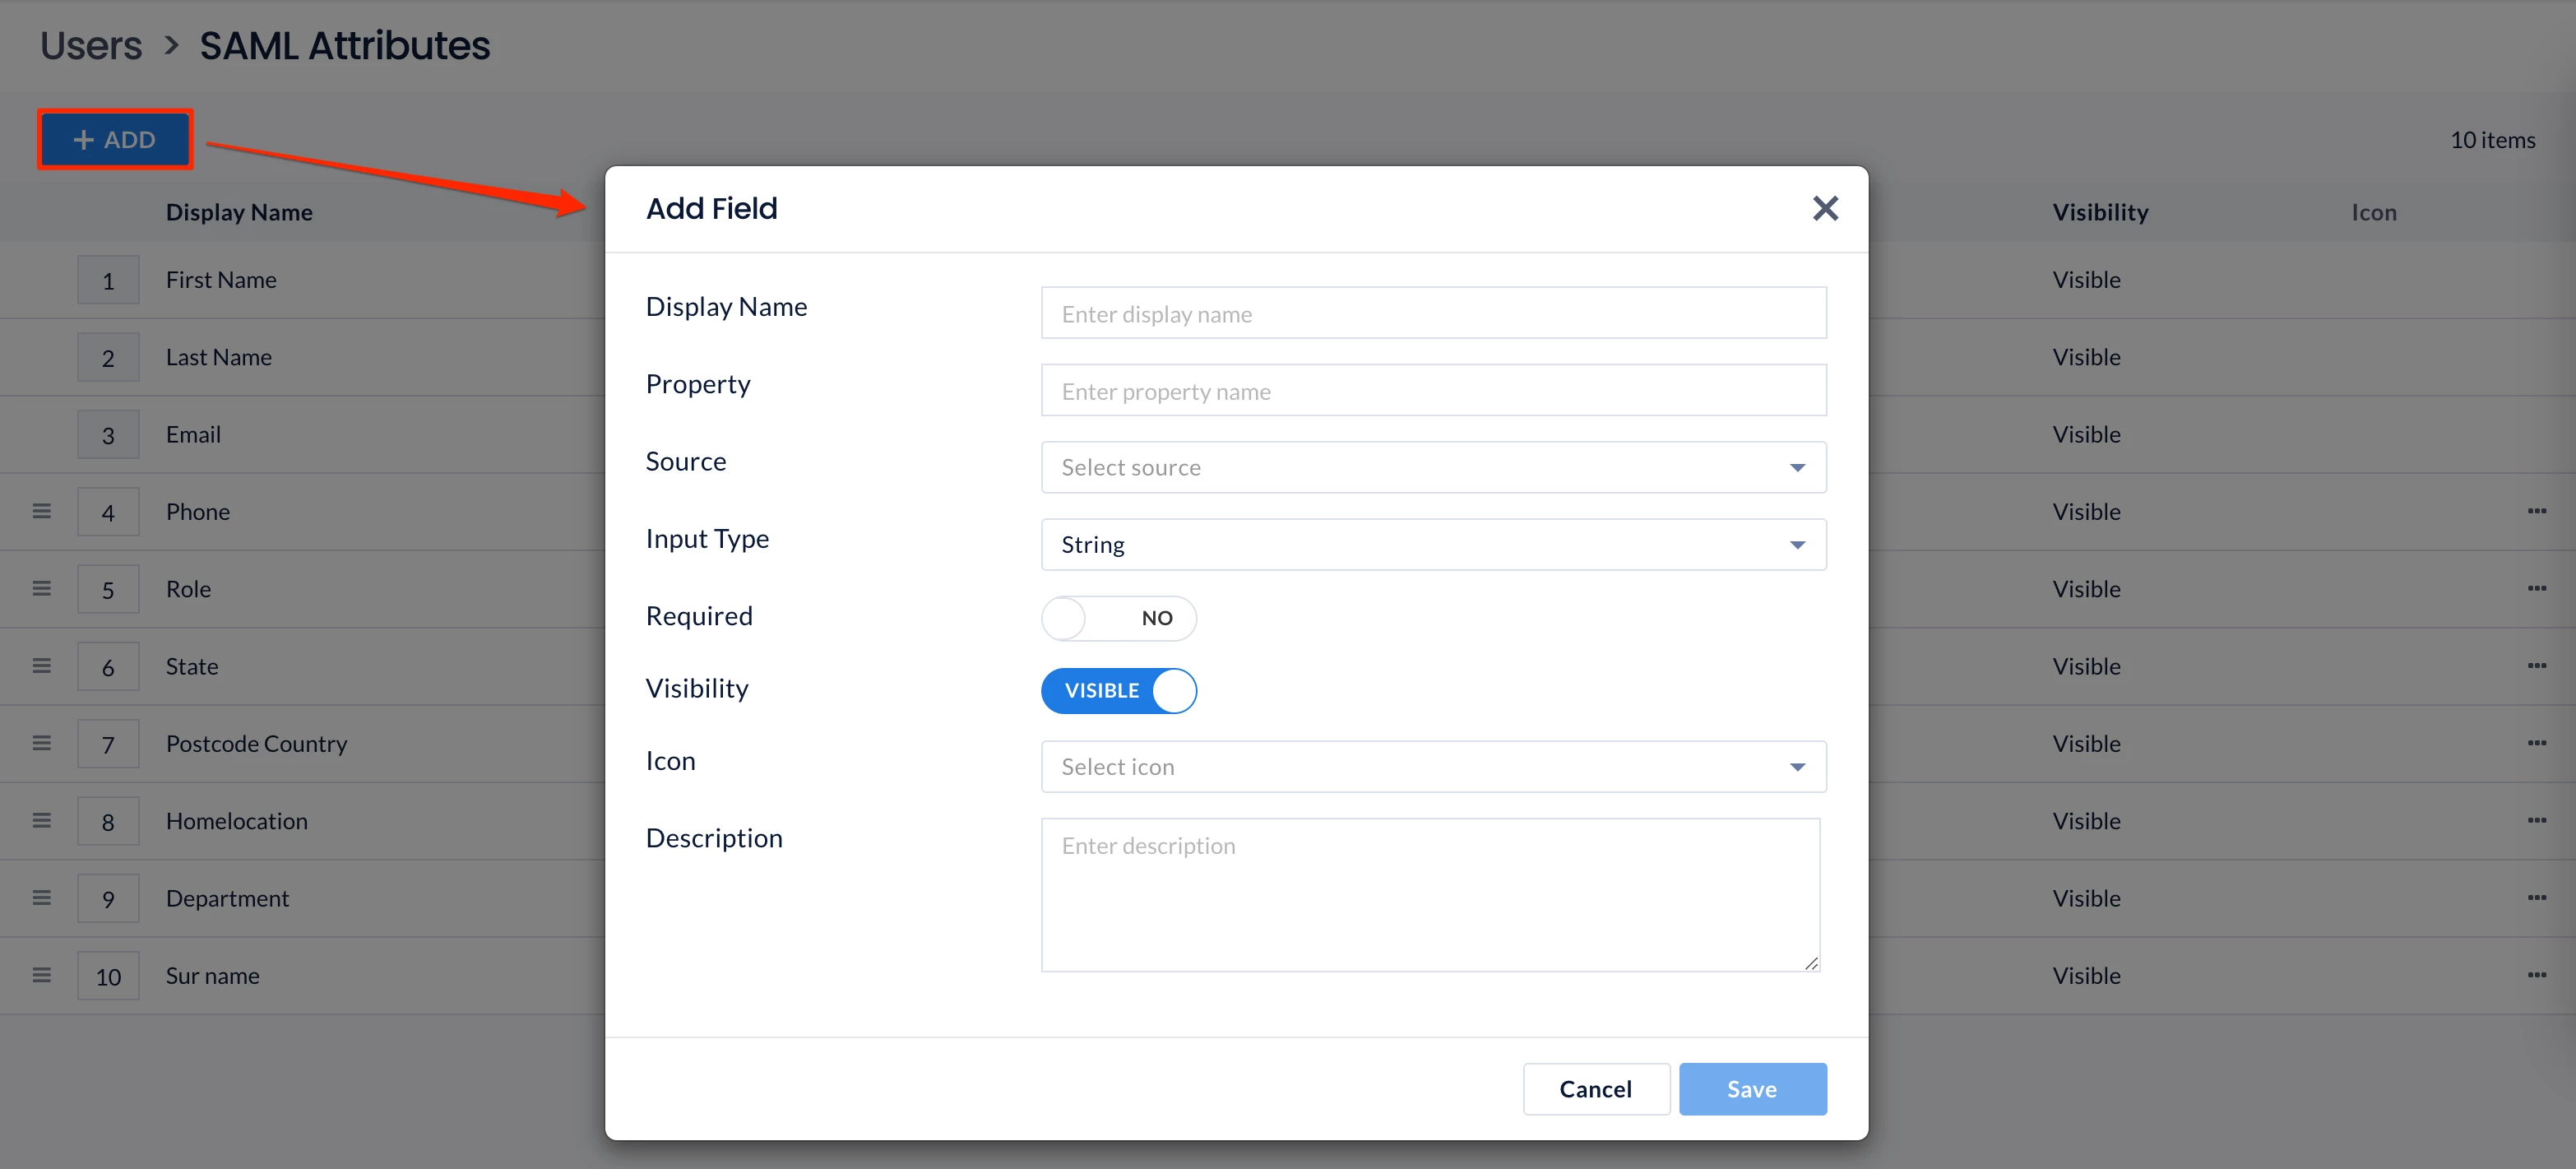
In the Add Field window, configure the following fields:
-
Display Name — Enter the name of the attribute to display.
-
Property — Enter the property name of the attribute.
-
Source — Select SAML as the source of the attribute.
-
Input Type — Select Integer for numeric characters or String for alphanumeric characters.
-
Required — Set to YES or NO (default).
-
Visibility — Set to VISIBLE (default) or HIDDEN.
-
Icon — Select an icon for the attribute in the user profile.
-
Description — Enter a description of the attribute.
-
-
Click Save.
Important: Ensure the attribute Property and Input Type are correct and match the external IdP or SCIM source. These fields cannot be changed after you save.
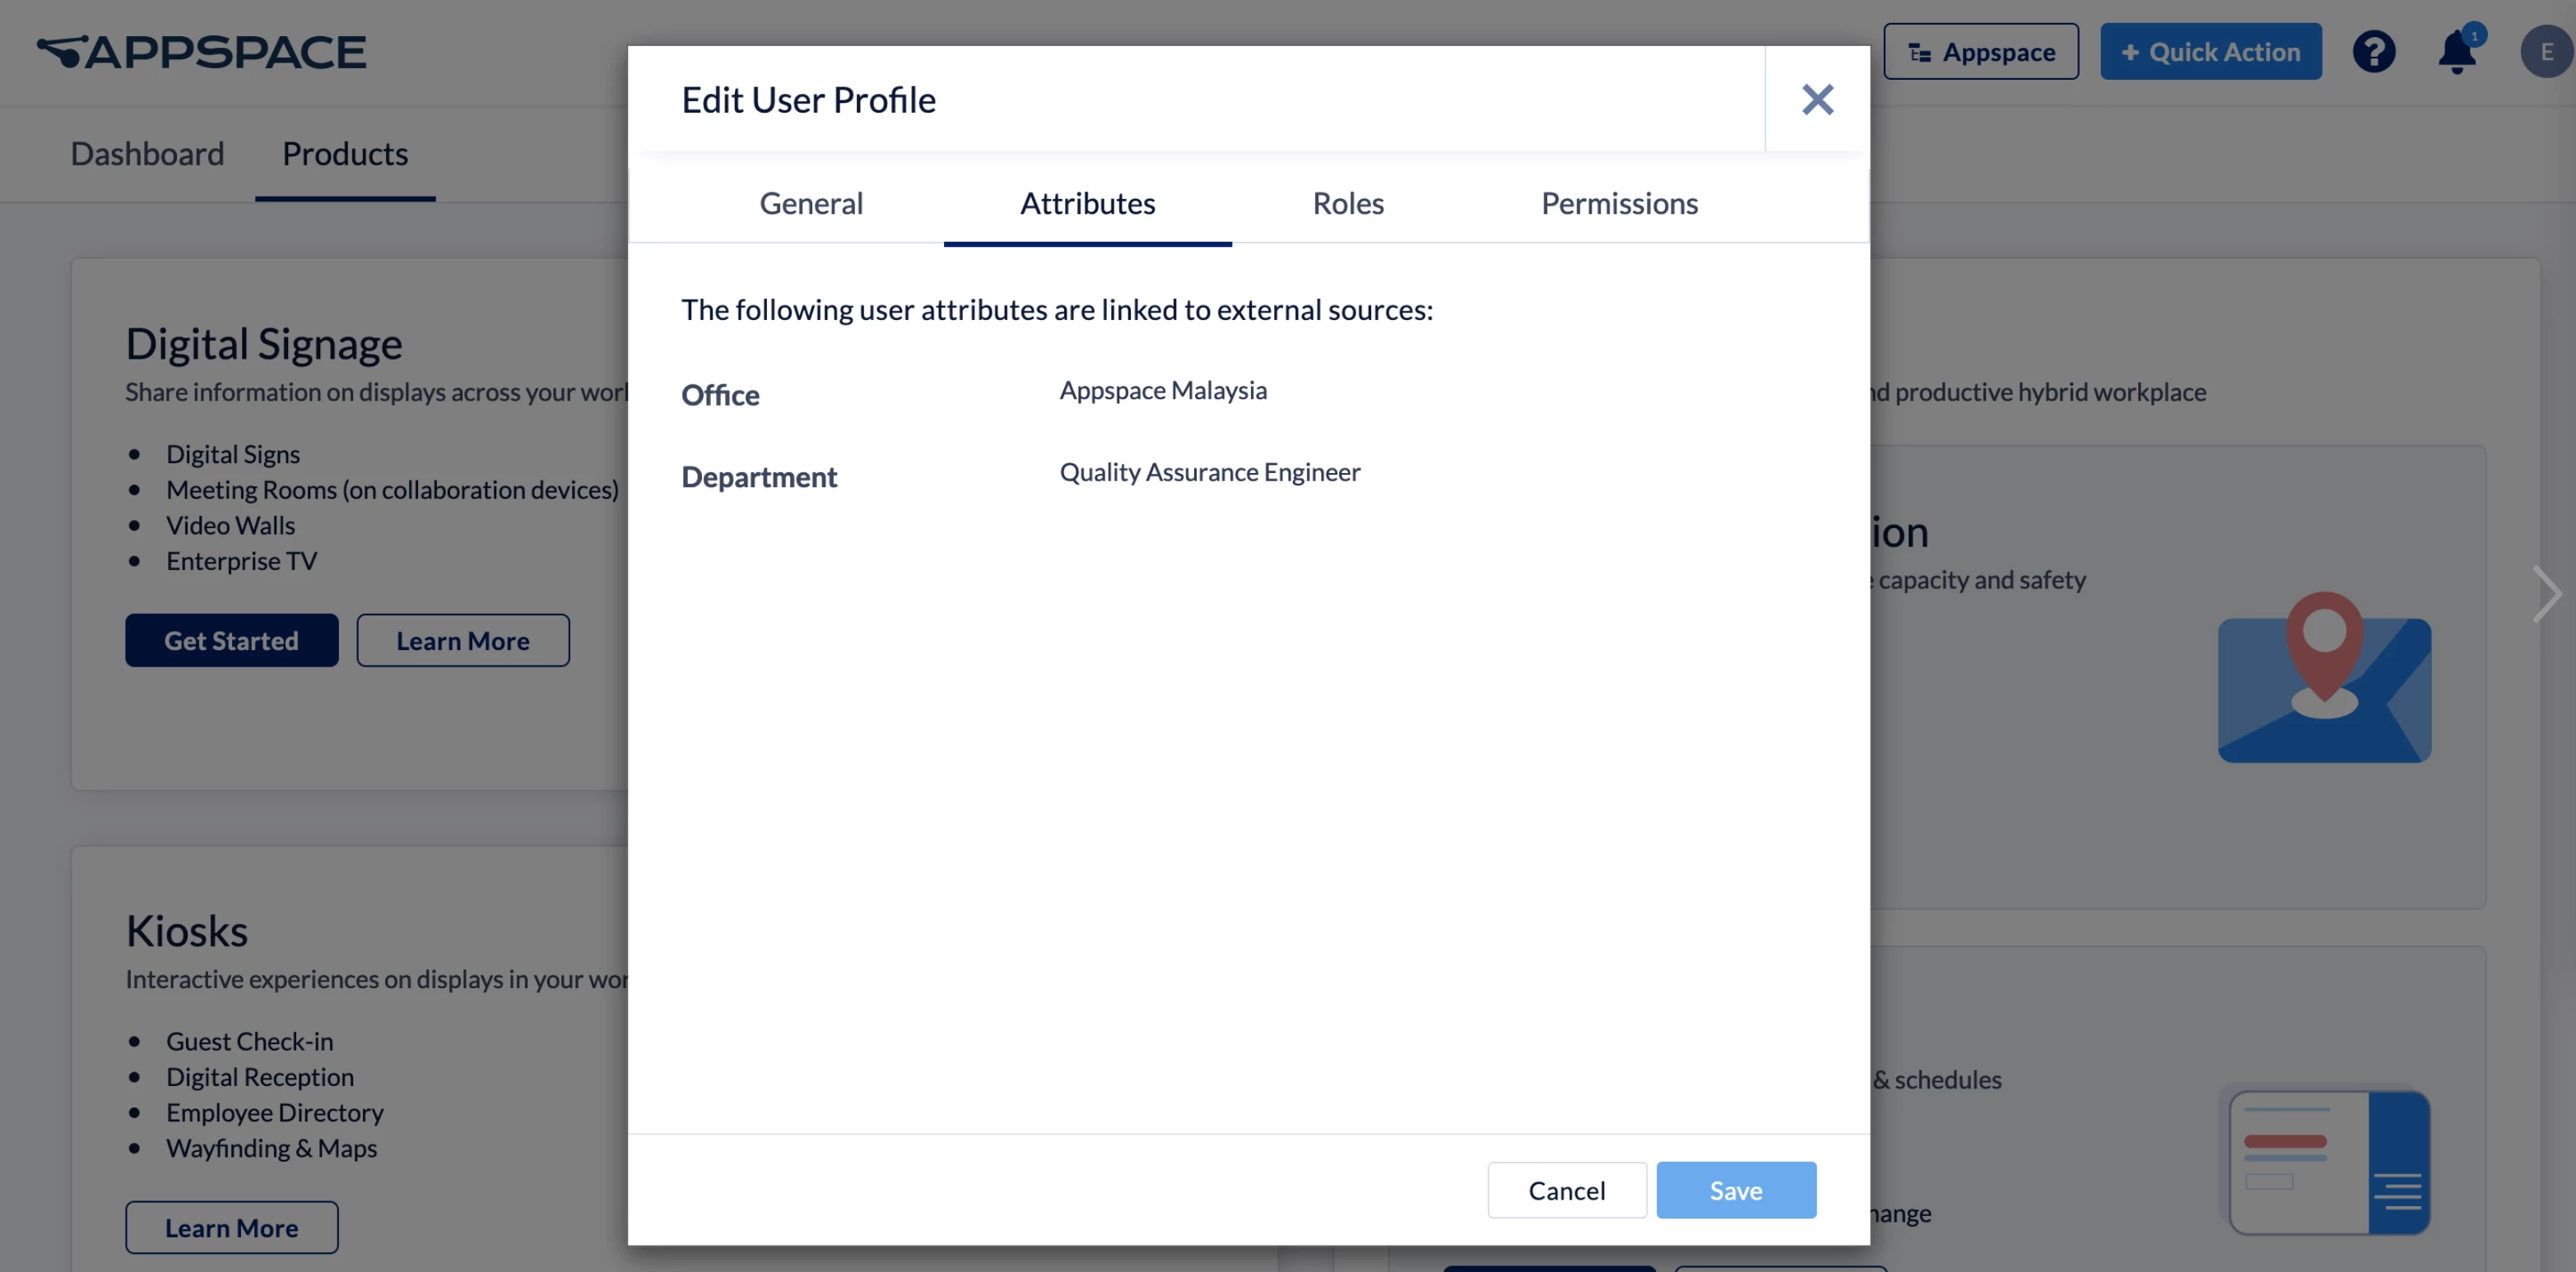
Custom attributes can be edited or deleted after you add them. They appear on the Attributes tab in the user profile for users provisioned through SSO with JIT or through SCIM.
Configure User Groups with SAML Mapping and Rules
Follow the instructions below to configure SAML mapping rules for a user group.
Note: If the user group does not exist yet, create it first. See Create and Organize User Groups.
-
Log in to the Appspace console.
-
Click Users from the ☰ Appspace menu.
-
Click the ellipsis of the desired user group, and select Edit User Group.
-
In the Edit User Group window, select Custom Rule from the SAML Mapping drop-down menu.
-
In the Manage Rules window, click Create Rule.
-
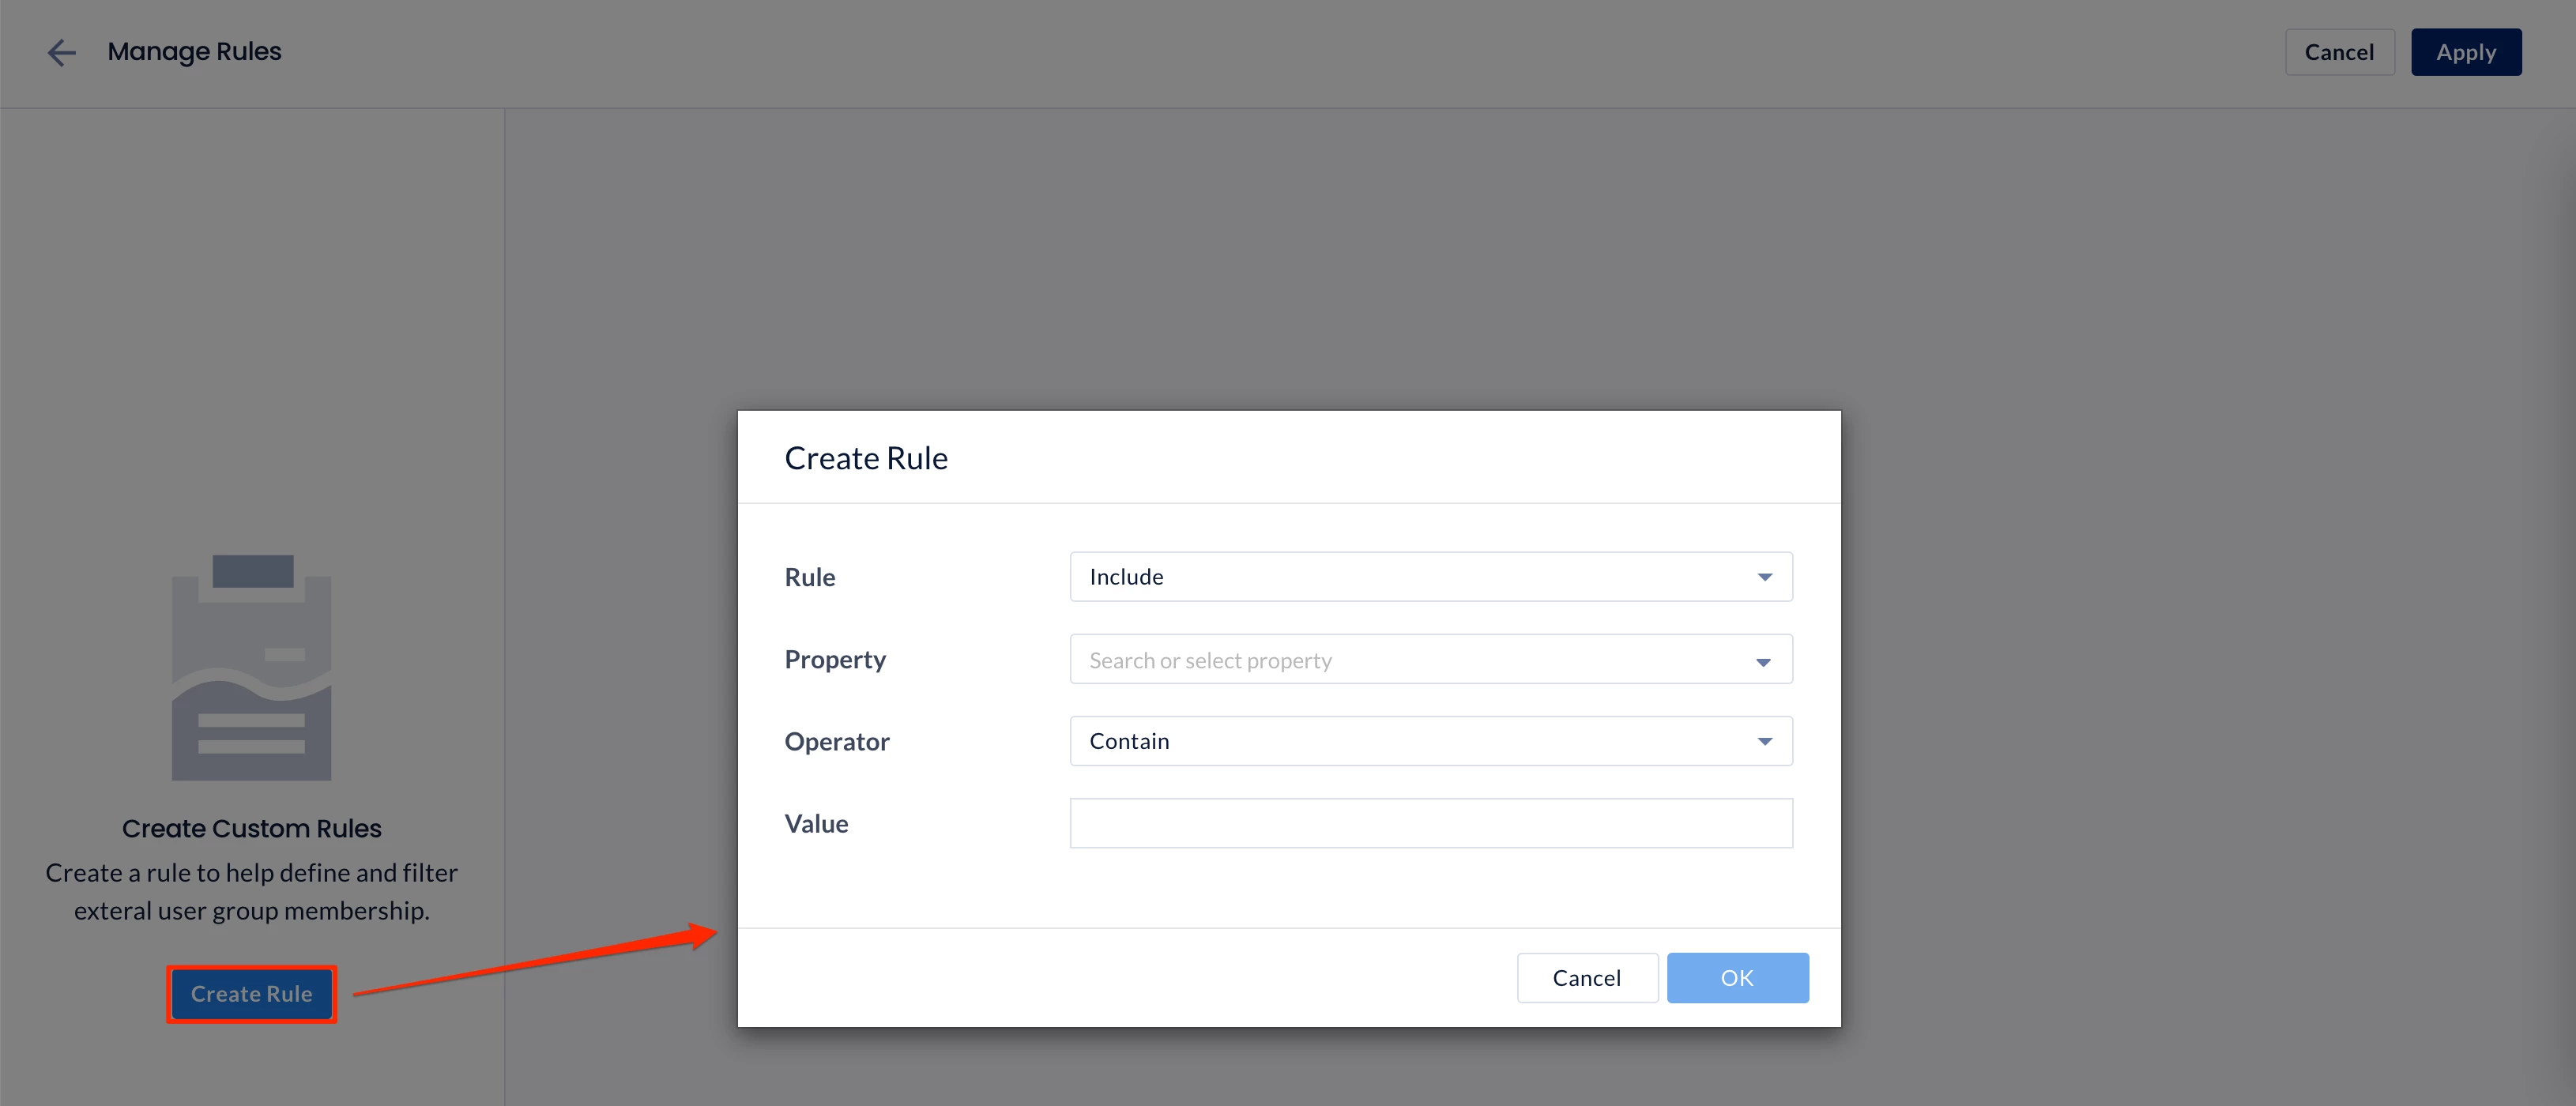
In the Create Rule window, configure the following fields:
-
Rule — Select Include or Exclude.
-
Property — Select the SAML attribute property the rule applies to.
-
Operator — Select Equal, Not Equal, Contain, Not Contain, In, or Match.
-
Value — Enter the attribute value required by the rule.
-
-
Click OK.
-
Review the users that match the custom rule, then click Apply to assign them to the user group.

Note: Users that match the rule but have not accepted their Appspace invitation are assigned to the user group only after they accept the invitation.