


Configure Single Sign-On in Appspace Cloud to authenticate users through a SAML 2.0 identity provider. This article is for IT administrators who enable SSO and optional Just-in-Time (JIT) provisioning. After you complete these steps, users can sign in with your IdP, and you can optionally create Appspace accounts automatically on first SSO sign-in.
For: IT Administrator — Account Owners configuring SSO and JIT for Appspace Cloud
What’s in this article:
Prerequisites
-
An Identity Provider that is SAML 2.0 compliant.
-
IdP metadata, or the SSO URL and the x.509 certificate.
-
Appspace account with Account Owner credentials to configure SSO settings.
-
Make Appspace available in the IdP-specific app catalog, if required by your IdP.
Important: Ensure the NameID in the SAML assertion is the email address of the user. Appspace uses the following NameID format: urn:oasis:names:tc:SAML:1.1:nameid-format:emailAddress.
Note: See Introduction to Configuring SSO with Appspace for more information. To configure SSO on Appspace private cloud, contact Appspace Support.
JIT Provisioning Prerequisites
-
An Appspace user group to act as the default user group for newly created JIT-provisioned users.
-
Configure a SAML identification attribute flag to identify an IdP user that should be created in Appspace. Configure this attribute in both the IdP and Appspace.
-
Configure the IdP to pass the correct JIT-related attributes to Appspace, such as First Name and Last Name.
-
Configure JIT in your access management tool (for example, Okta or OneLogin) and ensure any Appspace-specific attributes are created and passed with each assertion.
SSO, SCIM, and Identity Providers
SSO authenticates users. User provisioning is configured separately:
-
SSO — user authentication through your SAML IdP.
-
JIT — optional user creation on first SSO sign-in based on SAML attributes.
-
SCIM — optional ongoing user provisioning, updates, and de-provisioning. See Configure SCIM User Provisioning with HRIS/IdP for Appspace Cloud.
Appspace supports a primary and a secondary SSO identity provider. If you need additional SSO providers, contact Appspace Support.
Note: SSO is not required for SCIM. You can use SCIM with Appspace credentials or with SSO. JIT provisioning creates users at sign-in and does not provide the same ongoing profile updates and de-provisioning capabilities as SCIM.
Enable Single Sign-On Authentication
Follow the instructions below to enable and configure SSO authentication for Appspace Cloud.
-
Log in to the Appspace console.
-
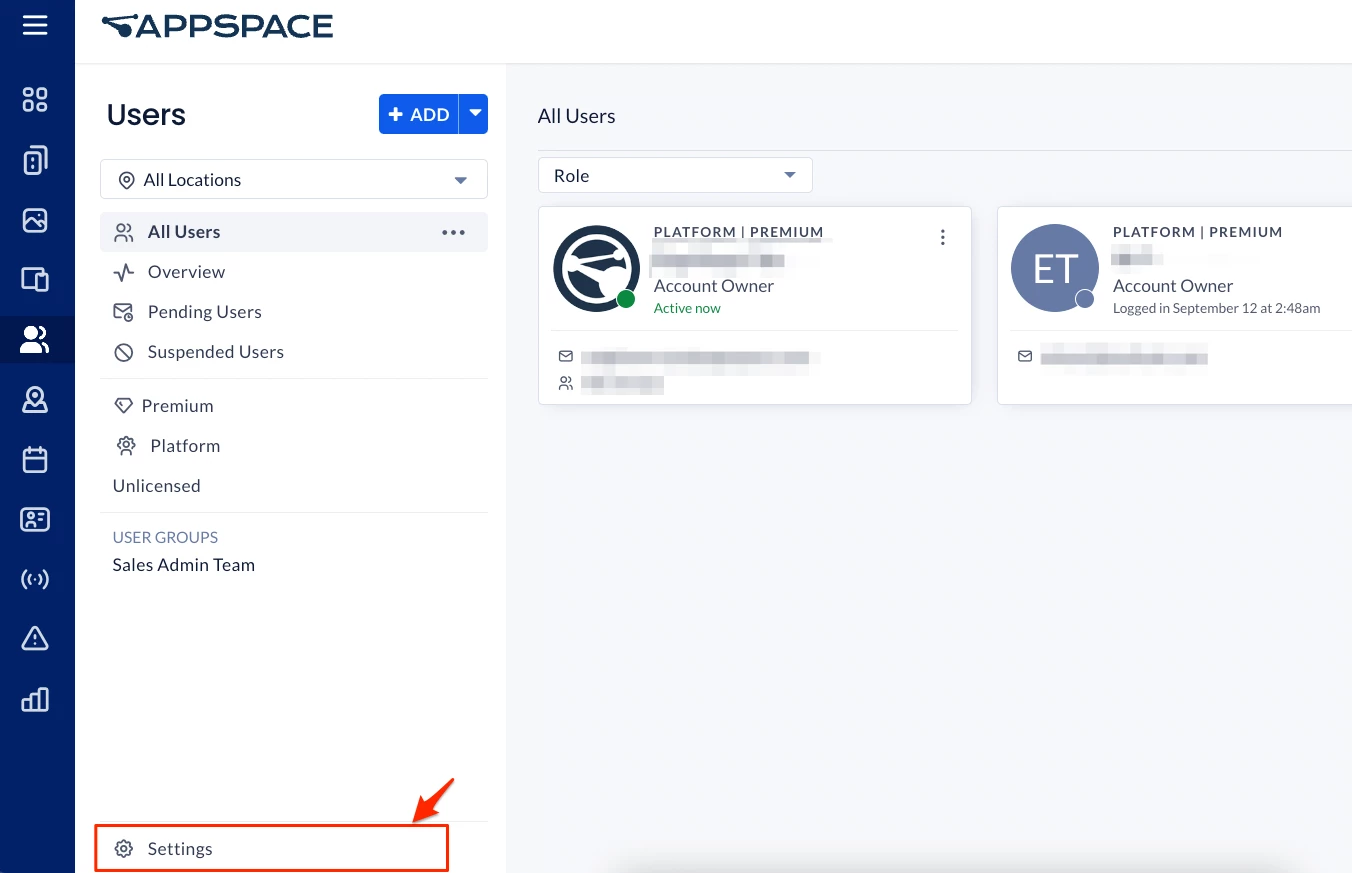
Click Users from the ☰ Appspace menu.
-
Click ⚙ Settings, and click Account Authentication from the side-panel menu.
-
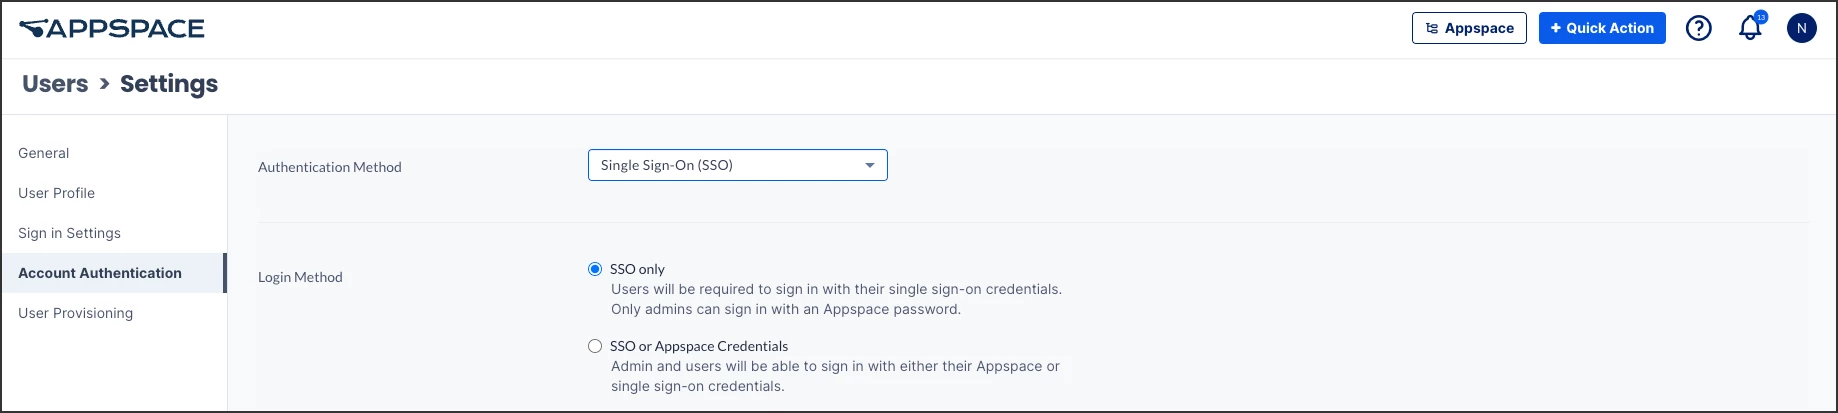
Select Single Sign-On (SSO) from the Authentication Method drop-down menu.
-
Select the Login Method:
-
SSO only — Users must sign in with their single sign-on credentials. Only Account Owners can sign in with an Appspace password.
-
SSO or Appspace Credentials — Account Owners and users can sign in with either Appspace or single sign-on credentials.
-
-
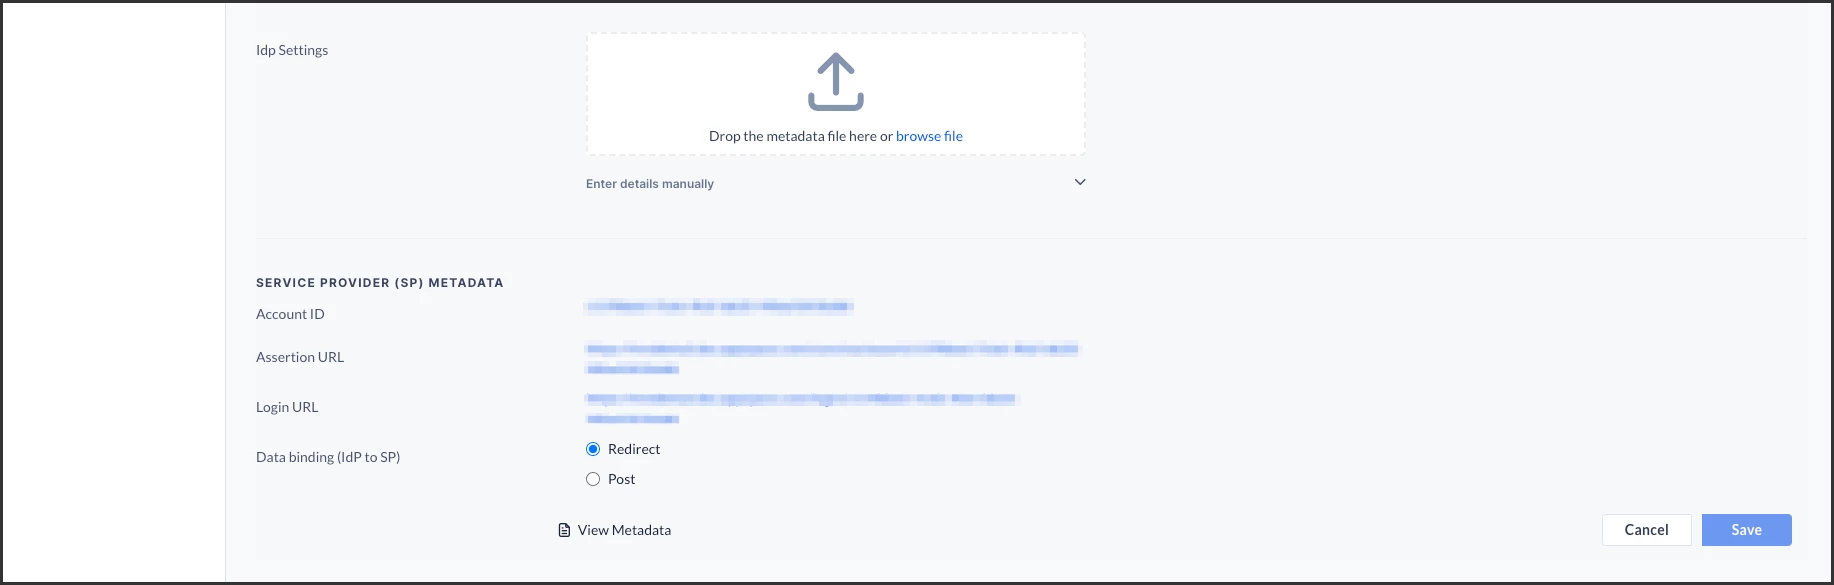
In the IDENTITY PROVIDER (IDP) INFORMATION section, configure the IdP settings using one of the following methods:
-
Drop or upload the IdP metadata XML file.
-
Manually enter the SSO URL and X.509 Certificate details.
-
-
In the SERVICE PROVIDER (SP) METADATA section, select the desired Data binding (IdP to SP) option:
-
Redirect — Users are redirected to the Identity Provider. SSO details are passed in a query string with
?SAMLRequest=as part of the URL. -
Post — SSO details are passed using the POST method. Ensure the Identity Provider has direct access to the Appspace server for this method to work.
-
-
Click Save.
Important: Ensure the NameID in the SAML assertion is the email address of the user. Appspace uses the following NameID format: urn:oasis:names:tc:SAML:1.1:nameid-format:emailAddress.
Configure Just-In-Time User Provisioning
Just-in-Time provisioning automatically creates users on the Appspace account when they sign in with SSO and do not already exist.
-
Log in to the Appspace console.
-
Click Users from the ☰ Appspace menu.
-
Click ⚙ Settings, and click User Provisioning from the side-panel menu.
-
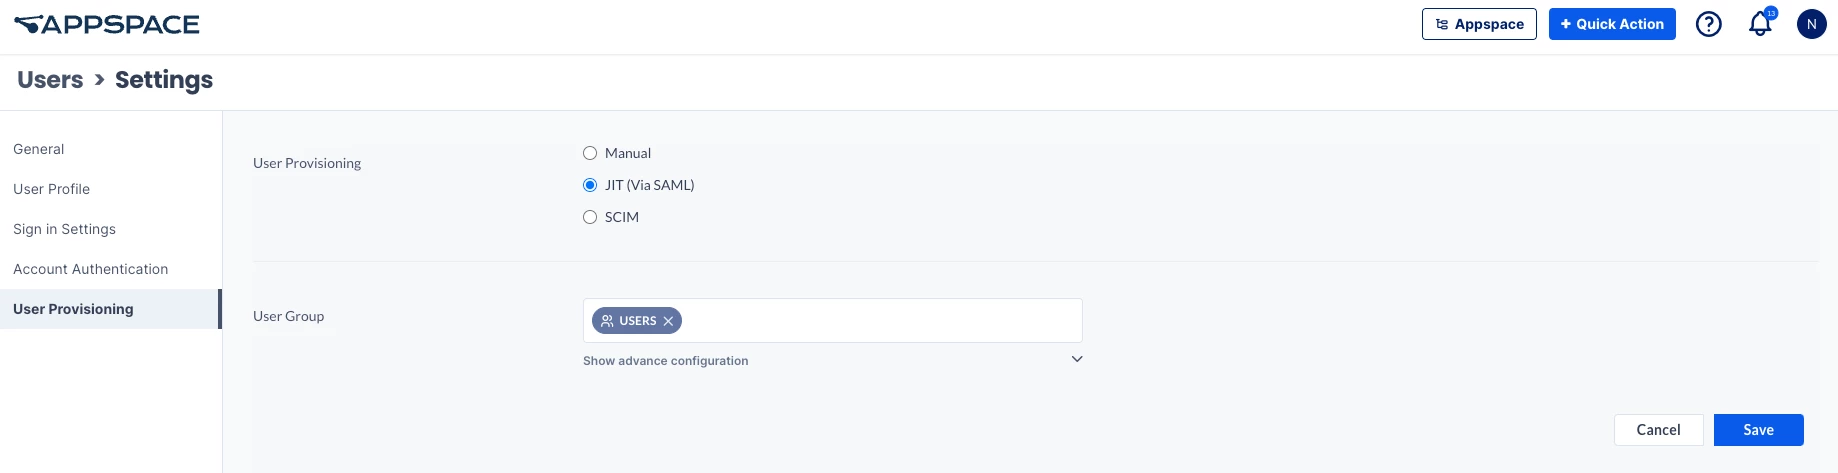
Select the JIT (VIA SAML) radio button from the User Provisioning options to display the JIT settings.
-
Enter the user group to which new users will be assigned.
-
Optionally, click Show advanced configuration if you want to map the SAML attributes to values that match your IdP implementation.

-
Enter the SAML attribute mappings for First name and Last name.
-
-
Enter the JIT condition Attribute Name and Attribute Value Regex.
-
Click Save.
Note: By default, the SAML attributes are mapped to the first name and last name from the IdP configuration. The default SAML identification attribute flag uses Attribute=appspace-role and Value=^platform-user$. This value is a regular expression. If the attribute value matches the expression, the user is provisioned via JIT. You can match all users by setting an attribute such as mail with value .*.
Important: Ensure first-time users sign in using the Login URL listed in the GENERATING SERVICE PROVIDER (SP) METADATA section so JIT can create their accounts. After their accounts are created, they may continue to sign in with the default Appspace login URL.
