

This article consists of three parts. You can continue reading with the links below:
The Appspace Visitor Management system enables employees using the Appspace Space Reservation system to configure visitor and check-in information for events with the new Visitors module in the Appspace console, allowing you to then invite external users (visitors) to a meeting or event held in your company using the Appspace Employee View. These visitors could be an employee from another facility/division/subsidiary within your company or other corporate entities from outside the company.
Configure the Appspace Visitor Management System to allow your visitors to self-check-in for events using Appspace visitor kiosks.
Personas
There are 4 key personas involved in the operation of the Visitor Management solution:
- Administrator – An Appspace user responsible for setting up the Visitors system, administering visitor and system behavior, setting up the kiosk, and configuring interfaces with any external systems (calendars, watchlists, printing services, etc.).
- Host – An employee or administrator in an organization (an Appspace user), who initiates any visitor activity by inviting an external user to an event/meeting via the Appspace Employee View. Once an employee sends an invitation, they automatically become the event/meeting host.
- Facilitator – An employee or administrator in an organization (an Appspace user), who will be the initial point of contact for visitors, and who will typically be tasked with managing and facilitating the registration or badge printing for all visitors scheduled to enter the facility and attend the event.
- Visitor – A visitor to the facility who has received an invitation from the event/meeting host. We also accept drop-in visitors who do not have a prior invitation on some occasions. Visitors must complete registration activities (if available) before attending the event/meeting. These visitors do not need to be an Appspace user.
Workflows
The following describes the key workflows in a Visitor Management system:
- Configuration – Administrators configure the Appspace Reservation and Visitor Management systems, and define integrations with 3rd party systems (calendars, watchlists, printing services, etc.) to enable the Visitor Management functionality.
- Invitation – Hosts initiate the visitor invitation as part of a meeting/event reservation activity. We introduce a new permission-controlled, interactive visitor dashboard within the Employee View (Visitor tab), with access to some of the visitor management functions.
- Registration – Visitors receive the invitation and are notified of any registration tasks that need to be completed via a portal. Both the host and the visitor will have visibility of the completed registration tasks.
- Registration/Check-In –
- The Visitor Kiosk card will be deployed to kiosk devices and used for self-guided visitor registration and check-in at the event facility.
- The Facilitator will be the initial point of contact for visitors on-site, with a complete view of all upcoming events and visitor details. Facilitators will help visitors verify the Registration activities have been completed, and help with the check-in processes on-site if needed.
- If the Visitor has not completed the Registration tasks, the visitor may complete them on-site and then proceed to check-in.
- Visitors must check-in for the event on-site, and complete any last-minute tasks (such as ID confirmation, badge printing, etc.) at the kiosk.
- The Host is automatically notified upon completion of the check-in process by visitors to the event.
Features & Functions
The following lists the main features and functions in the Appspace Visitor Management system:
- Host & Visitor Invitation Features
- Invite visitors to a room, space, or building.
- Enter visitor data to invite using a spreadsheet (bulk import).
- Configurable registration workflows for admins, hosts, and visitors.
- Calendar and email reminders for all visitor registration checkpoints.
- Visitor check-in notifications to email and enterprise messaging apps.
- Visitor registration activity completion notifications.
- Manual registration of drop-in visitors for last-minute events.
- Visitor Registration & Check-in Features
- Submit registration information in advance.
- Submit a photo for visual verification in advance.
- Calendar and email reminders for the completion of registration items.
- Auto-filling of information for returning visitors.
- Option for on-site self-guided registration and check-in.
- Option to complete end-to-end registration on-site without registration.
- Administrator & Facilitator Dashboard Features
- Access to all admin functions in a separate admin console.
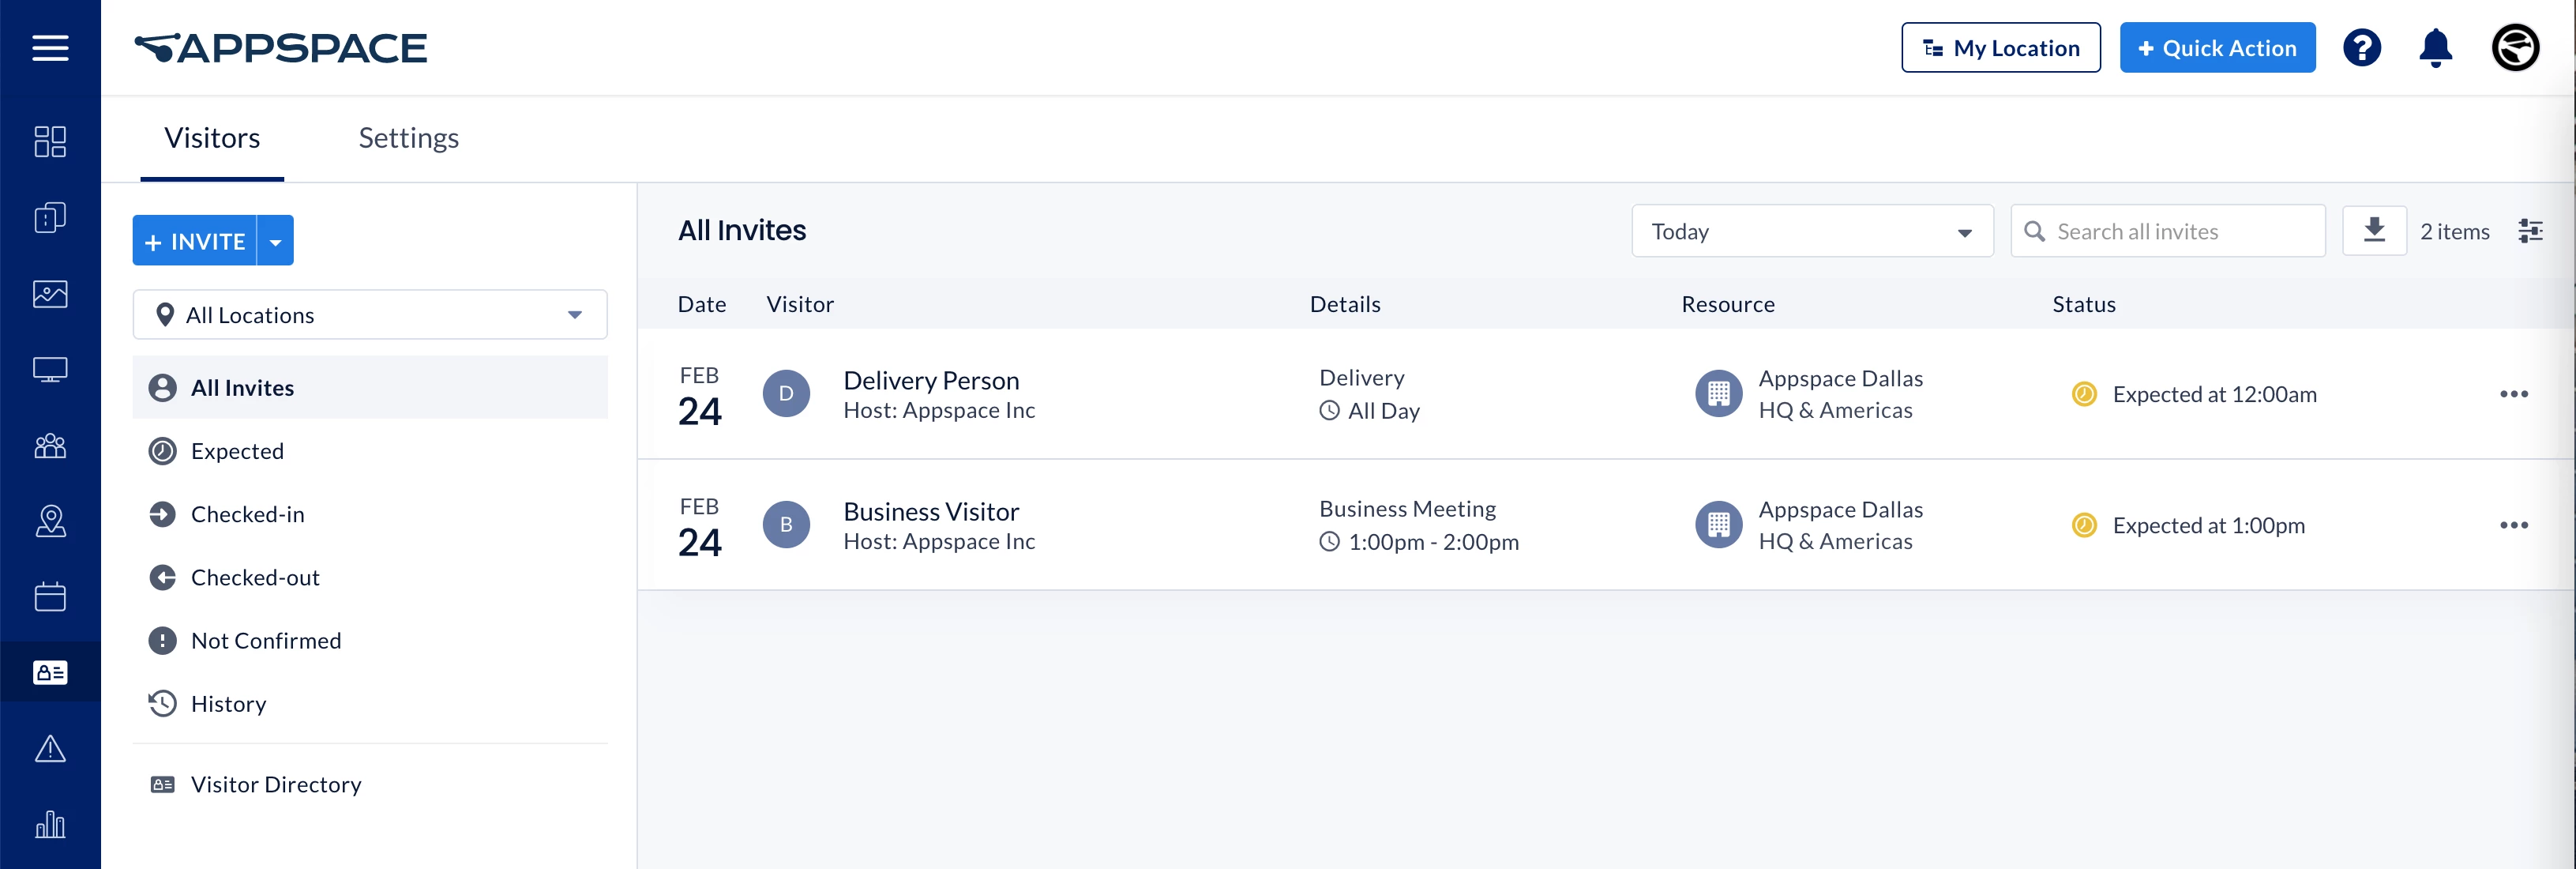
- Calendar and list view of expected visitors and historic records of past visitors.
- Review visitor details including, but not limited to: Name and contact details, company, host, date, time, duration, photo, and much more.
- Option to enable/disable touchless check-ins and manually check-in visitors.
- Select multiple visitors to perform check-in/check-out, print badges, or cancel/delete invitations in bulk.
- Option to enable/disable pre-registration, notifications, and checkpoints (this feature is currently behind a feature flag and not available to the public).
- System Configuration & Administration
- Access to visitor registration through a downloadable app/client.
- Configure, enable, and disable required registration fields.
- Option to make email required or optional for visitors. (new)
- Set a data retention period for visitor data and invitations to meet data privacy requirements.
- Option to allow hosts to view only visitors they have previously invited, and not the visitors of other hosts.
- Set visitor types and purposes to be recorded in visitor profiles and invitations.
- Native integration with Appspace Space Reservation system.
- Support for SSO and IdP.
- Roles & License Requirements:
- Administrator – User assigned with Account Owner or Location Admin role, and an Appspace Platform user license. To access the Employee View a Premium user license is required.
- Host & Facilitator – Hosts and facilitators will use the Appspace Employee View to invite visitors and to review and check-in visitors. The Employee View requires Premium user licenses.
- Kiosk – Devices running the Visitor Kiosk card for the self-service check-in will require a standard device license.
- Notifications
- Once a visitor has completed registration details, the visitor’s event status becomes confirmed. Visitors will be notified via email.
- Hosts will be notified via email and their configured enterprise messaging app, when a visitor:
- Accepts, Declines, or responds Maybe to an invitation.
- Completes registration details and is confirmed for their visit.
- Checks out onsite.
This article provides Administrators with the instructions to configure the Appspace Visitor Management System with the Visitors module in the console, to allow your visitors to self-check-in for events using Appspace visitor kiosks:
Important
- Administrators looking for information on navigating the Visitors module in the console, refer to Browse and Navigate Visitor Management in Appspace 8.x.
- Administrators who would like to setup the Visitor Kiosk card on a kiosk for self-check-ins, refer to Cards: Visitor Kiosk Check-Ins.
- Hosts and Facilitators looking for guidance to send and manage event invitations, refer to Manage Visitor Invitations – Hosts & Facilitators.
- Visitors looking for guidance for self check-in and registration, refer to Event Check-In and Registration.
Prerequisites
- Appspace 8.1-ac.25 and later.
- An active Appspace public/private cloud account.
- The Space Reservations system configured with buildings, locations, resources, and a booking calendar provider.
- Account Owner or Location Admin role, with an Appspace Platform user license to configure the Visitors system.
- To access the Appspace Employee View, a Premium user license is required.
- For iOS badge printing: On the iPad, ensure the Appspace App is allowed to discover devices on the local network. Navigate to Settings > Privacy & Security > Local Network and verify that the Appspace App toggle is enabled. This step may need to be performed by the device administrator.
Additional Equipment Requirements:
- Camera – QR Code functionality for touchless check-ins, check-outs, and also visitor photo capture requires devices that are supported by the Appspace Card Library.
- Printing – If badge printing is required, please ensure a supported printer is connected to the visitor kiosk, or to the device the facilitator dashboard is displayed on.
Important
- Visitor photo capture is currently supported on iOS 26, Android 12 (or later), ChromeOS, and Neat OS devices.
- Visitor badge printing is currently supported on iOS 26, Android 12 (or later), ChromeOS, and Neat OS devices configured with Brother QL Series printers. It is also supported on the following devices when configured with Brother QL Series printers:
-
Logitech Tap Scheduler
-
iAdea WRP-1000
-
Crestron TSS-770
-
Crestron TSS-880
-
- Device Property – Configure iOS devices with the following device property if Visitor badge printing is enabled:
Important
Due to formatting issues, we advise customers to remove and re-enter the quotation marks when copying and pasting from this article.
- For Brother QL Series Printers
-
Printer Type:
device.printer.type = brotherPrinter Options:
device.printer.options = {"model": "<printer model>", "modelName": "<printer model name>", "ipAddress": "<ip address>"}
or
-
Printer Options:
device.printer.options = {"model": "<printer model>", "modelName": "<printer model name>", "ipAddress": "<ip address>", "paperLabelName": "<paper label>"}Example:
{"model": "QL_820NWB", "modelName": "Brother QL-820NWB", "ipAddress": "<ipAddress>", "paperLabelName": "W60H86"}
The model property defines the specific printer device, thus please refer to the following reference link to determine how to list your device model property: https://support.brother.co.jp/j/s/support/html/mobilesdk/reference/android/printerinfo.html#modelThe paper label property defines the paper label used in the roll printer, based on the width and height of the label. If it is not specified, it is set to W62 as the default value. Please use the correct paper label property as supported by your Brother Labeller model, as provided in this reference link: https://support.brother.co.jp/j/s/support/html/mobilesdk/reference/android/labelinfo.html
-
- For Generic Printers
-
Printer Type:
device.printer.type = genericPrinter Options:
device.printer.options = {"printer":"ipp://<printer ip>/ipp/print"}or
-
Printer Options:
device.printer.options = {"printer":"ipp://<printer ip>/ipp/print" , "paper" :{"length" : "6cm"}}The paper length property indicates how long the paper is until it gets cut off on a roll printer. If it is not specified, it is set to 10cm as the default value.
-
- For Brother QL Series Printers
Enable Visitor Management
- Log in to the Appspace console.
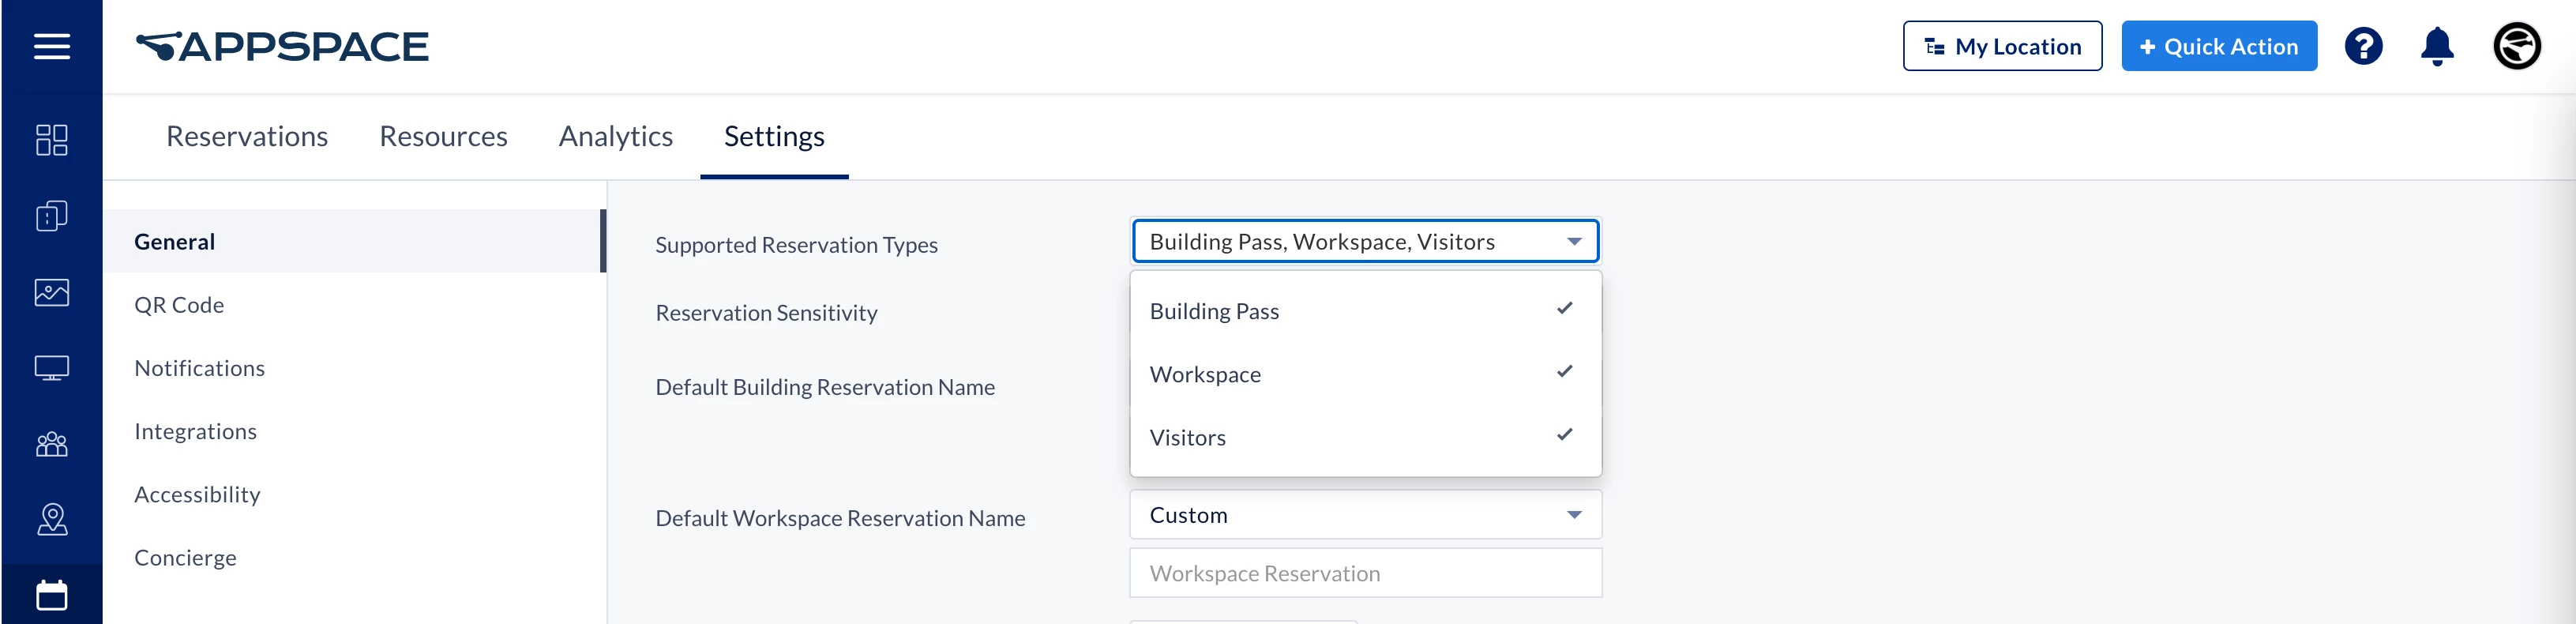
- Click Reservations from the ☰ Appspace menu, and click the Settings > General tab.
- Select Visitors from the Supported Reservation Types drop-down menu to enable the Visitor Management system.
Configure Building Resources for Visitors in Reservations
Follow the instructions below to ensure the resource accepts visitor invitations:
- Log in to the Appspace console.
- Click Reservations from the ☰ Appspace menu, and click the Resources tab.
- Select a building that you want to enable for Visitor Reservations, then click the ellipsis (…). Make sure you’re selecting the building itself, not a resource within it, as only buildings support the Allow Visitor Reservations rule. Select Edit.
- In the Edit Building window, ensure the following settings and constraints are added:
- In the General tab, ensure the following setting is selected:
- Reservable – Select User can reserve this resource from the drop-down menu.
- In the Rules tab, click the + Add Rule button to add the following constraints:
- Allow Visitor Reservations
- Category – Select Constraint from the drop-down menu.
- Type – Select Allow visitor reservations from the drop-down menu.
- Allow Visitor Reservations – Slide the toggle to YES.
- Allow Visitor Drop-In
- Category – Select Constraint from the drop-down menu.
- Type – Select Allow visitor drop-in from the drop-down menu.
- Allow Visitor Drop-in – Slide the toggle to YES.
- Require Confirmation By – Select the roles responsible to confirm drop-in visitors from the drop-down menu. You may select Host, Facilitator, or both Hosts or Facilitator.
- Timeout After – Select the timeout duration for the drop-in visit confirmation. Defaulted at 30 mins.
- Timeout Action – Select the action in the event the drop-in request is not confirmed within the timeout duration. Defaulted at None (no action taken). Selecting Cancel automatically cancels the drop-in request after the timeout duration.
- Allow Visitor Reservations
- In the General tab, ensure the following setting is selected: