Reservation Services 1.0 & 2.0
Feature Comparison and Setup Guide
Reservation Services 2.0 represents a major upgrade to the Services module. This update provides a centralized area in the Appspace Console for configuring Services as well as customizable forms and expanded workflow functionality.
For customers transitioning from Reservation Services 1.0, these differences are substantial. This guide will explain the key distinctions between the two versions and detail how to leverage Version 2.0 effectively moving forward.
To see a full article on just the Reservation Services 2.0 features, check out this article: Equip the Room, Feed the Team: Setting Up Reservation Services 2.0 | Community
Key benefits
- Centralized Management: Provides a single, centralized area on the Appspace Console for managing all service types (Catering, Business, etc.).
- Custom Form Flexibility: Offers greater ability to customize service forms to capture all necessary information upfront, reducing follow-up requests.
- Concierge Order Tracking: Empowers Concierge users with a dedicated view to efficiently track and manage incoming service requests.
- Post-Booking Flexibility: Employees can add service requests to existing reservations as plans evolve, without canceling or recreating the booking.
What this guide covers
- Service Creation (Business & Catering): Creating base services, customized request forms, and menus.
- Form Customization: Adding questions, menu items, categories, and modifiers.
- Checkout Settings: Configuring new options for delivery and checkout details.
- Service Checkpoints: Linking new service forms and menus to Checkpoint rules.
- Order Management: Using the new Concierge Orders view to track and manage incoming service requests.
- End-User Experience: Navigating the new end-user experience for employees submitting service requests.
- Mandatory Business Services: Requiring employees to complete a business service form during check-in.
- Adding Service Requests to Existing Reservations: How employees can submit ad-hoc requests post-booking.
Prerequisites
- Platform license to access the Admin Console
- Account Owner or Location Admin user role
Understanding the Services Module: 1.0 vs. 2.0
The most significant difference in the two versions of Reservation Services is an entirely new section of the Appspace Console dedicated to Services. Previously, in version 1.0, service forms were created only through the limited card template gallery.
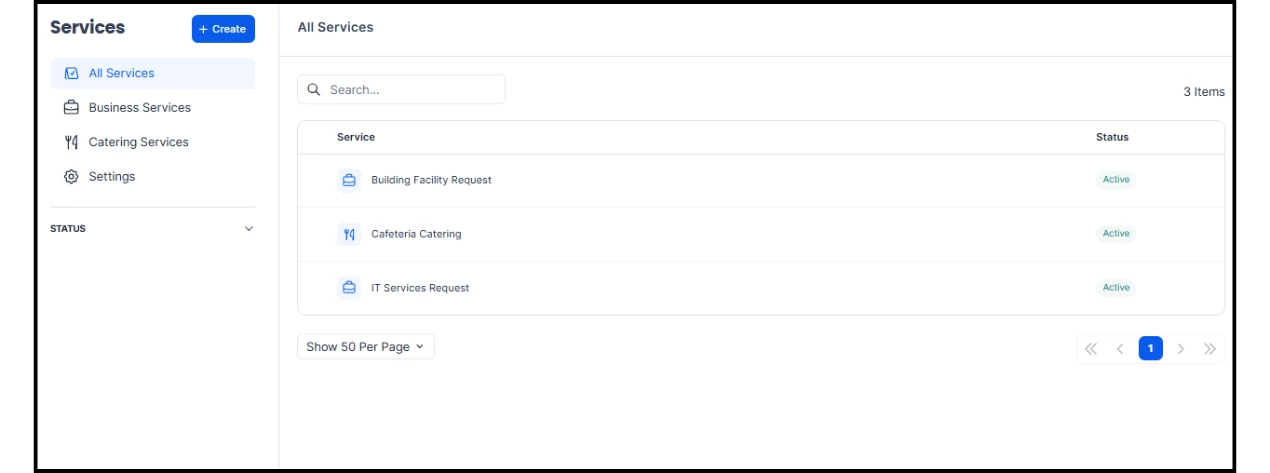
The Services module allows administrators to configure and manage two primary types of service requests:
- Business Services: Requests for items like stationery, office furniture, AV equipment, or lighting services.
- Catering Services: Requests for food and beverage catering.
This central view is also the hub for reviewing and managing status settings.
Building a Business Service
The original Reservation Services form in the template gallery was limited to basic text styling and a simple data table of questions. Version 2.0 uses a multi-layered structure to allow for far greater flexibility.
Step One: Building a Business Service Base
A Business Service is a form employees can use to request resources like AV equipment or additional chairs for a meeting room. Before setting up a form, first create a base service (e.g., a "Building Facility Request" service):
- Log in to the Appspace console.
- Open the ☰ Appspace menu and click Services.
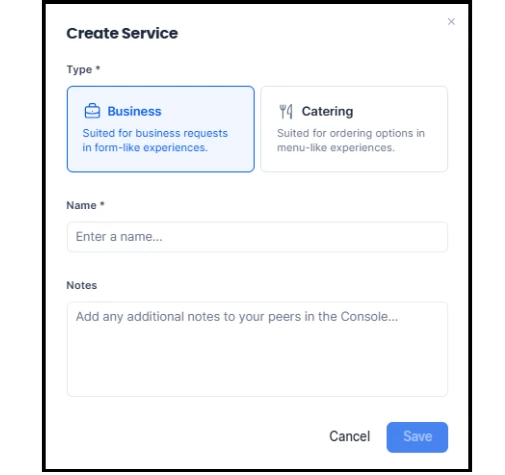
- Click +Create on the upper-left corner.
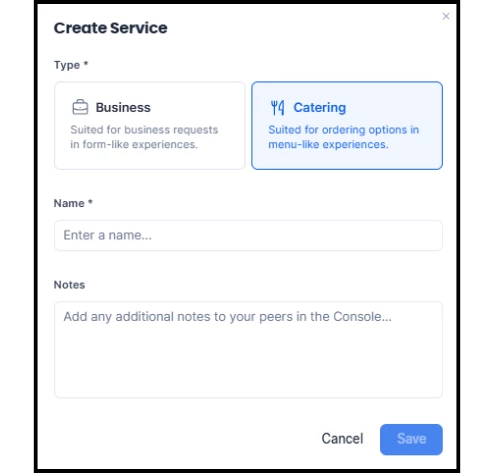
- For Type of business, select Business.
- In the Create Service window, enter the Name and Notes of the service.
- Click Save.
Step Two: Creating a Business Request Form
One type of Business Service can have several request forms under it (e.g., a "Building Facility Request" service may include "Room Configuration," "Required Equipment," and "AV Setup" forms). Administrators can configure basic information, preparation time, and payment for each form.
- From the Services page, click Business Services.
- Select the base business service to add a form to.
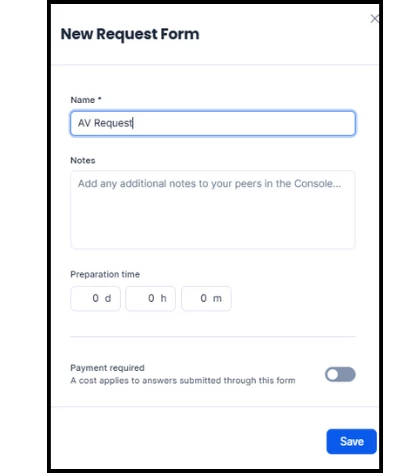
- In the Forms tab, click the +New button in the top right corner.
- In the New Request Form window, fill in the following details:
- Name and Notes
- Preparation Time: Set the time required before the event to place an order.
- Payment Required: Disable to show prices; choose the Currency from the list.
- Active: Enable this option to allow users to view and submit requests.
- Click Save.
Step Three: Configuring questions and sections
The new form allows for easier Question configuration than the old Services 1.0 data table. Additionally, Sections are a new feature for organizing questions. To start adding Questions and Sections to a form, select the new form from the list.
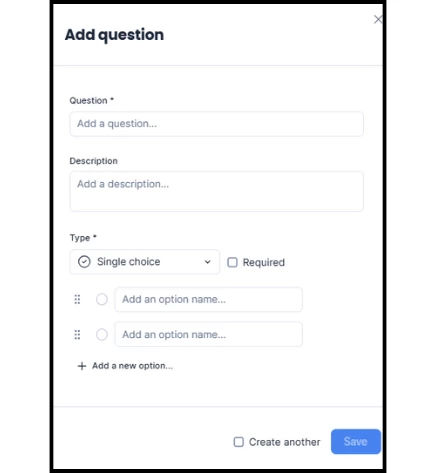
- Adding Questions: Configure the Questions on the form and their layout by clicking +Add question. Similar to Services 1.0, Administrators will fill out the question text, description, select the type of answer input, define the answer options, and mark whether the question is required.
- Adding Sections: Organize Questions under Sections by clicking +Add section. For example, in a "Required Equipment" form, Administrators can organize Questions into "Usage Requirements" and "Equipment Type and Number."
Building a Catering Service
The process of building a Catering Service differs significantly from the Business Service, as it uses Menus and Categories rather than static questions. However, the structure of multiple layers applies to the configuration of both.
Step One: Creating a Base Catering Service
- Log in to the Appspace console.
- Click the ☰ Appspace menu, and click Services.
- Click +Create on the upper-left corner.
- For Type of business, select Catering.
- In the Create Service window, enter the Name and Notes of the service.
- Click Save.
Step Two: Creating a menu
The process of building the Catering Service Menu form is the most different from the original Services 1.0. Rather than general questions, this form is built around a specific list of food Menu Items. Employees will see the available food selections as a specialized food order form.
- Select Catering Service from the Services list.
- Click +New in the upper right corner of the Menus tab.
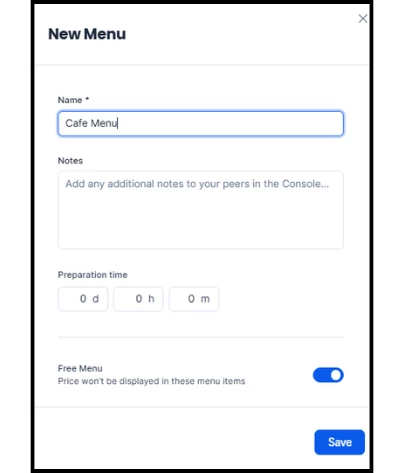
- In the New Menu window, fill in the following details:
- Name and Notes
- Preparation Time: The amount of time needed to prepare the Service. If a reservation duration is less than the time needed, the organizer will not be able to see the Service form.
- Free Menu: Disable this to show prices; choose the Currency from the list.
- Active: Enable this option to allow users to view and submit requests.
- Click Save.
Step Three: Adding categories, modifiers, and menu items
3A. Adding categories
Categories organize menu items into groups (e.g., Appetizers, Entrees, Sides, Desserts).
- On the Catering Services page, select the Categories tab.
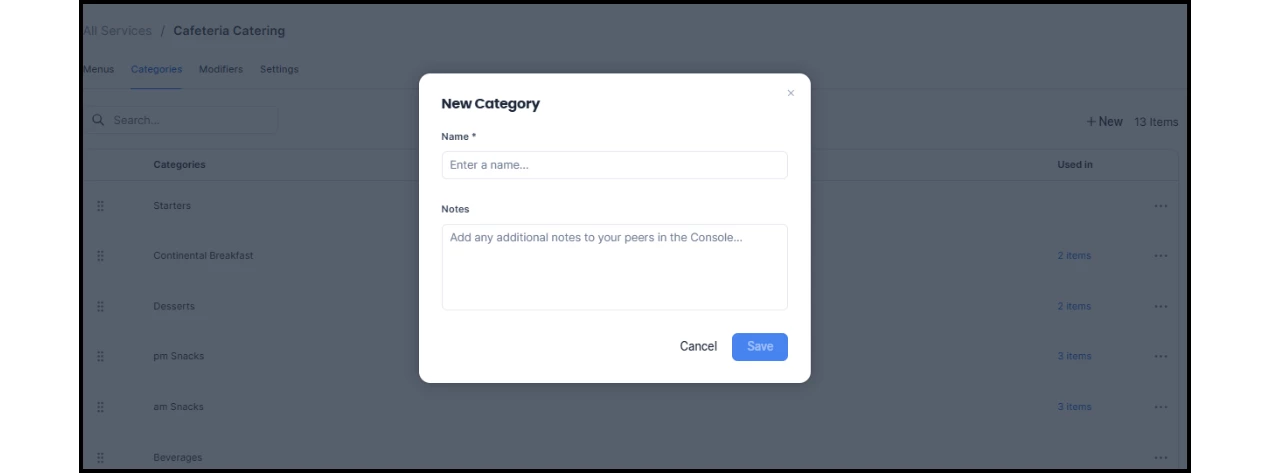
- Click +New at the top-right corner.
- In the New Category window, enter the Name and Notes.
- Click Save.
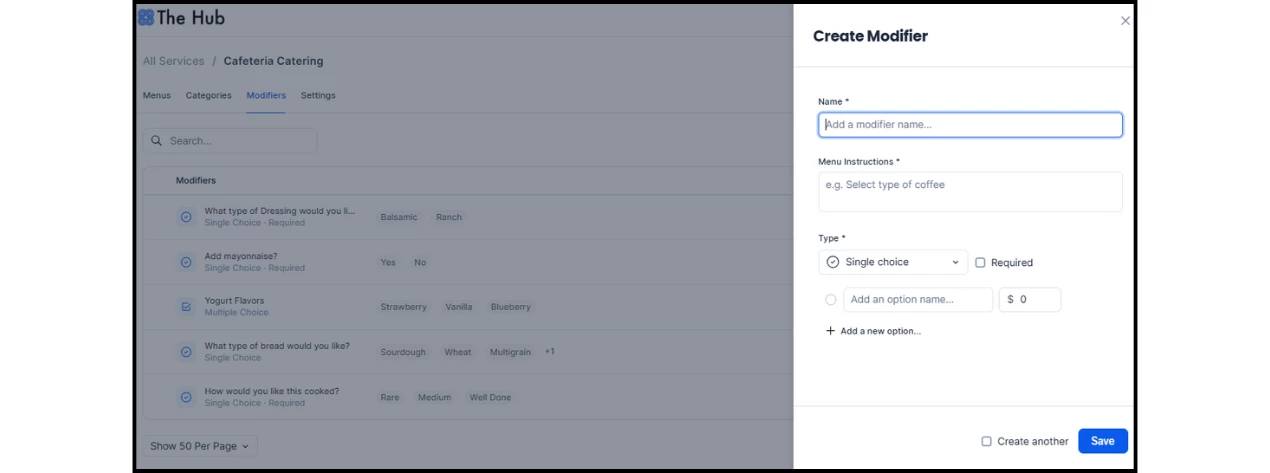
3B. Configuring modifiers for menu items
Modifiers allow employees to customize further their menu options (e.g., "hold the onions" or "extra cheese"). They can be reused across different menus and items.
- On the Catering Service page, select the Modifier tab.
- Click +New at the top-right corner.
- In the Create Modifier window, enter the Name and Menu Instructions.
- For Type, select how the options will be displayed: Single choice, Multiple choice, or Yes/No. This can be made required by clicking the checkbox.
- Click Save.
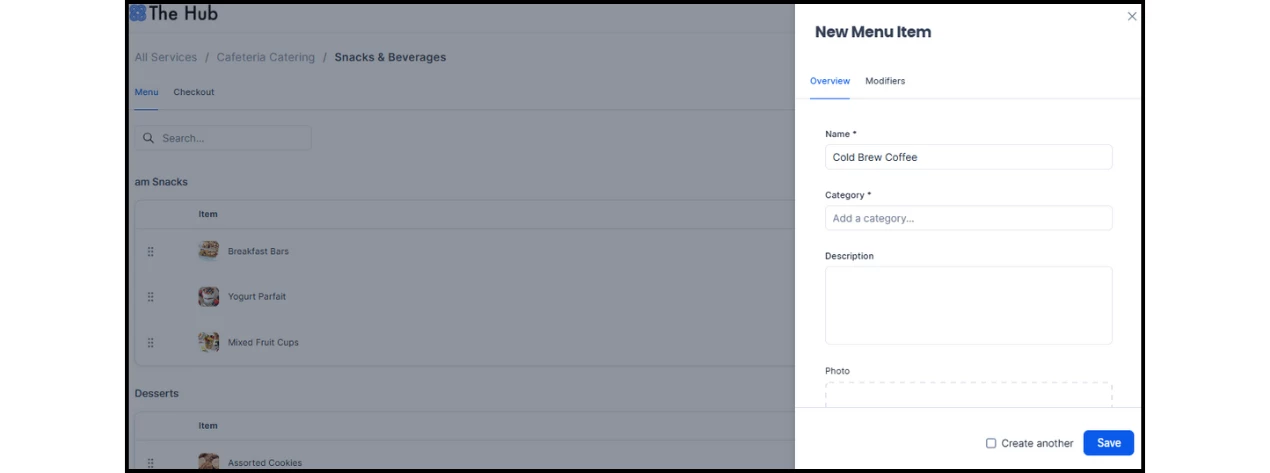
3C. Setting up menu items
Menu items are the food options employees select from the Services form.
- On the Catering Service page, select the Menu tab.
- Select a menu from the list and then click +New Item.
- In the New Menu Item window, enter the following information:
- Name
- Category: Select a category from the dropdown.
- Description, Price, Photo
- Availability: Enable In stock to make the item available.
- Modifiers: Go to the Modifiers tab. Type in the field to add one or more created modifiers to the item.
- Click Save.
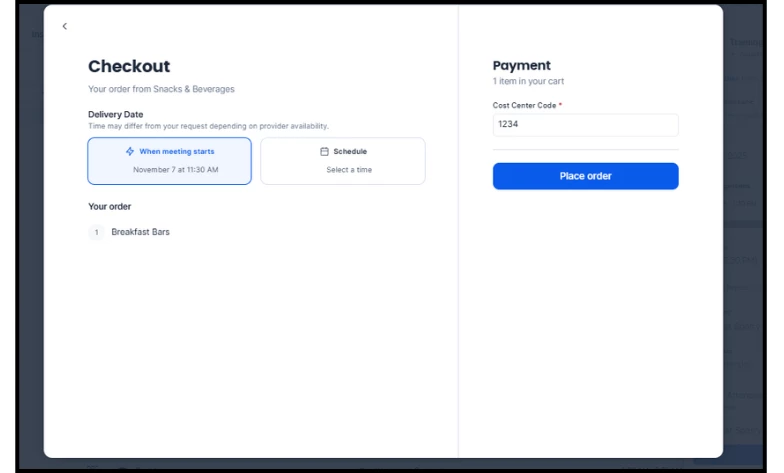
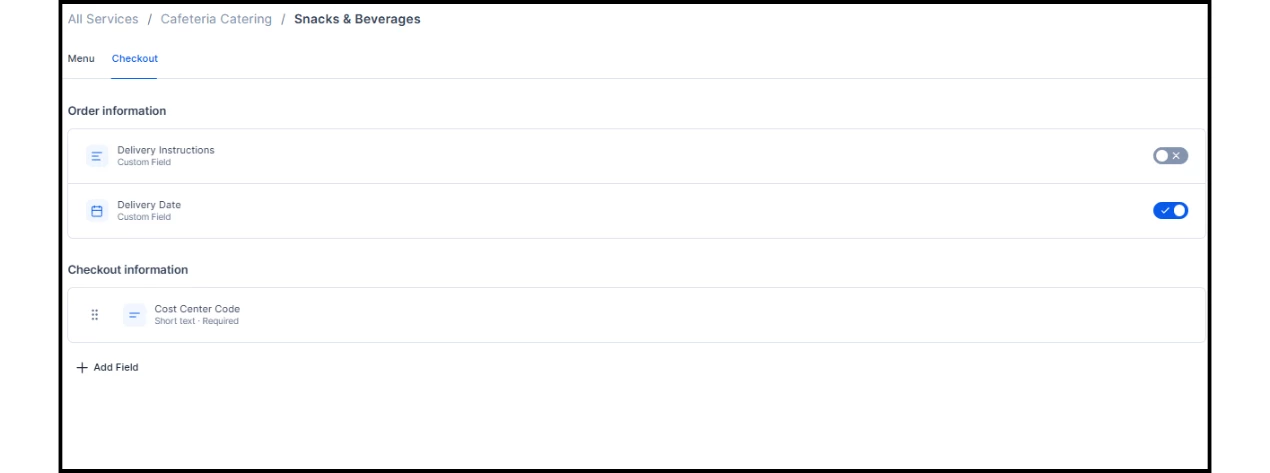
Step Four: Configuring checkout settings
The original Services 1.0 form did not include a dedicated section for checkout information. Version 2.0 allows Administrators to enable or disable additional fields for delivery and also add custom fields. These fields can be configured in the Checkout tab of the form.
- Request Information Custom Fields:
- Enable Delivery Instructions to display an additional field for special delivery instructions.
- Enable Delivery Date or Setup Date to display an additional date field on the request form.
- Checkout Information: Administrators can add custom checkout fields displayed during checkout by clicking +Add Field.
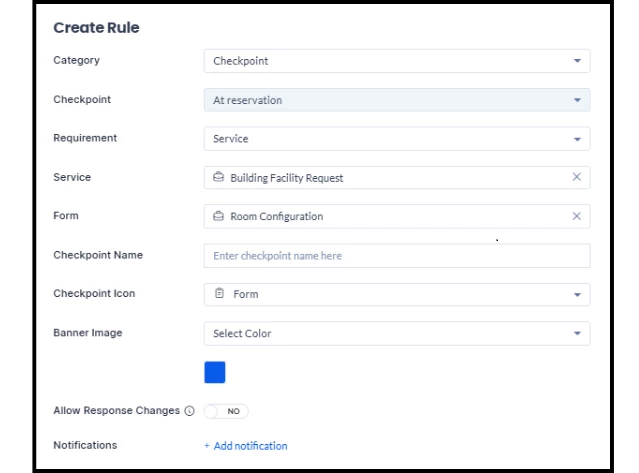
Setting up Services Checkpoints
Originally, when adding a service form to a Checkpoint rule, users selected "Form" and chose the document template from the Library.
Now, users must select Services from the Checkpoint dropdown options and type the name of the existing Service. They can then select from the forms under that Service.
- A checkpoint can only be tied to one form or one menu. Administrators must create a separate checkpoint for each one.
- Service Checkpoints can currently only be created for Organizers and Attendees of reservations (not Visitors).
- The Service option is currently only available for At reservation and not for On-demand, and is only for Appspace users.
Making a Business Service Mandatory
When configuring a Business Service checkpoint, you can enable the Pre-selected by default option to make the form mandatory during check-in. When this is enabled:
- Employees must complete the business form when checking in and cannot choose "No, thank you" or "Maybe later."
- If the form is not completed, the reservation is marked as not checked in.
- Employees (including organizers, attendees, or concierge users) can edit their responses after submission, but cannot cancel them.
Use this for resources where a service form is essential — for example, a boardroom that requires AV configuration confirmation or a lab that requires a safety acknowledgment before entry.
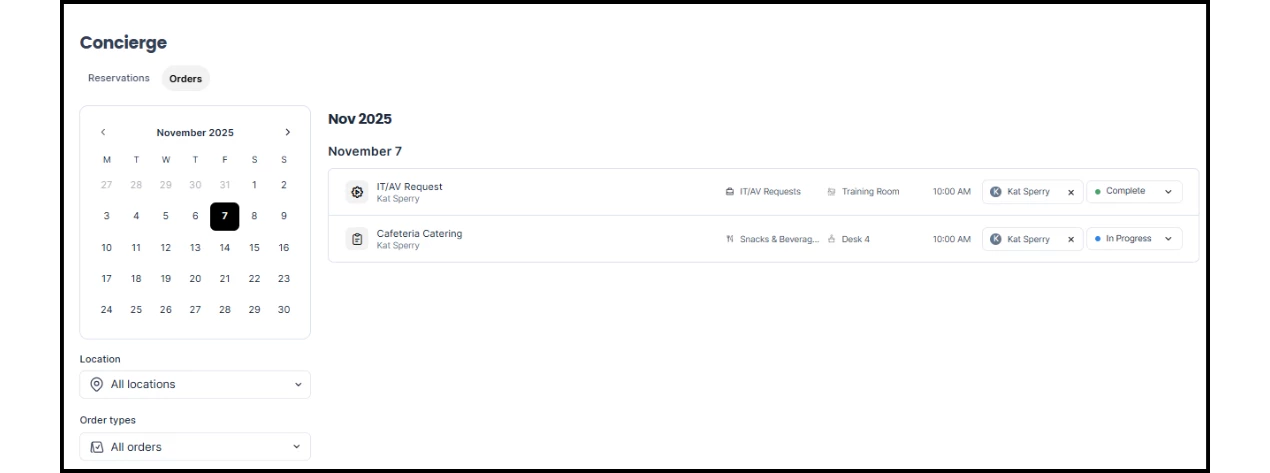
Concierge Order Management
Previously, a service request was only noted by a small icon on the rightmost side of a Reservation listing. Version 2.0 introduces a dedicated Orders view for tracking.
The Orders tab provides Concierge users with a centralized view to track and manage all service requests.
- To access it from the Employee View, click into the Concierge module within the navigation.
- On the Concierge view, click the Orders tab to view the Order Management dashboard.
- Concierges can update each order’s State and Assignee using drop-down menus located on each order’s listing.
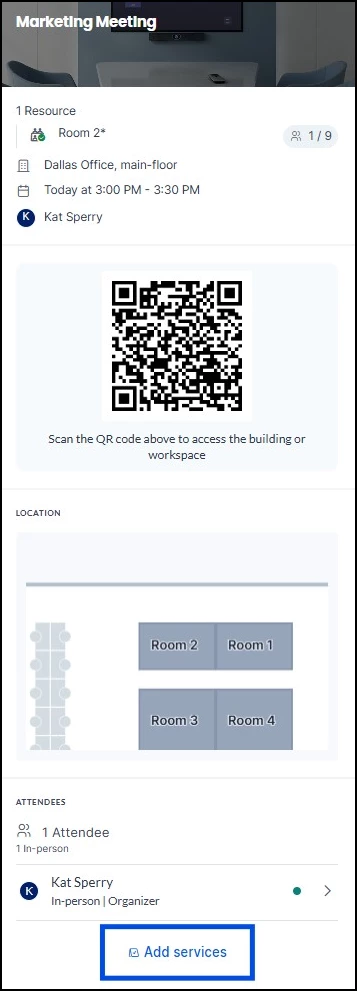
Adding Service Requests to Existing Reservations
Previously, once a reservation was created, employees had limited ability to request additional services. If plans changed after the initial booking, they had to cancel and recreate the reservation or contact support teams manually.
Employees can now add service requests to existing reservations directly from the reservation details view in the Employee App. An Add services button appears at the bottom of the reservation details, below the Attendees section. Tapping this opens the available services configured for that resource, allowing employees to browse and submit requests without modifying the core reservation.
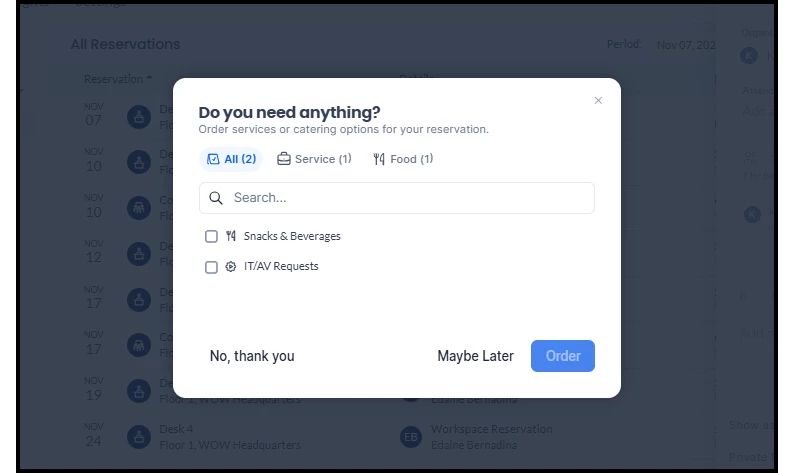
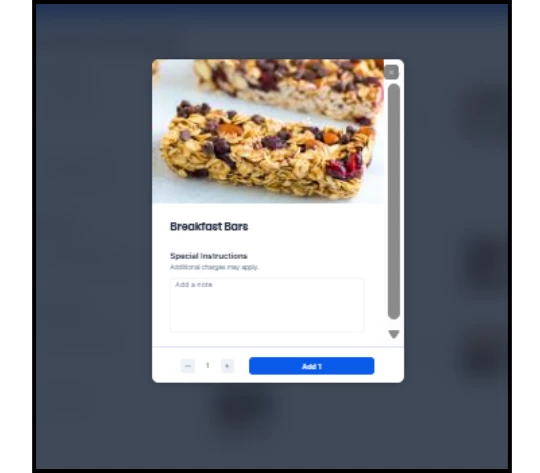
End-user view
The end-user experience also changes due to the new request form style. Below are a few examples of the steps they follow to fill out a form during a reservation.
Step One
Step Two
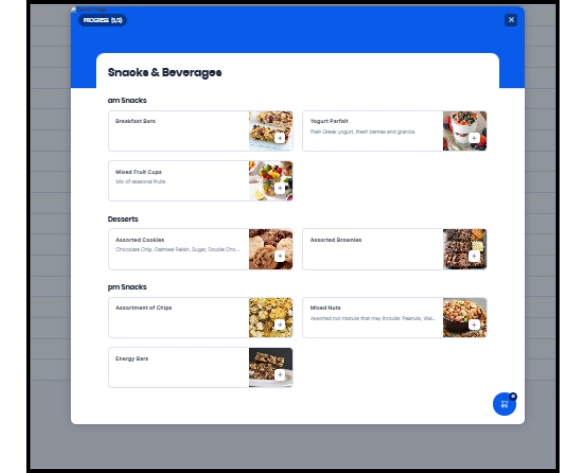
Step Three
Step Four