
Equip the Room, Feed the Team: Setting Up Reservation Services 2.0
Upgrading from Services 1.0? Version 2.0 replaces the old template-gallery-based forms with a dedicated Services module in the Admin Console, introducing multi-layered service configuration, customizable request forms, and a new Concierge Orders view for tracking fulfillment. For a full breakdown of what's changed and how to adapt, see the Reservation Services 1.0 & 2.0: Feature Comparison and Setup Guide.
This guide provides practical, scenario-based instructions for configuring and managing Reservation Services in the Appspace Admin Console. Rather than walking through every feature sequentially, it starts with common workplace scenarios and shows you how to build each one from scratch — including planning advice, tips, and pitfalls to avoid.
Reservation Services allows administrators to set up two types of service requests that employees can submit during the reservation process: Business Services (for items like AV equipment, office furniture, or IT support) and Catering Services (for food and beverage ordering). Once configured, these services are surfaced to employees through checkpoints during reservation check-in, and fulfilled by your team through the Concierge dashboard.
Key Benefits
- Streamlined Requests — Employees submit service requests directly within the reservation flow — no separate emails, forms, or ticketing systems needed.
- Organized Fulfillment — Requests are routed to the Concierge board with configurable workflow states, so your team can track every order from submission to completion.
- Flexible Configuration — Support a wide range of use cases — from simple equipment checklists to multi-category catering menus with modifiers and pricing — all within one module.
- Reduced No-Shows and Waste — Preparation time settings prevent last-minute orders, giving your team enough lead time to deliver reliably.
What This Guide Covers
- How to plan your workflow states before building services
- How to set up a Business Service for AV and equipment requests
- How to make a Business Service mandatory for specific resources
- How to set up a Catering Service with categories, menus, modifiers, and menu items
- How to handle multi-vendor and multi-floor scenarios
- How to connect services to resources using checkpoints
- How employees can add service requests to existing reservations
- Where submitted requests go and how to report on them
- Common mistakes and how to avoid them
Prerequisites
- Appspace Platform license — Premium license required for Concierge management.
- Account Owner or Location Admin role — Required permissions to configure services.
- Buildings and locations with floor plans — Must be created in Locations, with resources mapped.
- Users and user groups — Must be configured.
- Concierge user permissions — Required for team members who will manage fulfillment.
Planning Your Workflow States
Before creating any services, define the workflow states that will track each request from submission to completion. States are configured per service type (Business or Catering), and all services of that type share the same set of states.
To set up states, navigate to ☰ Appspace menu → Services → Settings and select the Catering Services or Business Services tab.
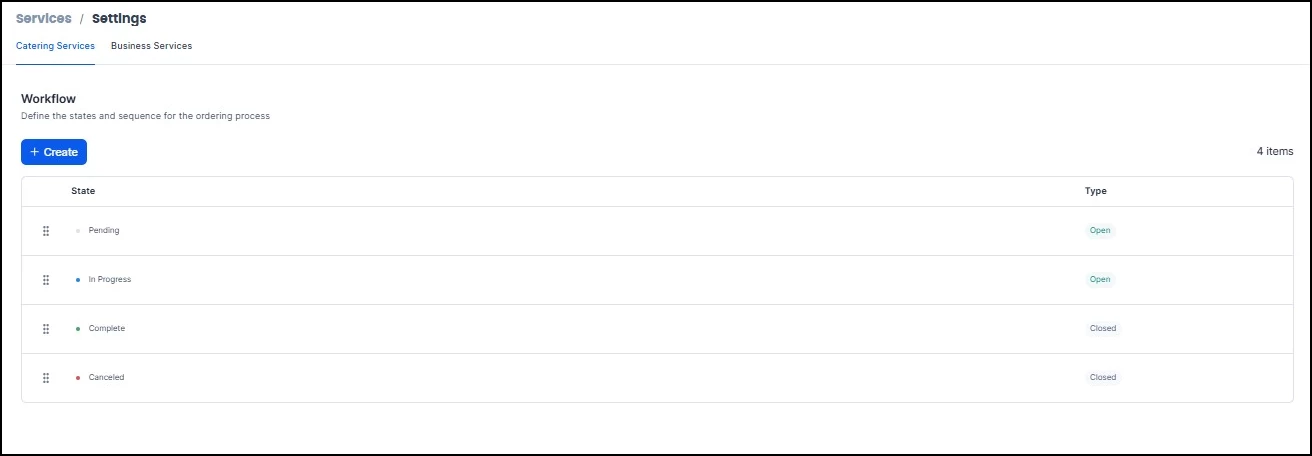
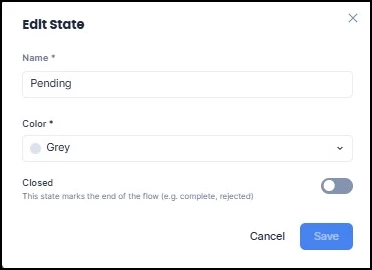
For each state, you'll configure a name, a color (visible on the Concierge board), and whether the state is Open (request still active) or Closed (request resolved). Hover over and click the ellipsis next to the state to edit existing states and click Create to establish new ones. You can reorder states by dragging the handle on the left side of each row.
Example Workflow
A simple but effective starting point for most organizations:
| State | Type | Color Suggestion | Purpose |
|---|---|---|---|
| New | Open | Blue | Request just submitted |
| In Progress | Open | Yellow | Team is working on it |
| Complete | Closed | Green | Successfully fulfilled |
| Cancelled | Closed | Red | Request was dropped |
Tips for Getting States Right
- Keep it simple. Three to five states per service type is usually sufficient. If you're building a ten-stage pipeline, consider whether a dedicated ticketing tool is a better fit.
- Use colors intentionally. If red means “Cancelled” and green means “Complete,” your Concierge team can scan the board at a glance.
- Think holistically. Your states apply to every service of the same type. If you plan to onboard multiple vendors or departments later, make sure your states work for all of them.
- Edit carefully. You can add, edit, deactivate, or delete states later, but changes to states already in use can cause confusion for your fulfillment team.
Quick Reference: Business Services vs. Catering Services
| Business Services | Catering Services | |
|---|---|---|
| Best for | Equipment, supplies, room setup, IT requests | Food and beverage ordering |
| Structure | Service → Forms → Questions (with Sections) | Service → Categories → Menus → Menu Items (with Modifiers) |
| Customization | Question types: single/multiple choice, yes/no, dropdown, number, short/long text | Modifiers: single/multiple choice, yes/no, with validation rules and pricing |
| Pricing | "Payment Required" toggle per form | "Free Menu" toggle per menu |
| Order settings | Special Instructions, Setup Date | Delivery Instructions, Delivery Date |
| Checkpoint type | Service → Form | Service → Menu |
| Mandatory option | "Pre-selected by default" toggle on checkpoint | Not available |
Scenario 1: Setting Up AV Equipment Requests (Business Service)
The situation: A project manager books a conference room for a hybrid meeting and needs a projector, speakerphone, and HDMI cables ready to go. Your IT team needs at least 24 hours' notice.
What You're Building
A Business Service called “AV & Tech Support,” containing a request form with questions about equipment needs and an optional field for special requirements.
Step 1: Create the Business Service
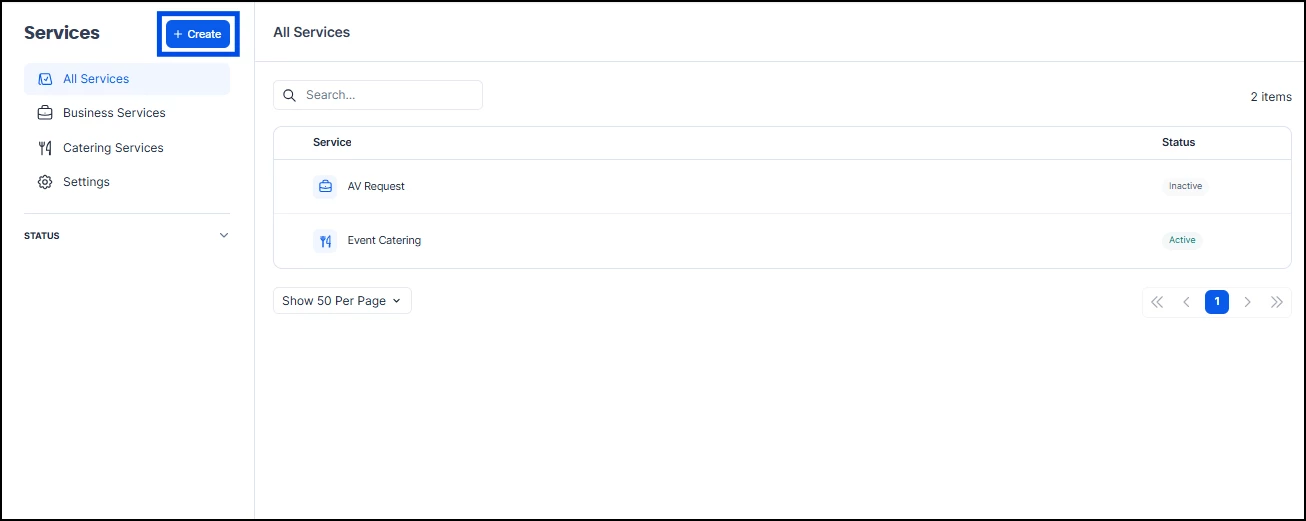
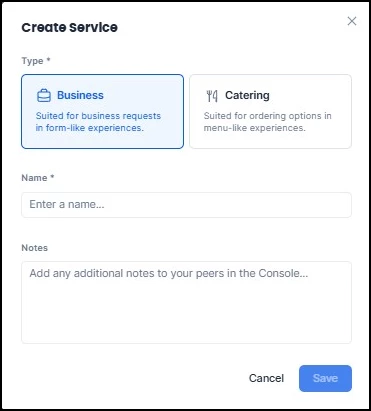
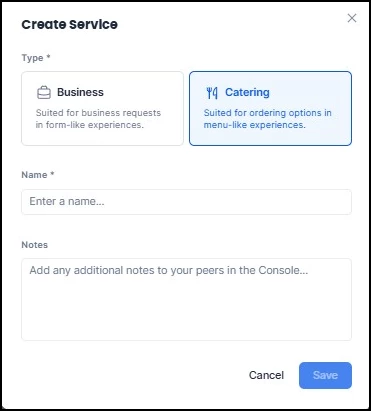
Navigate to ☰ Appspace menu → Services → +Create. Choose Business as the type, enter a name (e.g., “AV & Tech Support”), add any internal notes, and click Save. The service will be Inactive by default — you'll activate it once everything is configured.
Step 2: Build the Request Form
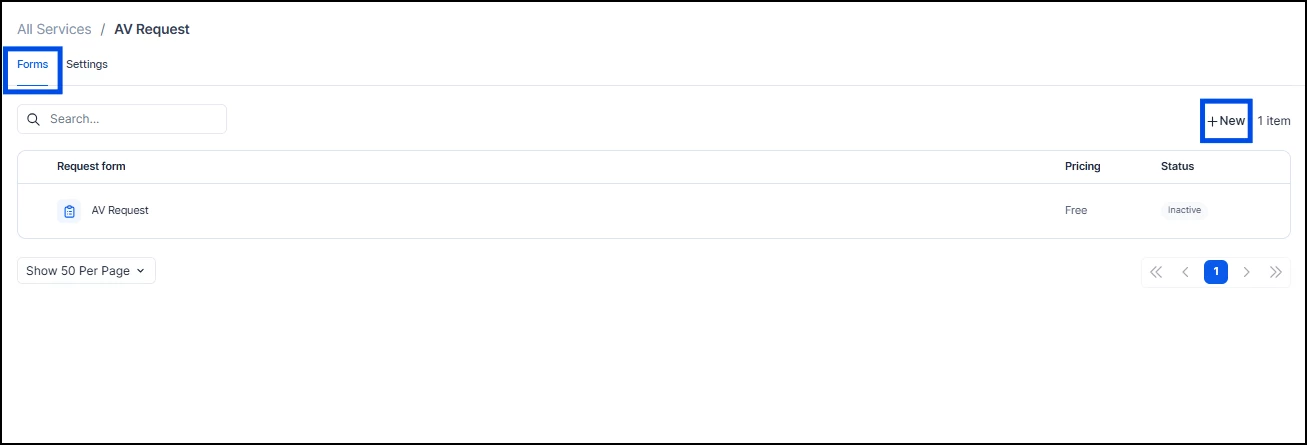
Click into the service, go to the Forms tab, and click +New. Give the form a name that employees will understand at check-in (e.g., “AV Equipment Request” rather than “AV Form v2 Final”).
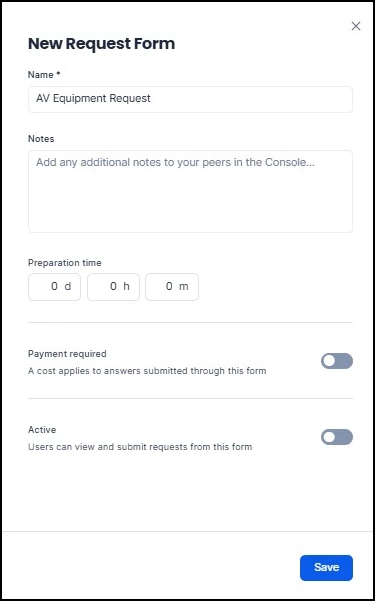
Configure the form settings:
- Preparation Time: Set to 1 day (or whatever lead time your IT team needs). The system automatically prevents submissions after this cutoff.
- Payment Required: Leave off if you don't charge departments for equipment. Enabling this later will reset all prices to zero.
- Active: Toggle on so the form is available once you finish setup.
Click Save.
Step 3: Add Questions
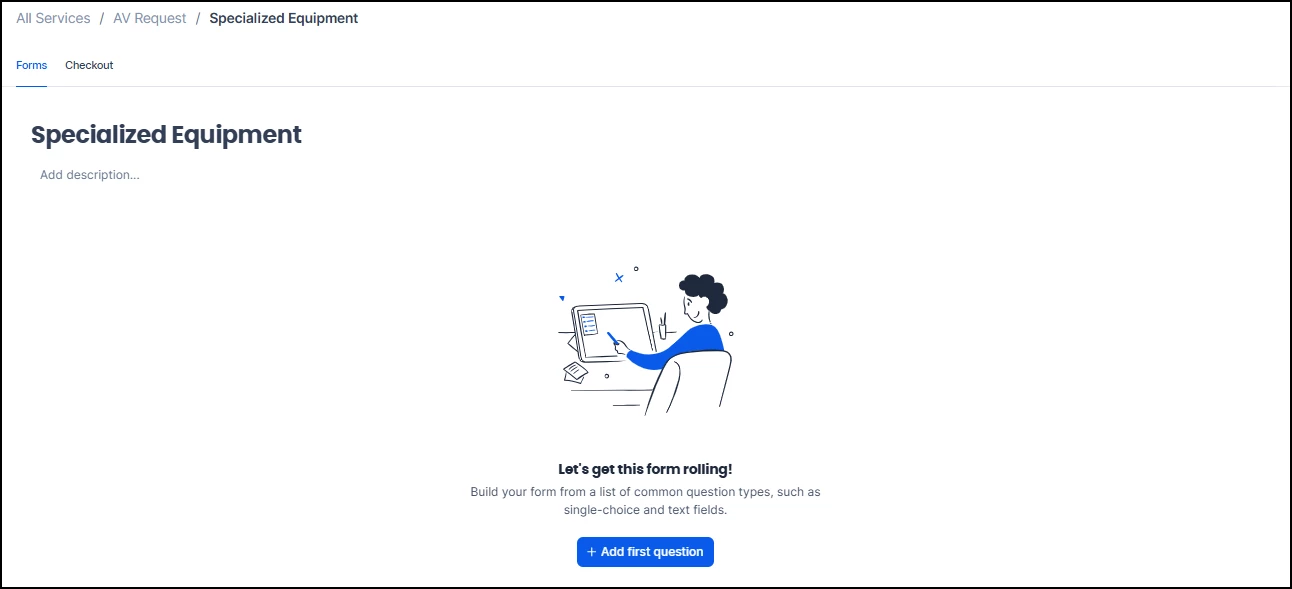
Select the form and click + Add first question.
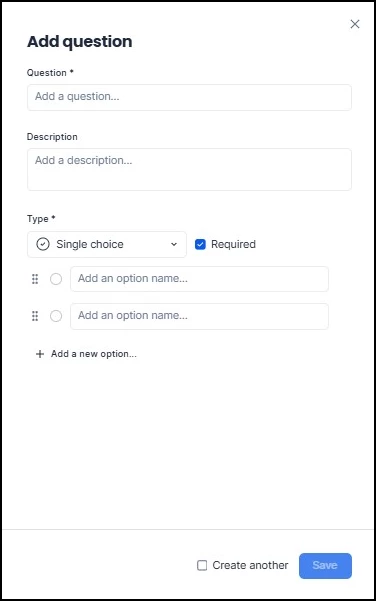
Build out the questions your IT team needs answered. For example:
| Question | Type | Required? | Options |
|---|---|---|---|
| “What equipment do you need?” | Multiple Choice | Yes | Projector, Speakerphone, Extra Monitor, HDMI Cables |
| “What laptop connection type?” | Single Choice | Yes | VGA, HDMI, USB-C, USB |
Important: A question's type cannot be changed after creation. If you need to switch from Single Choice to Multiple Choice, you must delete and recreate the question.
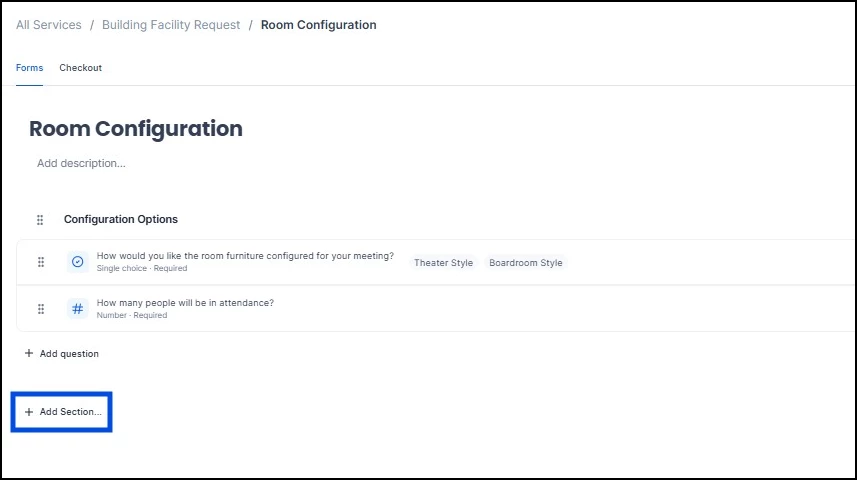
Step 4: Organize with Sections
If your form has more than four or five questions, group them under sections for readability. Click +Add Section at the bottom of the form editor to create headers like “Video & Display” or “Audio & Communication.” This makes the form much easier to fill out on mobile.
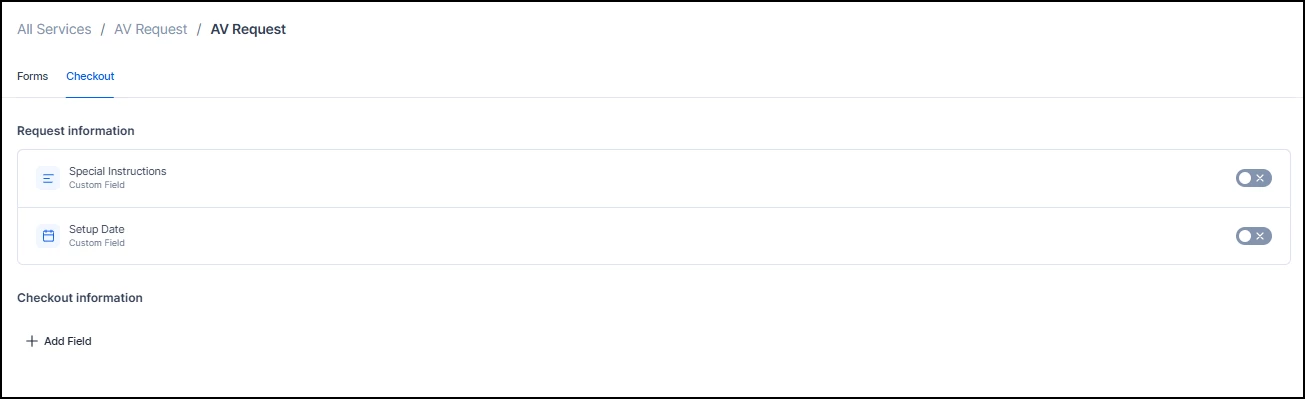
Step 5: Configure Checkout Settings
Go to the Settings tab on the service. Enable Special Instructions for a free-text field at checkout (e.g., “Set up in Room 4B by 8:45 AM”). Enable Setup Date if equipment might need to be ready on a date different from the reservation.
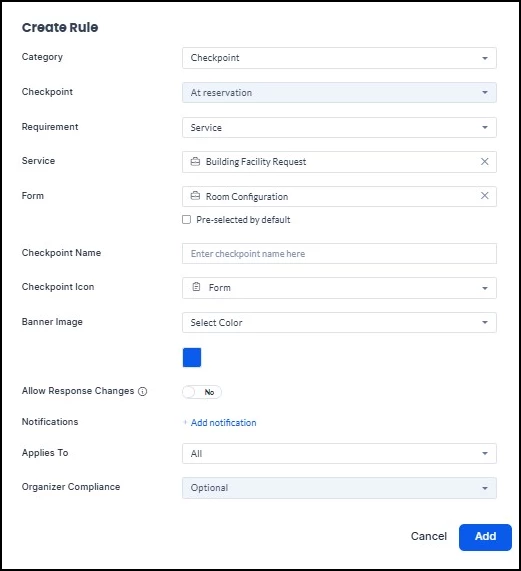
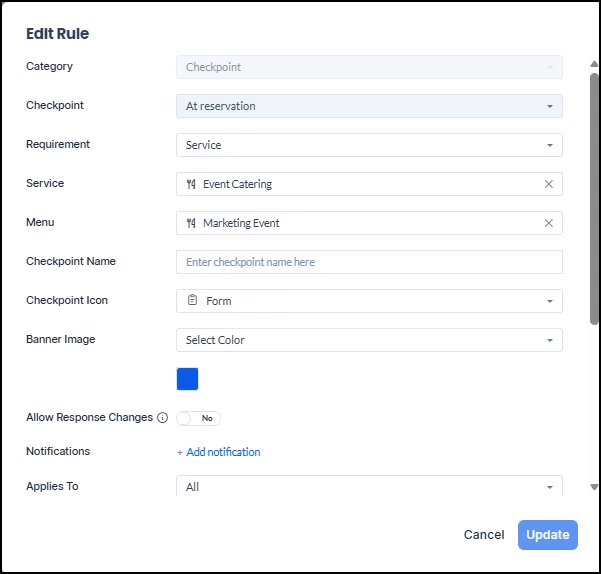
Step 6: Connect to a Checkpoint
Go to the resource (conference room) where AV requests should appear and create a new Checkpoint rule. Set the Requirement to Service, search for your service, and select the form. Each checkpoint connects to only one form — if this room also needs a “Room Layout” form, create a separate checkpoint for it.
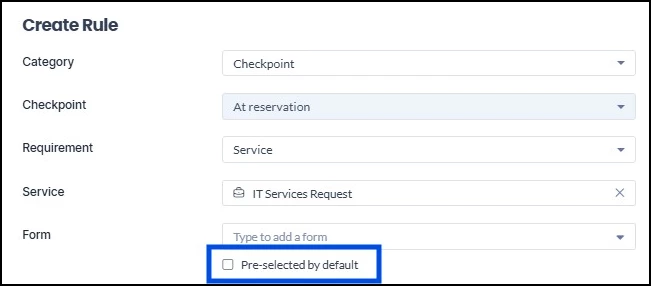
Making a Business Service Mandatory
If a resource requires employees to complete a business service form before check-in can proceed, enable the Pre-selected by default toggle on the checkpoint. When this is enabled:
- Employees must complete the form during check-in — the "No, thank you" and "Maybe later" options are removed.
- If the form is not completed, the reservation is marked as not checked in.
- Employees (including organizers, attendees, or concierge users) can edit their responses after submission, but cannot cancel them.
Use this for services that are essential to the resource — for example, a boardroom that requires AV configuration confirmation for every meeting, or a lab space that requires a safety acknowledgment before entry. For services that are helpful but not required, leave Pre-selected by default off so employees can skip them.
Step 7: Activate and Test
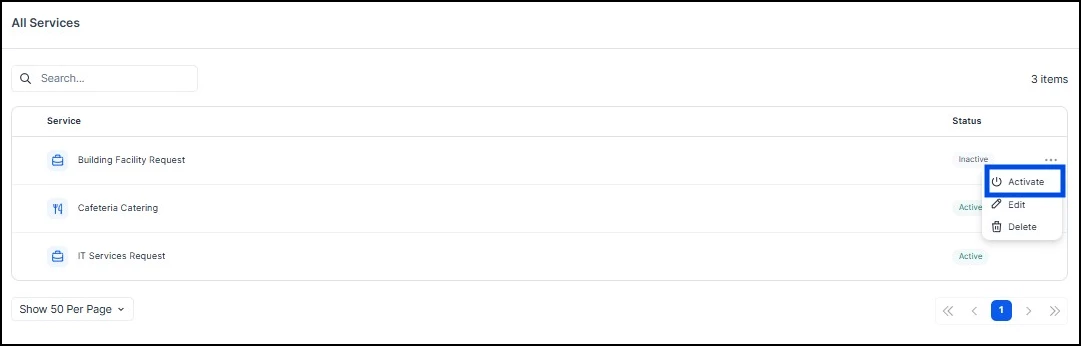
Return to the services list, click the ellipsis (…) next to your service, and select Activate. Then run a full test: book the room as an employee, go through check-in, submit a request, and verify it appears in the Concierge Orders view.
If you enabled Pre-selected by default, test that flow as well — confirm that check-in cannot proceed without completing the form, and verify that the "No, thank you" and "Maybe later" options are no longer shown.
Scenario 2: Setting Up Lunch Catering for Meetings (Catering Service)
The situation: Your office cafeteria vendor can deliver food to conference rooms. Managers want to order lunch directly through the reservation process, and the vendor needs 24 hours' notice.
What You're Building
A Catering Service representing the vendor, with categories to organize the menu, menu items with prices and photos, and modifiers for customization (spice level, protein choice, etc.).
Step 1: Create the Catering Service
Navigate to ☰ Appspace menu → Services → +Create. Choose Catering, name it after the vendor or offering (e.g., “Cafeteria Catering”), and click Save.
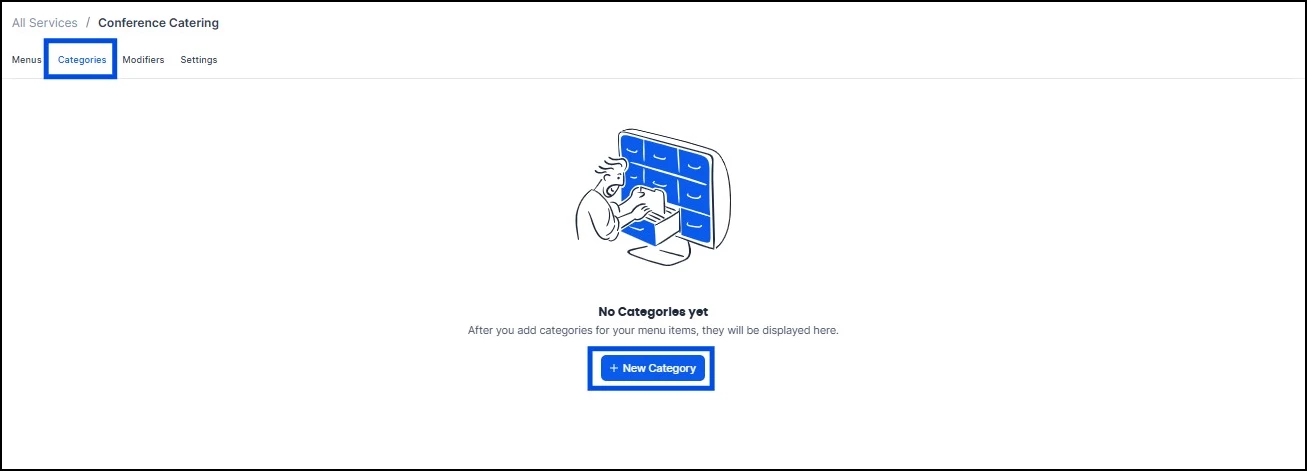
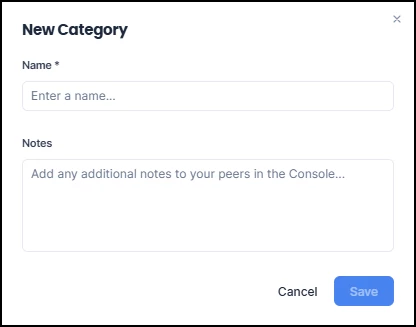
Step 2: Set Up Categories
Go to the Categories tab and create groups that match the vendor's menu structure — for example: Appetizers, Entrees, Sides, Beverages, Desserts. You must create categories before adding menu items, since every item must be assigned to one.
Categories are reusable across multiple menus within the same service, so a “Beverages” category can serve both your Breakfast and Lunch menus.
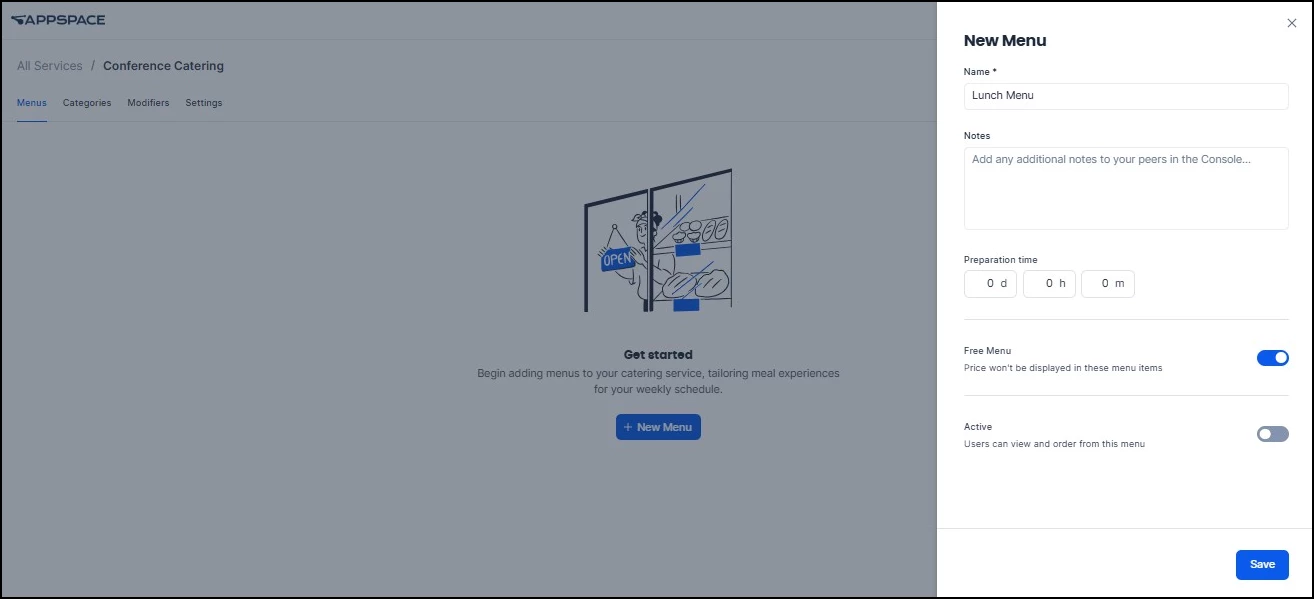
Step 3: Create a Menu
Go to the Menus tab and click +New. Name it clearly (e.g., “Lunch Menu”) and configure:
- Preparation Time: Set based on how much notice your caterer needs (e.g., 1 day).
- Free Menu: Leave enabled if the company covers costs. Disable to show prices and select a currency. Changing the currency later resets all prices to zero.
- Active: Toggle on.
Click Save.
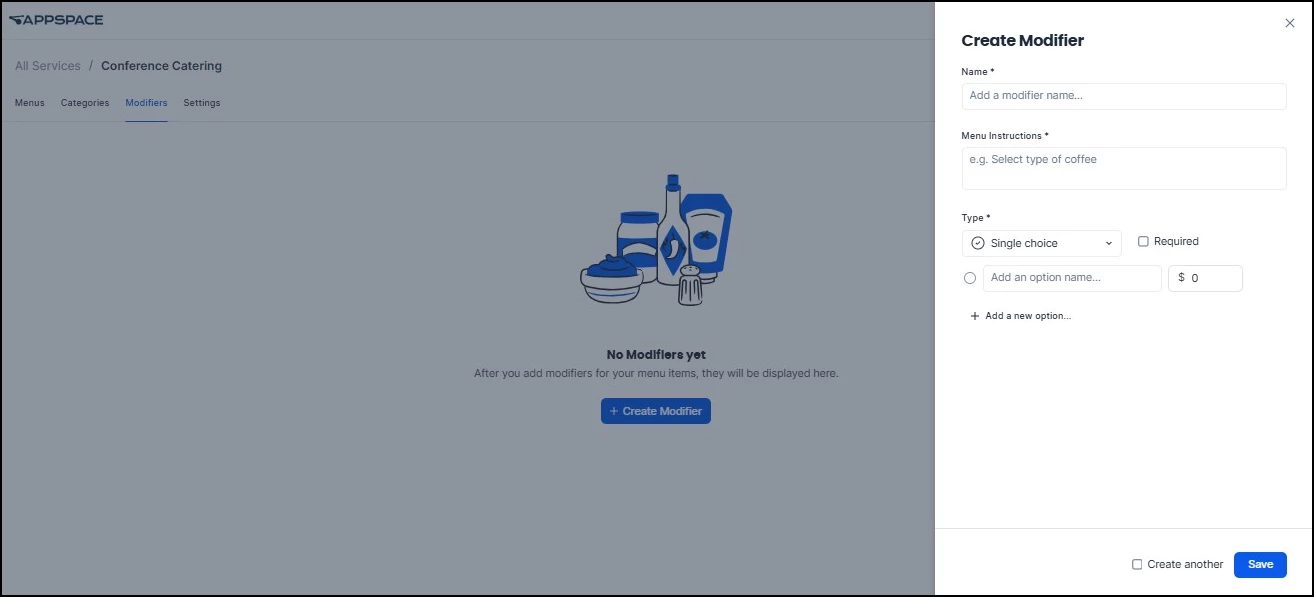
Step 4: Create Modifiers
Go to the Modifiers tab before adding menu items. Set up customization options that apply across items — things like spice level, protein choice, or portion size. For each modifier, define the name, instruction text, answer type (Single Choice, Multiple Choice, or Yes/No), and whether a selection is required.
You can set validation rules (e.g., “select exactly 1” or “select between 1 and 3 options”) and attach an additional price to each option (e.g., adding avocado costs $2 extra). Modifiers are reusable across menus and items within the same service.
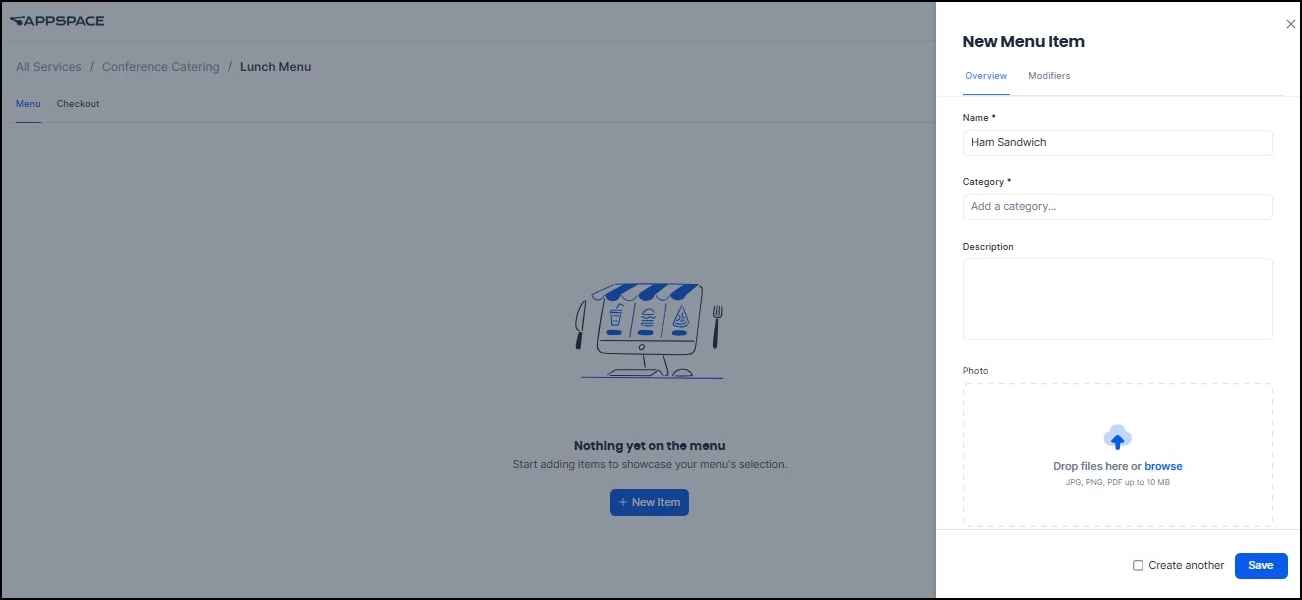
Step 5: Add Menu Items
Return to the Menus tab, select your menu, and click +New Item. For each item, enter the name, select a category, add a description, set a price (if applicable), and upload a photo. Photos make a meaningful difference in adoption — employees are more likely to order when they can see what they're getting.
Toggle In Stock on for available items. If the vendor runs out of something, toggle it off to hide the item from the ordering form without deleting it.
Switch to the Modifiers sub-tab within the item editor to attach relevant modifiers.
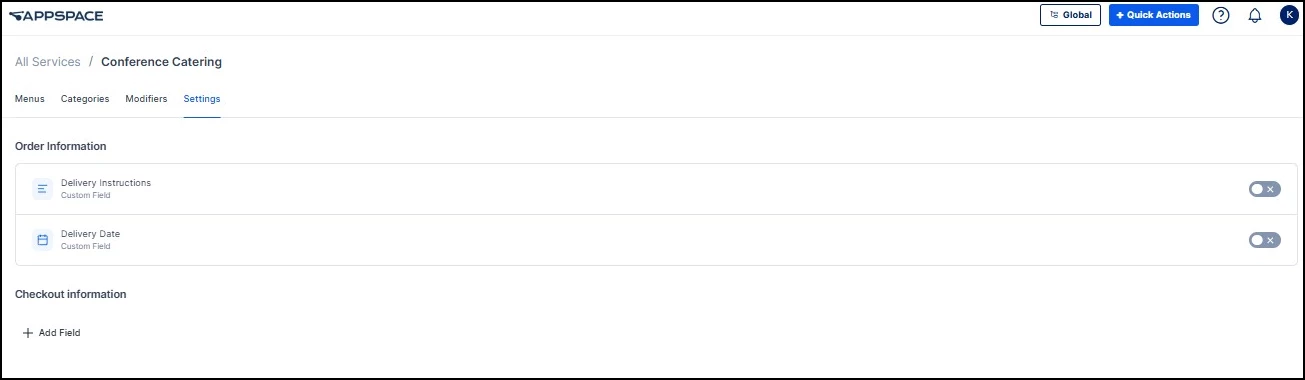
Step 6: Configure Delivery Settings
Under the Settings tab, enable Delivery Instructions and Delivery Date as needed.
Step 7: Create a Checkpoint
Create a Checkpoint on the relevant resource(s), set the Requirement to Service, select your catering service and menu, and save.
Step 8: Activate and Test
Return to the services list, click the ellipsis (…) next to your service, and select Activate. Then run a full test: book the room as an employee, go through check-in, submit a request, and verify it appears in the Concierge Orders view.
Scenario 3: Handling Multiple Vendors or Floors
Because each checkpoint connects to exactly one form or menu from one service, you have two structural options:
Multiple services — Create separate Catering Services for each vendor (e.g., “Floor 1 — Joe's Café” and “Floor 3 — Fresh Bites”) and attach the appropriate one to resources on each floor. Use this approach when the vendor, workflow, or fulfillment team is different.
One service, multiple menus — Create one service with multiple menus (Breakfast, Lunch, All-Day Snacks) and assign each menu to its own checkpoint on the same resource. Use this when the same team handles everything but the offerings vary by time or event type.
Adding Service Requests to Existing Reservations
Employees don't always know what they'll need at the time of booking. A meeting scope might change, an attendee list might grow, or a last-minute client visit might call for catering that wasn't planned originally.
With the ability to add service requests to existing reservations, employees can submit new requests after a reservation has already been created — without modifying the core reservation details like room, date, or time.
How It Works
From the reservation details view, employees can access a new option to add service requests post-booking. The workflow allows them to:
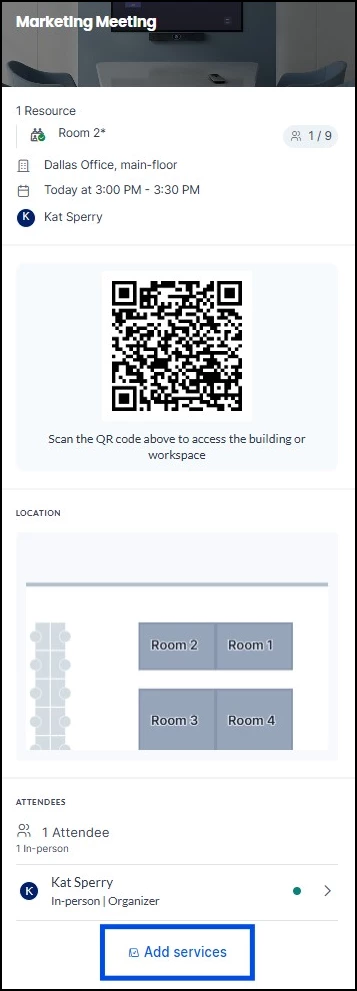
- Open an existing reservation to view its details (resource, location, time, attendees, and QR code).
- Tap Add services at the bottom of the reservation details.
- Browse available services based on the reservation's location and configured checkpoint rules.
- Select items from business service forms or catering menus.
- Submit the request, which is automatically routed to the relevant internal service team for fulfillment.
Once submitted, the employee receives a confirmation notification, and the reservation summary is updated to reflect all added services. Service providers receive notifications detailing the fulfillment requirements.
Key Details
- Real-time validation — The system checks service availability, provider hours, and lead-time requirements before allowing a submission. If a service requires 24 hours' notice and the meeting is in 2 hours, the employee won't be able to submit that request.
- Same workflow states — Ad-hoc requests follow the same workflow states as check-in requests. Your Concierge team manages them from the same Orders view — no separate queue to monitor.
- Audit tracking — All post-booking service modifications are logged, giving administrators a clear record of what was added and when.
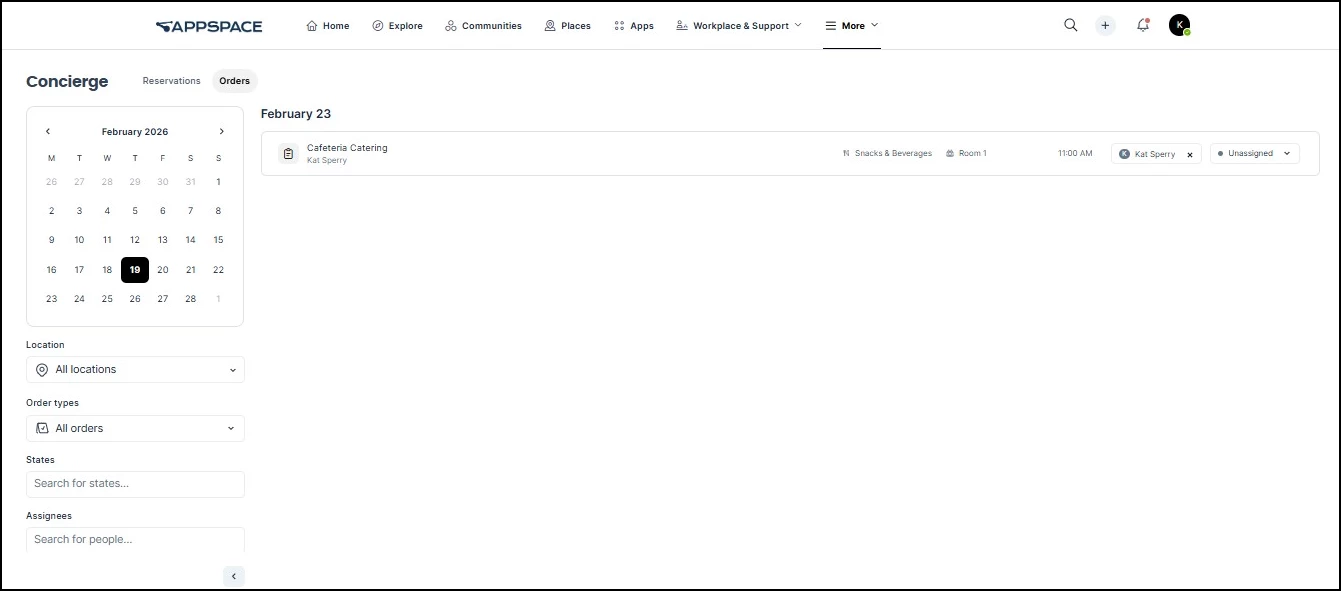
Where Submitted Requests Go
Once employees submit requests, your fulfillment team manages them in the Concierge View (Employee View → Concierge module → Orders tab). The board shows requests organized by date, with filters for location, service type, menu/form, state, and assignee.
All order cancellations are tracked in the order history with clear attribution. The system records whether a cancellation was initiated by the end user, a concierge, an admin, or an automated process — giving your fulfillment team a clear audit trail when orders are dropped. For a detailed walkthrough of managing orders from the Concierge perspective, see Order Management: User Guide.
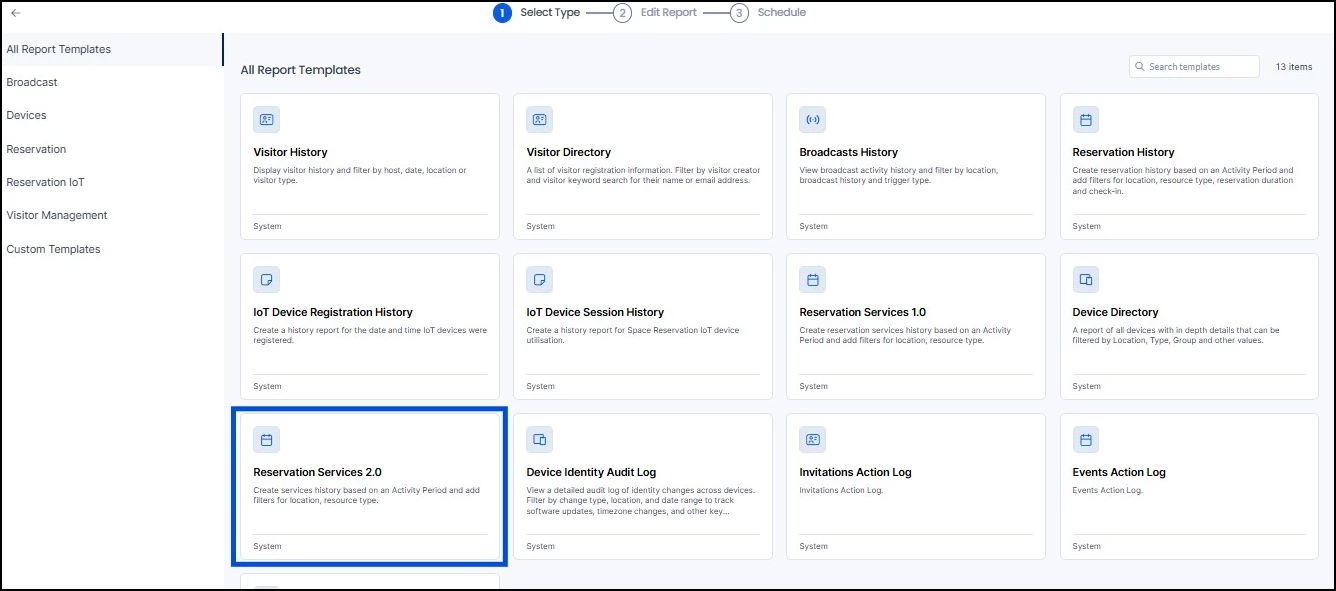
For bulk reporting, navigate to Analytics → Reports → +Create and select the Reservation Services 2.0 template to configure scheduled reports. You can also download requests for a specific checkpoint directly from the Concierge View by clicking the ellipsis next to the checkpoint filter and selecting Download.
Common Mistakes and How to Avoid Them
Building before planning states. States apply to all services of the same type. Plan them holistically before creating your first service, especially if you'll onboard multiple vendors or departments.
Forgetting to activate. Services, forms/menus, and checkpoints all have Active/Inactive toggles. If any piece in the chain is inactive, employees won't see it. After setup, verify that all three layers are active.
Changing currency or payment settings after entering prices. Toggling “Free Menu” on or switching “Payment Required” off wipes all prices. Changing the currency resets prices to 0.00. Plan to re-enter pricing if you make these changes.
Overcomplicating forms. Employees fill these out during check-in, often on their phone. Keep forms focused — 3 to 6 questions is the sweet spot for most use cases. Use sections to organize anything beyond that.
Not testing the employee experience. The admin console shows you the structure, but not the exact employee view. Always do a full end-to-end test: book, check in, submit a request, and verify it appears on the Concierge board.
Assuming a cancelled order was a mistake. When an order disappears from the active queue, check the order history before following up. The system now logs who initiated each cancellation — end user, concierge, admin, or automated process — so your team can distinguish between a user changing their mind and a system-triggered cancellation.