

Appspace Signage Quick Start: A Guide for Account Owners and Publishers
Who does what
The Account Owner prepares the account. The Publisher creates the card, builds the channel, and publishes it to a device.
- Account Owner: console branding, locations, user groups, invitations, roles, device registration, device groups, and the Library structure.
- Publisher: Library content, the Fullscreen Signage Channel, playout for each item, and publishing to a device.
A Publisher needs a Platform license. That license opens the console. The Publisher role is what lets them create and publish the channel. Assign Platform, not Premium.
Note: This Quick Start Guide covers the fullscreen channel workflow, not the multizone, live, advanced, or playlist channel workflows. Additionally, Location Admin responsibilities and functionality are not included here.
Account Owner
Let's begin
As the Account Owner, you prepare the console so a Publisher can put a Fullscreen Signage Channel on a screen. You also handle the account configuration and user management for your Appspace environment.
Before you start, you can sign in to the console. Your account already includes the Account Owner role.
When you finish this track, the console shows your logo and colors, locations exist for the screens, Publishers can sign in, and devices are registered. The Publisher track creates the channel and publishes it. A device with no channel assigned stays on a blank screen until that publish finishes.
Getting around the platform
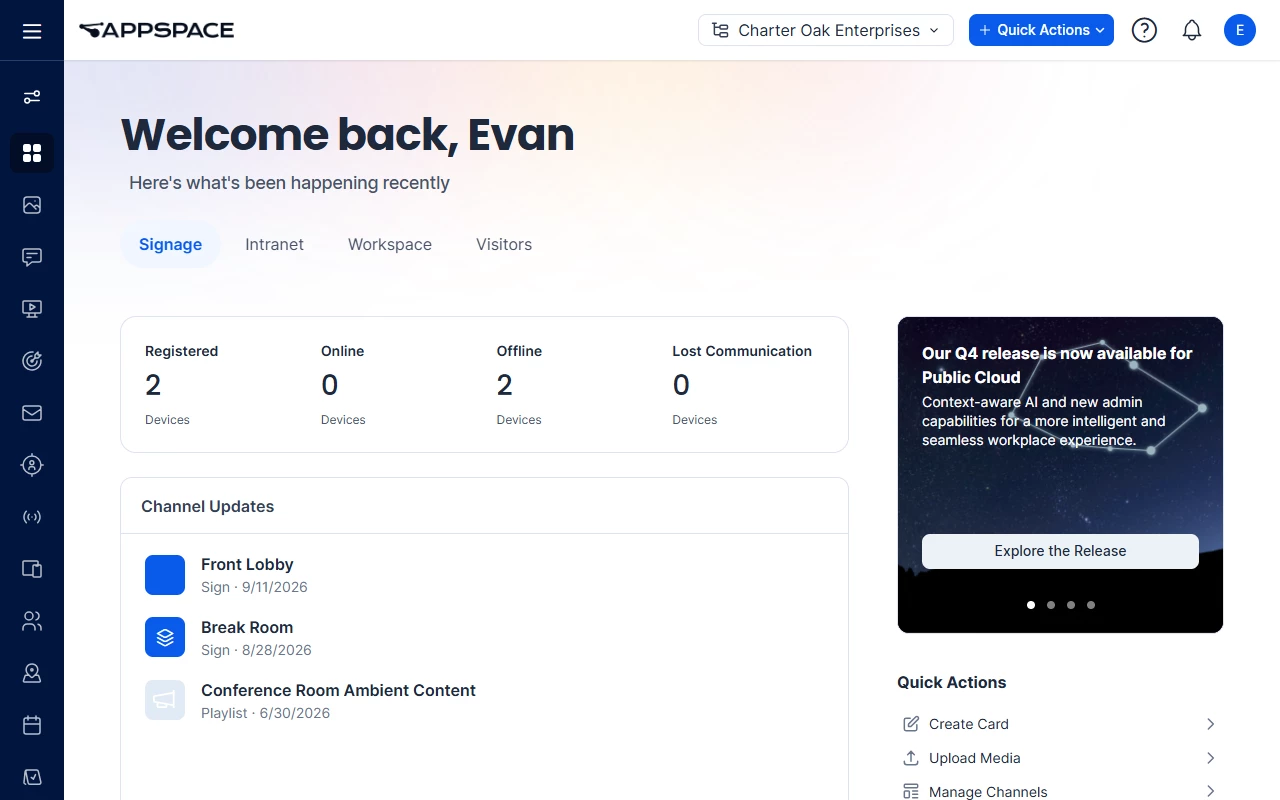
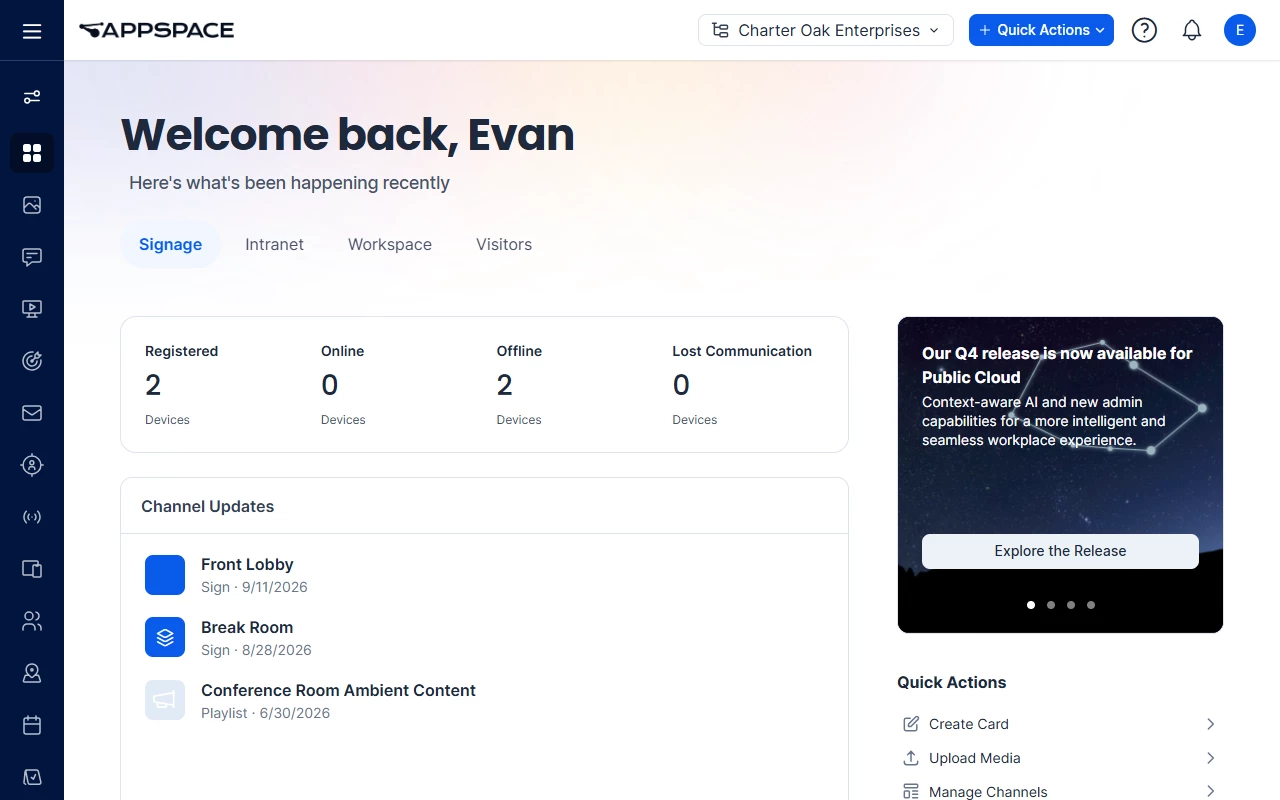
The console opens on the Signage dashboard. If you have other Appspace products, you’ll see different dashboards available. For this guide, stay on the Signage dashboard.
The left menu is a column of icons. For this track, you’ll use:
- Dashboard shows registered, online, offline, and lost-communication device counts, plus recent channel updates.
- Library holds cards, images, and videos.
- Channels is where a Fullscreen Signage Channel is created and published. The Publisher does that work.
- Devices lists registered screens. Device groups are managed from the DEVICE GROUPS heading on this page.
- Users is where you send invitations. Existing groups are listed under USER GROUPS.
- Locations is where you add the locations you assign to screens and people.
The Quick Actions button in the upper-right of the dashboard includes Create Card, Upload Media, Manage Channels, Register a Device, and Manage Devices.
Logos, colors, and fonts are set on the Brand tab. Open the navigation panel, roll over Settings, and click Configuration. See Branding the console.
Branding the console
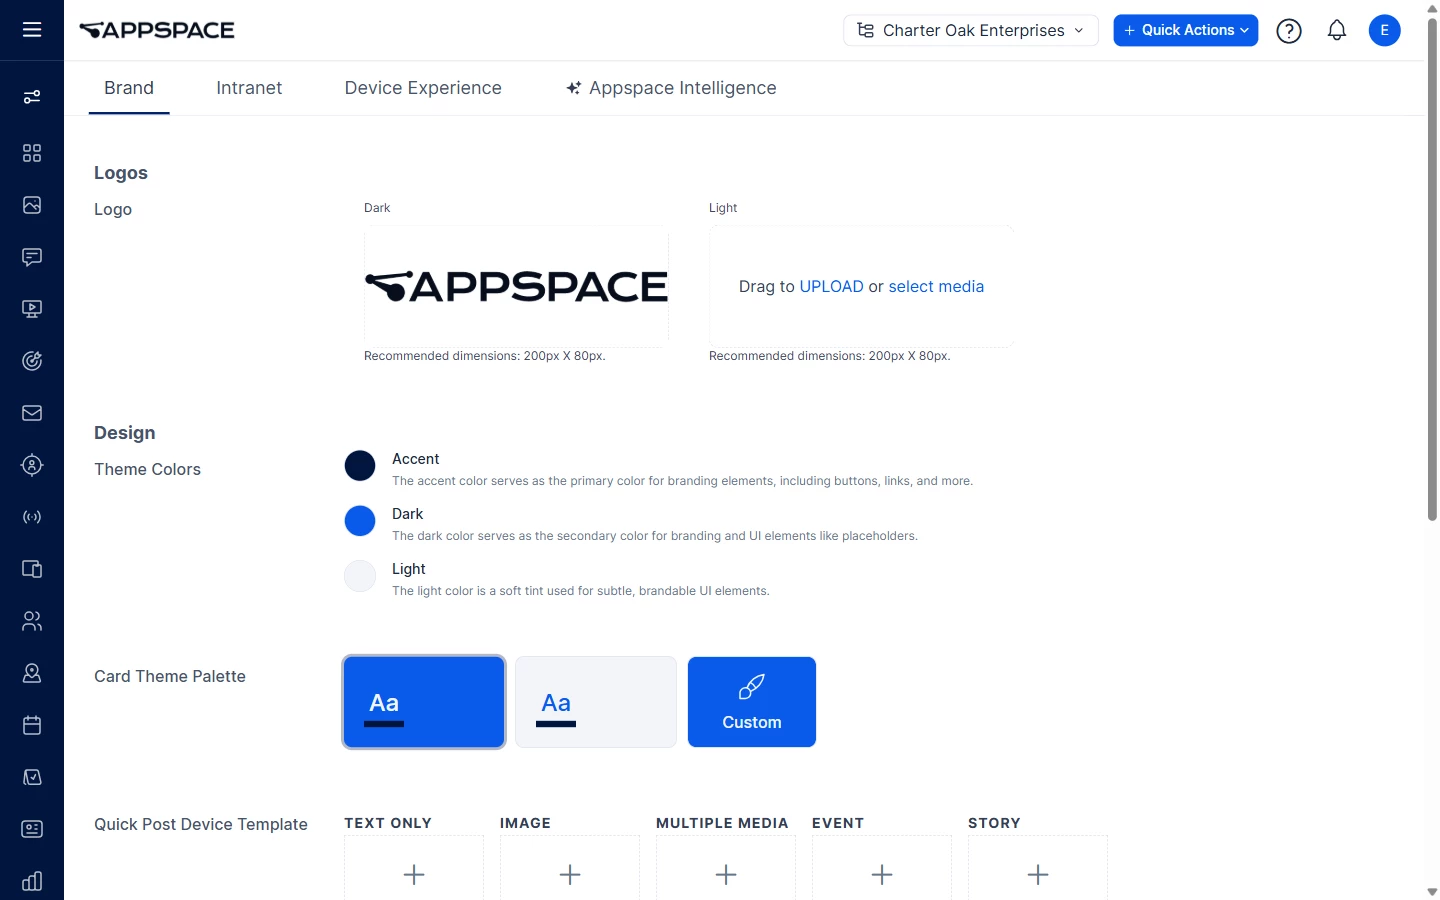
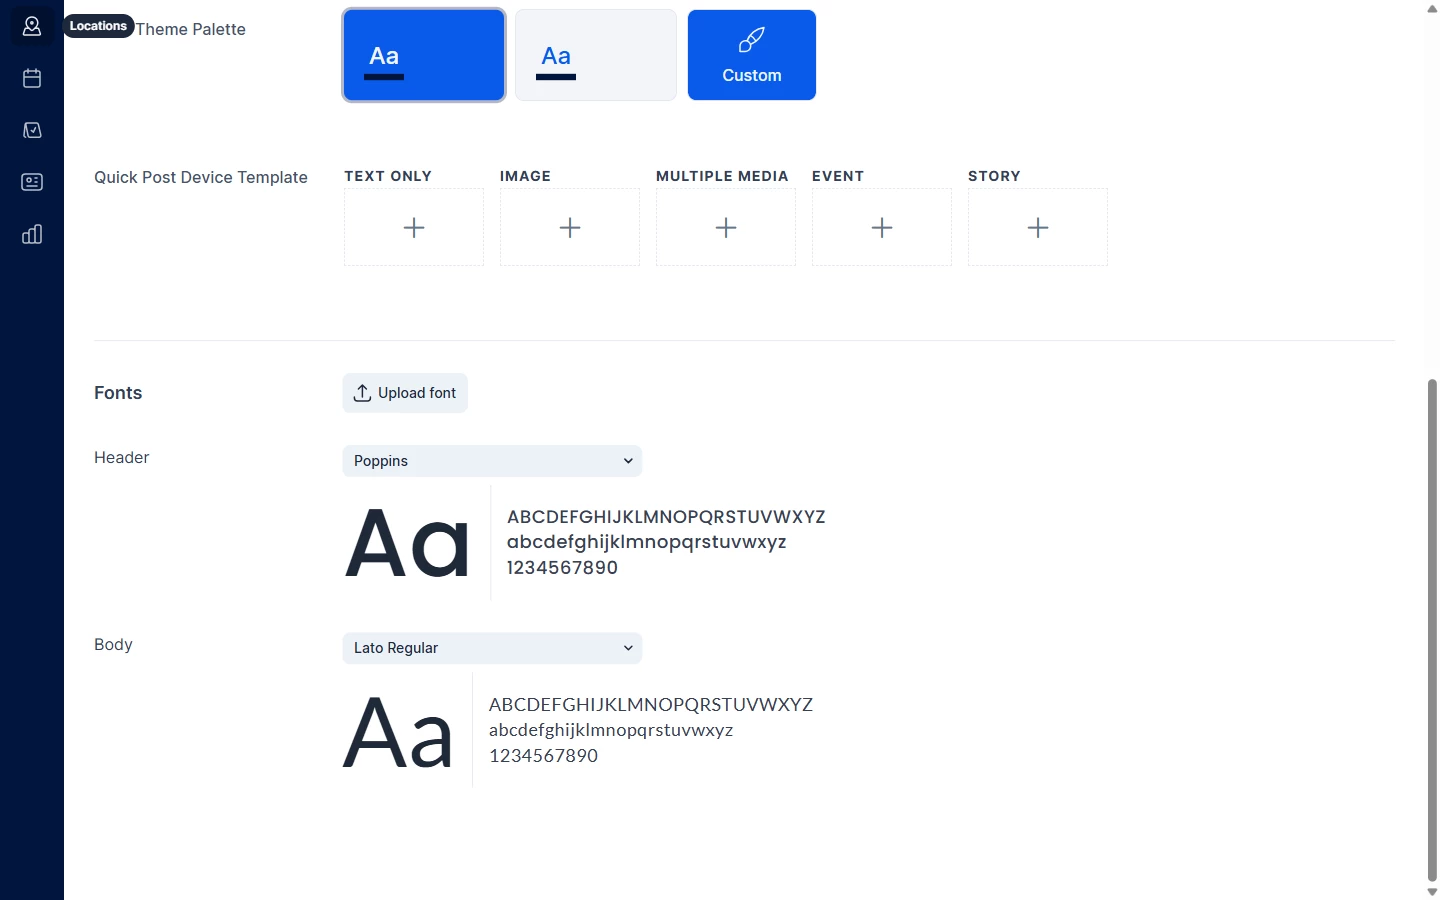
The Brand tab sets the logos, theme colors, card palette, and fonts. Each field has its own Save button.
- Open the navigation panel.
- Roll over Settings.
- Click Configuration.
- Brand is the first tab. Stay on it.
On Brand:
- Under Logos, set Dark and Light. Drop a file, click UPLOAD, or click select media. The recommended size is 200px by 80px.
- Under Theme Colors, set Accent, Dark, and Light. Click that field's Save.
- Under Card Theme Palette, choose a palette. Custom is one of the choices. Click that field's Save.
- Under Fonts, set Header and Body, or click Upload font. Click that field's Save.
Understanding user roles and permissions
A license opens the console. A role decides what the person can do. A permission is the access on one channel, location, or library.
Give console users a Platform license. These are the roles for this work:
- Account Owner can create content and channels, register devices, invite users, assign roles, create locations, and configure branding. One account starts with one Account Owner. You can assign the same role to another person when you want a second owner.
- Publisher for a location can manage the channels in that location, edit their content, publish them to devices, and approve changes. Assign this role to the people who will run the Publisher track. Assign it for the location where their screens live. The same person can be a Publisher for more than one location.
- Publisher on one channel is narrower. It applies to that channel only, from the channel's settings. Use the location Publisher role so the person can create the channel, not only edit one that already exists.
- Author can work in the Library and cannot publish a channel unless you also grant channel permissions. Assign Publisher so the same person can create the card and publish the channel.
An Editor on a channel can change that channel's content and may need a Publisher to approve the change.
Understanding the location hierarchy
A location is the place you assign a screen and a person to. Locations can contain sub-locations, so the tree can follow a campus, a building, and a floor.
Devices receive a location when you register them. A person's Home Location is set on their profile after they accept the invitation. Content and device updates can then target that location.
The location tree is the same tree used for maps and floor plans. Do not create maps or floor plans here.
Create the locations before you register a device. Register New Device asks for a location.
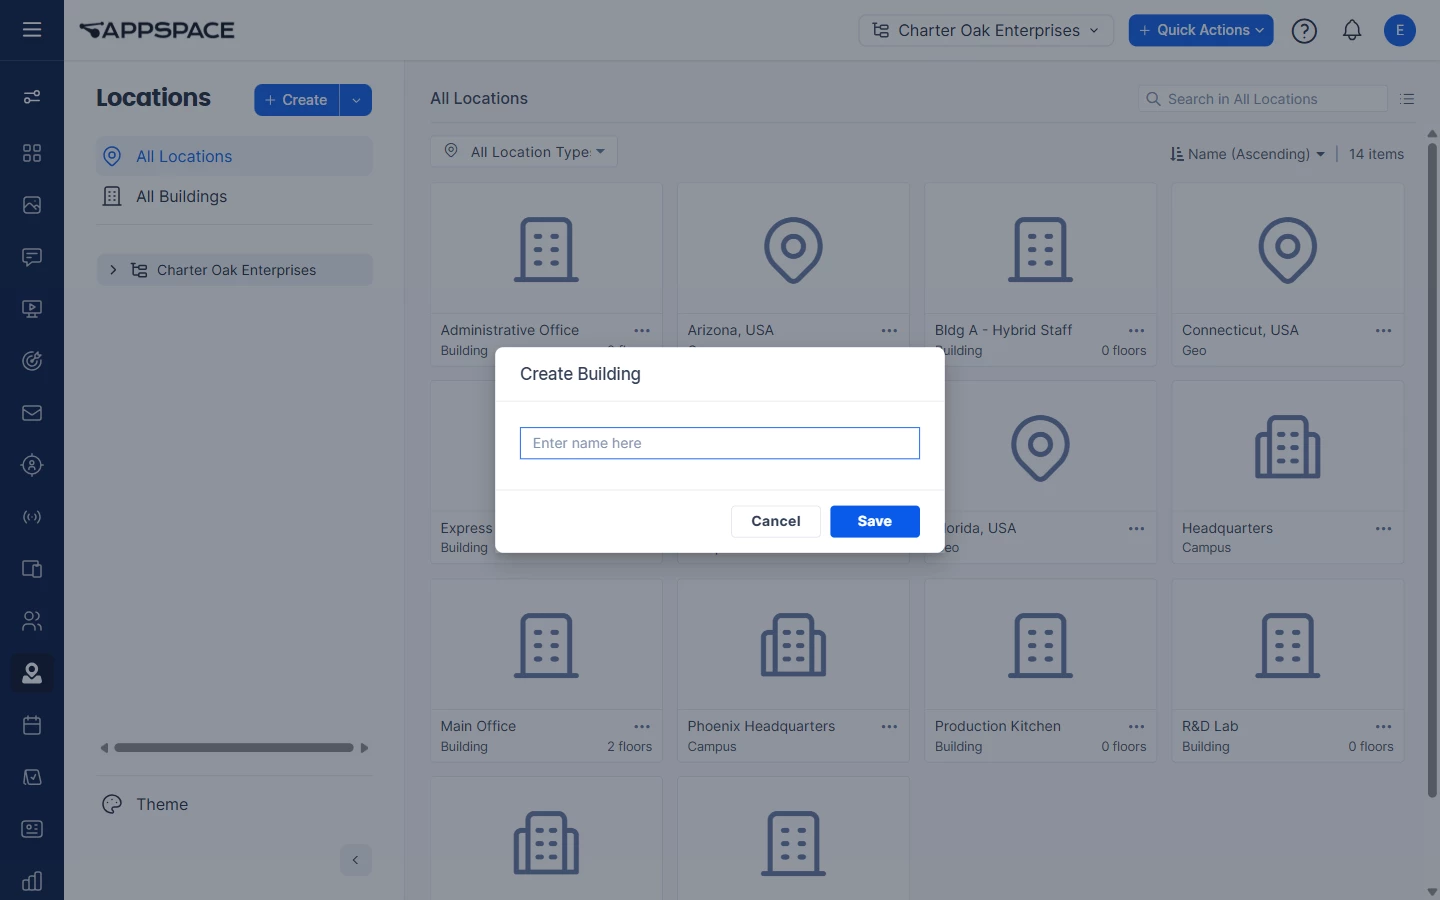
Creating locations for your devices
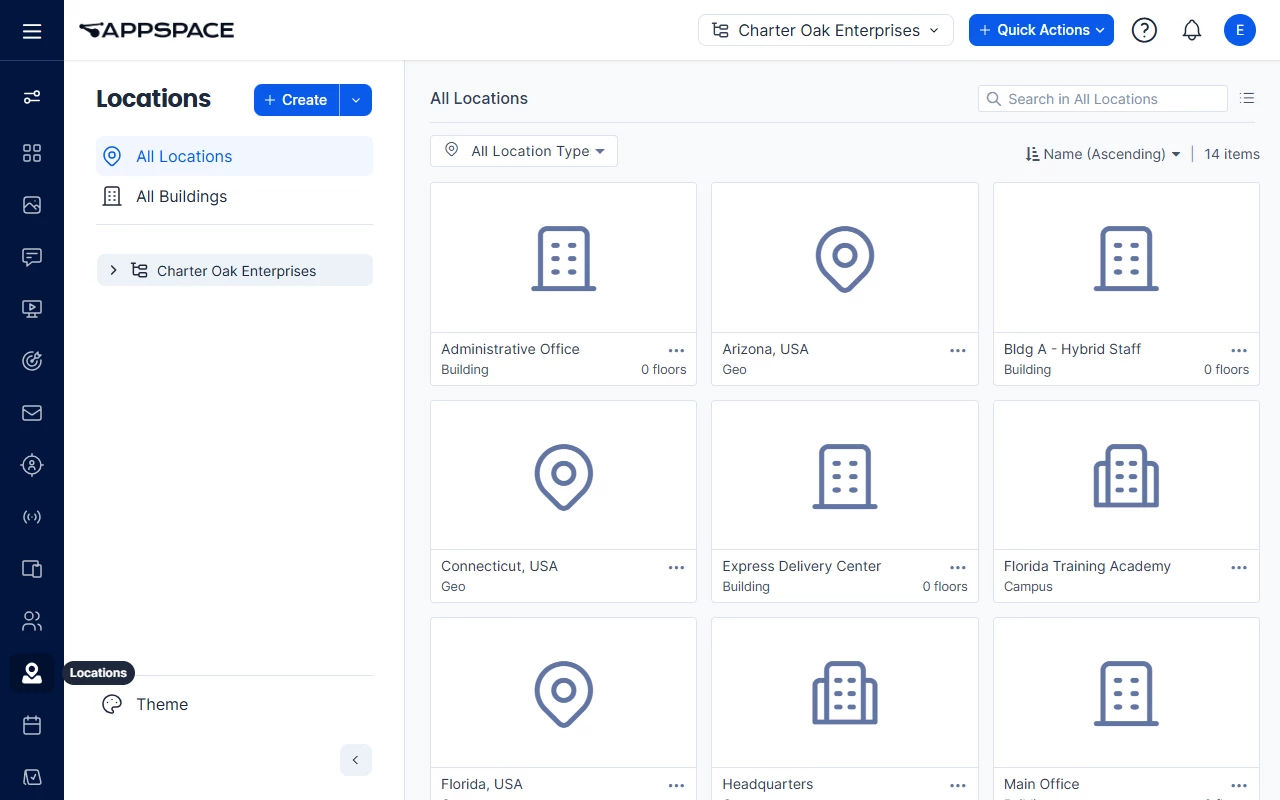
Add locations in the Locations module. The Location menu in Register New Device lists the locations you create here.
- Click Locations.
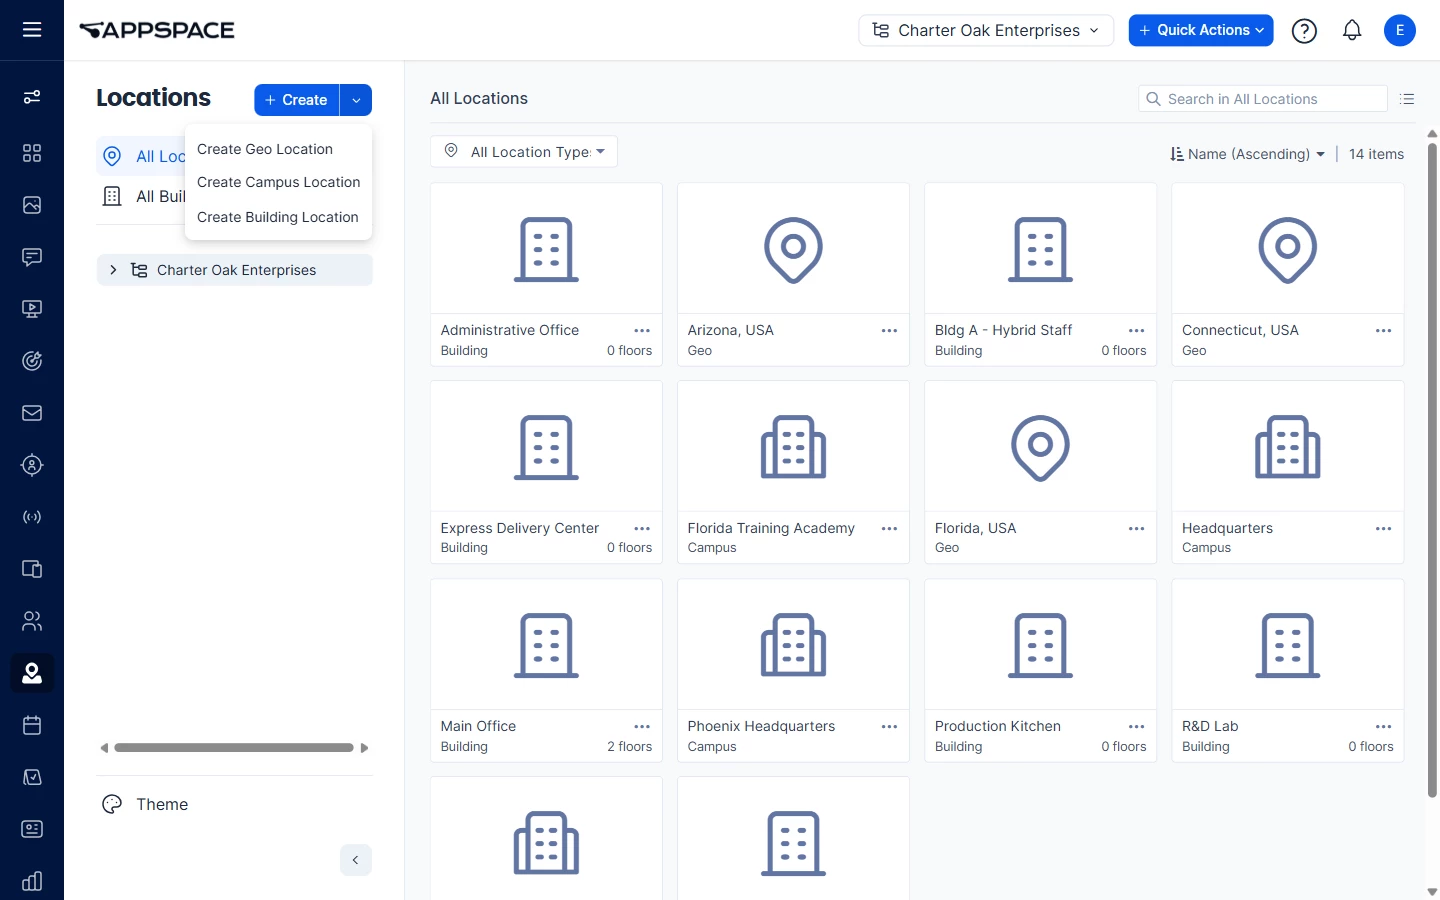
- Open the dropdown beside + Create.
- Click Create Geo Location, Create Campus Location, or Create Building Location.
- Enter the name and click Save. Create Geo Location and Create Campus Location ask for a name, the same way Create Building does.
Creating and managing user groups
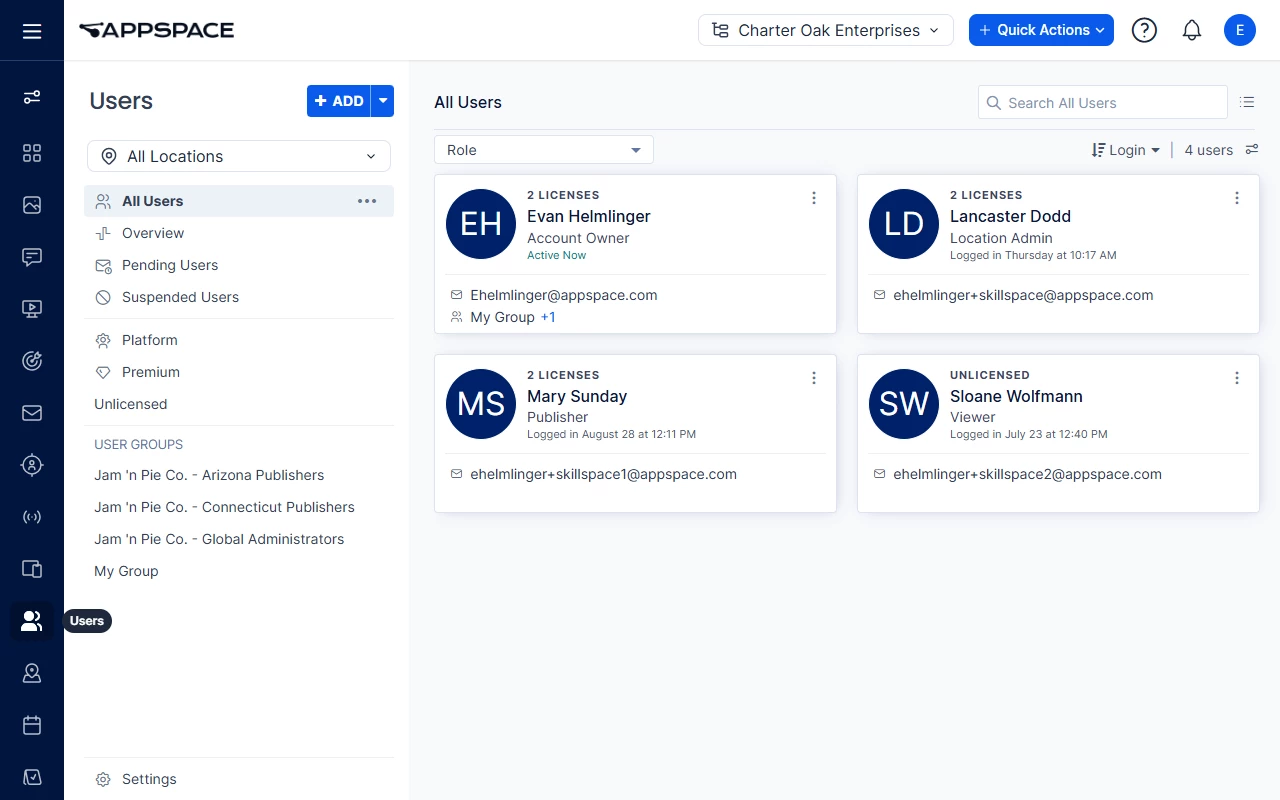
A user group gives the same role to everyone in the group. On Users, existing groups are listed under USER GROUPS.
- Open Users.
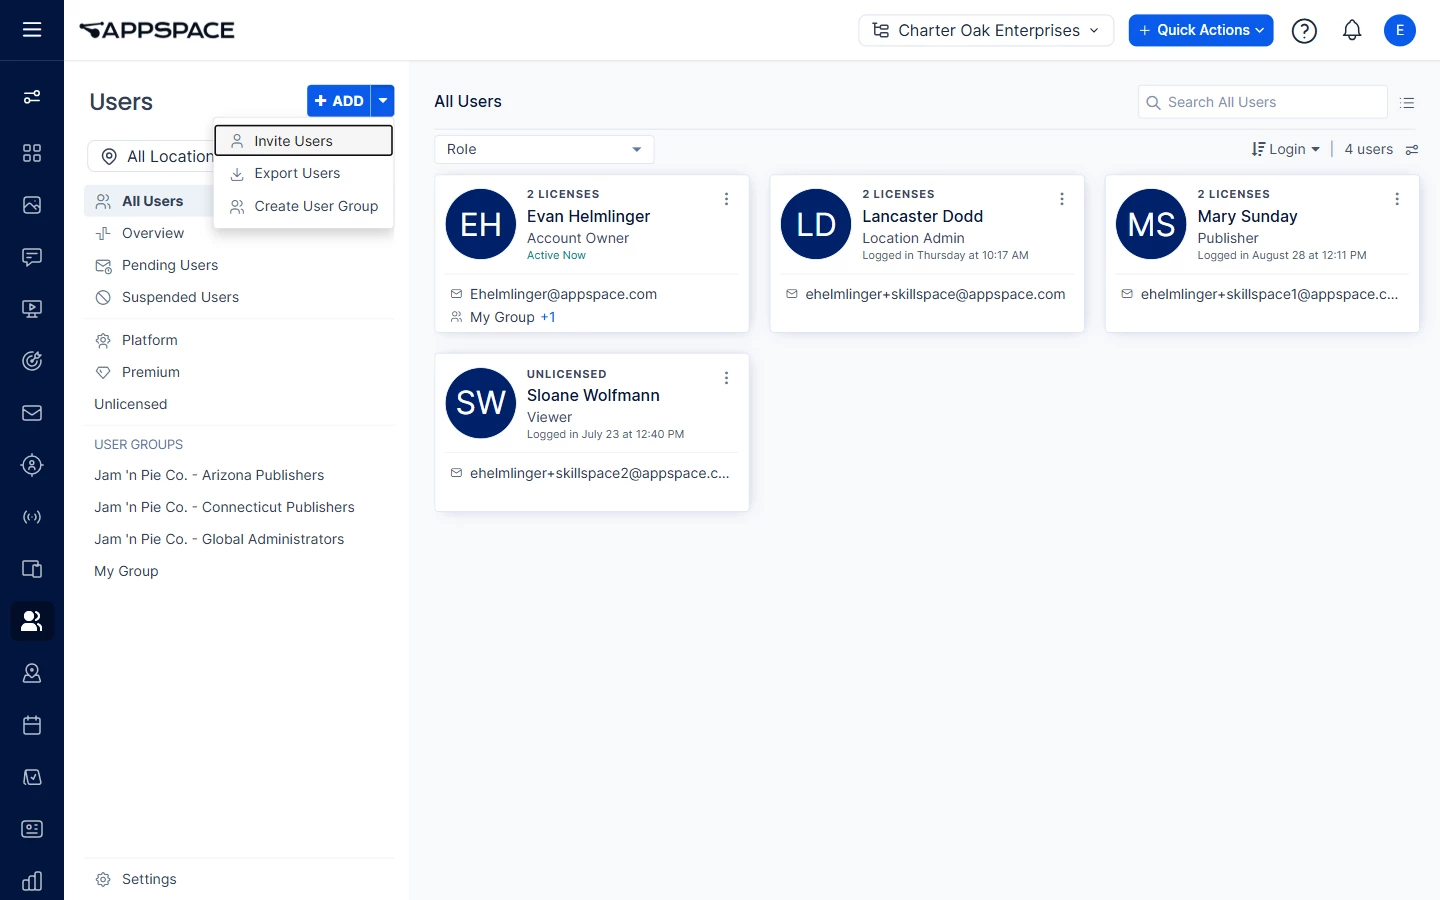
- Open the dropdown beside + ADD.
- Click Create User Group.
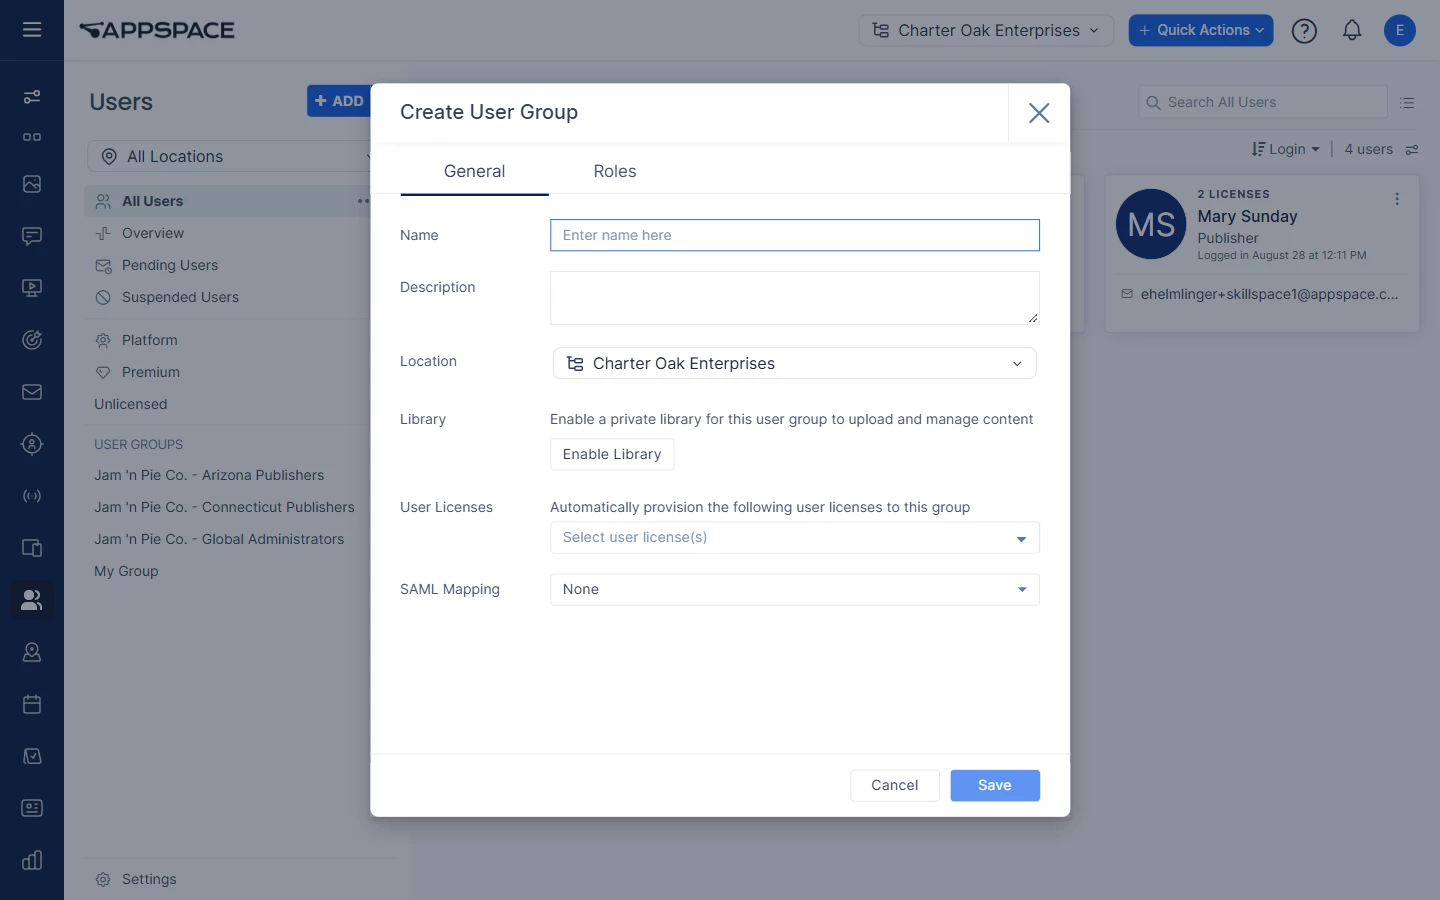
- On General, enter a Name.
- Select the Location.
- Under User Licenses, select Platform.
- Open Roles. Click Add. The menu lists Account Owner, Location Admin, Publisher, and Author.
- Choose the role, then choose the location it applies to. A group can hold more than one role, each at its own location. A Location Admin at one location can be a Publisher at another. For this work, add Publisher at the location where the screens live.
- Click Save.
General also has Description, Enable Library, and SAML Mapping. The same + ADD dropdown includes Invite Users and Export Users. Use Invite Users to add a person. That is the next section.
Inviting users and assigning locations, roles, and permissions
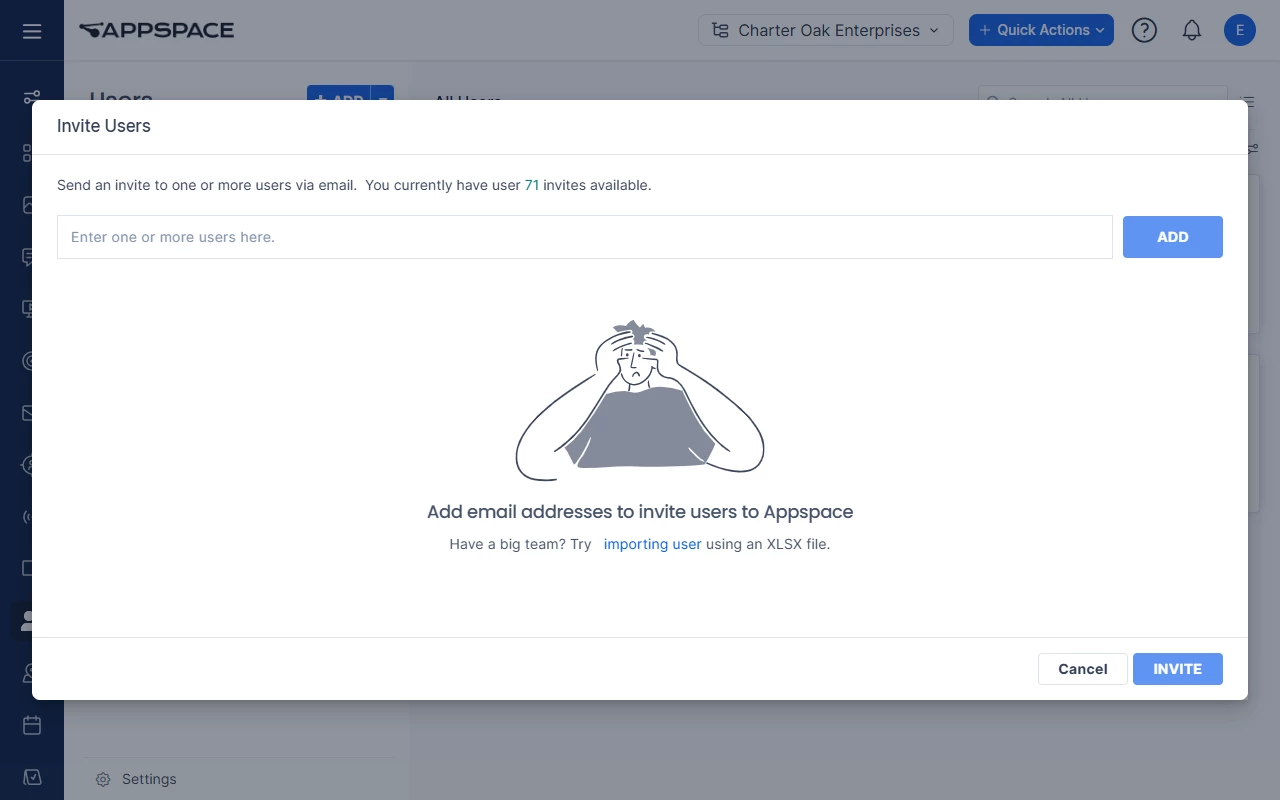
- Open Users.
- Click + ADD. That opens Invite Users. The dropdown beside + ADD also has Invite Users.
- Enter one or more email addresses.
- Click ADD. The address appears in the dialog. Location, license, and role can be set at this time or later.
- Click INVITE.
The dialog shows how many invites are left. A large list can be imported from an XLSX file.
The person receives an email and finishes sign-in. Pending Users lists invitations that are not accepted yet. Set or edit Home Location, the Platform license, and the Publisher role on the user profile after they accept. That is the next section.
Editing user information, roles, and permissions
Use this after the person has accepted the invitation, or when their location, role, or group changes.
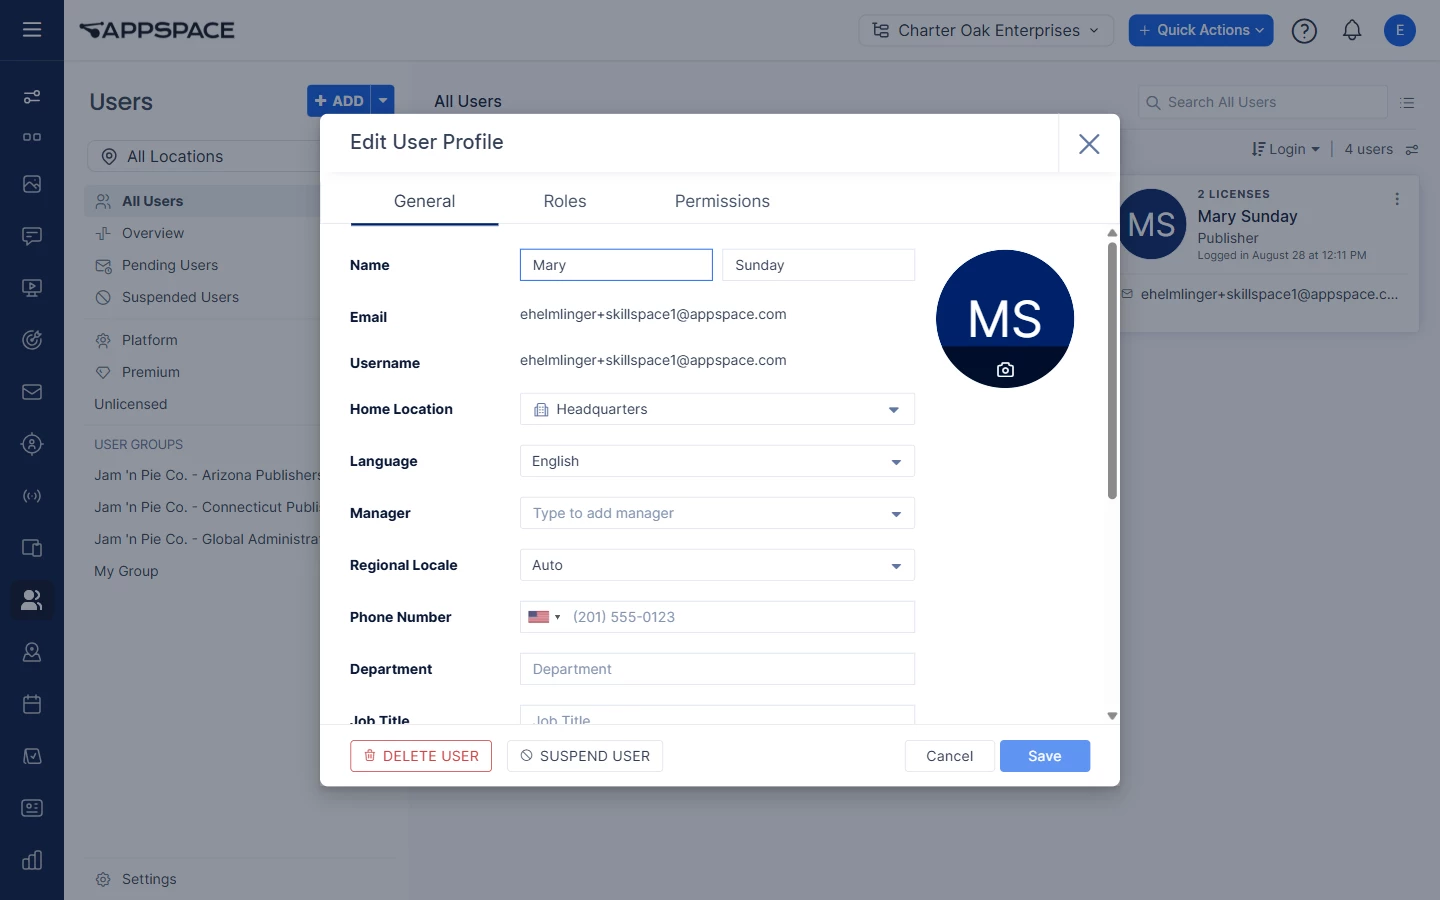
- Open Users.
- Click the person's name. Edit User Profile opens.
- On General, Name is two fields. Email is shown. Set Home Location.
- Under User Licenses, include Platform.
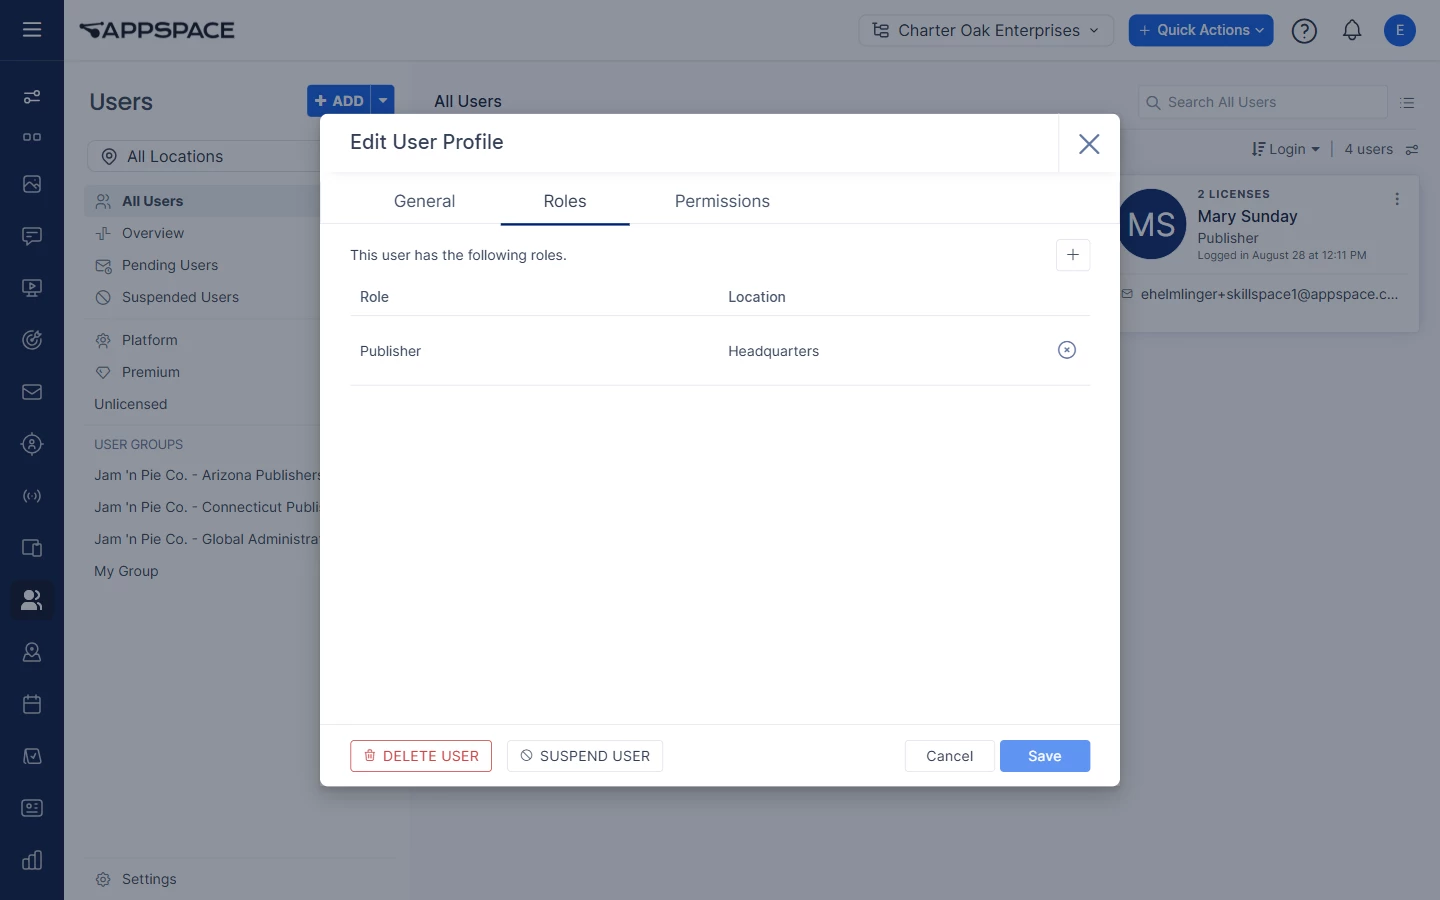
- Open Roles. Click Add. Choose Account Owner, Location Admin, Publisher, or Author, then choose the location for that role. A person can hold more than one role, each at its own location. For this work, add Publisher at the location where their screens live. The remove control on a row clears that role.
- Click Save.
Member of on General lists the person's user groups.
Connecting your devices
First, install the Appspace App for Devices on the device before this procedure. You’ll then register each screen with the 6-character code on the device.
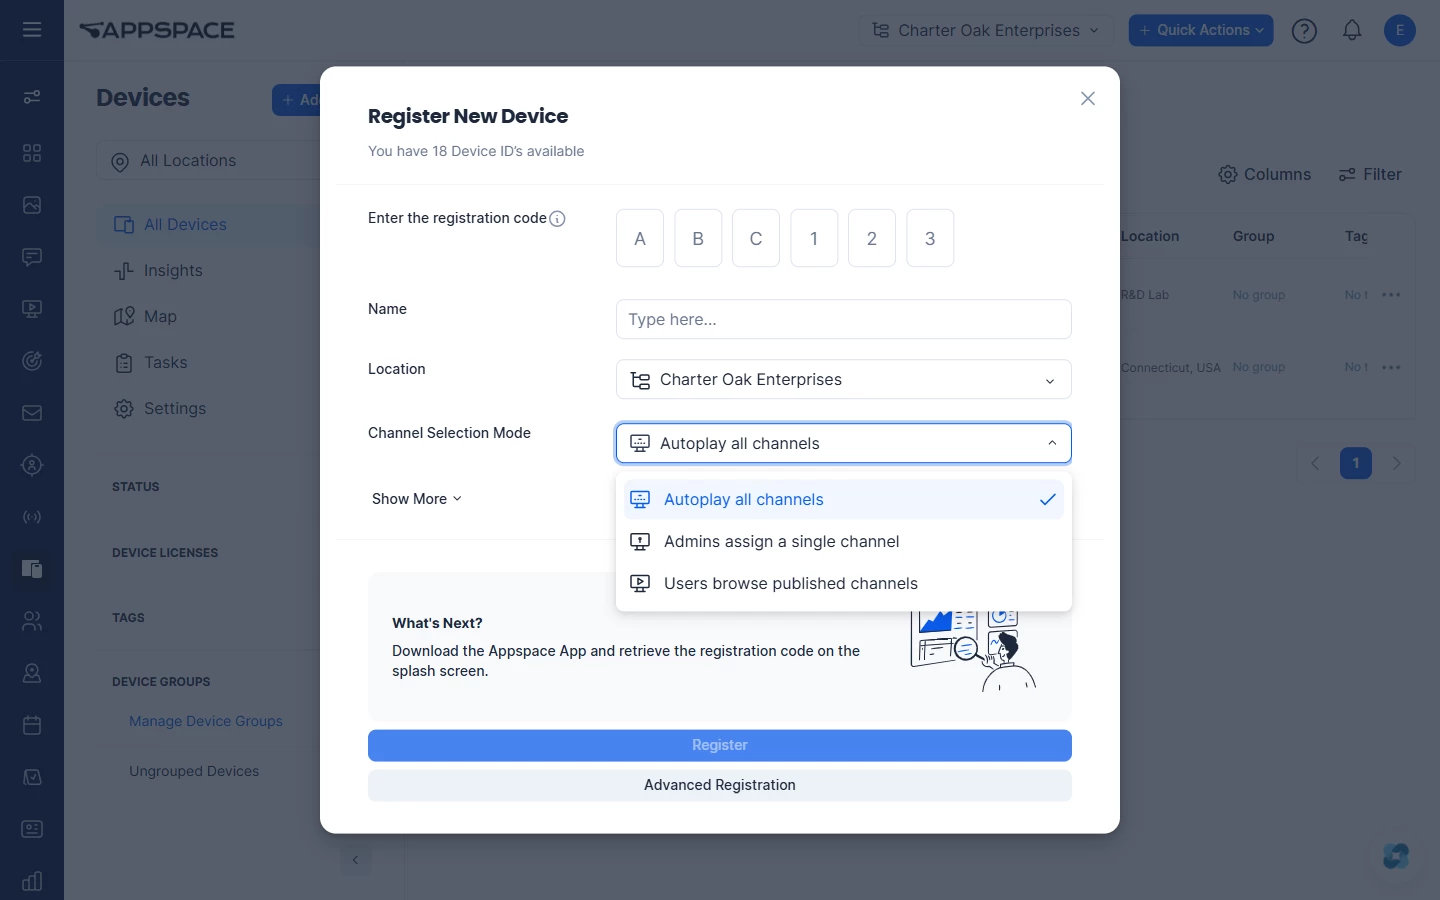
- On the device, launch the Appspace App. The registration screen shows a 6-character code.
- In the console, click Devices, then + Add. Quick Actions on the dashboard also includes Register a Device.
- In Register New Device, enter the code in Enter the registration code.
- Enter a Name.
- Select the Location.
- Open Channel Selection Mode and choose one:
- Autoplay all channels
- Admins assign a single channel
- Users browse published channels
- Click Register.
Advanced Registration is on the same dialog. Use it for a registration path other than the 6-character code.
The screen stays blank until a Publisher publishes a channel to the device.
Using device groups
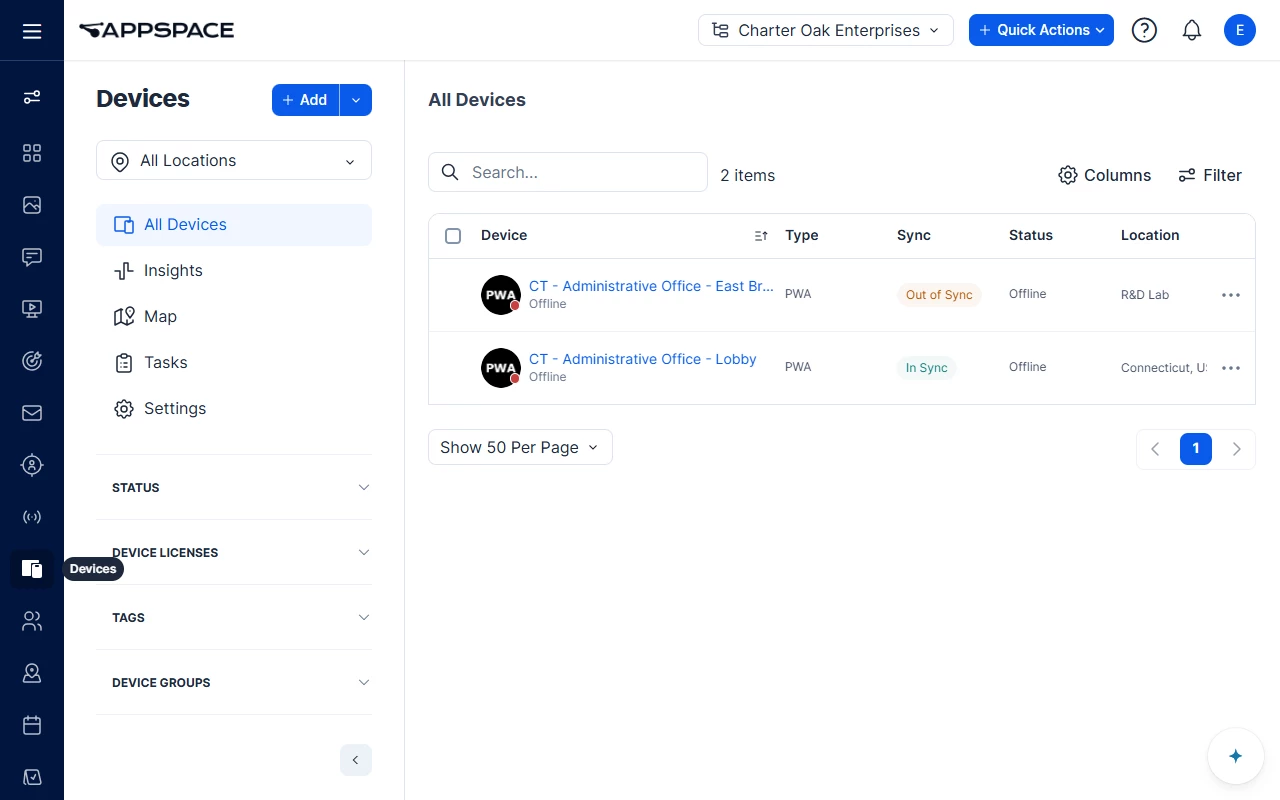
- Click Devices.
- Open the DEVICE GROUPS heading.
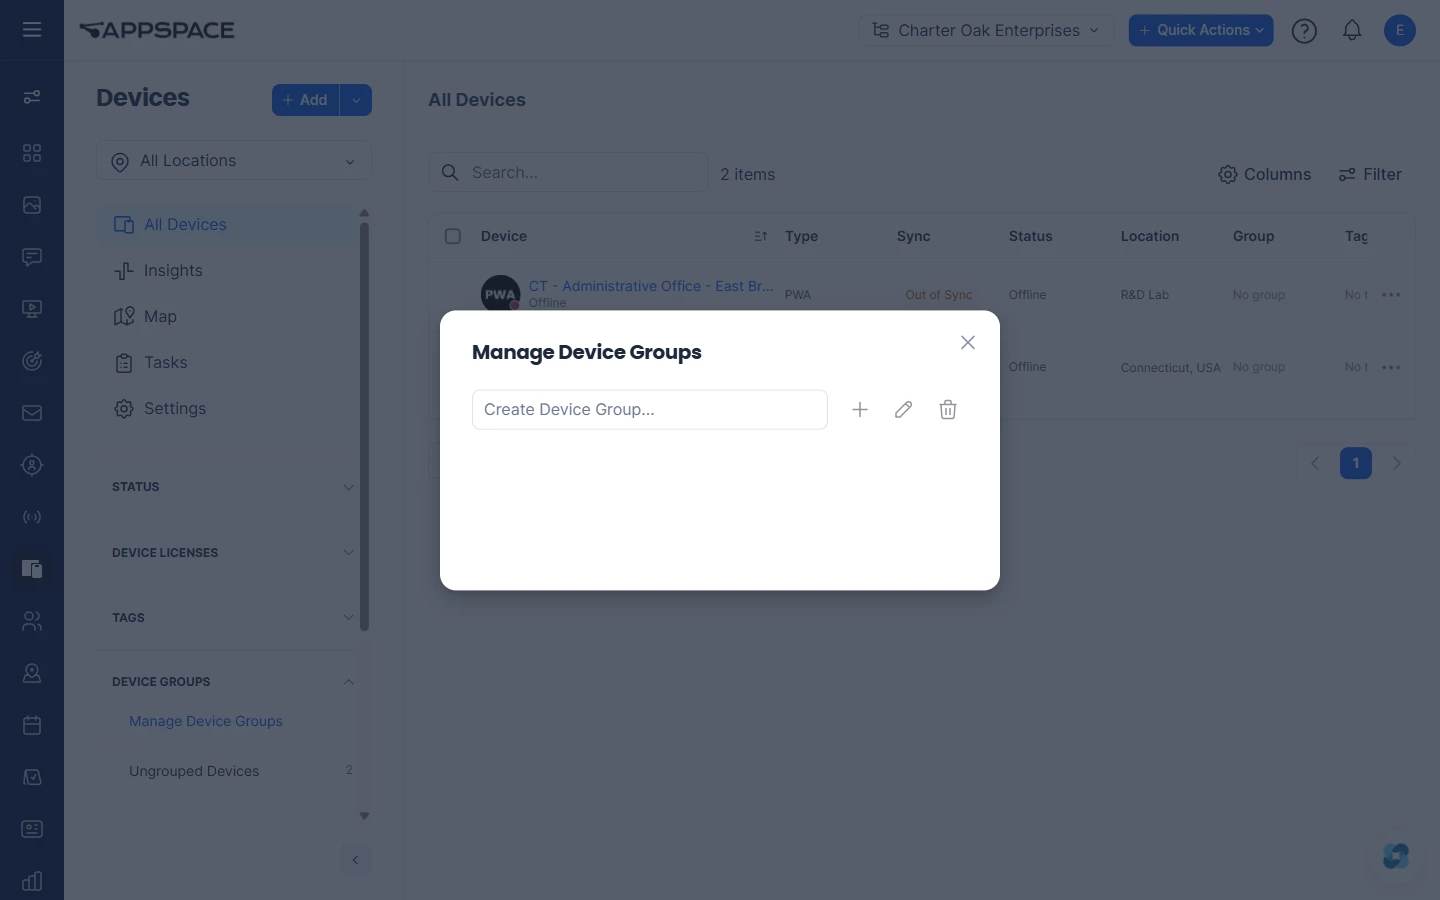
- Click Manage Device Groups.
- Enter a name in Create Device Group... and click +. The pencil edits the selected group. The trash can deletes it.
To put a device in a group:
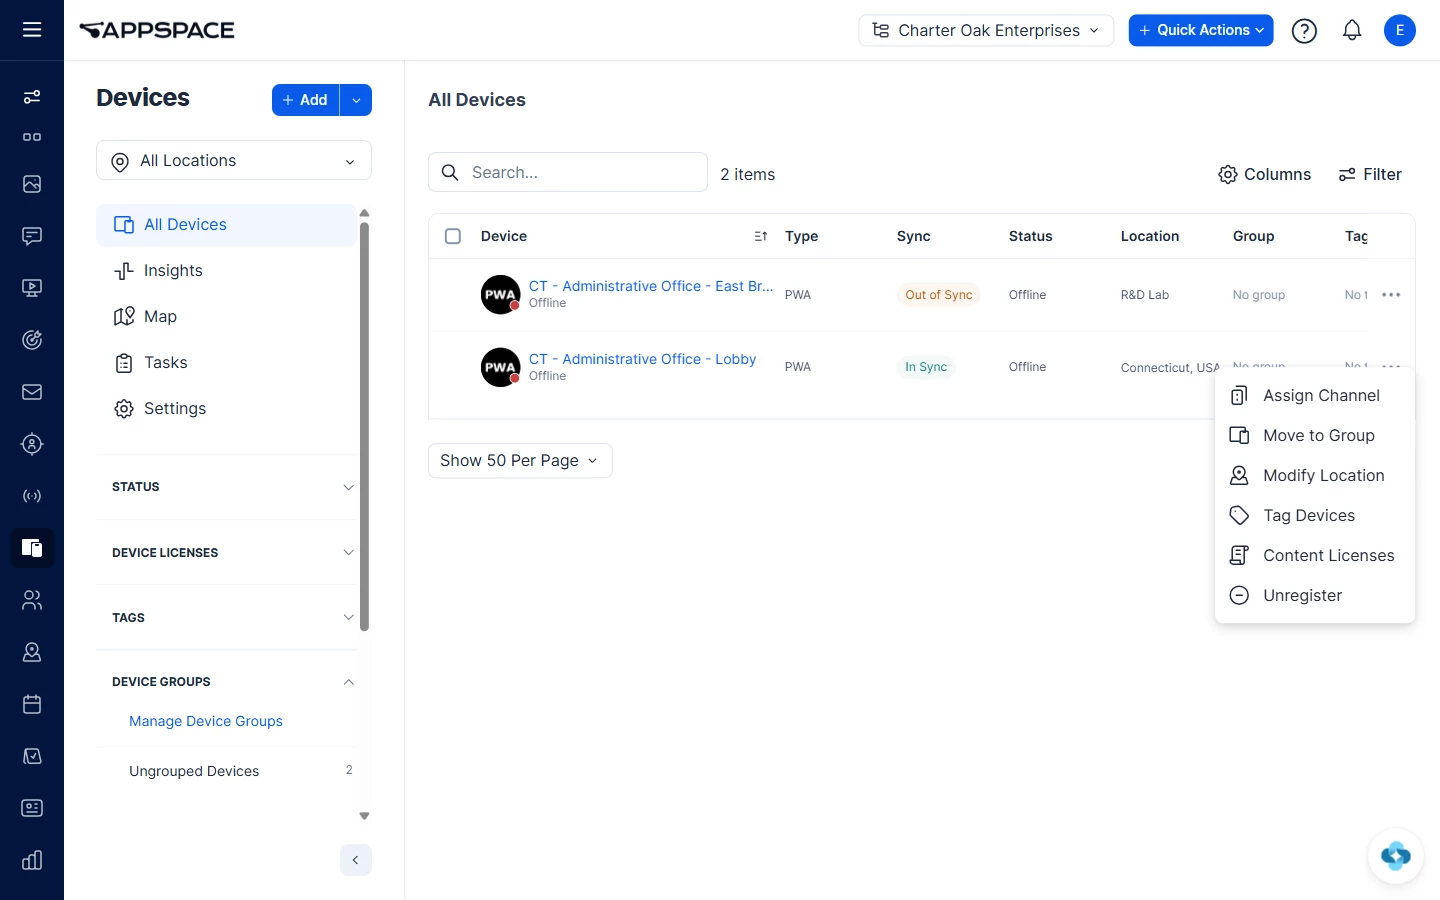
- On Devices, open the device's more options menu.
- Click Move to Group.
- In the popup, select a group from the groups at that location.
The same menu includes Assign Channel, Modify Location, Tag Devices, Content Licenses, and Unregister.
Understanding the Library
The Library stores the cards, images, and videos that a channel plays. Publishers create and edit that content. You as the Account Owner decide where it lives.
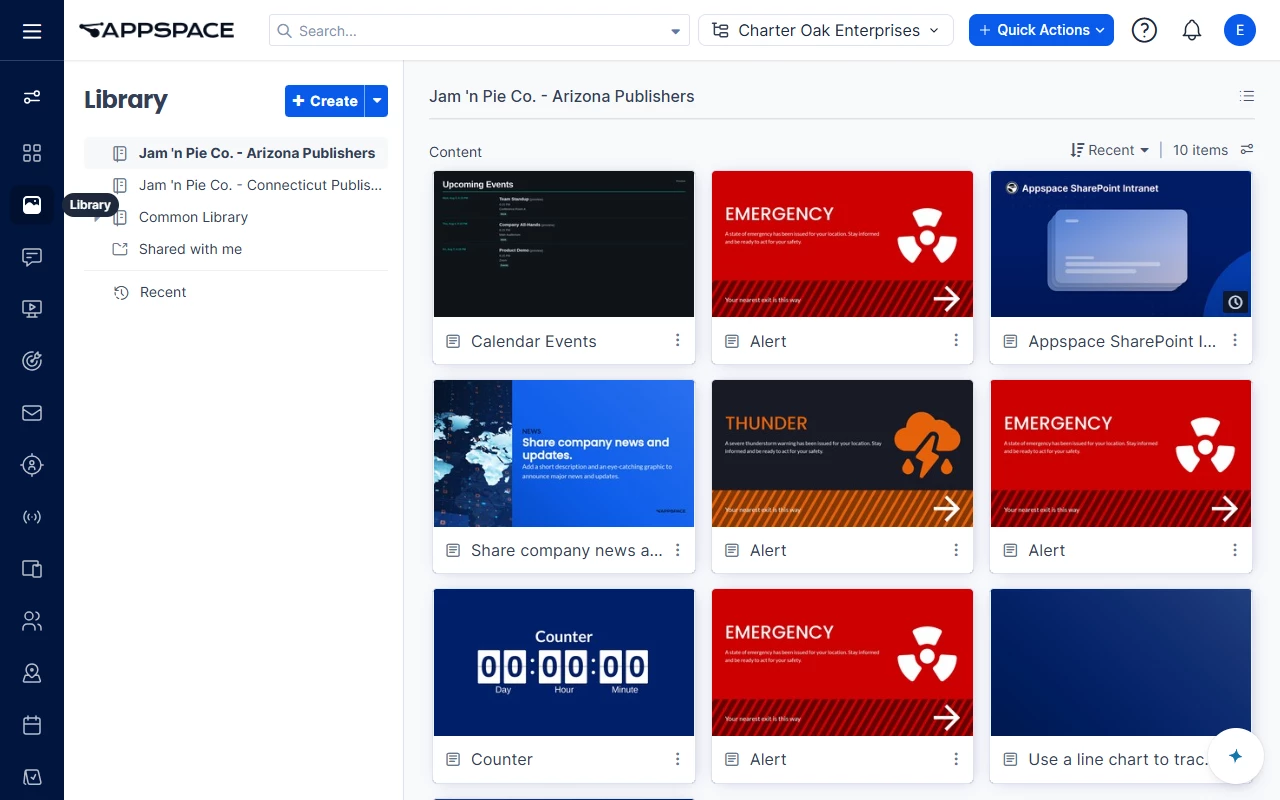
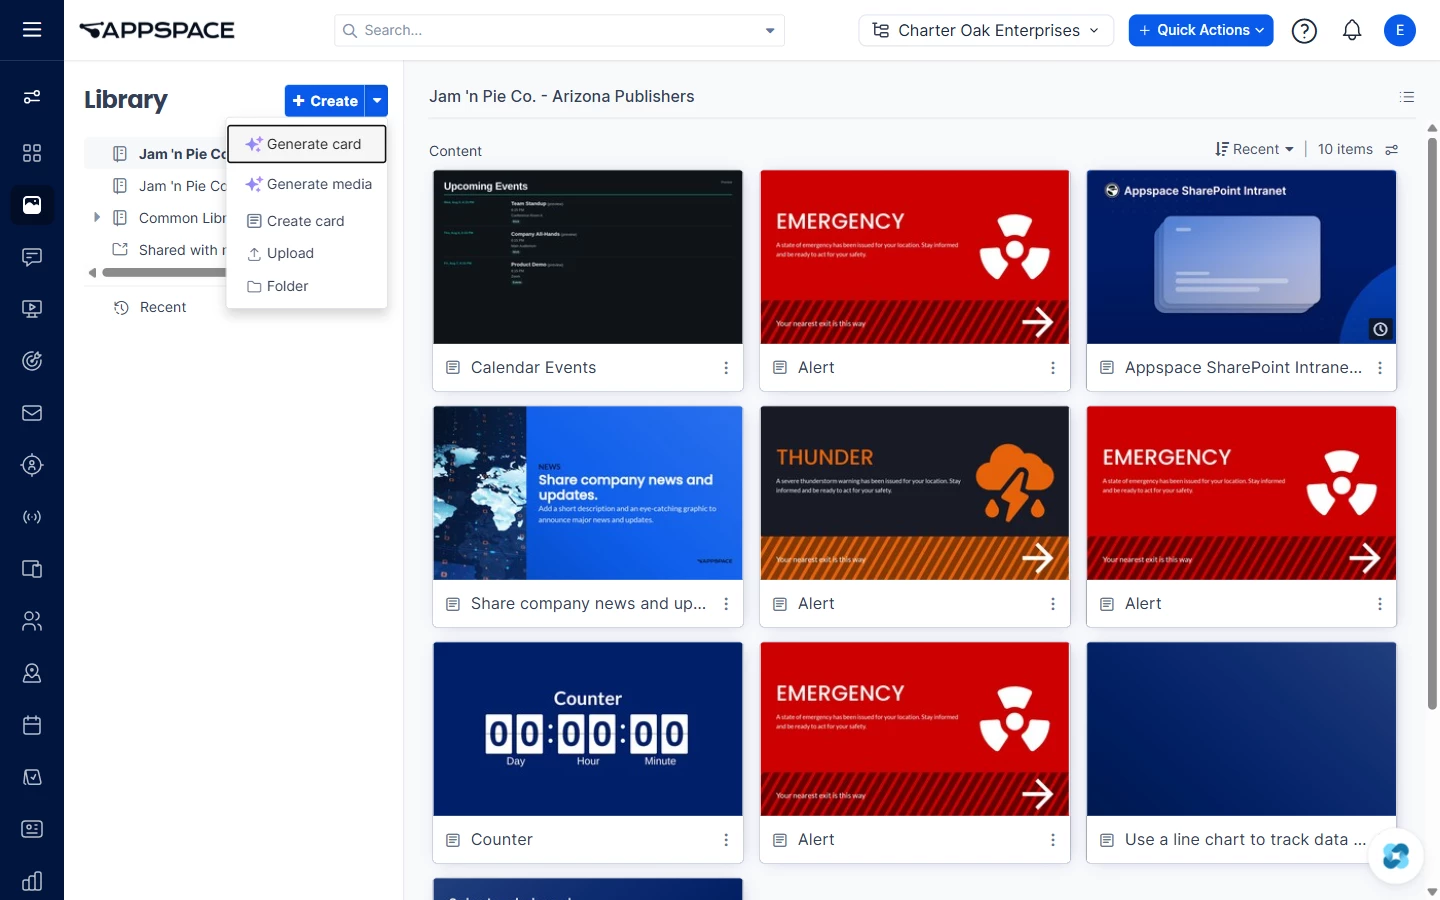
Open Library. The side list shows each library, including Common Library, plus Shared with me and Recent. + Create opens Create card. The dropdown beside + Create includes Generate card, Generate media, Create card, Upload, and Folder.
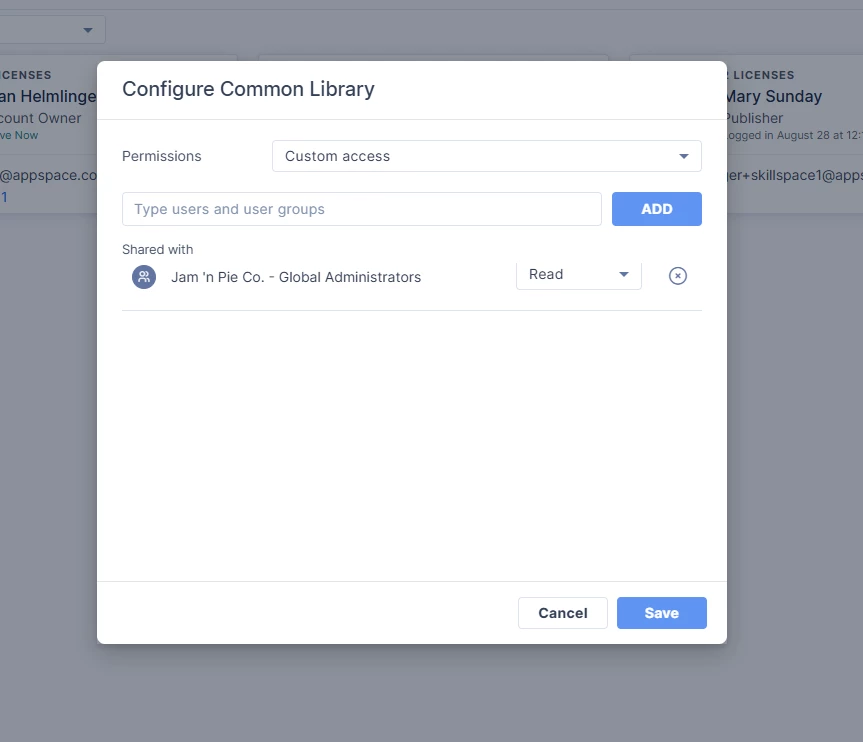
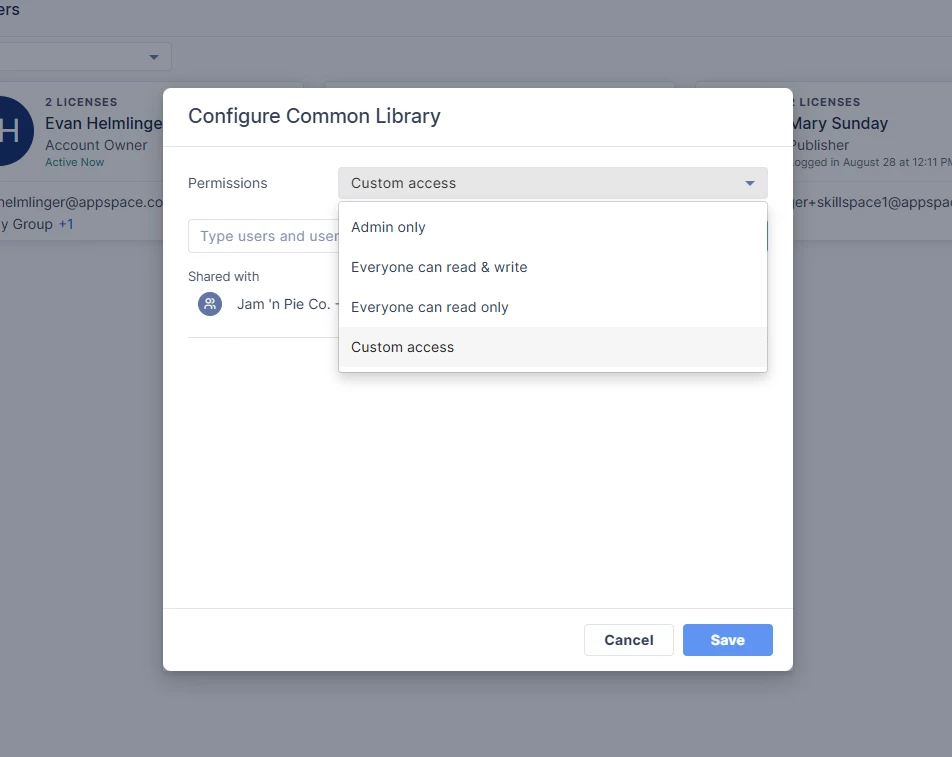
Only an Account Owner can open Common Library until you share it. On Users, open the ... beside All Users. Configure Common Library opens.
- Open Permissions.
- Choose Admin only, Everyone can read & write, Everyone can read only, or Custom access.
- For Custom access, type a user or a user group, then click ADD.
- On the Shared with row, set that person's or group's access. The row can show Read.
- Click Save.
Publisher
Let's begin
The Account Owner has already created your location, sent your invitation, and registered the screens.
You need a Platform license and the Publisher role for that location. Accept the invitation email, then sign in to the console.
When you finish this track, an Announcement card is in the Library, it plays in a Fullscreen Signage Channel, and that channel is published to a device.
You do not invite users, create locations, or register devices. If the screen you need is not in the device list, ask the Account Owner to register it.
Getting around the platform
Use two areas in the icon menu:
- Library is where you create the card and upload media.
- Channels is where you create the Fullscreen Signage Channel, set playout, and publish it.
Quick Actions on the Signage dashboard also includes Create Card, Upload Media, and Manage Channels.
The channel itself has five tabs: Edit, Calendar, Preview, Publish, and Settings. You build the playlist on Edit, check it on Preview, and send it to a screen on Publish. Calendar shows scheduled, live, and expiring content.
Understanding user roles and permissions
Your Publisher role for the location lets you create the channel, change its content, and publish it to devices in that location. The Account Owner assigns that role.
You do not need Account Owner access to do the work in this track. If a control for users, locations, or device registration is missing, reach out to an Account Owner to assist.
A Publisher permission on a single channel is limited to that channel. Your location role is what lets you create a new Fullscreen Signage Channel.
Understanding the Library
Open Library. The side list shows each library, including Common Library, plus Shared with me and Recent. Common Library is available when the Account Owner has added you. + Create opens Create card. The dropdown beside + Create includes Generate card, Generate media, Create card, Upload, and Folder.
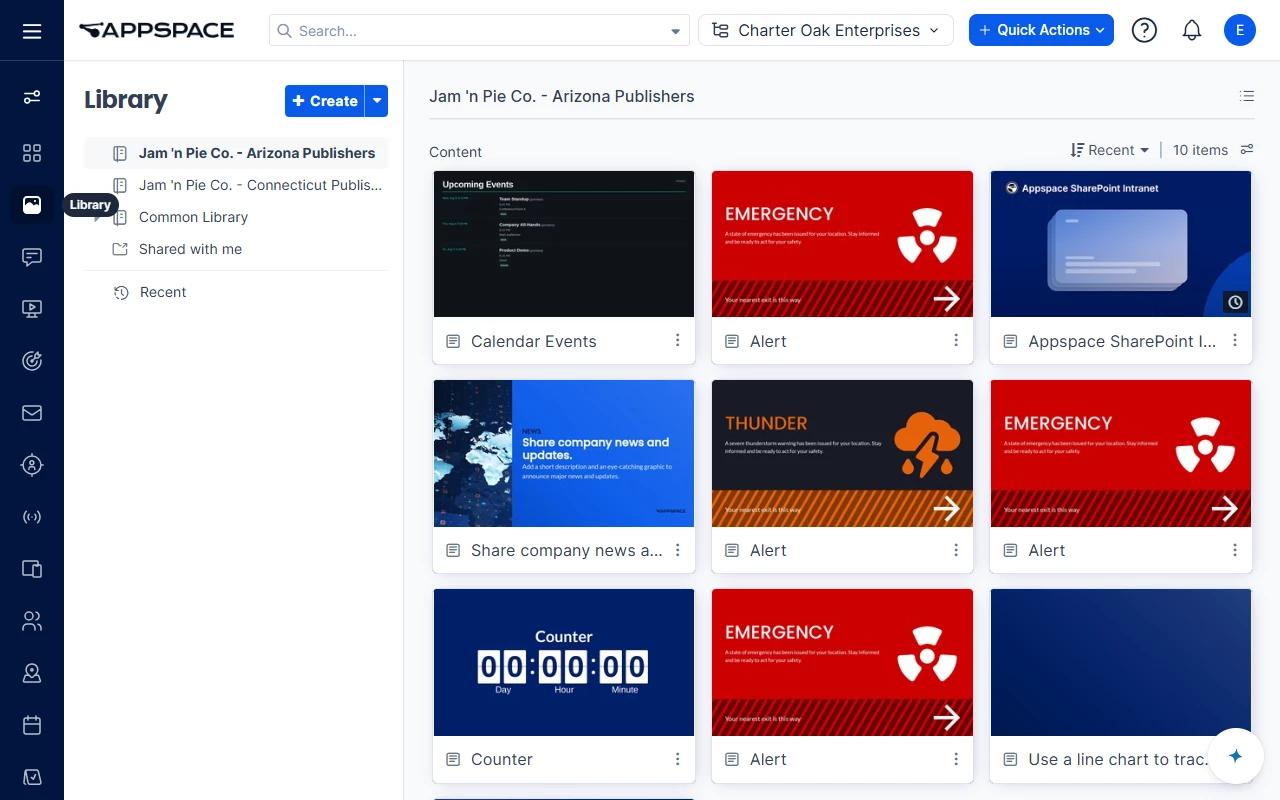
Creating a card in the Library
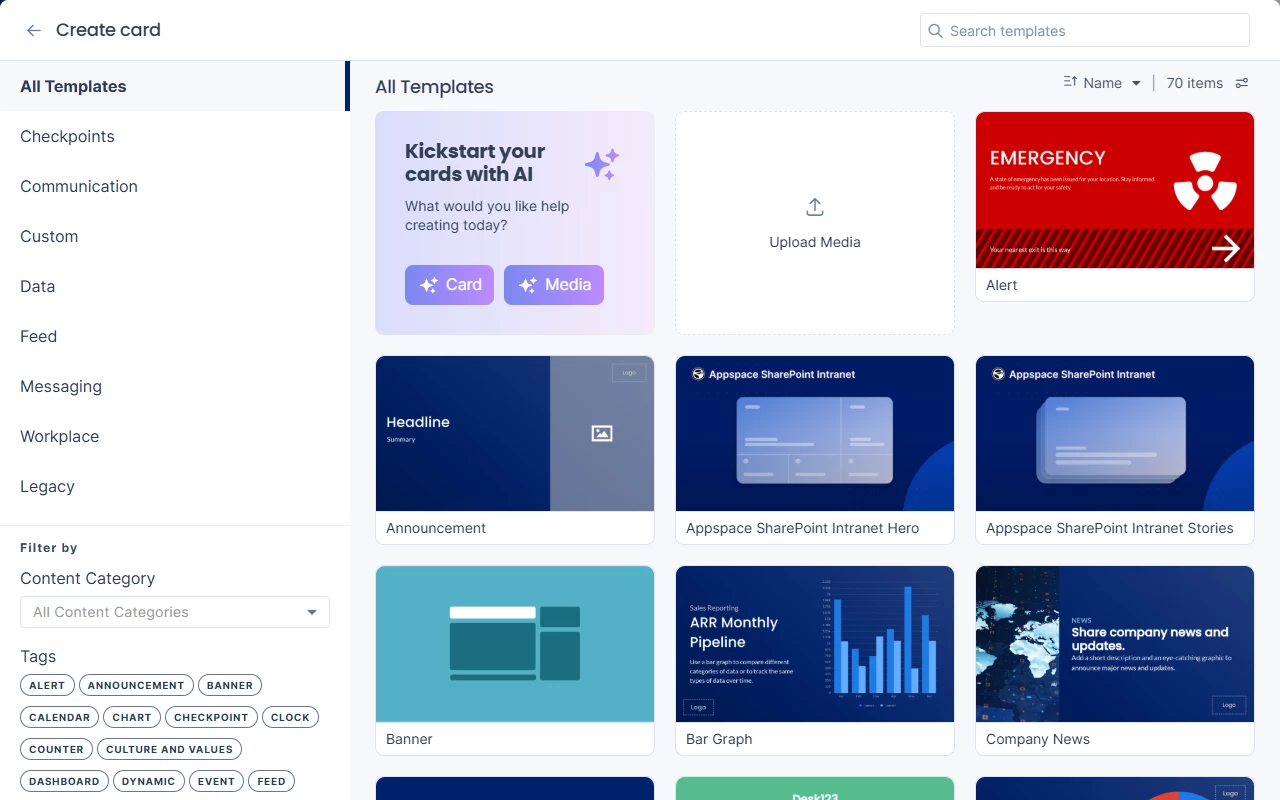
Create an Announcement card from the Communication category. Add the card from the Fullscreen Signage Channel after you save it.
- Click Library.
- Select the library where the card should be saved.
- Click + Create.
- On Create card, select Communication.
- Click Announcement.
- Enter a Title. The title is also the file name in the Library.
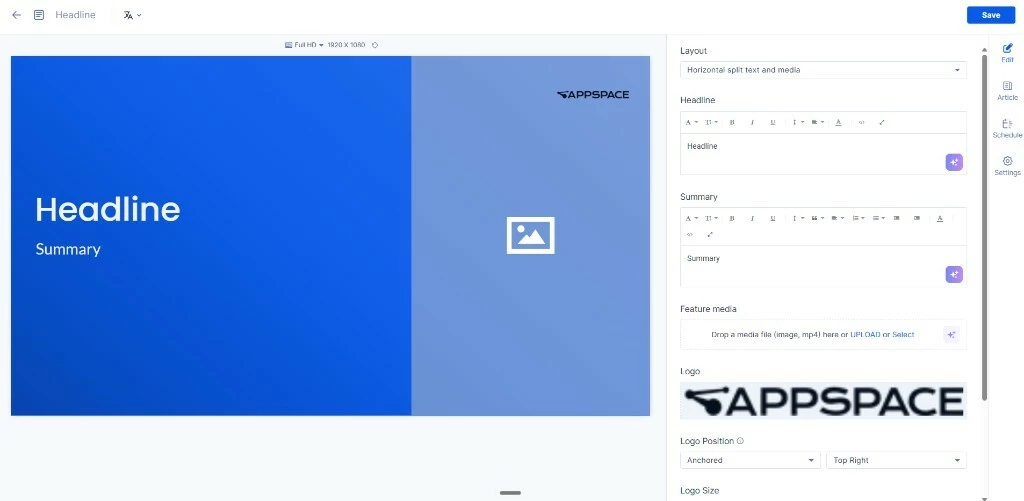
- Select Edit.
- Select a Layout:
- Text only
- Horizontal split text and media
- Vertical split text and media
- Text and media
- Enter the Headline and the Summary.
- Under Feature media, drop an image or an mp4, click UPLOAD, or click Select.
- Set Logo, Logo Position, and Logo Size when the card should show a logo. Logo Position opened on Anchored and Top Right.
- Leave Schedule unset.
- Click Save.
English is the default language. Open the Language icon and select another language only when the card should play in that language.
Managing content in the Library
Upload a file, put it in a folder, or rename and delete an item you no longer want on a screen.
Upload a file
- Open Library and select the destination library.
- Open the dropdown beside + Create.
- Click Upload.
- Select the file.
Create a folder
- In the Library, open the dropdown beside + Create.
- Click Folder.
- Name the folder.
Rename, move, or delete
- Right-click the item, or open its ellipsis.
- Click Rename, Tags & Expiry, or Delete.
To move several items, select them. On the batch bar, click Move to a new folder and choose the folder.
Right-click also includes Add to Channel. Add the card from the Fullscreen Signage Channel instead, so the channel type stays a Fullscreen Signage Channel.
Creating and configuring channels
A Fullscreen Signage Channel plays one item at a time on the full screen.
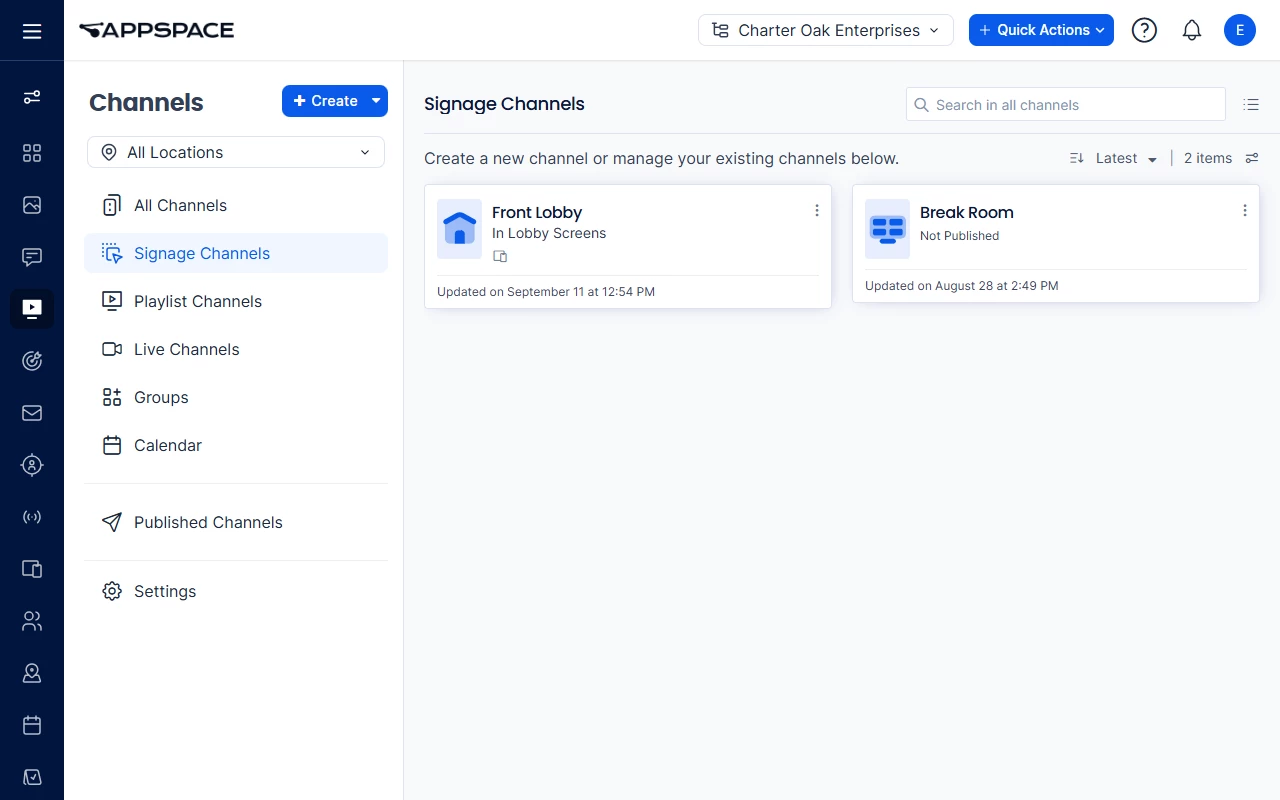
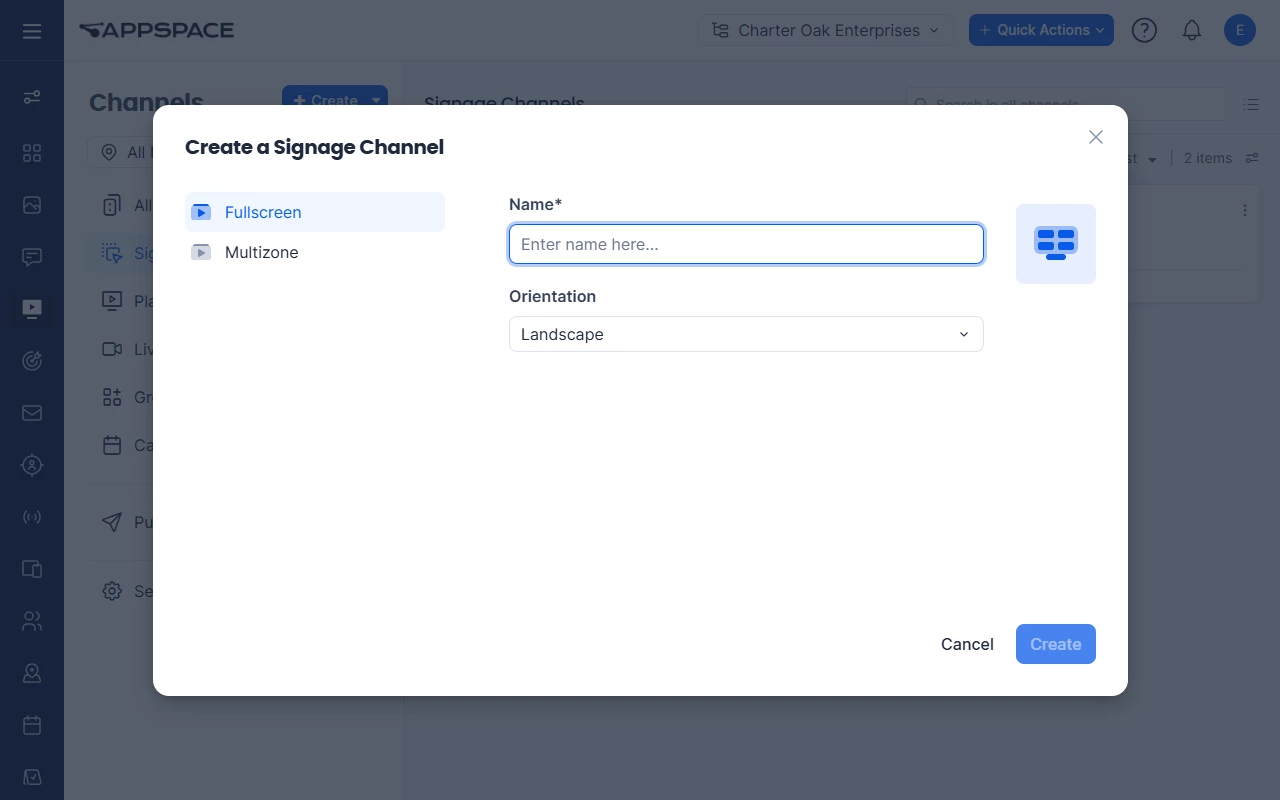
- Click Channels.
- Click Signage Channels.
- Click + Create.
- In Create a Signage Channel, select Fullscreen.
- Enter the name in Name.
- Select Orientation. The dialog shows Landscape until you change it.
- Click Create.
The channel opens on the Edit tab. The other tabs are Calendar, Preview, Publish, and Settings.
Adding Library content to a channel
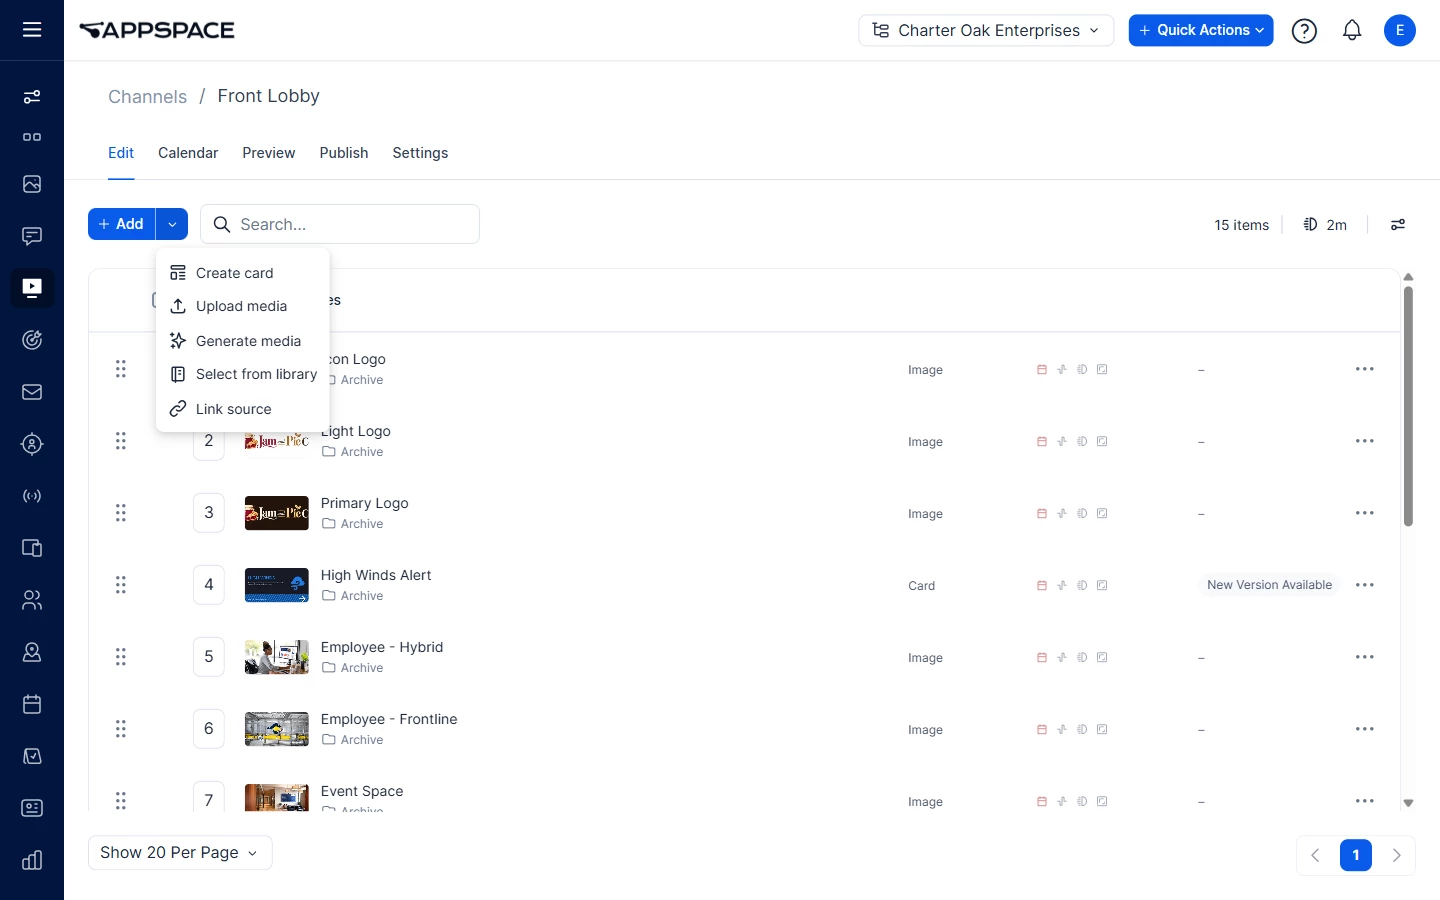
- Open the Fullscreen Signage Channel and select the Edit tab.
- Open the dropdown beside + Add.
- Click Select from library.
- Select the Announcement card, or another Library item, and add it.
The same menu includes Create card, Upload media, Generate media, and Link source. Select from library is the option that adds an item already in the Library.
The item appears in the channel content list.
Configuring content playout properties
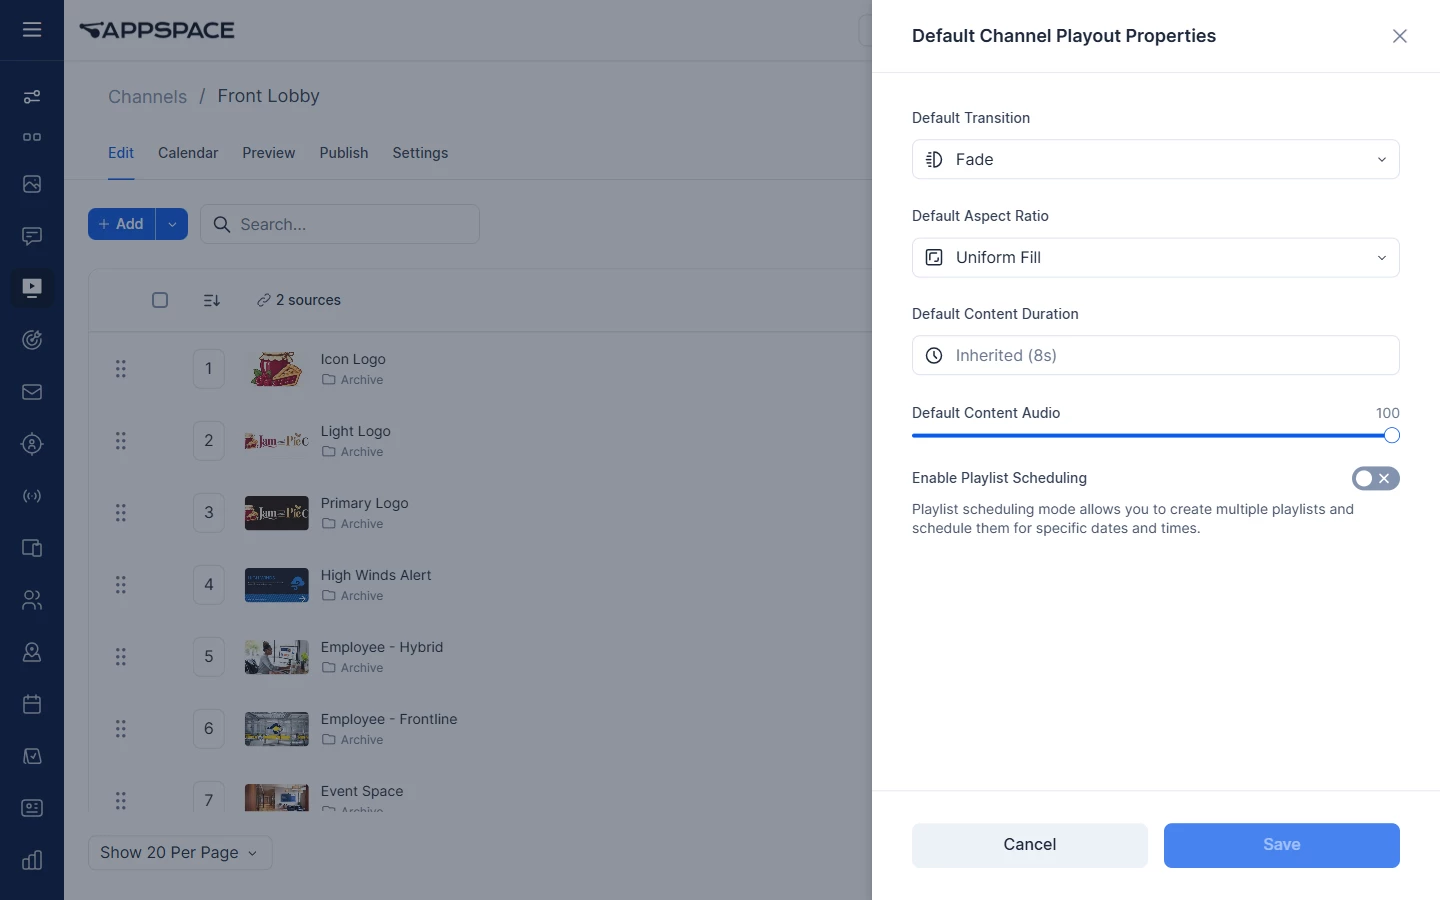
On the Edit tab, the duration control opens Default Channel Playout Properties. It shows the current default, such as 2m.
- On the Edit tab, click that duration control.
- Set Default Transition. It opened on Fade.
- Set Default Aspect Ratio. It opened on Uniform Fill.
- Set Default Content Duration. It opened on Inherited (8s).
- Set Default Content Audio.
- Leave Enable Playlist Scheduling off unless this channel needs more than one schedule.
- Click Save.
To change playout for one item, or for several items at once:
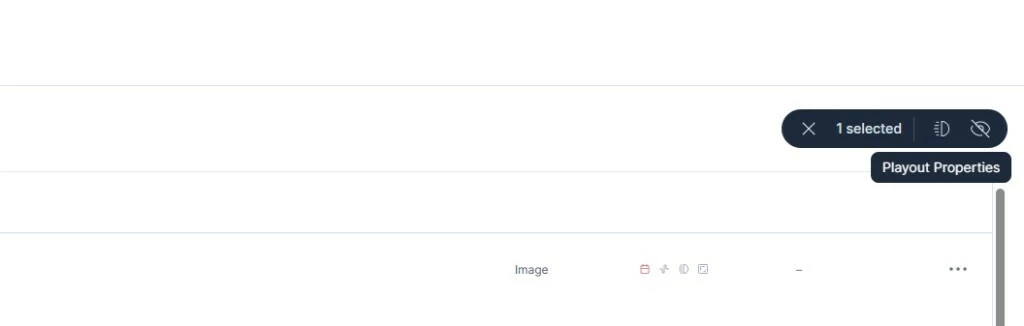
- Select the item, or select the items together. The selection bar shows how many are selected.
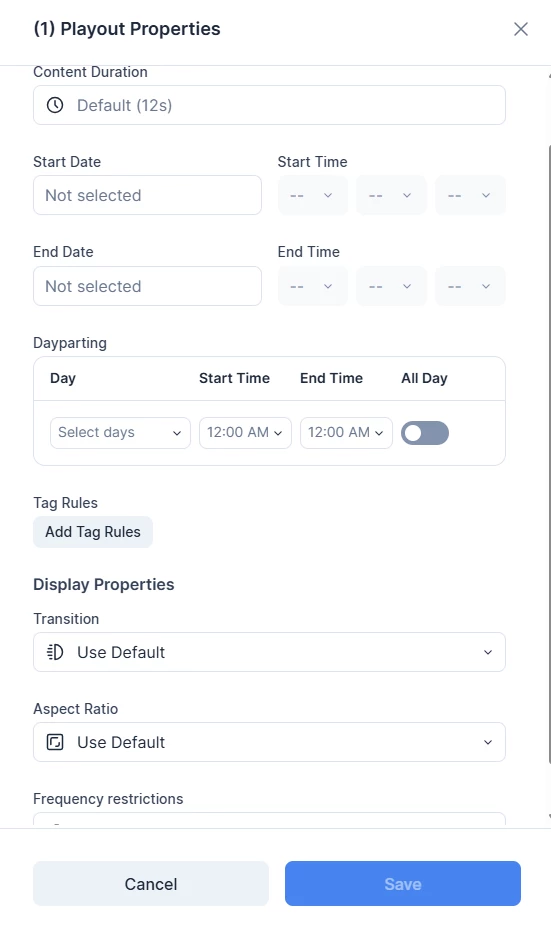
- Click Playout Properties. The title shows that count, such as (1) Playout Properties.
- Set Content Duration. It opened on Default (12s).
- Set Start Date and Start Time when the item should begin on a schedule. Set End Date and End Time when it should stop. Both dates opened on Not selected.
- Under Dayparting, choose the days, the start time, and the end time. Turn on All Day when the item should play the whole day. The times opened on 12:00 AM.
- Click Add Tag Rules only when the item should play for certain tags.
- Under Display Properties, set Transition and Aspect Ratio. Both opened on Use Default.
- Set Frequency restrictions when the item should play less often than every loop.
- Click Save.
Managing cards in a channel
On the Edit tab, use the content list:
- Drag an item by its handle to change the play order.
- Open the item's more options menu to Edit, Move to bottom, or Disable.
Disable keeps the item in the list and stops it from playing. Edit opens the item.
Publishing a channel to a device
Preview the channel, then add the device on the Publish tab.
- Select the Preview tab.
- Select a display resolution.
- Review the preview.
- Select the Publish tab.
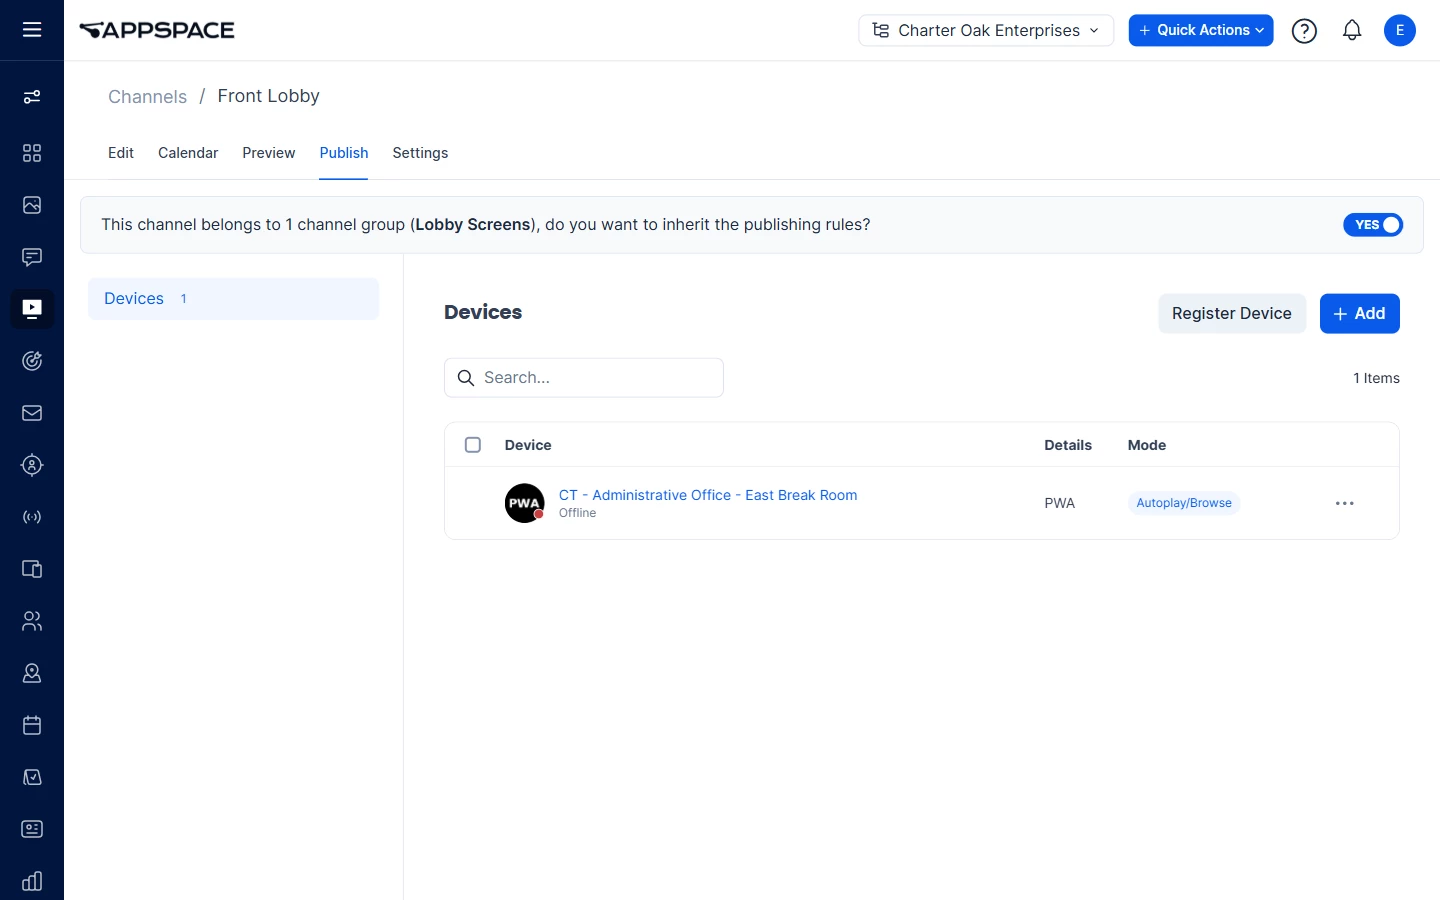
- Select Devices.
- Click + Add.
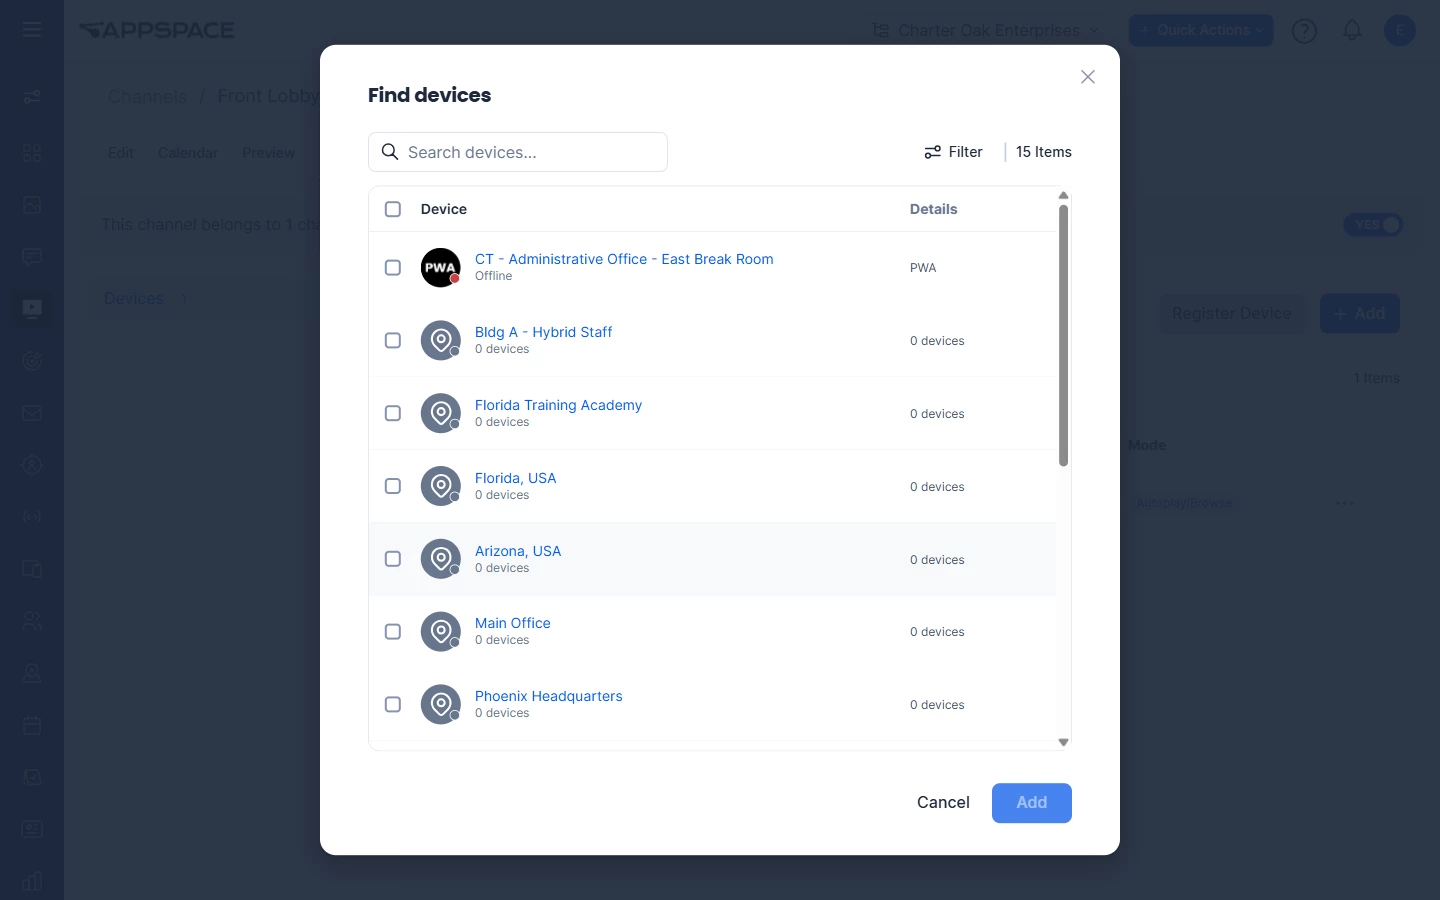
- Click Find devices.
- Search or filter for the device.
- Select the device.
- Click Add. The device is added to the Add Devices dialog.
- Review the device.
- Click Add.
The device appears in the publish list. Device shows the name and status. Details shows information such as the device type or location. Mode shows the playback mode when the list includes it. The device must be online and registered before it can play the channel.
If the device is not in the list, stop and ask the Account Owner to register it.
Find devices lists devices and locations. To publish to every device in a location, click + Add and select Publish to location and sub-locations, then click Add. That assignment includes the sub-locations.