



Learn how to manage a Table Listing widget in a Multizone Signage Channel. This article is for Communicators who publish tabular information such as timetables, menus, or rates to a layout zone. After you read this article, you can add the widget, enter table data, query a sheet, and set paging and layout.
For: Communicators — Table Listing Widgets
Prerequisites
-
You must be a Publisher for the selected location, channel, or channel group, or have another role that allows you to manage the channel.
-
Create a Multizone Signage Channel with at least one layout and one zone. See Create a Multizone Signage Channel.
Note: Enter table data on the channel Edit tab. Queries, paging, placement, CSS, actions, and permissions are configured in the layout editor. A Table Listing widget opens there with five tabs: Edit, Content, Actions, Properties, and Permissions.
Add a Table Listing Widget
Add Table Listing to a zone from the channel Edit tab. Follow the Add Widgets to a Zone steps in Create a Multizone Signage Channel, then select Table Listing from New widgets.
The widget appears in the content list for the selected zone.
Note: Select Existing widgets when you want to reuse a Table Listing widget that already exists in another layout in the same channel.
Enter Table Content
Type values into the Table Listing spreadsheet on the channel Edit tab. You do not use a Visual Editor or Widget Properties window.
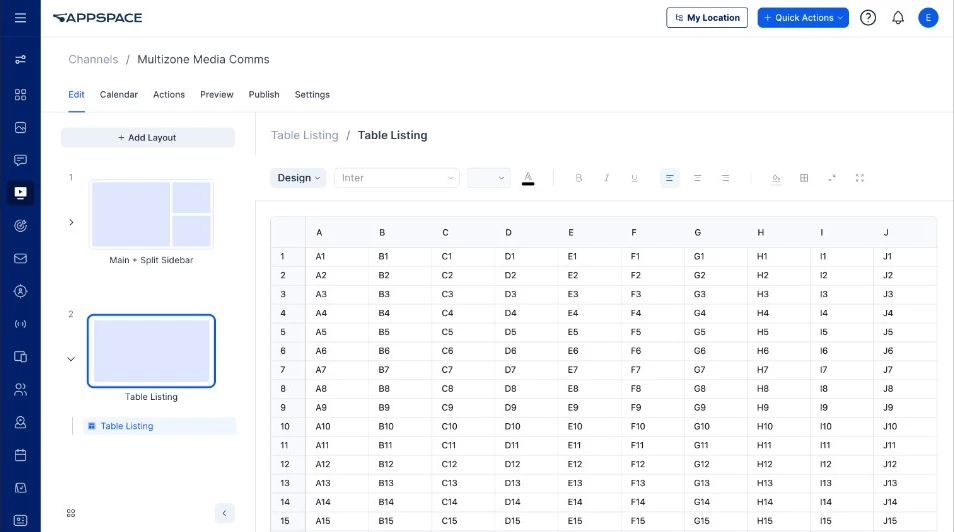
The Table Listing spreadsheet and Design toolbar on the channel Edit tab.
-
Select Channels from the Appspace menu.
-
Open the Multizone Signage Channel.
-
Select the Edit tab.
-
Select the layout that contains the Table Listing widget.
-
Select the Table Listing widget in the layout list.
-
Select Design from the mode menu if it is not already selected.
-
Click a cell and enter the value.
-
Use the Design toolbar to change font, size, color, Bold, Italic, Underline, alignment, or cell fill.
-
Click + next to Sheet 1 if you need another sheet.
-
Click Save.
The spreadsheet and the Design toolbar appear in the center of the page after you select the widget. The header shows Table Listing / Table Listing. Cell values are saved with the widget.
Query Table Data
Use a SQL query against the widget sheets when the table should display a subset of the spreadsheet. Queries are configured on the Content tab in the layout editor.
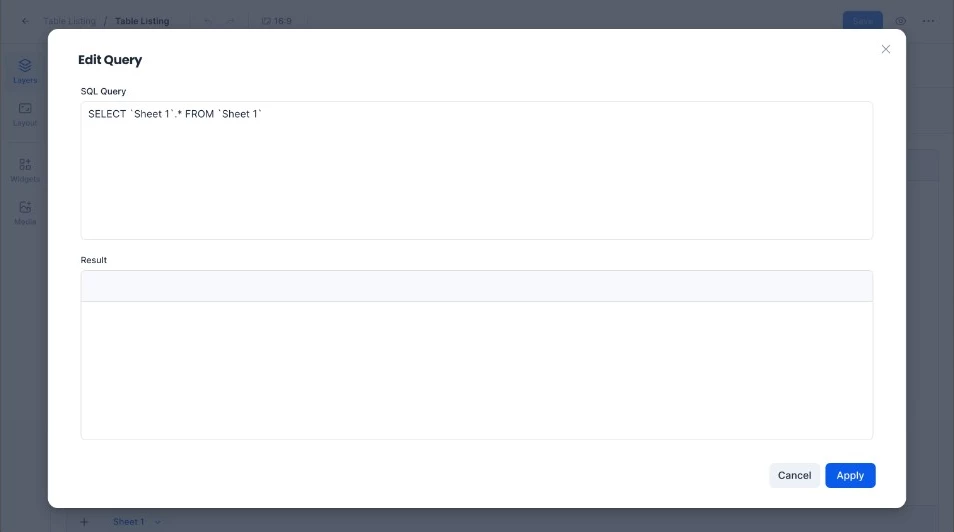
The Edit Query window, with the default SQL Query for Sheet 1.
-
Select Channels from the Appspace menu.
-
Open the Multizone Signage Channel.
-
Select the Edit tab.
-
Select the layout that contains the Table Listing widget.
-
Select Edit from the layout more options menu.
-
Select the Table Listing widget.
-
Select the Content tab.
-
Select Data source from the mode menu.
-
Click the Edit Query pencil.
-
Enter or edit the SQL Query. The default query is
SELECT 'Sheet 1'.* FROM 'Sheet 1'. -
Click Apply.
-
Click Save.
The Content tab shows No query set until you apply a query. The Edit Query window includes SQL Query, Result, Cancel, and Apply. The query is saved on the widget.
Note: Sheet names in the query use single quotes, for example 'Sheet 1'. Switch the mode menu back to Design when you need to edit cells again.
Tip: You can also open the layout editor from the layout preview. Select a zone, click the + button, and select Open editor.
Configure Table Listing Settings
Table Listing settings that control rows, columns, paging, and word wrap are on the layout editor Edit tab, in the PROPERTIES accordion. These labeled fields are the same values as the keys on the Properties tab.
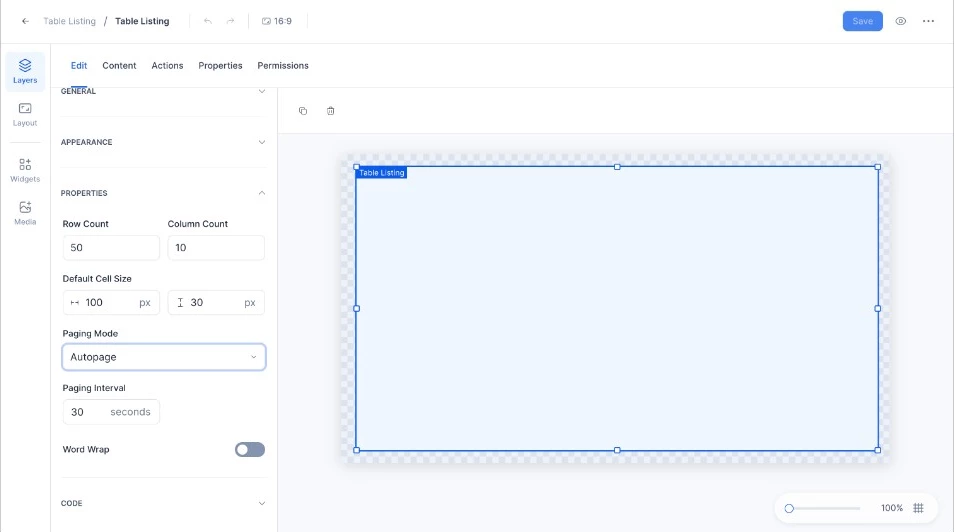
The Edit tab PROPERTIES accordion, with Row Count, Column Count, Default Cell Size, Paging Mode, Paging Interval, and Word Wrap.
-
Open the Table Listing widget in the layout editor.
-
Select the Edit tab.
-
Expand PROPERTIES.
-
Set the table fields.
-
Click Save.
| Setting | Default | What you set |
|---|---|---|
| Row Count | 50 | Number of rows in the table. |
| Column Count | 10 | Number of columns in the table. |
| Default Cell Size | 100 px × 30 px | Default column width and row height. |
| Paging Mode | Autopage | None or Autopage. |
| Paging Interval | 30 seconds | Interval in seconds used when Paging Mode is Autopage. |
| Word Wrap | Off | Turns wrapped cell text on or off. |
Use the other Edit accordions for placement and style:
-
GENERAL — Name, Size, Position, Opacity, Animation In, and Animation Out.
-
APPEARANCE — Background color, background image, border color, thickness, corner radius, and margins.
-
CODE — Widget GUID and Custom CSS.
Note: The Properties tab lists the same settings as searchable key-value pairs. Change the labeled fields on Edit unless you need to add, disable, or delete a key. Do not treat the Properties tab as a second set of table settings.
Note: Widget actions are configured on the Actions tab. See Configure Signage Channel Widget Actions. Widget permissions are configured on the widget Permissions tab, not on the channel Permissions tab. Publishers can edit, configure, and delete the widget. Editors can add, delete, and manage content.