


Configure the Ticketing widget in Appspace to show support tickets on the Intranet homepage. This article is for IT administrators who connect a certified ticketing system and place the widget on an Employee Experience theme. After you complete these steps, employees can view their own tickets in the Appspace Intranet without opening the ticketing system separately.
For: IT Administrators — Ticketing Widget Setup
Important: Appspace (WXI) certifies each customer tenant before wider rollout. Validate the first go-live jointly with Appspace before you place the widget for all employees.
Prerequisites
-
Appspace Intranet on a current plan (Public Cloud or Private Cloud).
-
A certified ticketing system with API access. ServiceNow (ITSM / Now Platform) is certified for this release. See Supported Ticketing Widget Platforms.
-
An integration system user in the ticketing system, supplied by customer IT. This user is not a named employee account.
-
Outbound HTTPS from Appspace. No on-premises agent, firewall change, or VPN is required. Nothing is installed in the ServiceNow instance.
-
A console role other than User to open Integrations and create a Passport.
-
Account Owner role, or Publisher with channel manager permission, to add the widget to an Employee Experience theme.
Note: Appspace provisions the Merge connection and certifies the tenant. Do not treat Merge account provisioning as a customer console step. You still create the Appspace Passport in the console.
Connect the Ticketing System
The widget reads through a Merge linked account. Reads are scoped to the signed-in employee by email address. The widget keeps ticket data for 15 minutes in the browser session before it requests a fresh list. It does not mirror the ticketing system live.
Note: You cannot create a Passport from the widget configurator. Create and connect the Passport on the Passports page first. Do not select the legacy ServiceNow passport. The Ticketing widget uses ServiceNow Tickets.
-
Confirm that your ticketing system is certified and that API access is licensed. See Supported Ticketing Widget Platforms.
-
In ServiceNow, create the integration system user and grant API access for the ticket data the widget displays.
-
In the Appspace console, click the ☰ Appspace menu, select Integrations, and open the Passports tab.
-
Click Add. If no passports exist, click Create Passport.
-
Open the Ticketing tab and select ServiceNow Tickets.
-
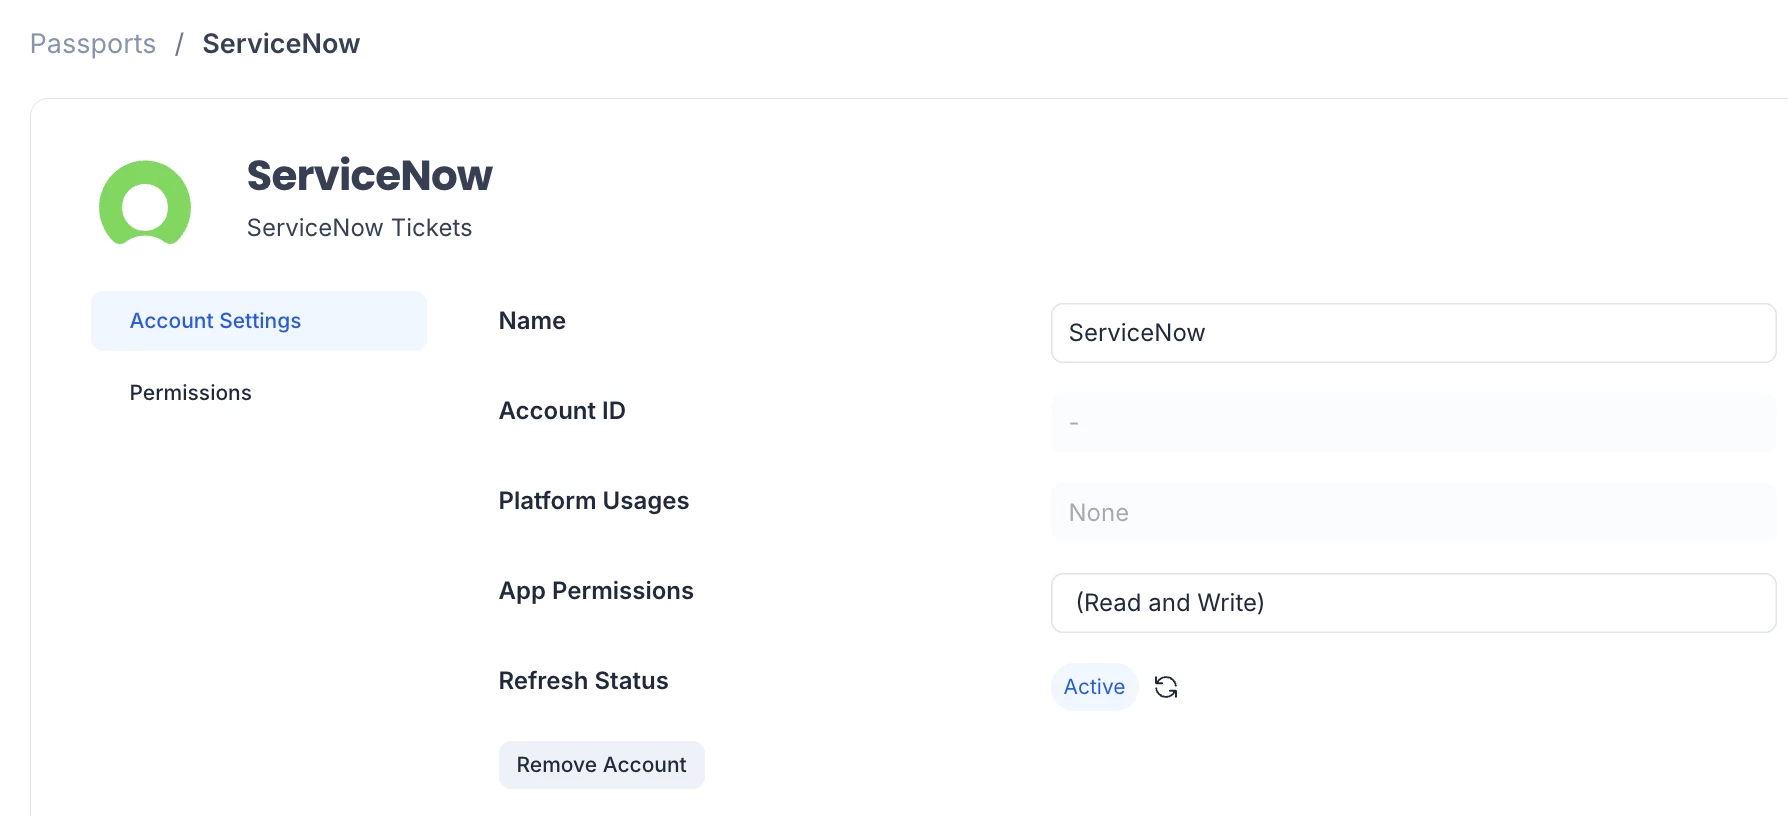
The console creates the Passport and connects the account through Merge Link. You can click the passport to view its information, change the Name of the passport, or click Remove Account.
-
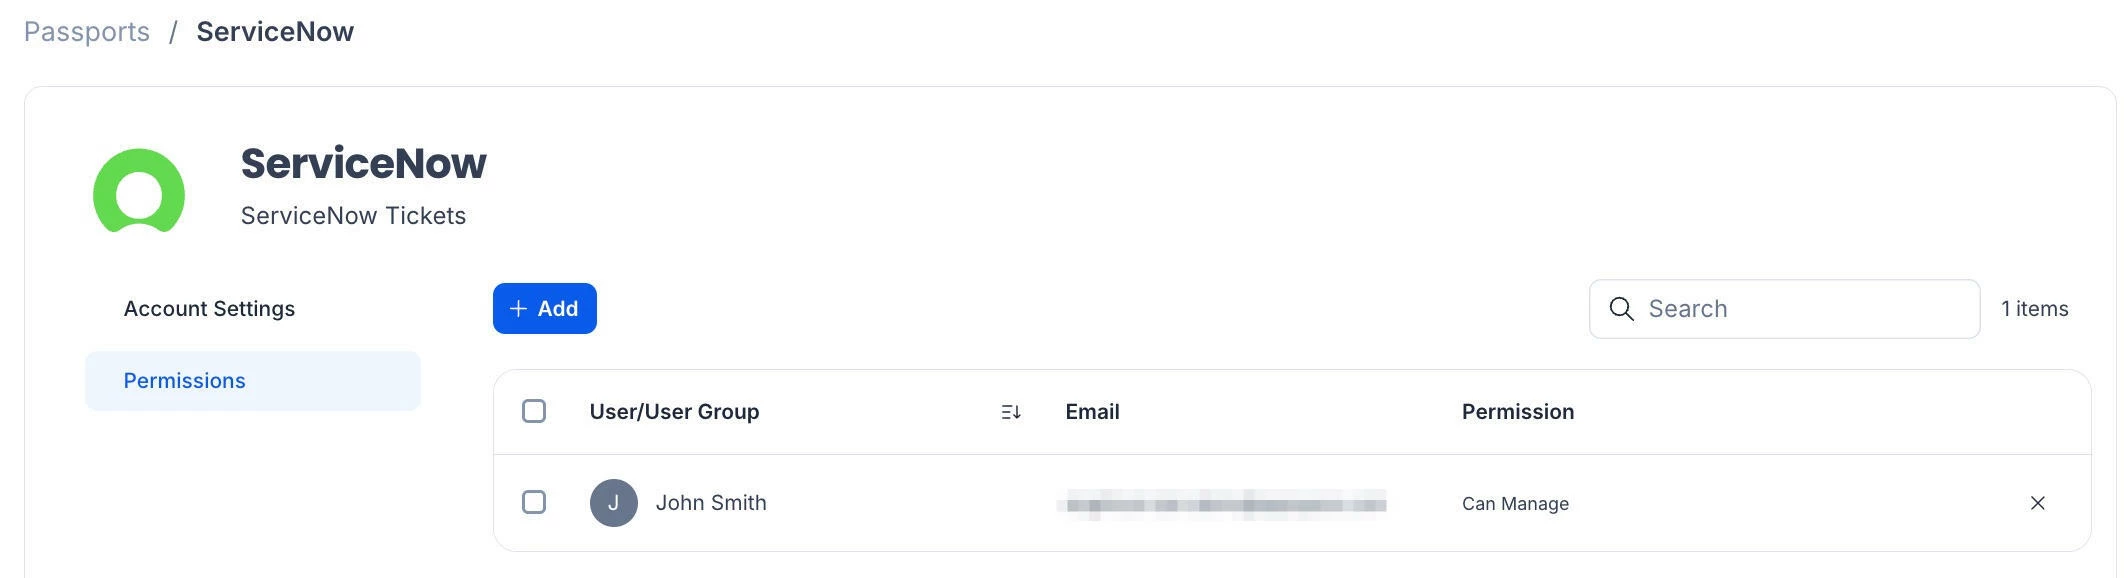
Click the Permissions tab on the right to view the Users and User Groups with View or Manage permissions for the ServiceNow Tickets Passport in Appspace. These permissions control access to the Passport configuration and do not determine which tickets employees can view. The widget will display tickets assigned to or created by Appspace users whose email addresses match their ServiceNow accounts.
-
Click + Add to add new users or user groups and grant them View or Manage permissions.
-
Click the X icon at the end of each row to delete the user or user group.
-
Add the Widget
-
Log in to the Appspace console.
-
Click the ☰ Appspace menu and select Settings > Configuration.
-
Click the Employee Experience tab, then click Themes.
-
Select the theme for the location, or create a theme.
-
Expand Widgets, select a column, and click +Add.
-
Under Advanced, select Ticketing.
The widget editor opens. The picker adds one Ticketing widget to the theme.
Note: The console places the Ticketing widget on homepage themes only. Community, topic, and channel widget pickers do not include it.
Configure Widget Settings
-
Select the ticketing widget under the expanded Widgets section.
-
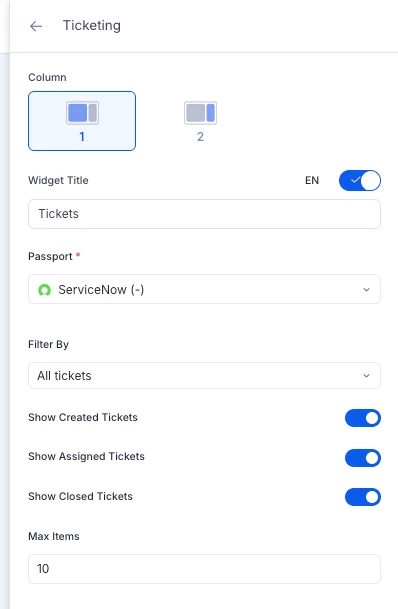
Enter the Widget Title. You can also toggle to set translations for the title.
-
In Passport, select the connected ServiceNow Tickets Passport.
-
In Filter By, select All tickets, Created date, Updated date, or Due date. The default is All tickets.
-
If you chose Created date or Updated date, select a Period of Last 7, 14, 30, 60, or 90 Days. If you chose Due date, select Next 7, 14, 30, 60, or 90 Days. The Period field does not appear when Filter By is All tickets. The default Period is Last 7 Days or Next 7 Days.
-
Turn Show Created Tickets and Show Assigned Tickets on or off. At least one must stay on. Both default to on.
-
Leave Show Closed Tickets off to hide tickets with a Closed status. Turn it on only if employees need to see closed tickets. The default is off.
-
Optionally set Max Items (1 to 20). The default is 5. This value controls how many tickets appear in the homepage list. Employees can click View all to open the rest.
-
Click Apply and save the theme.
The widget appears on the Employee Experience homepage for users in that theme location. Closed tickets stay hidden unless you turn Show Closed Tickets on.
Note: Pilot with one group first, then roll out. A widget certified against a test tenant can differ from a live customer environment in configuration, fields, and permissions.