Extend Your Intranet with Custom Widgets: A Step-by-Step Guide to Adding Widgets in Appspace
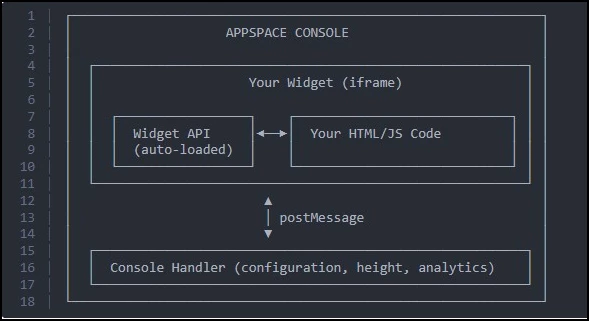
Custom widgets are self-contained applications that extend your Intranet beyond what the built-in widgets offer. They allow you to display custom content, connect to external services, and build interactive tools tailored to your organization.
Key Benefits
- Flexible Content: Display anything from countdown timers to live data feeds that the standard widget library does not cover
- Two Creation Paths: Build a widget with a developer or generate one using an AI coding assistant
- Independent Operation: Each widget runs in its own sandboxed space, so adding or changing one does not affect anything else on the page
- Configurable Settings: Administrators control widget behavior through an auto-generated settings form when adding the widget to a page
What This Guide Covers
- Understanding the difference between built-in and custom widgets
- Creating a custom widget (developer path and AI-assisted path)
- Example widgets you can create
- Uploading the widget ZIP file to Appspace
- Adding the widget to an Intranet theme
Prerequisites
- Admin Role: Required to import and manage custom widgets in the Console
- Location Admin Role (or Higher): Required to add widgets to Intranet themes
- Space Owner Role: Required to add widgets to communities, topics, and channels via the space editor
- Widget ZIP File: A packaged widget file, produced by a developer or through the AI-assisted workflow described in this guide
Understanding Widgets in Appspace
Widgets are interactive building blocks that make up the Intranet. They help create an engaging and personalized experience for end users by displaying relevant content, tools, and resources directly on the pages employees visit every day.
When an administrator sets up the Intranet, they arrange widgets on the homepage and other pages to control what employees see and interact with. Each widget serves a specific purpose, whether it is surfacing the latest company news, providing quick links to frequently used tools, or displaying upcoming events.
Appspace provides a set of built-in widgets that are ready to use out of the box. Administrators can add and configure these directly in the Intranet theme settings without any development work. These built-in widgets handle a wide range of standard Intranet needs. However, every organization is different, and there are times when you need something that the built-in options do not offer. That is where custom widgets come in.
How Custom Widgets Differ from Built-In Widgets
The key differences come down to availability, configuration, and flexibility:
- Built-in widgets are provided by Appspace and ready to use immediately. You configure them through the theme settings in the Console. No development or file uploads are required.
- Custom widgets are created outside of Appspace (by a developer or with AI assistance), packaged into a ZIP file, and uploaded to the Console. Once uploaded, they appear in the widget picker alongside the built-in options.
Custom widgets give you the flexibility to display content, connect to external services, or build interactive tools that are specific to your organization. For example, you might create a custom widget that pulls data from an internal system, displays a countdown to a company event, or shows a curated set of resources that the built-in widgets cannot replicate.
You can place custom widgets in four areas of the Intranet:
- Homepage Themes
- Communities
- Topics
- Channels
Step One: Creating a Custom Widget
There are two ways to create a custom widget. Choose the option that best fits your comfort level and available resources.
Option One: Build It Yourself (with a Developer)
If you have access to a developer or a technically skilled team member, they can build a widget from scratch using the Custom Widget Developer Guides.
Appspace provides a guide for building with plain HTML, CSS, and JavaScript (Custom Widget Developer Guide), as well as a guide for building custom widgets that integrate with third-party services using Passports (Custom Widgets Advanced Developer Guide).
This option gives you full control over the design and functionality of your widget. It is best for highly customized widgets with specific business logic, branding, or integration with third-party services (like Microsoft 365 or external APIs).
What this involves:
- Your developer sets up the widget project using the boilerplate (starter template) provided in the technical guide.
- They define the configuration options administrators will see when adding the widget (for example: title, color scheme, or refresh interval).
- They write the widget code to display the content you need.
- They build and package the project, which produces a ZIP file.
- You upload the ZIP file to Appspace (covered in the next section).
Option Two: Use AI to Generate Your Widget
If you do not have a developer available, you can use an AI coding assistant to generate a widget for you. AI tools can create a complete, functional widget from a plain-language description of what you want. This is best for getting a widget up and running quickly without writing code yourself. It works well for straightforward display widgets like countdowns, announcement banners, and quick-link panels.
What this involves:
- Open an AI coding tool.
- Give the AI the boilerplate starter files provided in the technical guide as context (or share a link to the Custom Widgets Developer Guide).
- Describe the widget you want in plain language. Be as specific as possible about what it should display and what options administrators should be able to configure.
- The AI generates all the necessary files.
- Build the project to produce the ZIP file (the AI can walk you through this).
- Upload the ZIP file to Appspace.
Tip: The more detail you include in your description, the better the result. Mention what the widget should display, what settings administrators should be able to change, and where the widget should appear (homepage, community, etc.). See the Example Widgets section below for prompt ideas.
Example Widgets You Can Create
Custom widgets are flexible enough to serve a wide range of purposes. Below are examples to help you get started.
| Widget | Description | Sample Use Case |
|---|---|---|
| Countdown Timer | Displays a live countdown to a specific date, showing days, hours, minutes, and seconds. Administrators can set the target date, display title, and color scheme. | Count down to a product launch, open enrollment deadline, or company event. |
| Weather Display | Shows current weather conditions for a configurable location by pulling data from an external weather API. | Display weather for the main office location on the company homepage. |
| Team Spotlight | Features a rotating profile card showcasing individual team members with their photo, name, role, and a short bio. | Recognize employees on community or department pages. |
| Event Calendar | Pulls upcoming events from an external calendar (such as Microsoft 365) and displays them in a clean list or timeline view. | Show company-wide events, training sessions, or team meetings on the homepage. |
Note: Some widgets (like Weather Display and Event Calendar) require integration with external services. These may need additional authentication setup by an administrator. If you are using the AI approach, mention any external service requirements in your prompt.
Step Two: Uploading Your Widget to Appspace
Once your widget has been built and packaged into a ZIP file (either by a developer or through the AI workflow), you are ready to upload it to the Appspace Console.
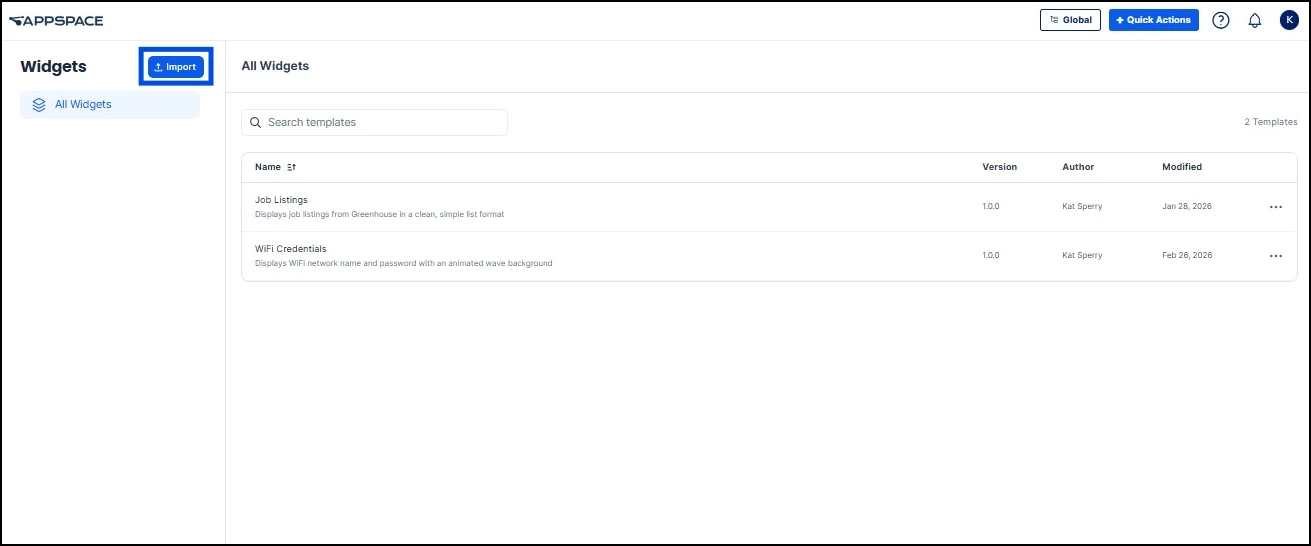
- In the Appspace Console, navigate to Settings > Widgets.
- Click Import. Select the .zip file that was produced during the build process.
- Appspace automatically checks the ZIP file to make sure it contains the required structure and configuration. If validation passes, your widget becomes available in the widget library.
- To test your widget before publishing it live, click the three dots next to the widget and select the Preview feature. This lets you confirm the widget displays correctly and edit any configuration options if needed.
Note: To update an existing widget, import a new ZIP file with an incremented version number (for example, from 1.0.0 to 1.1.0) using the same Import button. The Console will replace the previous version.
Step Three: Adding a Widget to Your Intranet Theme
After uploading, the widget is available in the widget picker. Follow the steps below to add it to a specific theme in your Intranet.
- In the Appspace Console, navigate to Settings > Configuration > Employee Experience > Theme. Select the theme for the location where you want the widget to appear, or create a new theme.
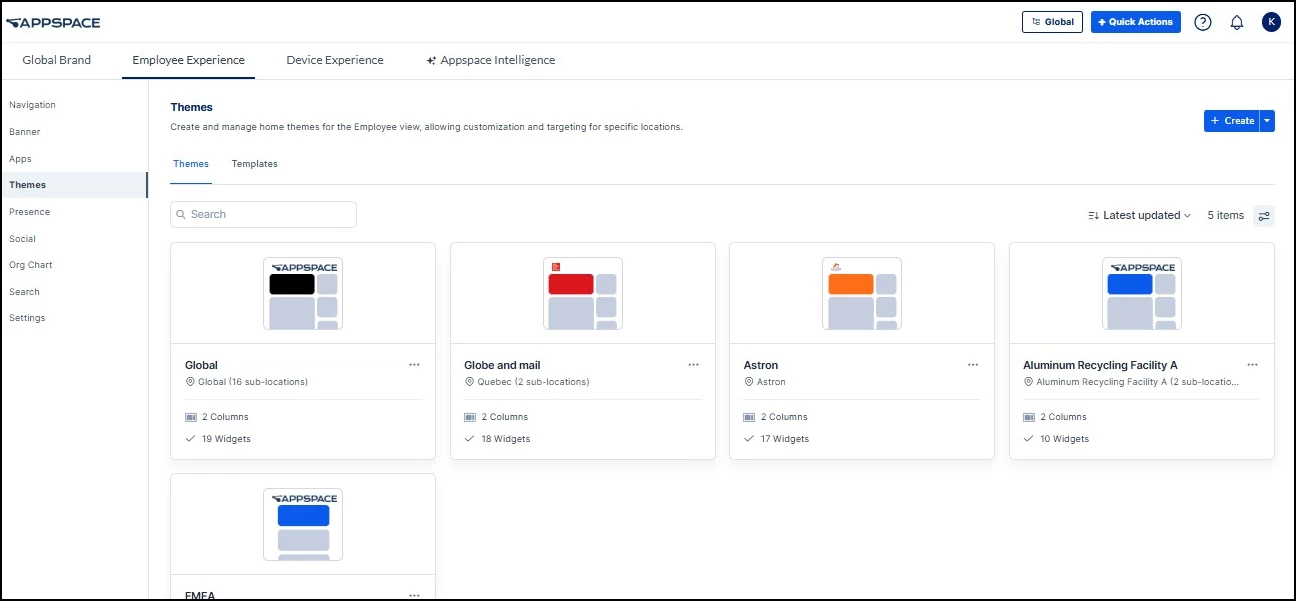
- Expand the Widgets section. Select the column where you want the widget to appear, click +Add, and select your custom widget from the widget picker.

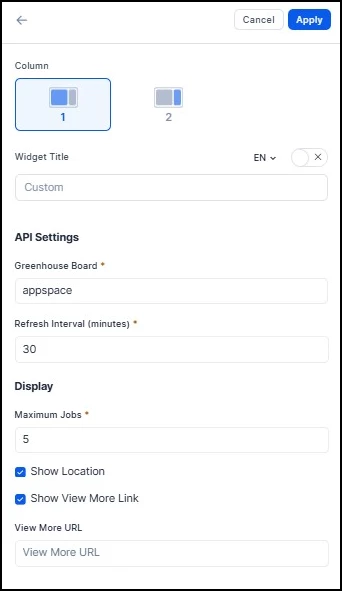
- Once the widget has been added, click into the widget to open its configuration form. This form is based on the settings defined during the build process. Fill in the fields as needed, then click Apply. You will need to do this in order to save your theme.
- To change where the widget appears relative to other widgets on the theme, click and drag the arrange icon to the left of the widget. You can also move it to a different column if your theme uses a multi-column layout.
- When you are done, click Save. The widget goes live and employees will see it the next time they visit that page in the Intranet.
Note: If the widget was built with the allowMultiple option enabled, you can add more than one instance of the same widget, each with its own configuration. For example, you could have two Countdown Timers on the homepage, each counting down to a different event.
Step Four: Adding a Widget to Your Spaces
In addition to the Intranet homepage, you can add custom widgets to communities, topics, and channels. The process is the same across all three space types.
- In the Intranet, open the community, topic, or channel where you want the widget to appear.
- Click the Settings button on the bottom left corner and navigate to the Widgets tab.
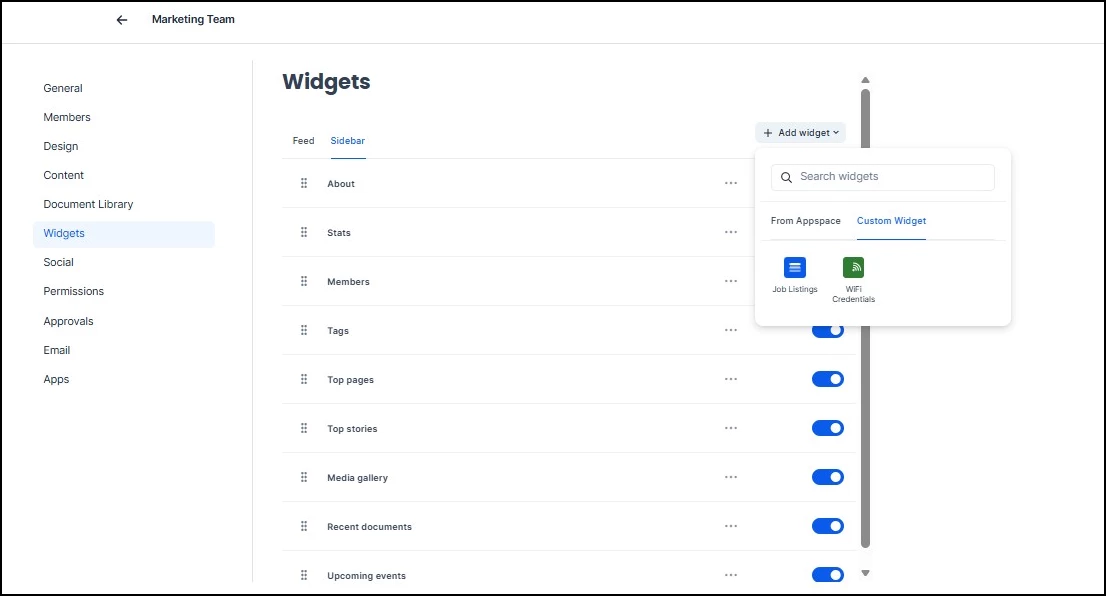
- In the Widgets tab, select the area you want the widget to be added to: the Feed or the Sidebar. Then, click the +Add widget dropdown.
- Your uploaded custom widget will appear in the widget picker alongside any built-in widgets. Select it to add it to the space.
- Appspace will display the same configuration form you would see when adding the widget to a theme. Fill in the fields as needed for this widget.
- Click Apply and then Save. The widget will be visible to employees the next time they visit the community, topic, or channel.