

IoT Sensor Framework - Cisco Meraki Environmental Sensor Integration: Technical Guide
Introduction
This guide provides technical information and configuration steps for integrating Cisco Meraki environmental sensors using the new system driver in Appspace 8.10.0-ac.1. This integration allows the Appspace platform to leverage environmental data within the Reservation module.
The driver automatically appears once the Reservation IoT Service is deployed. It processes data from Meraki MT-15 environmental sensors via their webhook system, capturing and storing seven sensor metrics (i.e. temperature, air quality, ambient noise, humidity, CO2, PM2.5, TVOC) in the Appspace database.
Key Benefits
The Meraki IoT driver offers several benefits for monitoring facilities and managing data:
- Real-Time Environmental Metrics: Capture and consolidate seven critical sensor metrics in real-time within the Appspace database.
- Unified Data: Seamlessly feed data from Meraki webhooks directly into Appspace for a unified IoT data source within the Reservation module.
- Ready-to-Use Framework: Use a pre-built, default system driver (appspace.drivers.cisco.meraki) to simplify the deployment of environmental monitoring capabilities.
What This Guide Covers
This guide will cover the following topics:
- How to install the Cisco Meraki IoT driver and retrieve necessary security credentials (URL and Key)
- How to register the Meraki MT-15 device in the Appspace IoT Sensors section
- How to configure Meraki webhooks, including creating a Liquid Body template and an API receiver
- How to navigate the technical details of the Cisco Meraki driver manifest file
- How to test the integration using mock API calls and real Meraki Alert Profiles
Prerequisites
Before proceeding with the configuration, ensure the following requirements are met:
- You must have an Account Owner role within Appspace.
- Appspace resources must be configured in the Reservation module.
- You must have access to the Meraki system (https://n1046.meraki.com).
- Devices/Sensors must be registered in the Meraki system
Configuration
The integration requires configuration in both the Appspace Console (IoT driver and device setup) and the Meraki Dashboard (webhook setup).
Step One: Configure in Appspace
The Appspace configuration involves installing the driver and registering the physical Meraki sensor device.
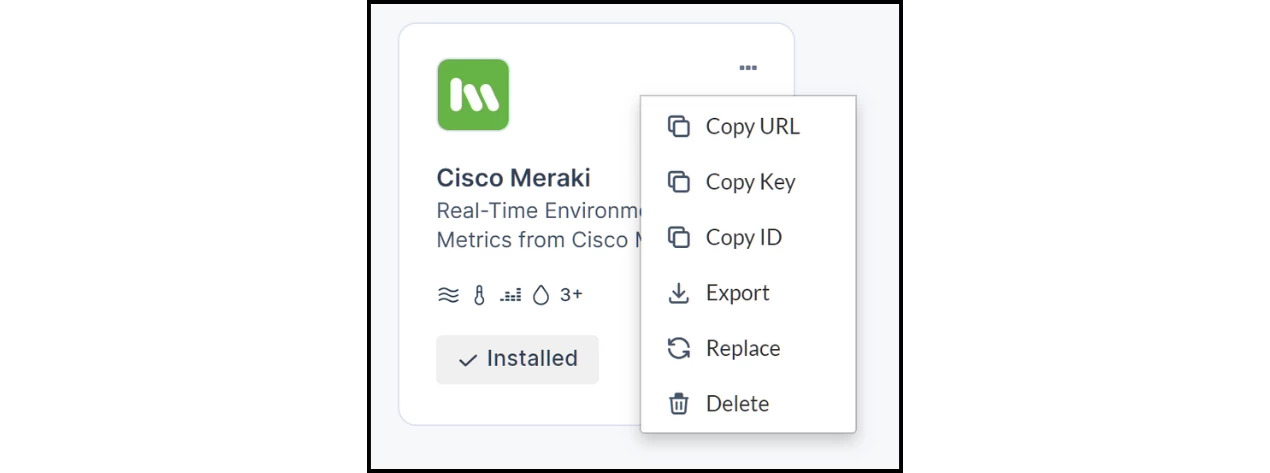
- Install the Driver:
- Log in to Appspace.
- Go to Reservation > Settings > IoT Sensors > Drivers.
- Click Install on the Cisco Meraki driver (skip if already installed).
- Click the ellipsis (...) on the driver to copy the URL and Key (Shared Secret). Keep these secure.
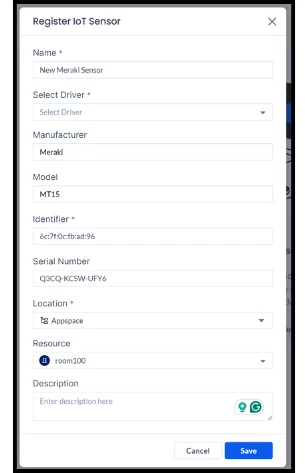
- Register the IoT Sensor:
- Go to IoT Sensors.
- Click the +Add button.
- Fill up the details, ensuring the MAC address is used as the identifier and the device serial as the reference (obtain these from the Meraki system).
- Click the Save button.
Step Two: Configure in Meraki
The Meraki configuration involves creating a template to structure the webhook payload and a receiver to send the data to the Appspace endpoint.
A. Create Webhook Template
- Go to the Meraki system (https://n1046.meraki.com).
- Navigate to Organization → API & webhooks.
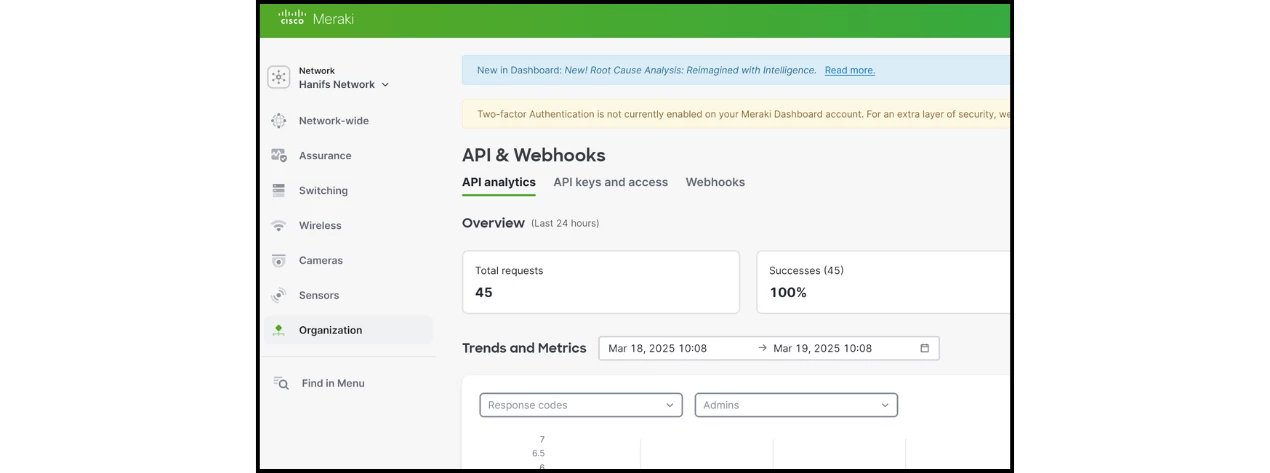
- Click on Webhooks → Templates.
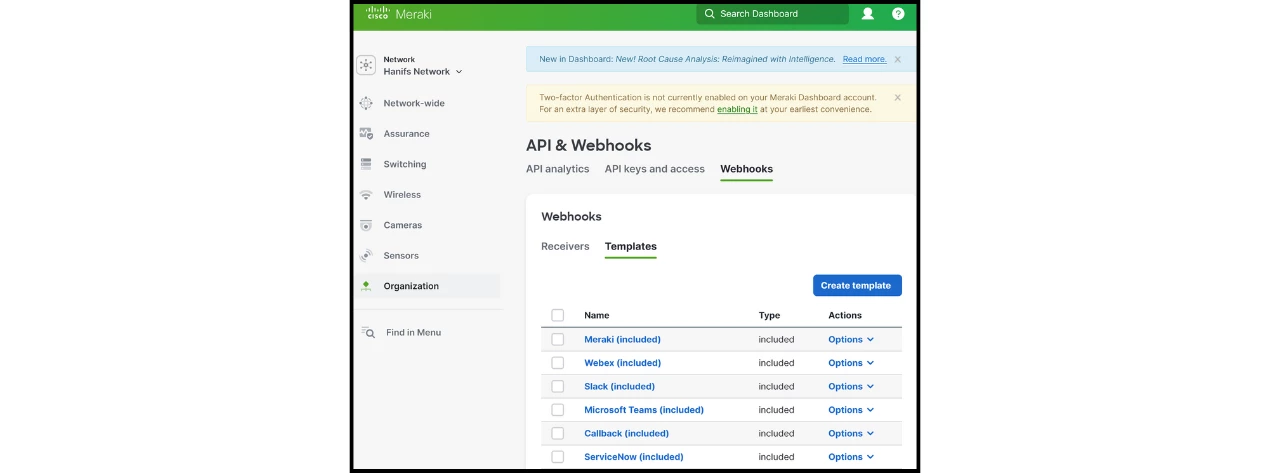
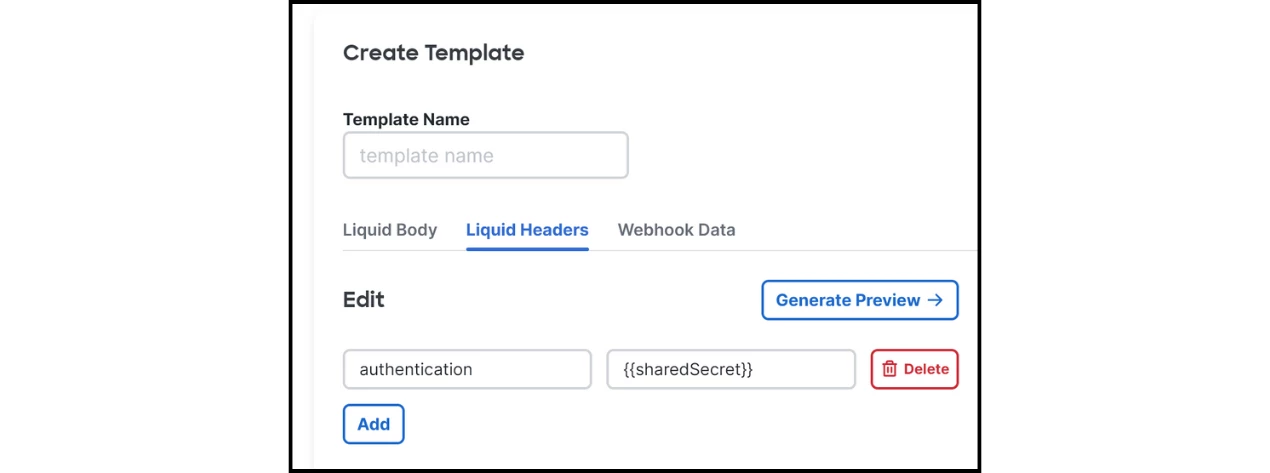
- Click Create template and type "Appspace" as the template name.
- Fill in the Liquid Body with the payload variables:
{
"deviceSerial": "{{deviceSerial}}",
"deviceMac": "{{deviceMac}}",
"deviceName": "{{deviceName}}",
"alertData": {{ alertData | jsonify }}
}
- Click the Liquid Headers tab.
- Click Add and set the authentication header:
- Key: x-appspace-iot-token
- Value: {{sharedSecret}}
-
-
- Click Save template.
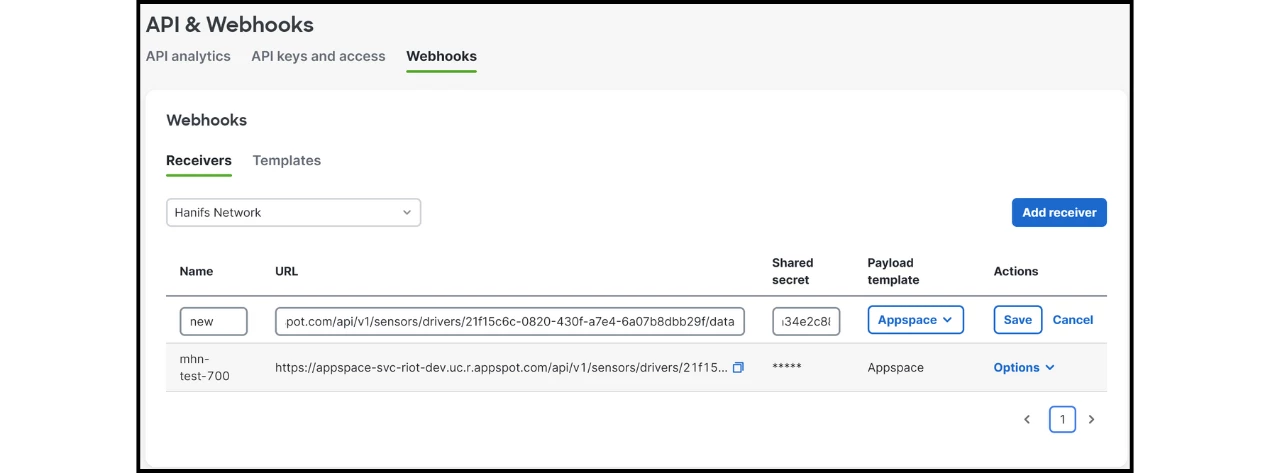
B. Create Webhook Receiver
- Go to Webhooks → Receivers.
- Click Add Receiver.
- Put a descriptive name.
- Put the Appspace endpoint (URL copied from the Meraki driver) as the URL.
- Put the Appspace Key (copied from the Meraki driver) as the Shared secret.
- Choose the Appspace template you recently created.
- Click Save receiver.
C. Create Alert Profile
To test with live data, configure an alert profile in Meraki to trigger the webhook.
- Go to Sensors → Alert Profiles in the Meraki system.
- Click on New alert profile.
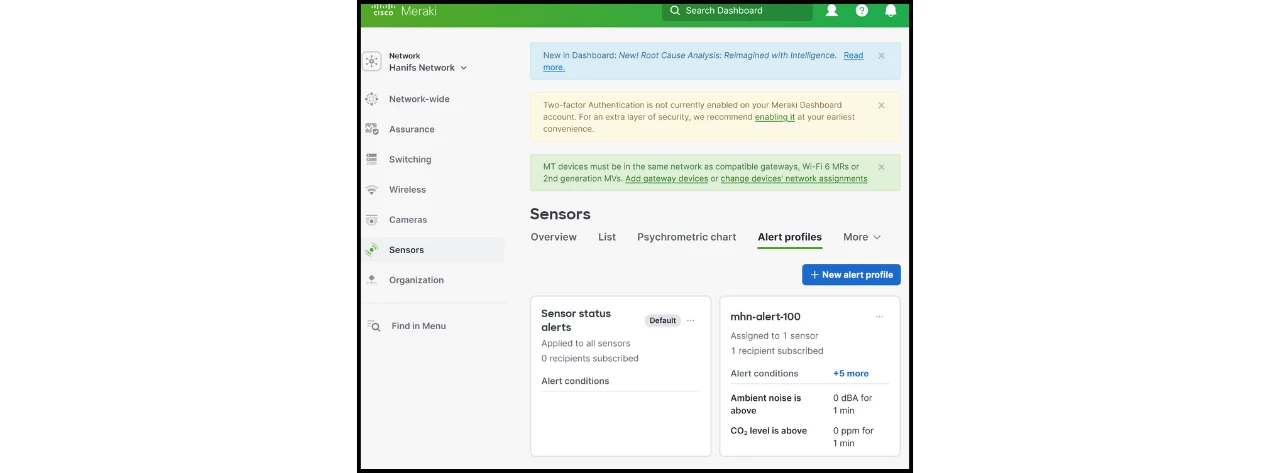
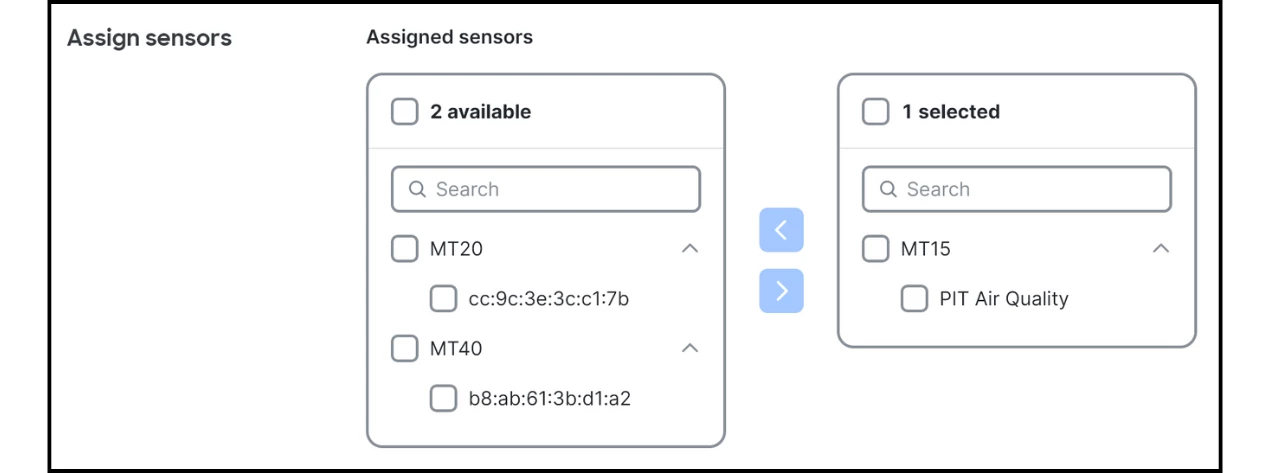
- Configure the sensor and Alert conditions as desired.
- Scroll down to Webhooks and choose the receiver you created.

- Click Save changes button.
The Meraki alert/notification will be published, and the Appspace RIOT service will process the real data.
Manifest File
The driver manifest details the data structure and sensor types supported by the integration.
{
"name": "Cisco Meraki",
"description": "Real-Time Environmental Metrics from Cisco Meraki",
"key": "appspace.drivers.cisco.meraki",
"version": "1.0.1",
"iconPath": "meraki.jpg",
"iconContentType": "image/jpg",
"detailsUrl": "",
"authType": "Key",
"authKey": "x-appspace-iot-token",
"authSecret": "will.be.replaced",
"originalIdentifierPath": "$.deviceMac",
"originalReferencePath": "$.deviceSerial",
"sensorTtlSeconds": 600,
"sensorGroupTtlSeconds": 3600,
"dataPath": "$.alertData.triggerData",
"mergeDataKeyPath": "$.trigger.type",
"readingTypes": [{
"type": "air-quality",
"name": "Air Quality",
"description": "Indoor Air Quality",
"valueAggregation": "Average",
"mappingScriptPath": "air-quality/mapping.json",
"parsingScripts": [{
"properties": ["iaq_index.trigger.sensorValue"],
"scriptPath": "air-quality/parsing.json"
}]
}, {
"type": "temperature",
"name": "Ambient Temperature",
"description": "Ambient Temperature (C)",
"valueAggregation": "Average",
"mappingScriptPath": "temperature/mapping.json",
"parsingScripts": [{
"properties": ["temperature.trigger.sensorValue"],
"scriptPath": "temperature/parsing.json"
}]
}, {
"type": "sound",
"name": "Ambient Noise",
"description": "Ambient Noise Level (dBA)",
"valueAggregation": "Average",
"mappingScriptPath": "sound/mapping.json",
"parsingScripts": [{
"properties": ["ambient_noise.trigger.sensorValue"],
"scriptPath": "sound/parsing.json"
}]
}, {
"type": "humidity",
"name": "Humidity",
"description": "Humidity (%)",
"valueAggregation": "Average",
"mappingScriptPath": "humidity/mapping.json",
"parsingScripts": [{
"properties": ["humidity.trigger.sensorValue"],
"scriptPath": "humidity/parsing.json"
}]
}, {
"type": "tvoc",
"name": "TVOC",
"description": "Total Volatile Organic Compounds (μg/m³)",
"valueAggregation": "Average",
"mappingScriptPath": "tvoc/mapping.json",
"parsingScripts": [{
"properties": ["tvoc.trigger.sensorValue"],
"scriptPath": "tvoc/parsing.json"
}]
}, {
"type": "co2",
"name": "CO2",
"description": "Carbon dioxide (ppm)",
"valueAggregation": "Average",
"mappingScriptPath": "co2/mapping.json",
"parsingScripts": [{
"properties": ["real_co2.trigger.sensorValue"],
"scriptPath": "co2/parsing.json"
}]
}, {
"type": "pm2_5",
"name": "PM2.5",
"description": "Airborne particulate matter (μg/m³)",
"valueAggregation": "Average",
"mappingScriptPath": "pm2_5/mapping.json",
"parsingScripts": [{
"properties": ["pm25.trigger.sensorValue"],
"scriptPath": "pm2_5/parsing.json"
}]
}],
"supportedModels": [{
"Manufacturer": "Cisco",
"Model": "MT15"
}]
}
Testing
Use Mock Data: Call API Directly with Webhook Payload
To test processing, use a tool like Postman to call the driver URL with a sample Meraki payload.
- Method: POST
- URL: https://appspace-svc-riot-dev.uc.r.appspot.com/api/v1/sensors/drivers/<GUID>/data
- Headers:
| Key | Value |
| :--- | :--- |
| x-appspace-iot-token | <key-from-driver> | - Payload: (A sample webhook JSON payload would be placed here)