
This article provides the complete instructions for configuring an Appspace space (Channel, Community, or Topic) to publish content directly to a designated SharePoint Site as a new Site Page.
Prerequisites
-
An active SharePoint Publishing Passport must be authorized by an Appspace Administrator.
-
An Account Owner, Publisher, or the Space Owner/Moderator of the Appspace space being configured.
-
SharePoint Permissions: A Site Owner or a user with Full Control or Edit permissions on the target SharePoint site is required.
Configure the SharePoint Publishing Link
There are two primary methods for setting up the publishing destination, depending on your Appspace role and the content type you are managing.
Method A: Link via the Appspace Admin Console (Recommended for Channels & Publishers)
-
Log in to your Appspace console.
-
From the side menu, navigate to Channels (or Spaces if configuring a Community/Topic).
-
Select the specific Appspace channel or space you want to publish content from.
-
Click the Publish tab at the top of the channel settings page.
-
Click the Apps sub-tab, then select Publish to An App.
-
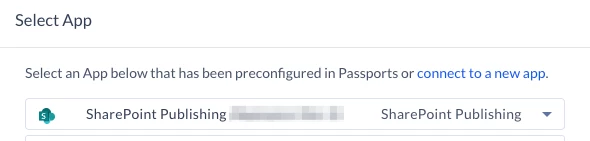
Find and click the created Sharepoint Publishing passport from the list of available passports.
-
Click the SharePoint Site Collection field. From the resulting dropdown list, select the target Site Collection where the content will be published.
Note:
In the Settings, ensure you have selected the appropriate format and configured all required rules before publishing your content. -
Click Save to complete the configuration.
Method B: Link via the Appspace Employee App (Recommended for Communities & Topics)
-
Log in to the Appspace Employee App.
-
Navigate to the specific Space (Community or Topic) that you own or moderate.
-
Click the Settings for the space.
-
In the space settings menu, click the Apps tab.
-
Click the Add button.
-
Choose the Sharepoint Publishing passport that your admin has already authorized.
-
Click the SharePoint Site Collection field. From the resulting dropdown list, select the target Site Collection where the content will be published.
Note:
In the Settings, ensure you have selected the appropriate format and configured all required rules before publishing your content. -
Click Add to complete the configuration.
Publish Content (Day-to-Day Action)
Once the Appspace space is configured, content publishing automatically creates a new SharePoint page.
-
Navigate to the Appspace channel, community, or topic you just configured.
-
Create a new post or content item in this space.
-
In the content editor, click Publish.
Verification
The Appspace platform will automatically process the new content and publish it as a new Site Page in the linked SharePoint Site Collection. Log in to your SharePoint Site and navigate to the Site Pages library to verify the new content.