

Order Management: User Guide
Introduction
This guide provides information on configuring, setting up prerequisites for, and properly using Order Management. This feature enhances Reservation Services by providing Concierges with a centralized view to track and manage all service requests.
Key Benefits
Using Order Management offers several benefits:
- Centralized Order Management: Provides a single dashboard to view and manage orders.
- Improved Service Efficiency: Supports more efficient fulfillment and coordination of services, leading to fewer missed or incorrect orders.
- Better Oversight: Enables the Concierge to track the status of each order, access the order’s full details, and review any special instructions and modifiers from one dashboard.
- Cancellation Transparency: Every order cancellation is logged with clear attribution, showing whether it was initiated by the end user, concierge, admin, or an automated process.
What This Guide Covers
This guide will cover the following topics:
- Navigating to the Order Management functionality within the Concierge view
- Managing orders as a Concierge
- Creating and editing states and sequences for the ordering process
- Understanding cancellation tracking and order attribution
Prerequisites
Before you can use Order Management, you need to meet the following requirements:
- You must have a Premium user license.
- You must have a Platform user license (if editing states).
- You must have Concierge permissions.
Navigating to the Order Management View
The Order Management functionality is a tab within the Concierge view.
To access it from the Employee View, click into the Concierge module within the navigation.
Note: Your administrator may have configured the navigation without a link to the Concierge module. To access Concierge via web URL, use this structure: https://{subdomain}.appspace.com/console/#!/browse/concierge.
On the Concierge view, click the Orders tab to view the Order Management dashboard.
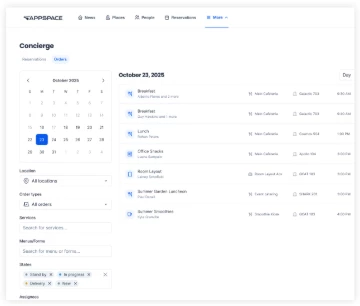
Managing Orders as a Concierge
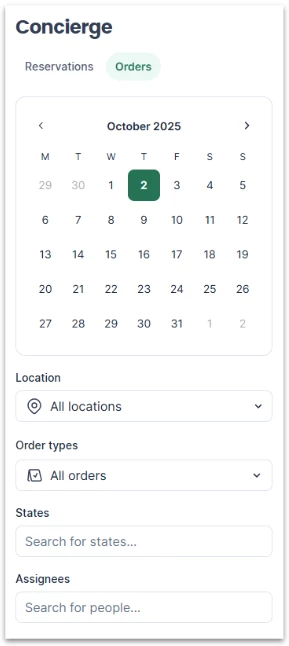
Orders are organized by date and can be filtered by:
- Location - The location of the resource that submitted the request
- Order types - The category of request, such as:
- Catering (food and drinks)
- Service (equipment, furniture, general assistance)
- States* - The status of the request, which include default options such as:
- Unassigned
- Pending
- In Progress
- Complete
- Canceled
- Assignees - The user(s) designated to fulfill the request
Concierges can update each order’s state and assignee using drop-down menus located on each order’s listing. Orders can arrive on the board from two sources: requests submitted during reservation check-in, and requests added to existing reservations after booking. Both types appear in the same Orders view and follow the same workflow states — there is no separate queue for ad-hoc requests. If your team currently monitors the board only around meeting start times, consider checking for incoming requests throughout the day since employees can now add services after their initial booking.
When an order is cancelled, the system logs who initiated the cancellation — whether it was the end user, a concierge, an admin, or an automated process. This attribution is visible in the order history, helping your team distinguish between a user changing their mind, an admin adjustment, and a system-triggered cancellation. This is especially useful when investigating why an order was dropped or when reconciling fulfillment records.
Note: States listed are default options for both Catering and Service orders. Available states are editable within the Admin View.
Editing Existing States
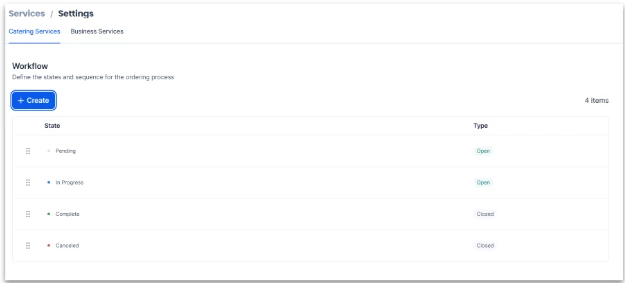
The states available for each order are configurable within the admin console for administrators with a Platform license. Appspace provides four default states for the order process, but you can edit these to your organization’s use case.
To edit the existing states:
- First, navigate to ☰ Appspace menu > Services > Settings.
- Select either the Catering Services or Business Services tab to view that category’s available states.
- To edit an existing state, click the three dots on the right side of each listed option, and edit the following options:
- Name of the state (e.g. In Progress, Out for Delivery)
- Color associated with that state
- Closed/Open status:
- Closed: This state marks the end of the flow and closes the request.
- Open: This state does not mark the end of the flow, and the request will remain open.
- Click Save when finished.
Creating New States
You can also add another state to the order process besides the four default states.
To create a new state:
- First, navigate to ☰ Appspace menu > Services > Settings.
- Under either the Catering Services or Business Services tab, select +Create to create a new state.
- In the window that appears, enter the state’s name and select a color.
- Select whether the state is Closed or Open:
- Closed: This state marks the end of the flow and closes the request.
- Open: This state does not mark the end of the flow, and the request will remain open.
- Click Save when finished.
