


Configuring System for Cross-domain Identity Management (SCIM) in Azure Active Directory for Appspace allows you to automate user provisioning and de-provisioning. This guide will walk you through the process of setting up SCIM for a new Appspace account within your Azure environment.
Prerequisites for Testing
- Enable the System for Cross-domain Identity Management (SCIM) configuration on your Appspace test account.
- The testing account must disable the just-in-time (JIT) provisioning.
Adding an application to support SCIM in Azure Provider link to Azure
- Azure Portal—https://portal.azure.com/.
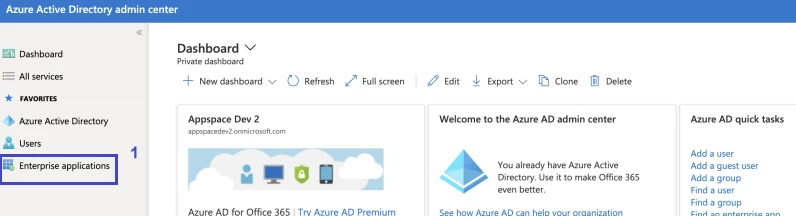
- Sign in to the Azure Active Directory (AAD) portal: https://aad.portal.azure.com/.
- Select enterprise applications from the left pane. A list of all configured apps is shown, including apps that were added from the gallery.
-
Select + new application.
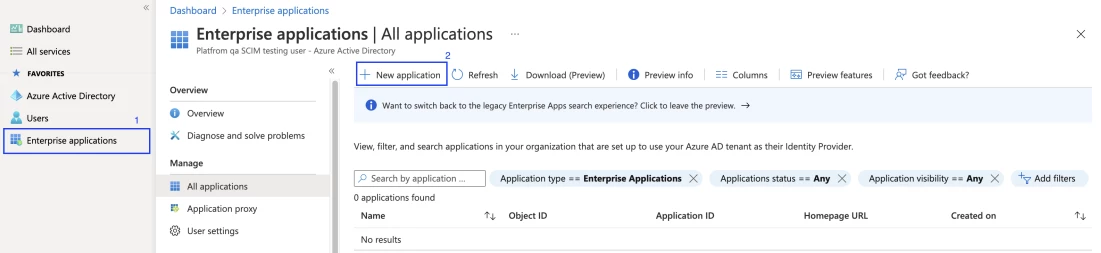
- Create your own application. Enter a name for your application, choose the option to integrate any other application you don't find in the gallery, and select add to create an app object. The new app is added to the list of enterprise applications and opens to the app management screen.

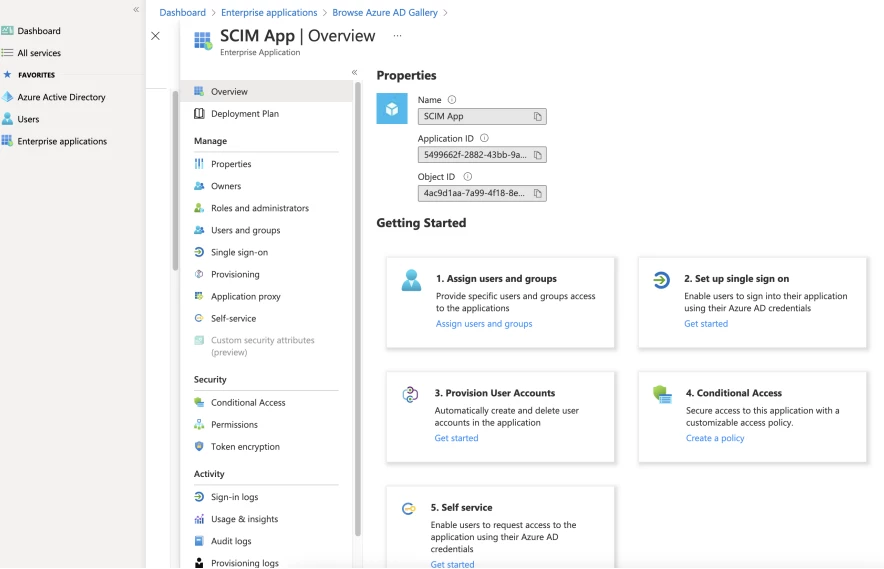
Choose Provisioning options
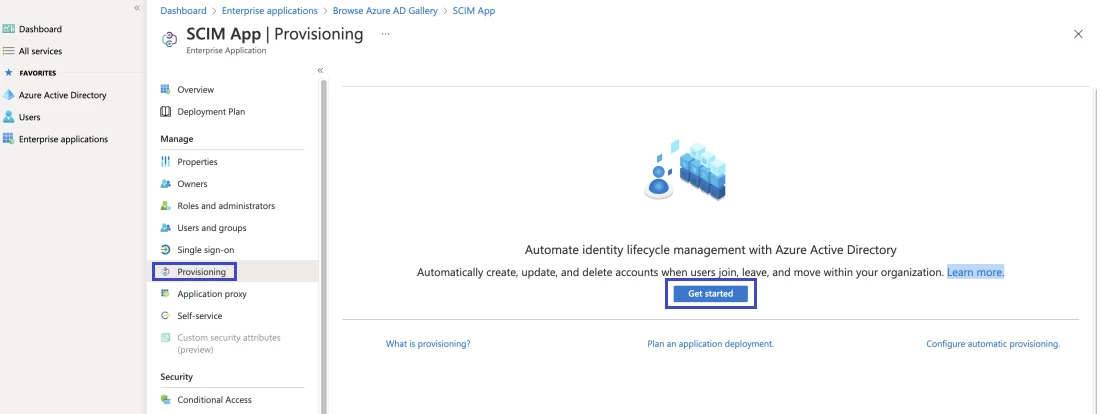
- In the app management screen, select provisioning in the left panel.
- In the provisioning mode menu, select automatic.

- In the tenant URL field, enter the URL of the application's SCIM endpoint (e.g., {server url}/identity/scim).
- Clouds:
- Log in to the Appspace admin console as the account administrator.
- Navigate to users > settings > user provisioning > SCIM.
- Enable SCIM.
- Select the generate new token button and copy the SCIM-based URL and the SCIM bearer token.
- Clouds:
- If the SCIM endpoint requires an OAuth bearer token from an issuer other than Azure AD. Copy the required OAuth bearer token into the optional secret token field. If this field is left blank, Azure AD includes an OAuth bearer token issued from Azure AD with each request. Apps that use Azure AD as an identity provider can validate this Azure AD-issued token.
- It's not recommended to leave this field blank and rely on a token generated by Azure AD. This option is primarily available for testing purposes.
- Select test connection to have Azure Active Directory attempt to connect to the SCIM endpoint; if the attempt fails, error information will display.
- Test connection queries the SCIM endpoint for a user that doesn't exist, using a random GUID as the matching property selected in the Azure AD configuration. The expected correct response is HTTP 200 OK with an empty SCIM ListResponse message.
- If the attempts to connect to the application succeed, then select save to save the admin credentials.
Attribute mappings section
- Click on mapping.
- Click on the provision Azure Active Directory users.
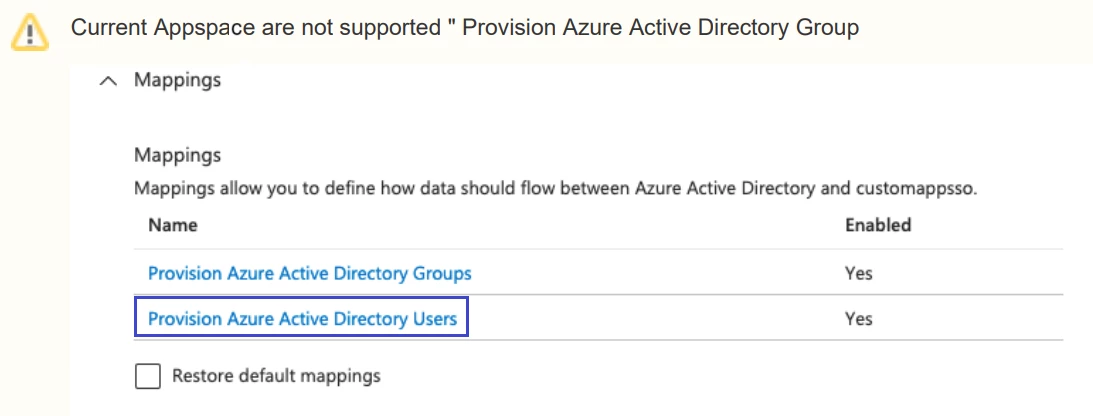
- Make sure the target object action is all checked.
- Selected the mapping type.
- This is the required attribute supported by Azure and Appspace.
- Configure the custom attribute.
- Check the show advance options.
- Select edit attribute list for customappsso.
- Insert the name with the value below and save it.
- Attribute Format: urn:ietf:params:scim:schemas:extension:appspace:2.0:User:{customattributepropertices}.

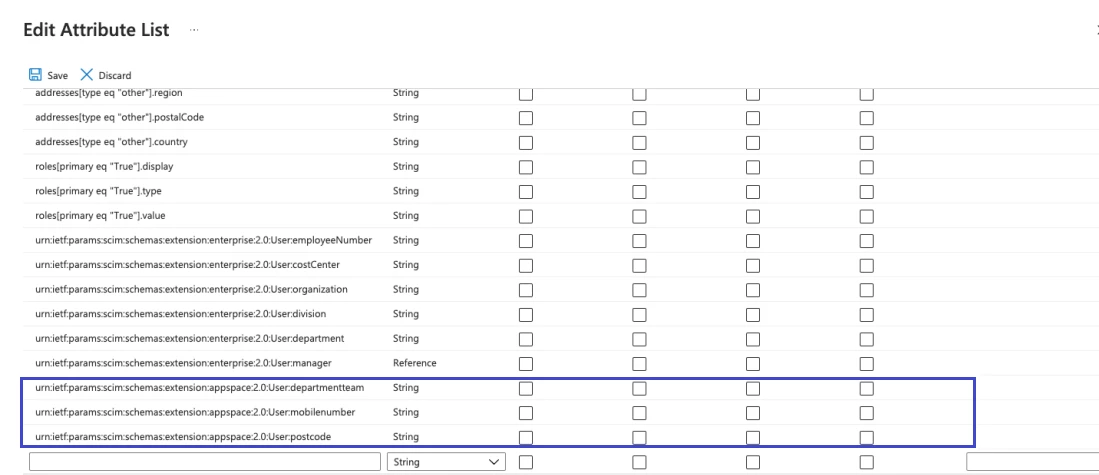
- Attribute Format: urn:ietf:params:scim:schemas:extension:appspace:2.0:User:{customattributepropertices}.
- Adding the attribute is supported by the identity provider (Azure AD) and Appspace > Click add new mapping.
- Select the mapping type, source attribute, and target attribute. Save the page.
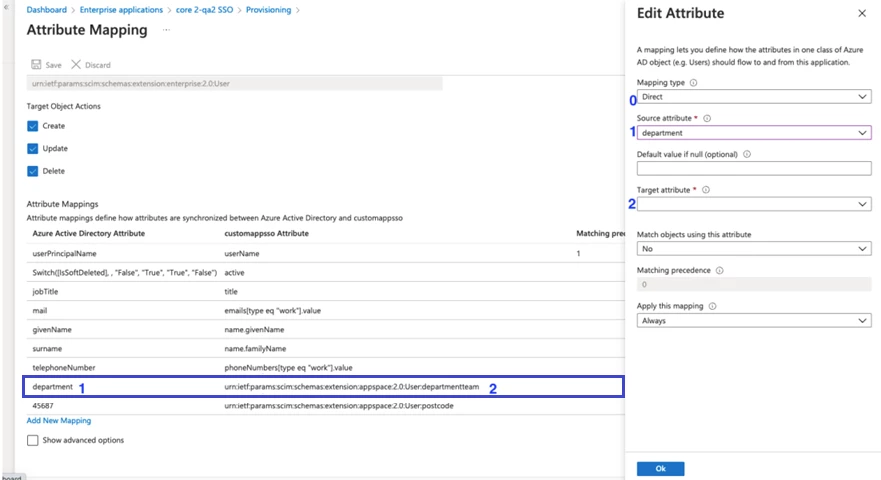
Note: If the admin wanted to configure the custom attribute to overwrite the value from the Azure profile, the mapping type requires selecting constant. Insert the constant value. The other will be the same as existing.
Assigning the user to the Application
- Select the user and group on the left panel.
- Select add user / group > select none selected > select some of the users you would like added to the application > select assign.
Provisioning
- Select provisioning on the left panel.
- Start provisioning; all the users will be provided to the application and the Appspace account.
Note: Provision is on-demand, will only occur for one user, and will be on the spot.