
Group Resources Together for Easier Space Management: A Step-by-Step Guide to Zones
Zones (also called neighborhoods) provide administrators with a more efficient way to organize and oversee a collection of resources, such as rooms and workspaces, within a floor of a building. Instead of handling each resource individually, you can group them into zones to streamline administration and make it easier for employees to find and reserve the right space.
Key Benefits
Using zones in your Appspace environment provides the following advantages:
- Simplified Resource Management: Group related resources like desks, rooms, and workspaces into logical areas for easier administration
- Improved Wayfinding: Help employees quickly identify and navigate to specific areas within a floor
- Streamlined Reservations: Allow users to browse and filter available resources by zone to find spaces that fit their needs
What This Guide Covers
This guide walks you through the following tasks:
- Creating a zone on a floor plan
- Configuring zone details and display settings
- Reserving a resource within a zone
Prerequisites
Before creating and managing zones, ensure the following requirements are met:
- Account Role: You must have an Account Owner or Location Admin role to create and configure zones
- Building and Floor Plan: The building and floor plan must already be configured under Locations in the Appspace console
- Resources Created: Reservable resources such as desks, rooms, or other spaces should already be created, or you should be prepared to add them after creating the zone
Creating Zones
Zones help identify and group specific areas within a building or floor that are relevant for navigation or reservation. Follow these steps to add a zone to your location’s floor plan:
- Go to Locations and navigate to the building where you want to add the zone.
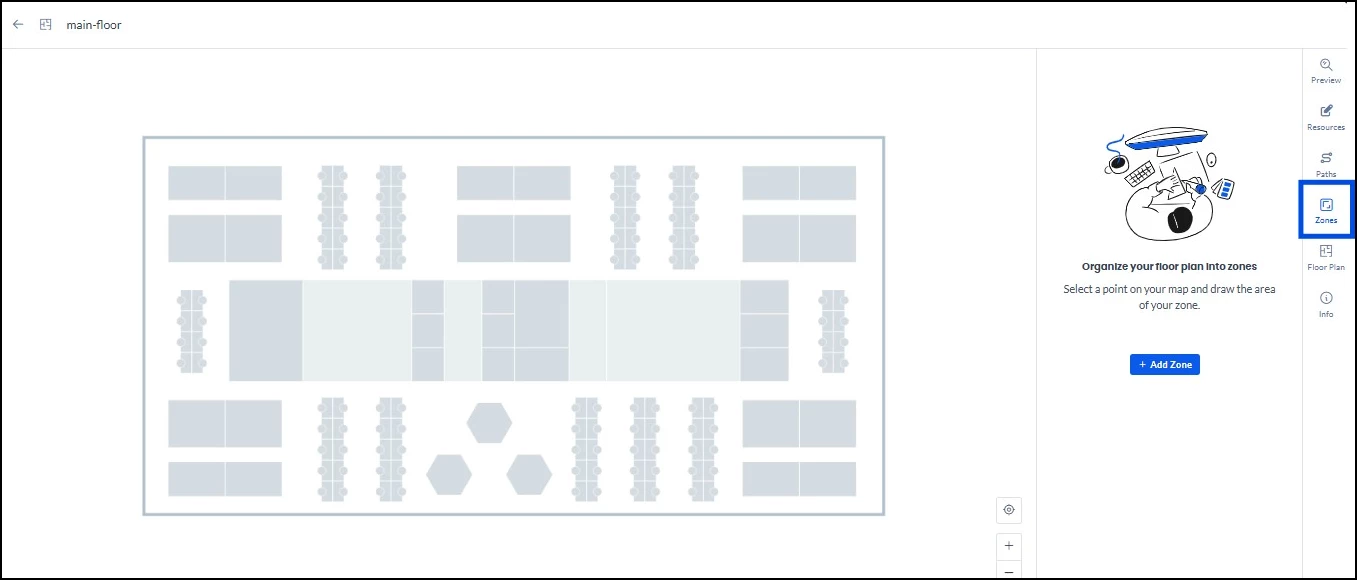
- Click on the floor plan and then select the Zones tab.
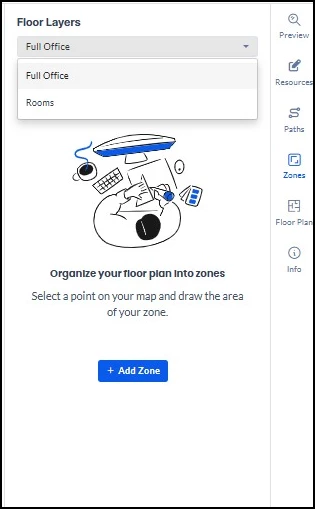
- If multiple floor layers are available, select the layer you wish to add the zone to under Floor Layers. It is recommended to create new zones in the default or primary layer first.
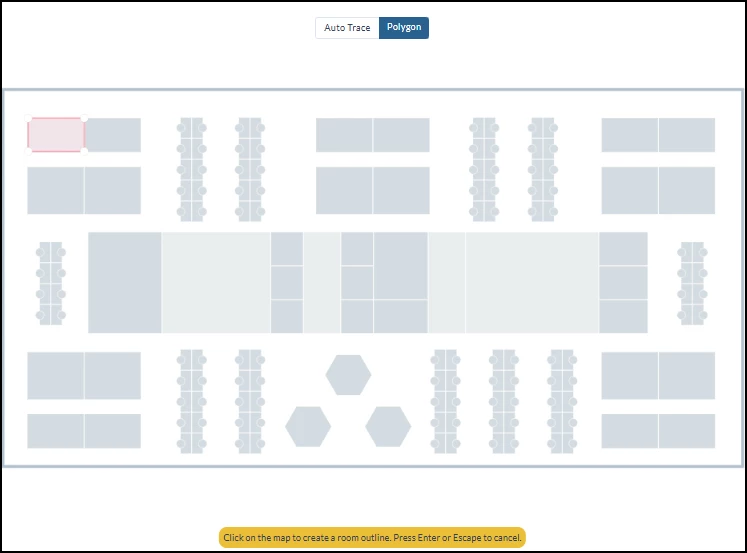
- Click Add Zone and select a map tracing option:
- Auto Trace: Click an area on the map and Appspace will automatically detect the zone boundaries based on your floor plan image.
- Polygon: Click each corner of the area on the map to manually draw the shape and boundary of the zone. Press the Enter key to save the zone.
Configuring Zones
Once you’ve mapped the zones on your floor plan, you can add details and customize how each zone appears. To edit the zone details:
- Click on the mapped zone on the floor plan.
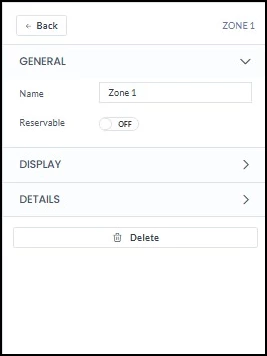
- In the right panel, click the General section to edit the following:
- The zone Name
- The Reservable toggle (turn on to allow reservations within this zone)
- Next, click the Display section to edit:
- The coordinates
- The label for the zone
- The zone color
- The label color
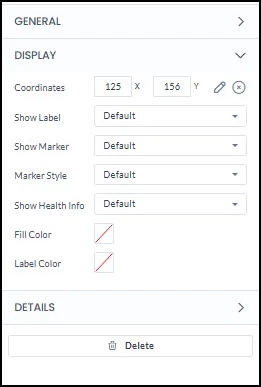
- Once you are done, click Save.
Note: Make sure you also manually add resources such as desks, rooms, or other spaces for reservation within the zone, if they are not already created. If a resource does not fall exactly inside the zone boundary, you may need to manually assign it to the zone.
Reserving a Space in a Zone
Once a zone has been set up, employees can search for and reserve resources within that zone from the Employee View. To reserve a resource in a zone:
- Go to Places in the Employee View.
- Select your building location from the dropdown and add a date, time, and duration for your reservation.
- Click the Filters button next to the duration dropdown.
- In the Filters window, select the zone you want from the Zone/Neighborhood dropdown, along with any other filter criteria.
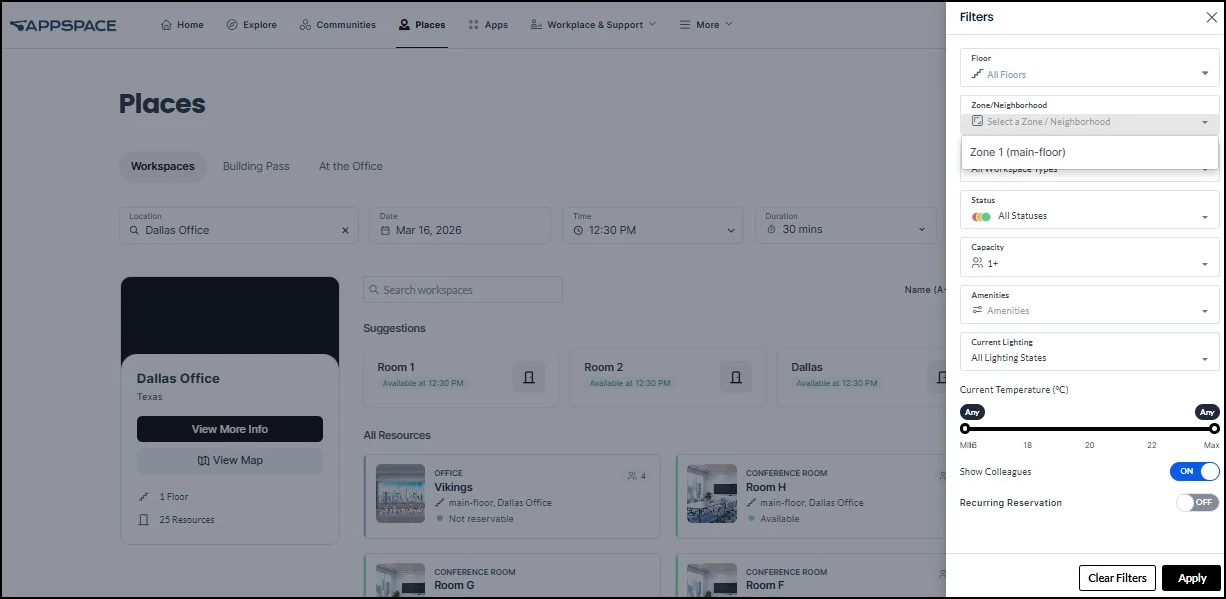
- Click Apply.
- Any resources available within the parameters you selected will now be listed for reservation.
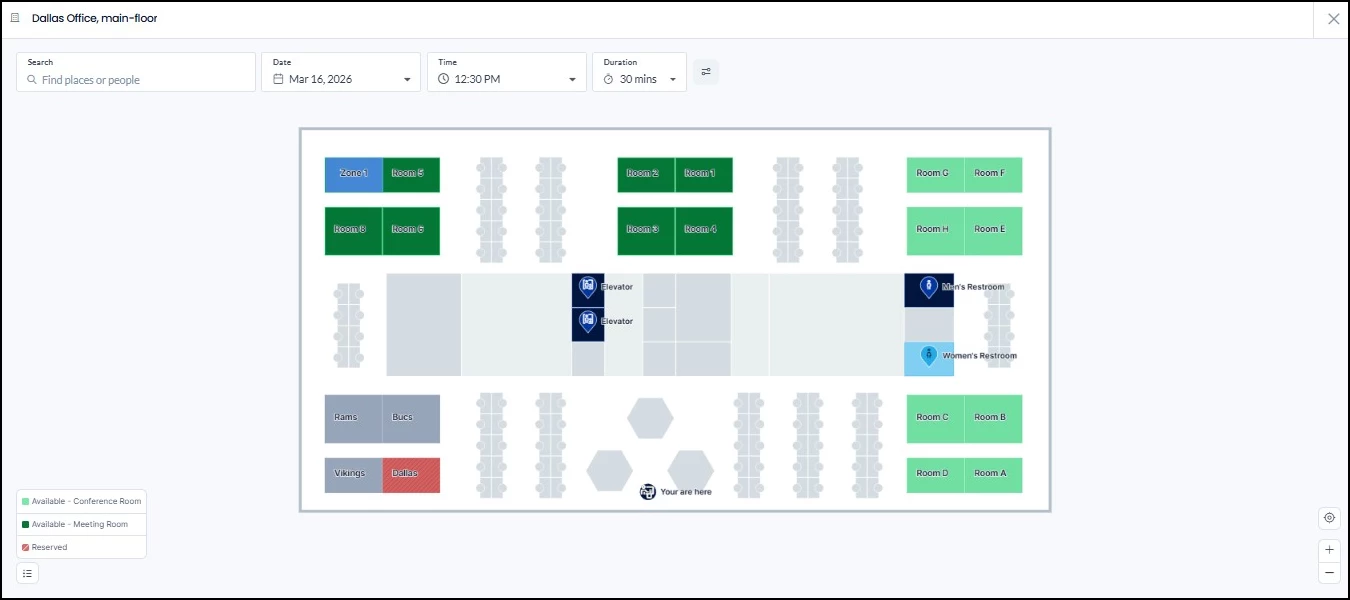
Tip: Employees can also browse a zone and reserve a resource by selecting it directly on the floor plan map. To do this, double-click on the zone or zoom in to view the individual resources within it.
Zone Use Cases
Here are a few common ways organizations use zones to improve their space reservation experience:
Department-Based Zones
Create zones that correspond to team or department areas on a floor. For example, you might set up a “Marketing” zone and an “Engineering” zone, each with its own color on the floor plan. This makes it easy for employees to find and reserve desks near their teammates, and helps administrators see at a glance how space is allocated across departments.
Workspace Type Zones
Group resources by function rather than team. For example, create a “Quiet Workrooms” zone for focus-oriented individual spaces and a “Collaboration Hub” zone for open seating and meeting rooms. Employees can then filter by zone to quickly find the type of environment they need for their workday.