User Presence: User Guide
Introduction
This guide provides information on the configuration, prerequisites, and proper use of the User Presence feature. This feature allows administrators to enable a presence indicator next to a user’s profile icon. This indicator can be managed directly within Appspace or synced externally with Microsoft Graph.
Key Benefits
The User Presence feature provides several key benefits:
- Real-Time Availability: See colleagues' availability status easily within Appspace.
- Enhanced Collaboration: Increase transparency around a colleague’s availability and expected response times.
- Seamless Microsoft Integration: Enable bi-directional synchronization with Microsoft Teams, ensuring presence is aligned across both platforms.
What This Guide Covers
This guide will cover the following topics:
- Setting up a Microsoft 365 Passport.
- Enabling User Presence in Appspace.
- Adding an Availability Status in the Employee View.
Prerequisites
Before configuring User Presence, you need to meet the following requirements:
- Platform license.
- Location Admin or Account Owner role.
- Presence enabled in Microsoft 365.
Configuration and Management
Step One: Setting up a Microsoft 365 Passport
If you plan to synchronize User Presence with Microsoft Teams, a Microsoft 365 Presence passport is required.
- To configure the passport, open the navigation in the Admin View and go to Integrations.
- Under the Passports tab, click +Add.
- In the Create a passport window that appears, select the People category.
- Choose Microsoft 365 Presence and then click Connect.
- Enter your Microsoft credentials to generate the passport.

Step Two: Enabling User Presence in Appspace
Once the passport is configured (if needed), you can enable the User Presence functionality across the platform.
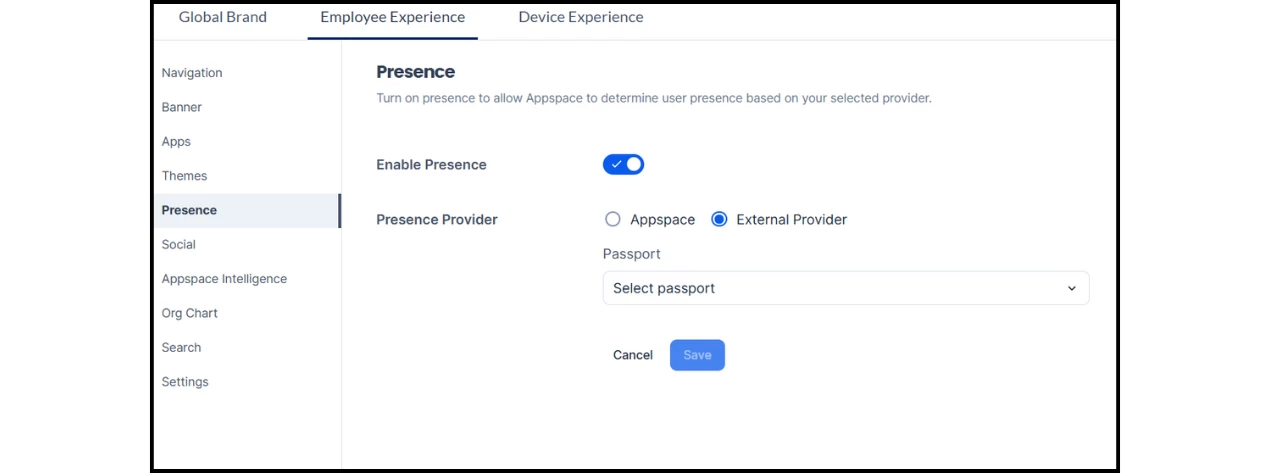
- Open the navigation in the Admin View and go to Settings > Configuration > Employee Experience > Presence.
- Toggle on the Enable Presence button.
- Select a Presence Provider, choosing either Appspace or an External Provider.
- If selecting External Provider, choose the existing passport from the dropdown menu that appears.
- When finished, click Save.
- Note: When enabled, User Presence is activated across all locations.
Step Three: Adding an Availability Status in the Employee View
With User Presence enabled, employees can display their status next to their profile picture in Appspace.
- To update your status, click your User Profile at the top-right corner of the Employee View.
- Select the status option to view the default availability options, which include:
- Available
- Do Not Disturb
- Appear Away
- You can also reset the status to the default setting.
- To set a custom status, click Status message and type in your custom details.