Campaigns: User Guide
Introduction
This feature allows Administrators and Publishers to group and track related content under a single initiative. Users can plan communications on a calendar, track progress, and measure the overall impact of their campaigns using unified insights.
Key Benefits
The Campaigns feature provides the following key benefits:
- Unified Strategic Campaigns: Allows teams to plan and execute multi-touchpoint campaigns.
- Simple Performance Measurement: Provides holistic analytics to measure impact in real-time.
- Increased Operational Clarity: Centralizes all content planning and tracking to allow for more visibility.
What This Guide Covers
This guide will cover the following topics:
- Navigating to the Campaigns module.
- Creating a new campaign.
- Accessing the campaign overview.
- Adding existing content to a campaign.
- Adding new content to a campaign.
Prerequisites
To use and configure Campaigns, you need to meet the following requirements:
- Platform license.
- Publisher or Account Owner role.
Configuration and Management
Step One: Navigating to the Campaigns Module
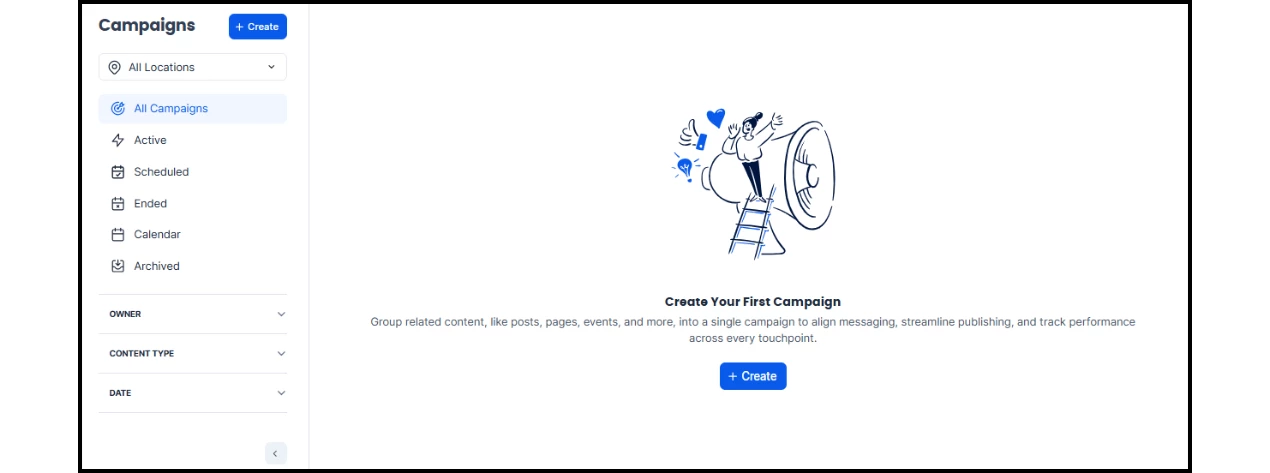
The Campaigns module enables content publishers to create and manage communication campaigns in a consolidated area.
To access campaigns, open the navigation in the Admin View and go to Campaigns.
In the module, users can perform the following tasks:
- Manage campaigns in specific locations.
- View Active, Scheduled, and Ended campaigns.
- View a calendar of all campaigns.
- View campaigns that have been archived.
- Filter campaigns by owners, content type, and date.
Additionally, users can preview, edit, schedule, and archive campaigns within the module.
Step Two: Creating a New Campaign
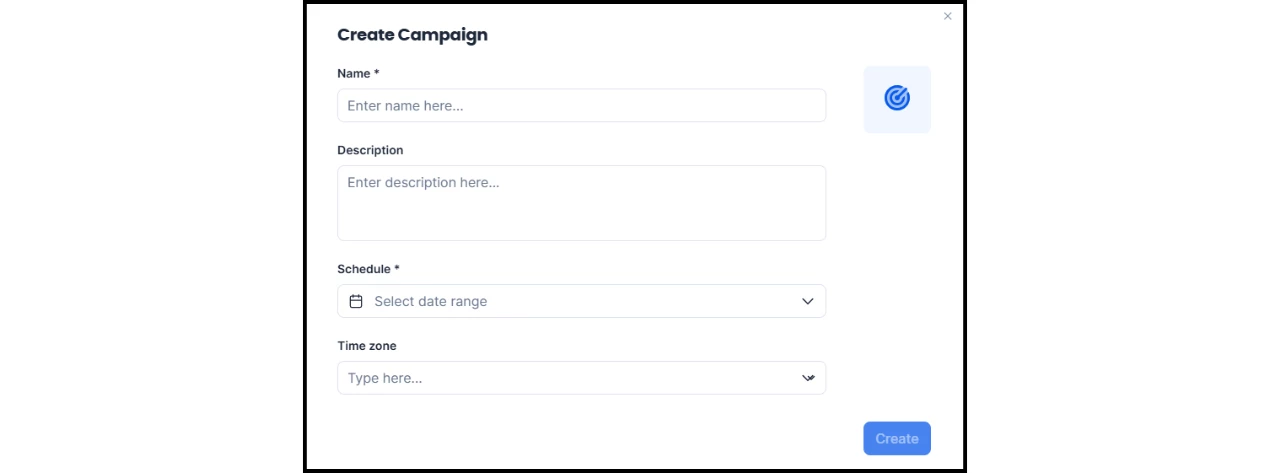
To create a new campaign in the Campaigns module, start by clicking +Create.
In the box that appears, enter the following information:
- Name
- Description
- Schedule
- Time zone
- Location
- Icon
Once the details are complete, click Create.
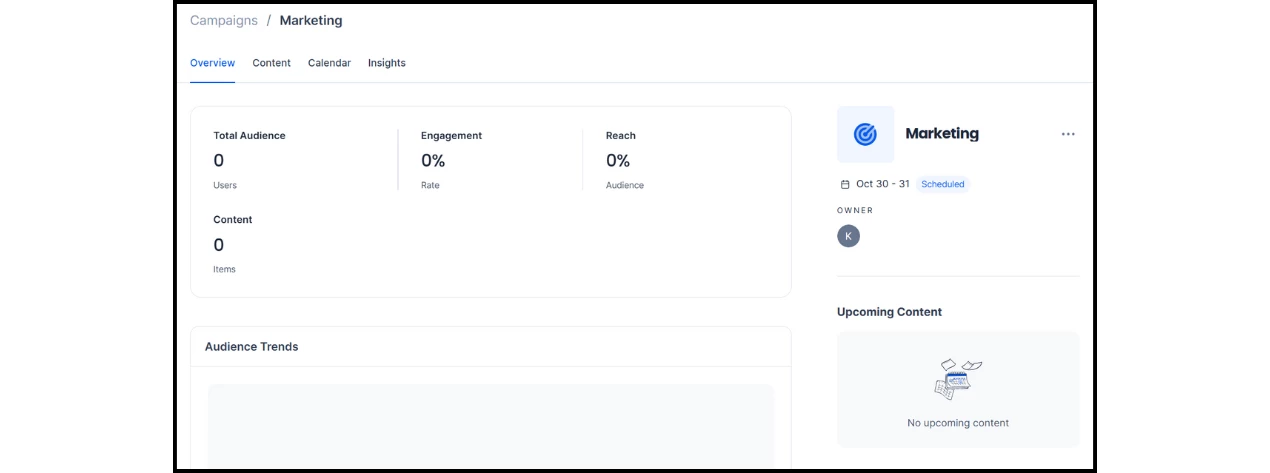
Step Three: Accessing the Campaign Overview
Once a campaign is created, users can click into it to view an overview, manage the content and schedule, and review analytics.
The Overview tab displays the following data points:
- Owners/Moderators
- Total Audience
- Engagement
- Reach
- Content
- Audience Trends
- Top Viewed Content
- Upcoming content
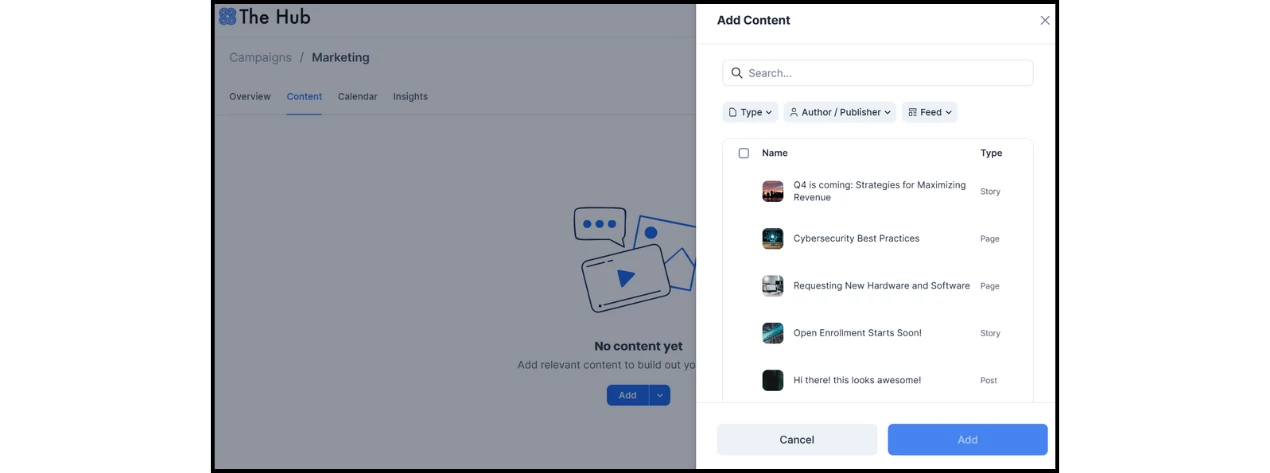
Step Four (Option A): Adding Existing Content to a Campaign
To add existing content to a campaign, click into the specific campaign and navigate to the Content tab.
- Click the +Add dropdown menu and select the option to add existing content.
- Note: Clicking the +Add button directly will default to existing content.
- A panel will appear to the right; use the search field to type in the name, type, author, or feed of the content.
- Click the checkbox next to the content you want to add.
- Select Add to incorporate it into the campaign.
Step Four (Option B): Adding New Content to a Campaign
To add new content to a campaign, follow the steps below depending on your content type:
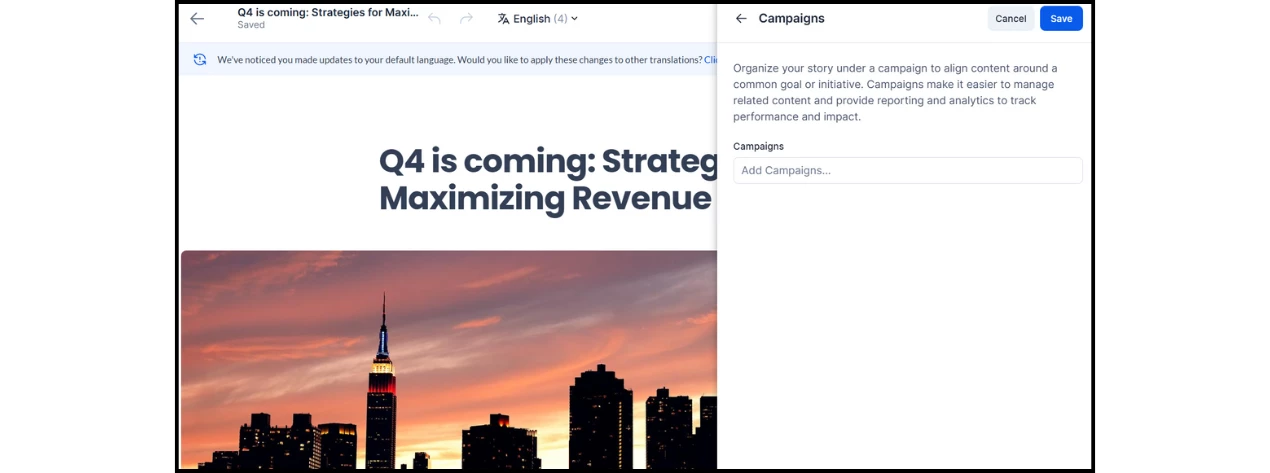
- Story/Page Editor: Open the Campaigns tab within the settings to add or edit the campaign.
- Note: If the editor was accessed via the +Add dropdown within the campaign, the campaign is already assigned.
- Post Editor: Click the ··· button beside the Post to dropdown menu to add or edit the campaign.
- Note: If the Post editor was accessed via the +Add dropdown within the campaign, the campaign is already assigned.
- Broadcasts Editor: Add a campaign in the Edit Broadcast window.