
Bring Your SharePoint Files to the Team: Setting Up Community Document Libraries
This guide walks Community Owners through setting up a SharePoint Document Library within an Appspace community. Once connected, community members can create, edit, rename, move, and organize SharePoint files directly within Appspace — without switching platforms.
A common use case: your Sales team has a community in Appspace where they share updates and collaborate. They also have a SharePoint site with proposals, pitch decks, and reports.
By connecting a SharePoint Document Library to the community, the team can access and manage those files right alongside their posts and discussions — no need to toggle between platforms.
Key Benefits
- Efficient File Management — Users can complete document workflows without leaving Appspace.
- Consistent Structures — Maintains familiar SharePoint file organization while using the Appspace interface.
- Controlled Access — Preserves existing SharePoint permissions and security — users can only perform actions their SharePoint permissions allow.
What This Guide Covers
- Navigating to community settings to begin setup
- Creating a Document Library and selecting SharePoint as the provider
- Connecting the library to a specific SharePoint location
- Accessing and working with files in the library
- Adding new files and folders
Prerequisites
- SharePoint passport — Must be configured in Appspace (recommended to set up in the Admin Console beforehand).
- Appspace Premium license — Required to use Document Libraries.
- Community Owner role — Required for the target community.
- No existing Document Library — Each community supports only one Document Library.
Step 1: Navigate to Community Settings
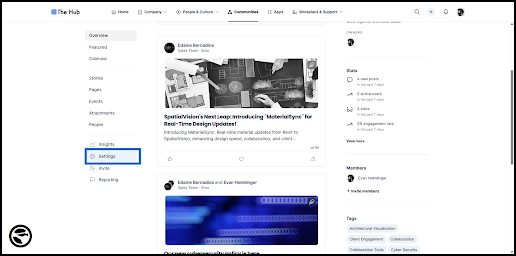
To begin, go to the Employee View in Appspace and open the Communities overview. Depending on how your home page is configured, communities may be accessible through the navigation menu, a shortcut or link, or search.
Select the community where you want to add the Document Library, then click Settings in the community's left-hand panel. You must be a Community Owner to access this area.
Step 2: Create the Document Library
From the community settings, click into the Document Library tab on the left-hand menu. Select Create document library to begin setup.
In the Select provider window that appears, choose SharePoint and click Next.
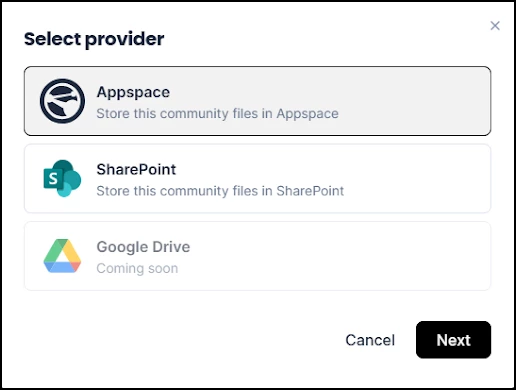
Important: Once created, a SharePoint Document Library cannot be converted to another library type without deleting and recreating it. The provider selection window also shows Appspace (for native storage) and Google Drive (coming soon) as options.
Step 3: Connect to a SharePoint Location
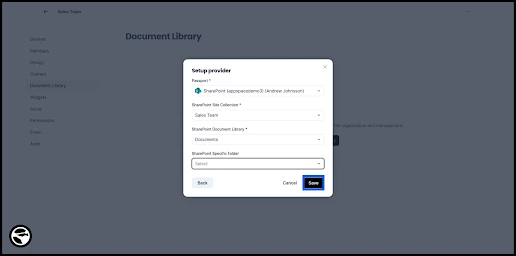
In the Setup provider window, configure the connection:
- Passport: Select your SharePoint passport from the dropdown. Although you can configure a new passport here, it's recommended that the passport has already been set up in the Admin Console.
- Site Collection: Select the SharePoint Site Collection that contains the files you want to connect.
- Document Library: Select the specific Document Library within that collection.
- Specific Folder (optional): Optionally, select a target folder to narrow the scope of what's visible in the community. This is useful if the SharePoint library contains files that aren't relevant to the community.
Click Save to create the SharePoint Document Library within the community.
Step 4: Access Files in the Library
After the library is created, an overview of the connected SharePoint location will appear in the community's Document Library tab.
Note: The initial synchronization may not be immediate and may require additional time before content is fully available.
To work with files:
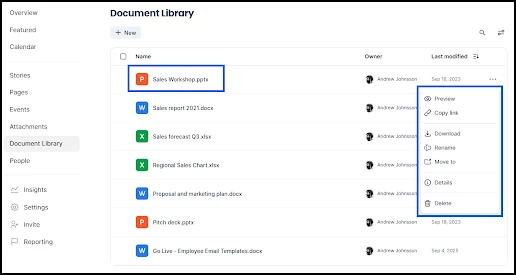
- Click a file's name to open a preview where you can also edit or download the file, depending on your SharePoint permissions.
- Click the three dots to the right of a file to open a menu of actions. Available actions (Preview, Copy link, Download, Rename, Move to, Details, Delete) are dependent on your SharePoint permissions.
Edits to existing files in the Document Library sync automatically with the files in the SharePoint location.
Note: Disconnecting the Document Library from SharePoint will not delete the SharePoint location's content or the location itself.
Step 5: Add Files and Folders
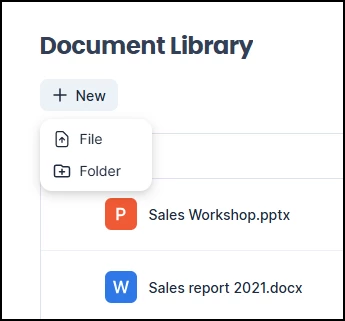
To upload files or create new folders, click the +New button above the file overview and select File or Folder.
Uploaded files and new folders appear immediately in the Document Library and are attributed to the SharePoint passport used to create the library.
Note: A file cannot be uploaded if another file with the same name already exists in the library.
New files and folders sync automatically with the SharePoint location. Deleting a file or folder in one platform will remove it from the other.