Device Map View: User Guide
Introduction
This guide provides information on configuring, setting up prerequisites for, and properly using Device Map View. With this feature, administrators can assign devices at the floor level and map those devices directly onto the floor plan.
Key Benefits
Using Device Map View offers several benefits:
- Visual Network Control: Manage your entire digital signage network with interactive maps.
- Faster Troubleshooting: Check device status (online/offline) and access details directly on the map.
- Streamlined Management: Find specific devices and manage your network more efficiently with powerful search and filtering tools.
What This Guide Covers
This guide will cover the following topics:
- Mapping new devices on a floor plan
- Adding existing devices to a map
- Editing mapping in Device Details
Prerequisites
Before you can use Device Map View, you need to meet the following requirements:
- You must have a Platform license.
- You must have an Account Owner or Location Admin role.
Mapping New Devices on a Floor Plan
When registering a new device, you have the option to map it directly to a floor plan.
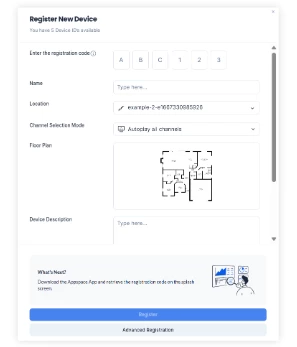
To map a new device:
- Go to the Devices module and click +Add.
- In the Register New Device window, enter the registration code, device name, and channel selection mode.
- From the Location drop-down menu, select the floor where the device is installed.
- Click Show More to expand the window, then hover over the Floor Plan area and click Set location.
- On the map, select where you want to place the device and click Save.
- Finish by clicking Register.
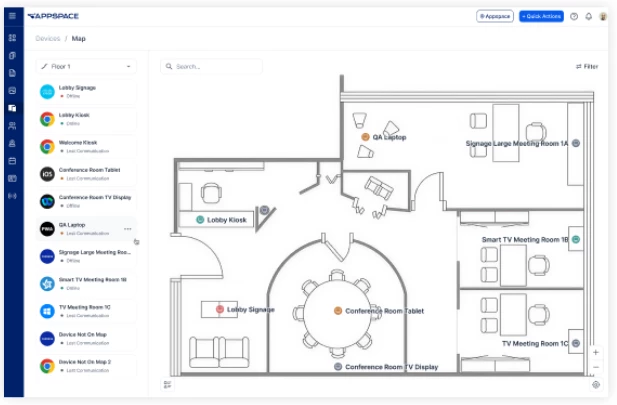
Adding Existing Devices to a Map
To add existing devices to a floor plan, start by going to Devices > Map. Your device will need to be already assigned to the specific location in order to map it.
To add existing devices:
- From the Map view, click the Location drop-down menu and select the specific floor where the device is located.
- The floor must have a floor plan in Appspace.
- Click the ellipsis next to the device and select Edit Floor Plan Location.
- Select the location on the floor plan to place the device.
- Click Save.
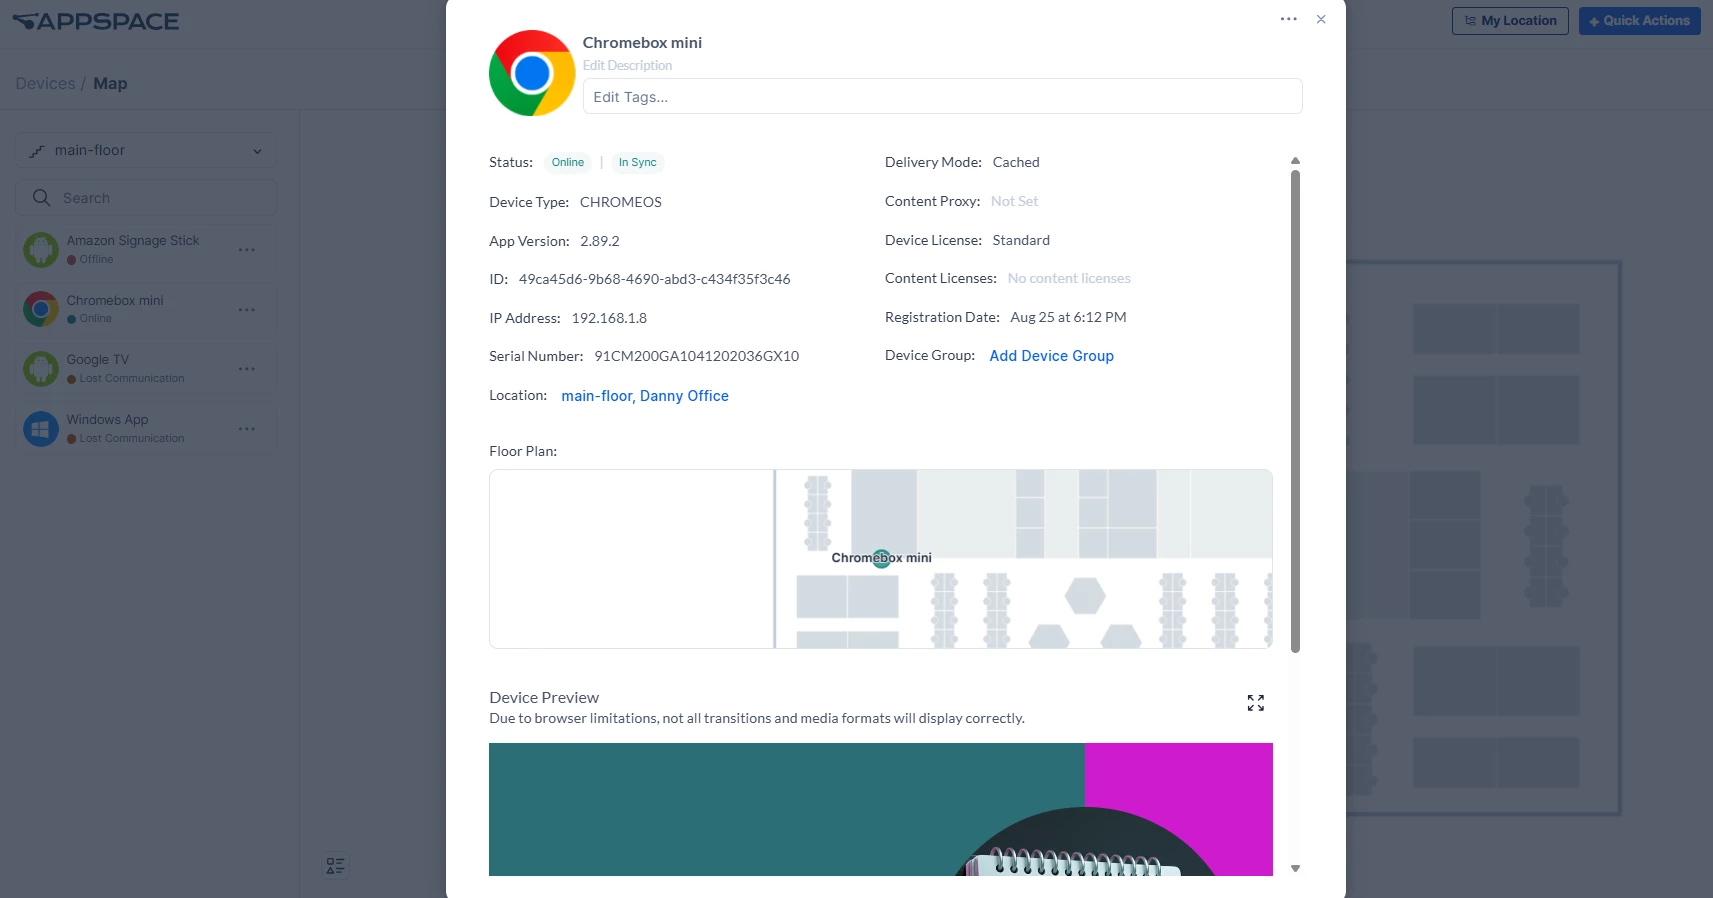
Editing Mapping from Device Details
It is possible to edit the mapped location of a device in the Device Details. You can also edit the device’s location within the hierarchy here.
To edit the mapped location in Device Details:
- In the Map view, click the ellipsis next to the device and select View Device Details.
- In the Floor Plan section, click Set Location.
- Place the device’s location on the map, and then click Save.