


Learn how to use a network policy file to register Appspace devices. This article is for IT Administrators who bulk-register devices on a local network. After you finish, unregistered devices pick up the policy file on the network, or open the Appspace App registration URL, and register to the location you selected.
For: IT Administrator — bulk-registering devices with a network policy file
Prerequisites
-
An Appspace App supported device, installed and configured with the Appspace App.
-
An active Appspace account with enough Device IDs to register the device.
-
Account Owner or Location Admin privileges in Appspace.
-
A local network administrator who can create the DNS hostname for your network, if you host the policy file locally.
Download the Network Policy File
Follow these steps to configure registration settings and download the policy.json file.
-
Log in to the Appspace console.
-
Click the ☰ Appspace menu, select Devices, then click + Add.
The Configure Advanced Registration window opens. The window shows how many Device IDs you have available.
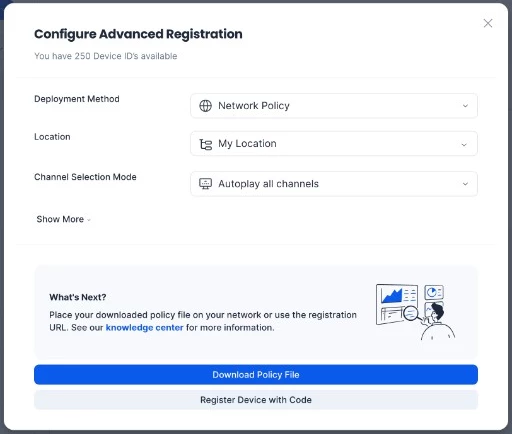
Configure Advanced Registration window with Network Policy selected.
-
Set Deployment Method to Network Policy.
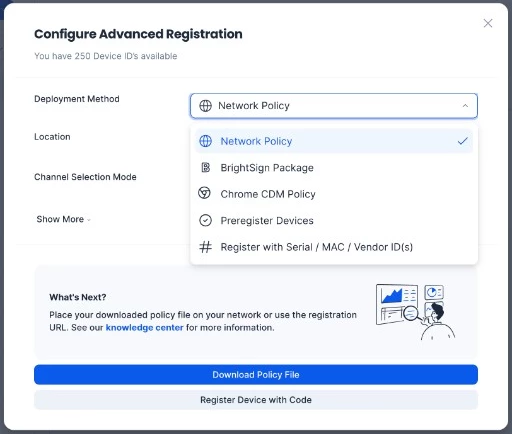
Select Network Policy from the Deployment Method list.
-
Select a Location.
Note: Location is the current name for what older documentation called a network. If the location does not exist yet, create it first. See Add and Manage Locations in Devices. You can also keep the default location and move the device later.
-
In Channel Selection Mode, select one of the following:
-
Autoplay all channels — one or more playlist channels autoplay on the device according to scheduling or dayparting settings.
-
Admins assign a single channel — the device displays one channel. You can assign a playlist channel, an advanced channel, or a live channel. If the channel does not exist yet, skip assignment and add it later.
-
Users browse published channels — interactive or channel browsing mode, for displays with a touch screen, mouse, keyboard, or remote control.
-
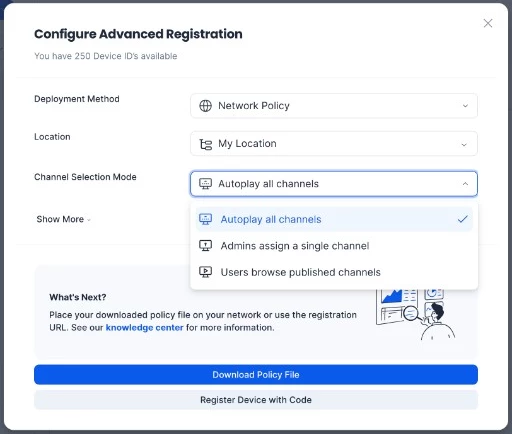
Channel Selection Mode options in Configure Advanced Registration.
-
Click Show More, then enter the following as needed:
-
Device Description — a brief description, such as the device location or function.
-
Device Group — an existing device group. Skip this field if no group exists. You can assign a group later.
-
Device Tags — existing tags, or type new tags.
-
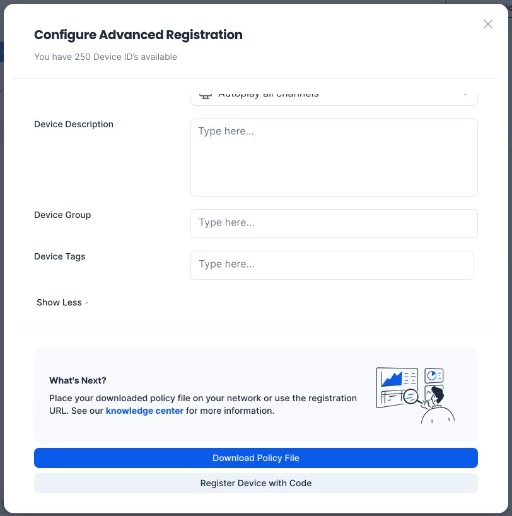
Optional Device Description, Device Group, and Device Tags fields.
-
Click Download Policy File.
The file downloads as policy.json. Next, place the file on your network, or open the registration URL on the target device.
Place the Policy File on the Network
-
Copy
policy.jsonto the/discovery/api/v1/folder in thewwwrootdirectory of your local web server.
Note: If the /discovery/api/v1 folder does not exist, create it in the wwwroot folder of the web server.
-
On your local DNS server, create the hostname appspace-discovery, pointing to the web server that hosts the policy file, so devices can reach:
http://appspace-discovery/discovery/api/v1/policy.json
Important: Creating a DNS hostname requires local network administrator permission.
-
Connect unregistered devices to the local network.
The Appspace App registers each device when it detects the policy file.
Use the Registration URL
As an alternative to hosting the policy file, open the Appspace App registration URL in a browser on the target device.
-
On the target device, open a browser.
-
Go to one of the following URLs:
-
Public cloud:
https://cloud.appspace.com/app/ -
Private cloud:
https://<customer>.cloud.appspace.com/app/pwa/
-
The Register your device screen displays a 6-letter claim code, a QR code, and a Log in button.
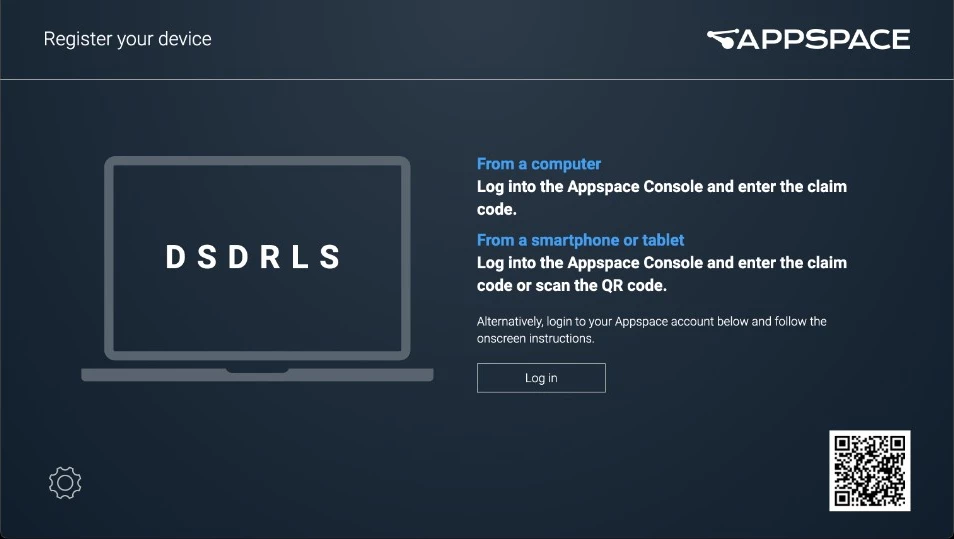
Register your device screen at the Appspace App registration URL.
Note: To finish registration with the claim code, QR code, or Log in option, see Register a Device with Appspace.