





Use SCIM provisioning to synchronize users and groups between Okta and Appspace.
SCIM can create users, update profile attributes, deactivate users, and push group membership changes to Appspace.
Enable SCIM in Appspace
- In Appspace, go to Users > Settings.
- Select SCIM as the user provisioning method.
- Select Save to generate the SCIM Base URL and bearer token.
- Copy the bearer token.
- Enable User Group Sync if you want Okta groups synchronized to Appspace.
Configure optional onboarding settings
- Enable Automatic Activation to activate synchronized users without requiring them to accept an invitation.
- Enable Added Users notifications if you want new users to receive an email when they are added to Appspace.
Enable SCIM provisioning in Okta
- Open the Appspace application in Okta.
- Edit the application.
- Enable SCIM provisioning.
- Open Provisioning.
- Enable Create Users.
- Enable Update User Attributes.
- Enable Deactivate Users.
- Save the settings.
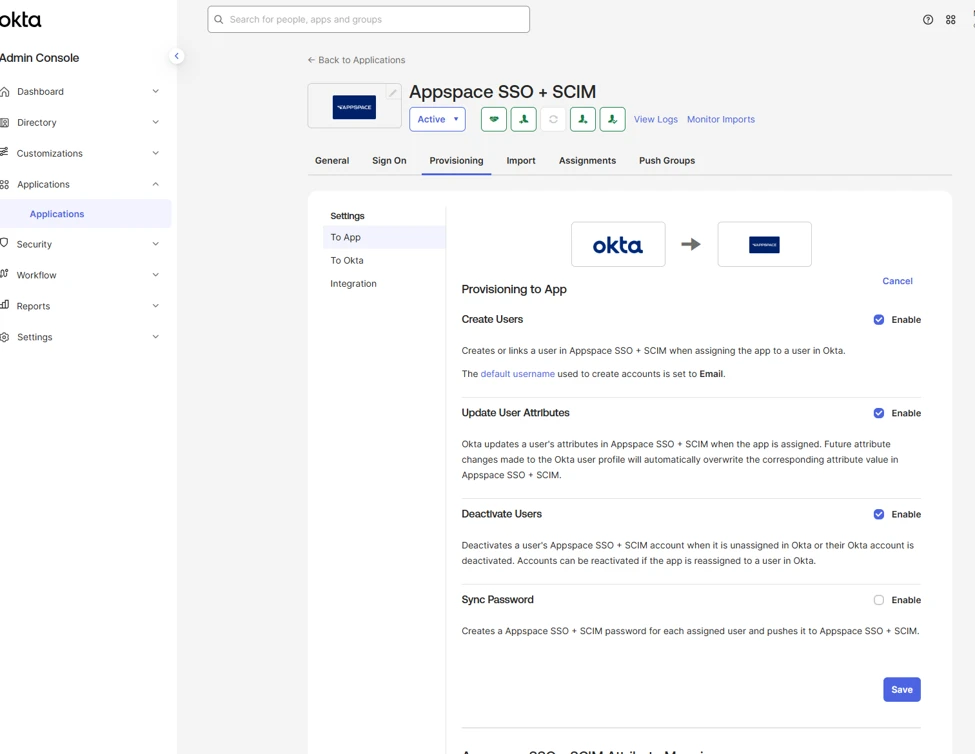
Configure the SCIM integration
In the Okta provisioning integration, configure the following:
| Setting | Value |
| SCIM connector base URL | https://cloud.appspace.com/identity/scim |
| Unique identifier for users | |
| Authentication mode | HTTP Header |
| Authorization | Use the Appspace bearer token |
Enable the applicable provisioning operations, including:
- Import New Users and Profile Updates
- Push New Users
- Push Profile Updates
- Push Groups
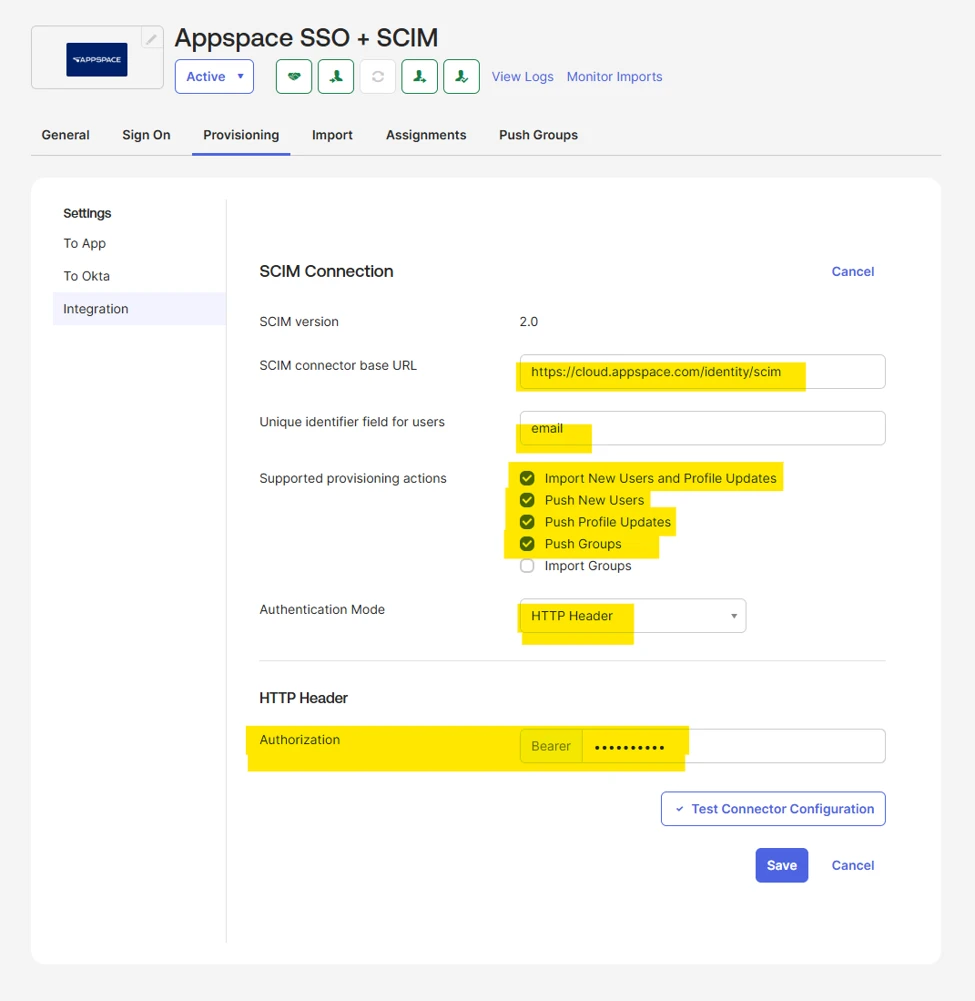
Test the SCIM connection
- Select Test Connection.
- Confirm that Okta reports the connector was configured successfully.
- Review the detected provisioning capabilities.
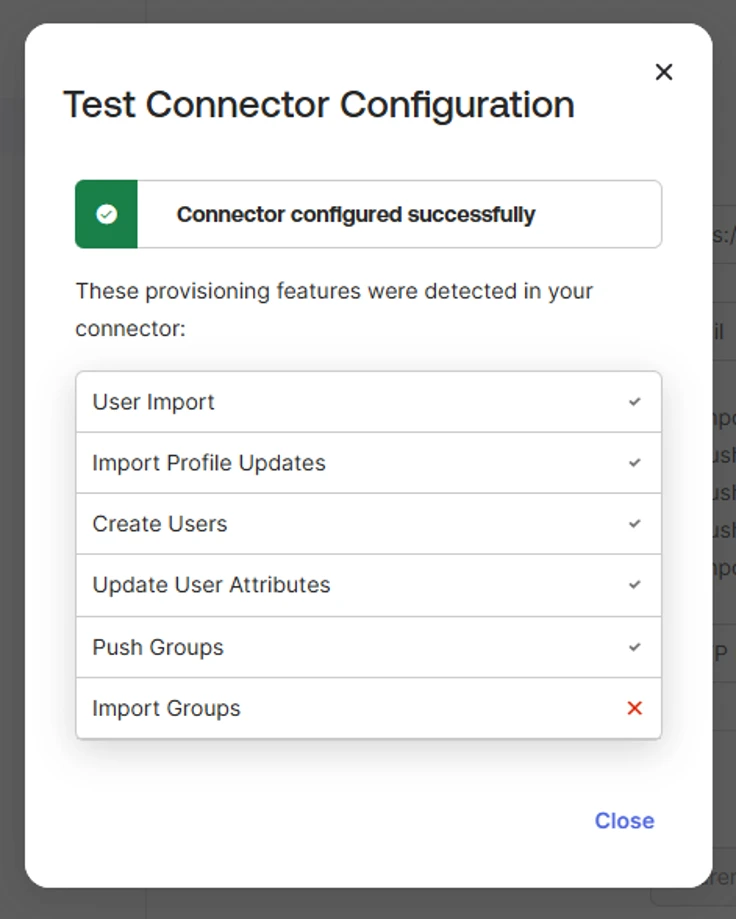
Create or identify your provisioning groups
Create or identify the Okta groups you want to provision to Appspace.
You may reuse groups that are already assigned to the Appspace application for SSO when that structure fits your access model.
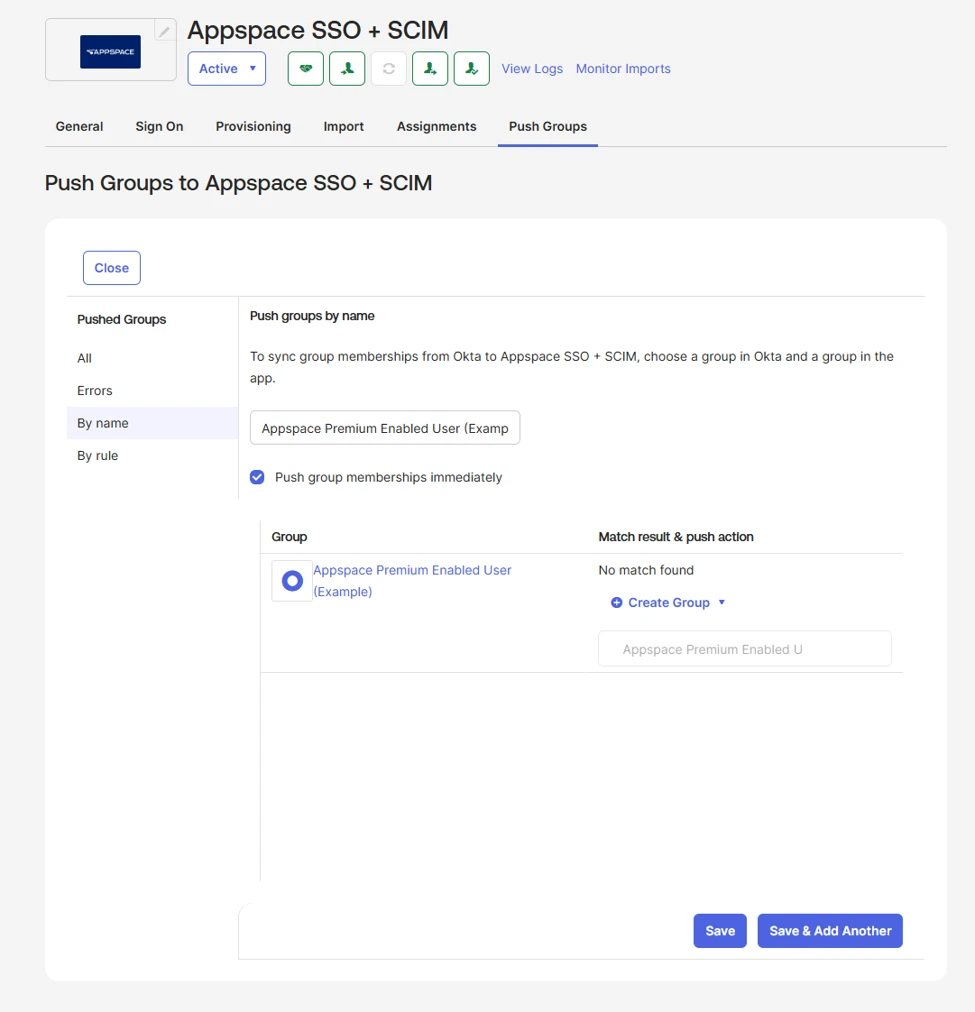
Push groups to Appspace
- Open the Appspace application in Okta.
- Select the Push Groups tab.
- Select the option to find groups by name or rule.
- Locate the group you want to provision.
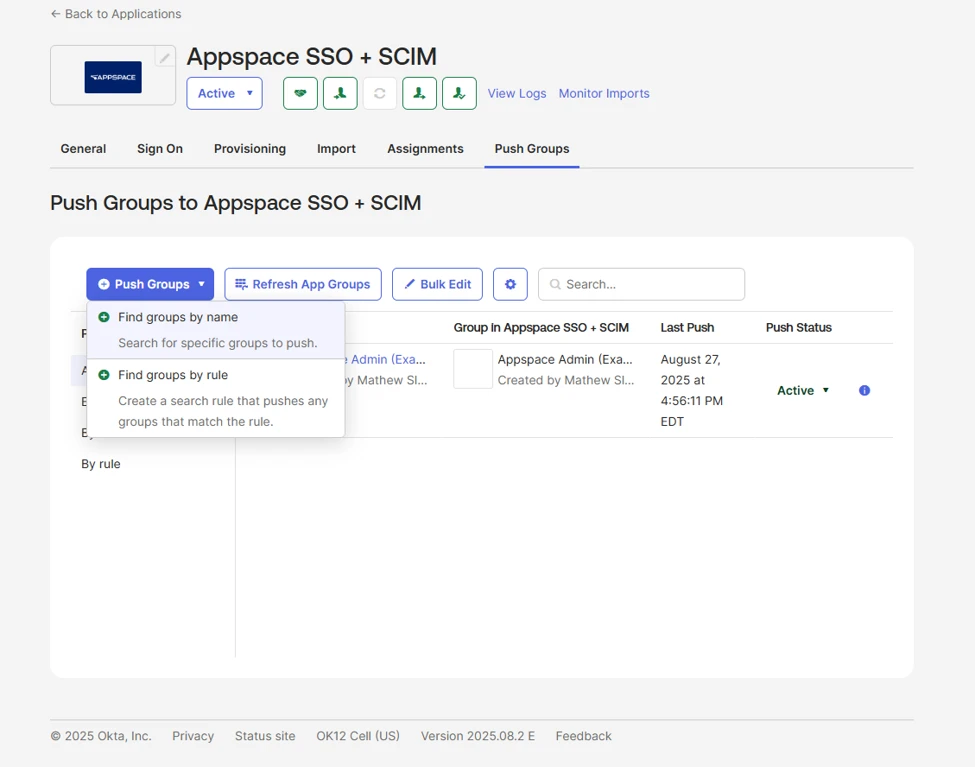
- Select the group.
- Confirm the group mapping or naming behavior.
- Select Save.
Verify provisioning
When group provisioning completes successfully, the Okta Push Status should display Active.
Go to Users in Appspace and confirm that the expected users and groups appear.
For very large user populations, synchronization may occur gradually. You can monitor the results from the Appspace Users page.