





Use System for Cross-domain Identity Management (SCIM) to automatically synchronize users and groups from Microsoft Entra ID to Appspace.
SCIM supports ongoing identity lifecycle management, including onboarding, profile updates, group membership changes, and deactivation.
How SCIM provisioning works
With SCIM enabled, Entra ID can synchronize user and group information directly with Appspace. This reduces manual account administration and helps keep Appspace access aligned with your organization's identity management processes.
When group synchronization is enabled, provisioned groups can also be used in Appspace to assign permissions, channels, channel groups, and licenses.
Enable SCIM in Appspace
- In Appspace, go to Users > Settings.
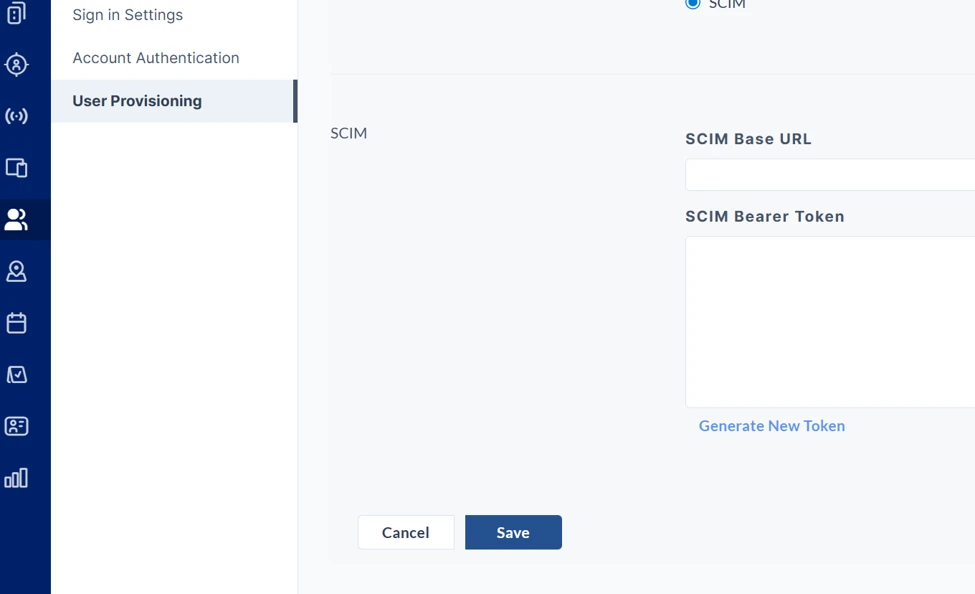
- Select SCIM as the user provisioning method.
- Select Save.
- Appspace generates the SCIM Base URL and SCIM bearer token.
- Copy the SCIM bearer token for use in Entra ID.
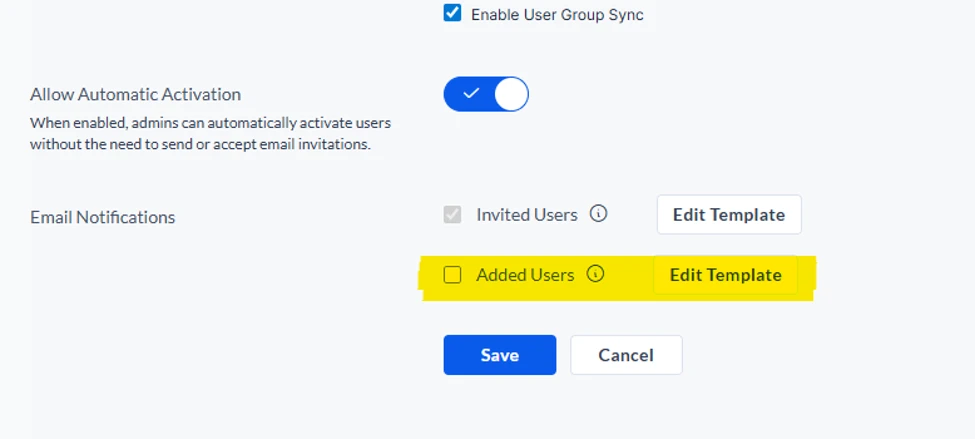
- Enable User Group Sync if you want groups and their membership synchronized to Appspace.
Configure optional onboarding settings
You can also configure options that streamline the experience for newly provisioned users.
- Automatic Activation: Activates provisioned users without requiring them to accept an Appspace invitation.
- Added Users notification: Sends an email when a user is added. The email template can be customized.
The Invited Users option applies to manual provisioning and is not available when SCIM is selected.
Connect Entra ID to Appspace
- Open the Appspace SSO + SCIM enterprise application in Entra ID.
- Open the application's provisioning configuration.
- Select the option to connect the application.
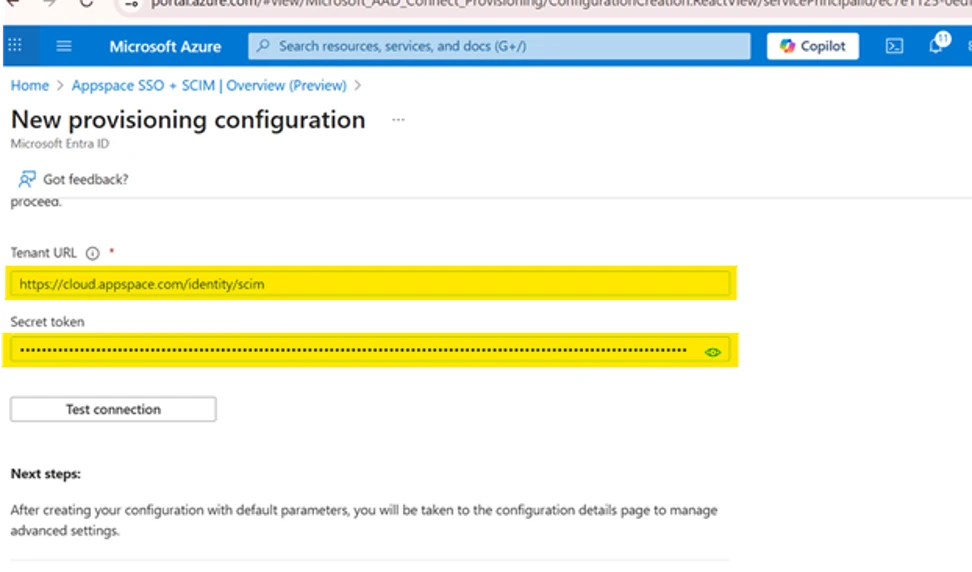
- Enter the Appspace SCIM Base URL as the Tenant URL.
- Enter the Appspace bearer token as the Secret Token.
- Select Test connection.
- After the connection succeeds, create or save the provisioning configuration.
Enable provisioning
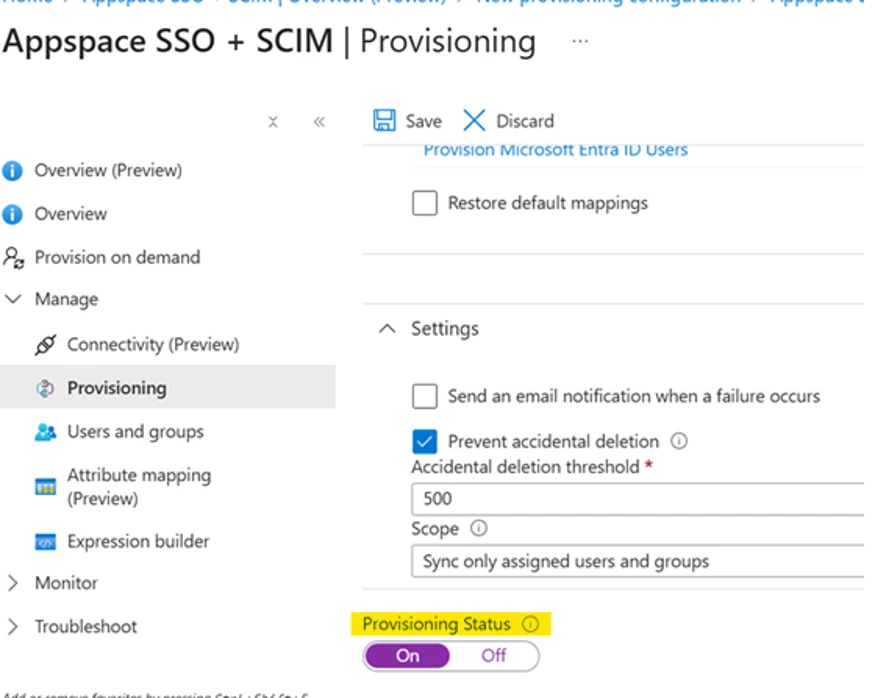
- Open the provisioning settings for the Appspace application.
- Set Provisioning Status to On.
Microsoft Entra ID normally runs provisioning on a recurring cycle. Users and groups may take up to approximately 40 minutes to appear in Appspace during the standard synchronization cycle.
Assign users and groups
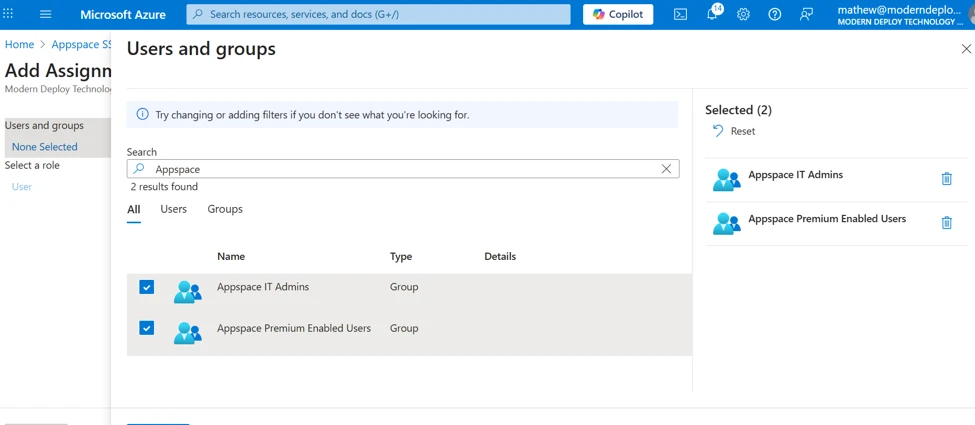
Add the users and security groups that should be associated with the Appspace enterprise application.
- Open the application's Users and groups area.
- Select Add user/group.
- Select the users or groups you want to provision.
- Complete the assignment.
Your Entra ID group design can follow your organization's existing naming and governance standards. Groups may represent roles, departments, locations, license levels, or other access requirements.
Test provisioning before the next synchronization cycle
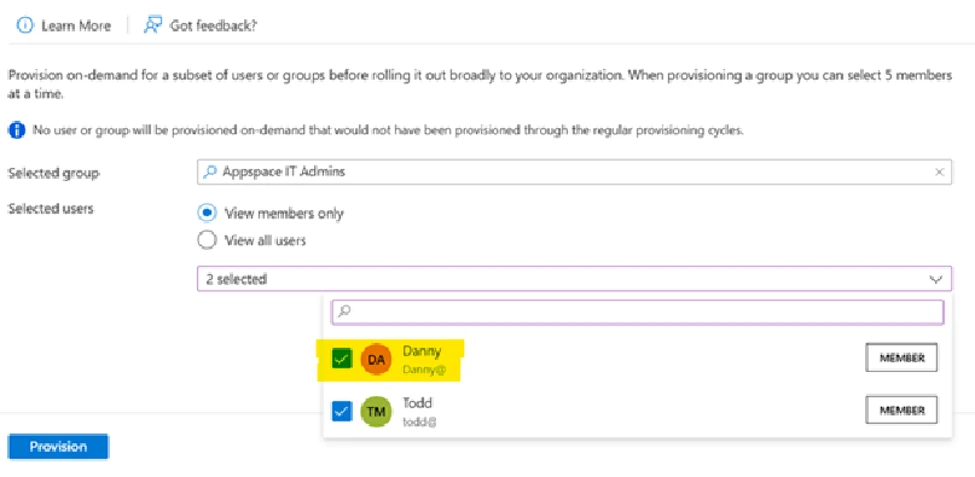
You can use Provision on demand to test the configuration with a small number of users or groups before waiting for the normal provisioning interval.
- Open Provision on demand for the Appspace enterprise application.
- Select a test user or group.
- Run provisioning.
- Review the result before expanding the deployment.
Verify provisioning
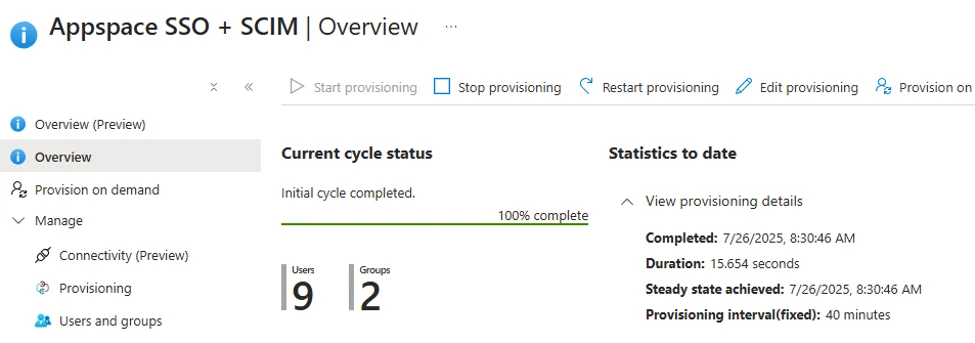
- After synchronization completes, review the provisioning status in Entra ID.
- Go to Users in Appspace.
- Confirm that the expected users and groups appear.
- Open a synchronized group to configure its Appspace settings.
Provisioned groups can be used to automatically assign:
- Permissions
- Licenses
- Channels
- Channel groups
For larger environments with thousands of users, provisioning may occur gradually. Refresh the Appspace Users page to monitor progress.