





Synchronize additional user profile attributes from Entra ID or Okta to Appspace.
Standard Appspace identity provisioning includes common user information such as email address, first name, and last name. Additional profile information such as phone number, department, and job title can also be provisioned.
Organizations that need additional profile fields can configure custom SCIM attribute mappings from Microsoft Entra ID or Okta.
Important: Confirm the source attribute and the Appspace profile property you want to synchronize before changing your identity provider configuration.
Configure a custom attribute in Microsoft Entra ID
- Open the Appspace SSO + SCIM enterprise application in Entra ID.
- Open Provisioning.
- Select Attribute Mapping.
- Select Users.
- Enable Show advanced options.
- Select Edit attribute list.
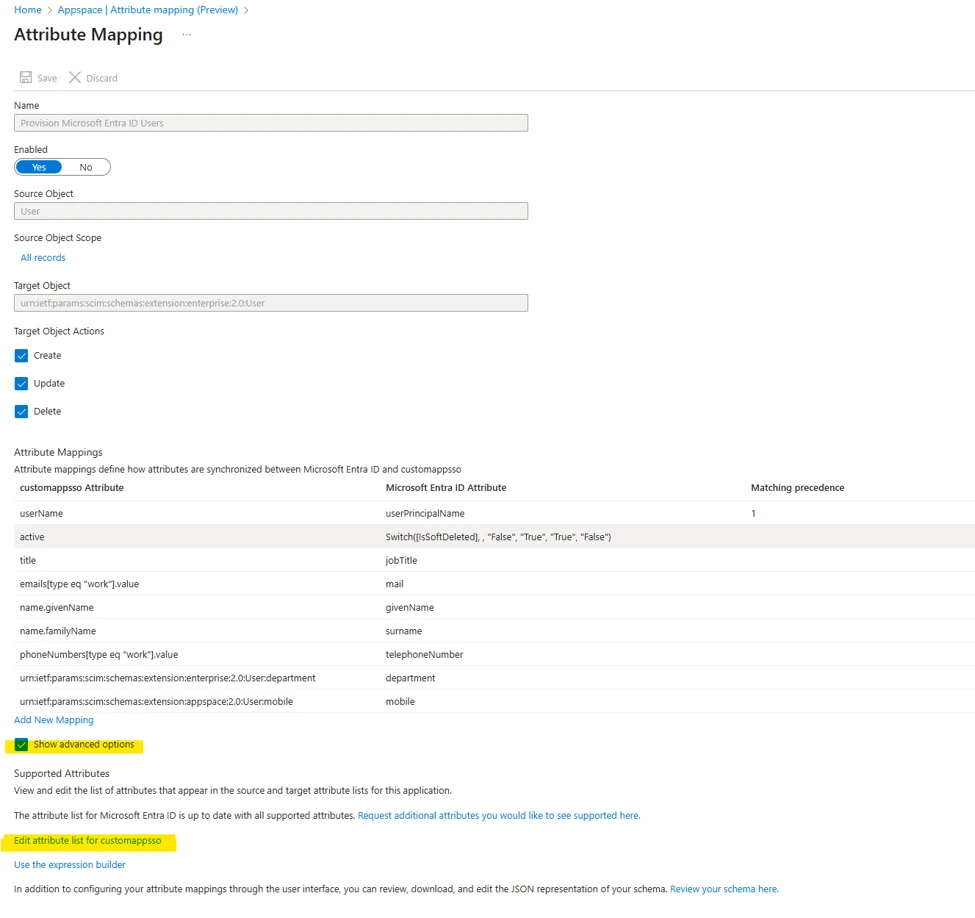
Add the Appspace SCIM attribute using the following format:
urn:ietf:params:scim:schemas:extension:appspace:2.0:User:[attribute]
Replace [attribute] with the user attribute you want to map to Appspace.
For example, to map a mobile phone attribute:
urn:ietf:params:scim:schemas:extension:appspace:2.0:User:mobile

Test the Entra ID mapping
- Save the attribute configuration.
- Use Provision on demand.
- Select a test user or small group.
- Run provisioning.
- Confirm that the new value synchronizes successfully before expanding the change.
Configure a custom attribute in Okta
- Open the Appspace application in Okta.
- Go to Provisioning.
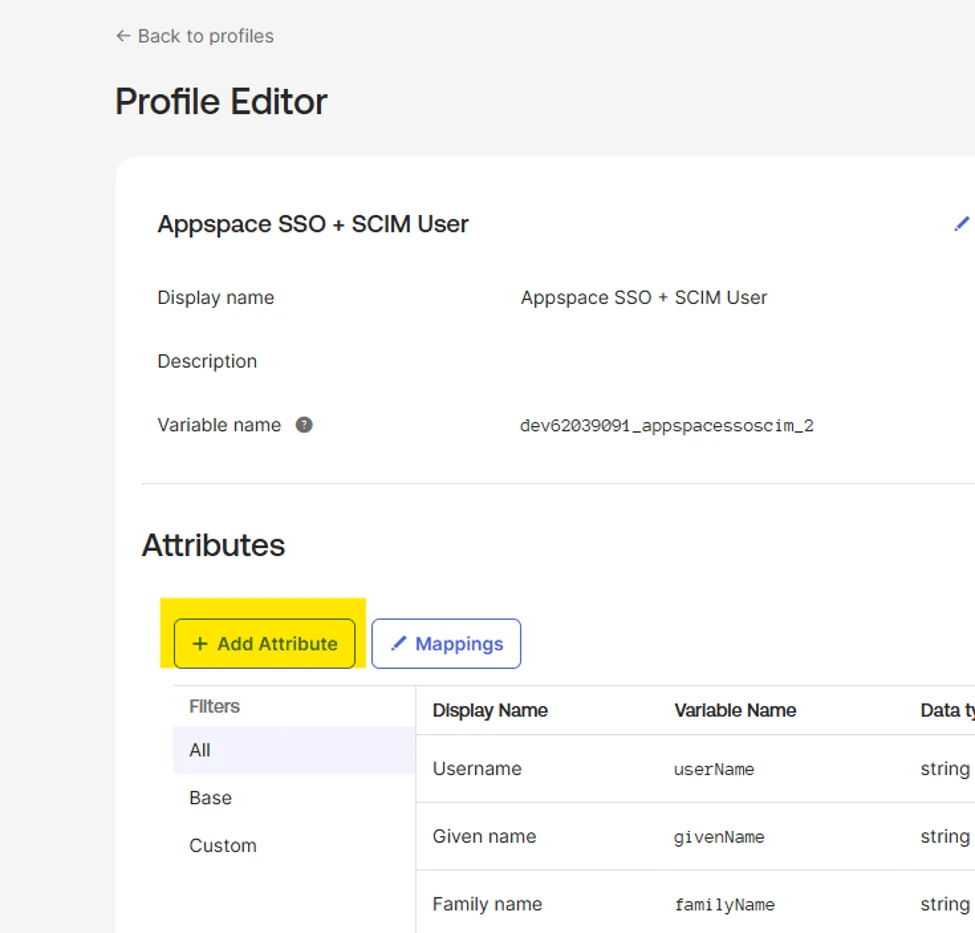
- Open the Profile Editor.
- Select Add Attribute.
Configure the Okta attribute
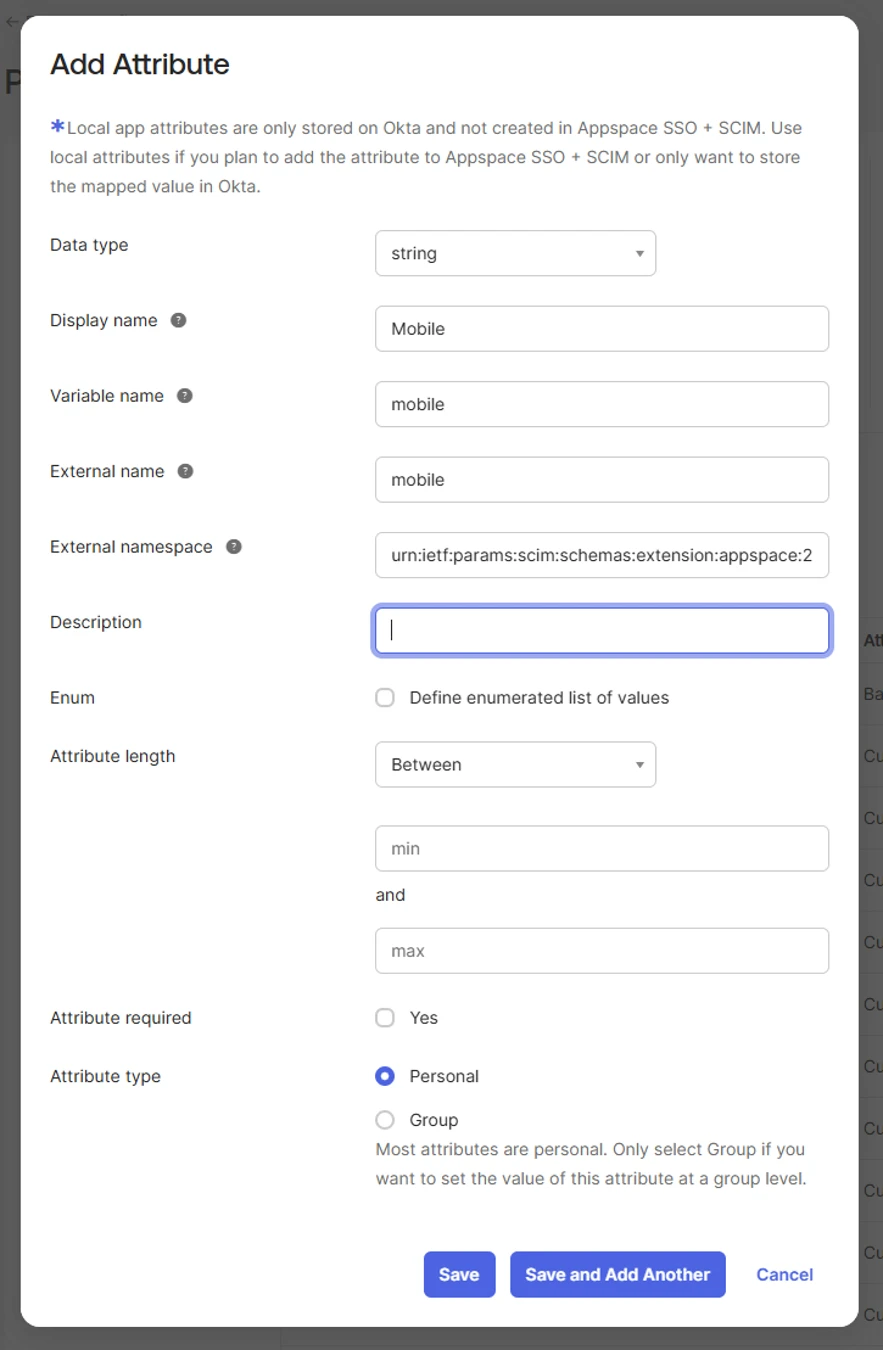
For a string-based profile field, configure the attribute using the appropriate value from your environment.
Use the following external namespace:
urn:ietf:params:scim:schemas:extension:appspace:2.0:User
For example, when mapping a mobile phone field:
- Data type: String
- Display name: Mobile
- Variable name: mobile
- External name: mobile
- External namespace: urn:ietf:params:scim:schemas:extension:appspace:2.0:User
- Scope: User personal
Replace Mobile and mobile with the display name and property required for the user attribute you are configuring.
Map the Okta attribute to Appspace
- Save the new attribute.
- Select Mappings.
- Select the Okta-to-Appspace user mapping.
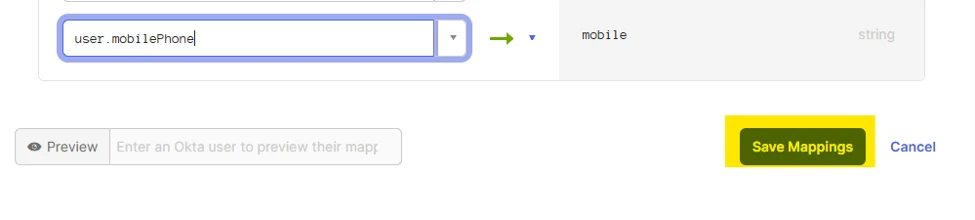
- Map the appropriate Okta user property to the Appspace attribute.
- Save the mapping.
Add the profile field in Appspace
If the custom property also needs to appear in the Appspace user profile:
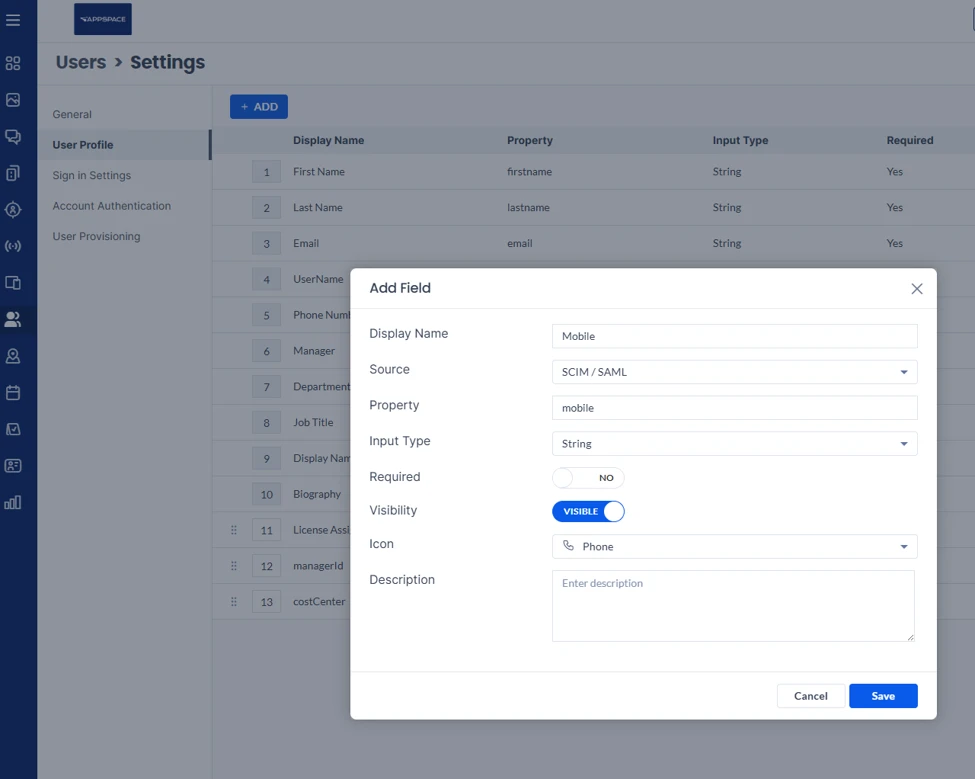
- Go to Users > Settings > User Profile.
- Select Add.
- Enter the appropriate display name.
- Set Source to SCIM / SAML.
- Enter the same property name used in the identity provider mapping.
- Select the appropriate input type.
- Select an appropriate icon.
- Save the field.
For example, a mobile phone profile field may use:
- Display Name: Mobile
- Source: SCIM / SAML
- Property: mobile
- Input Type: String
- Icon: Phone
Verify the synchronized attribute
After synchronization completes, open the profile of a provisioned user and confirm that the custom attribute appears with the expected value.
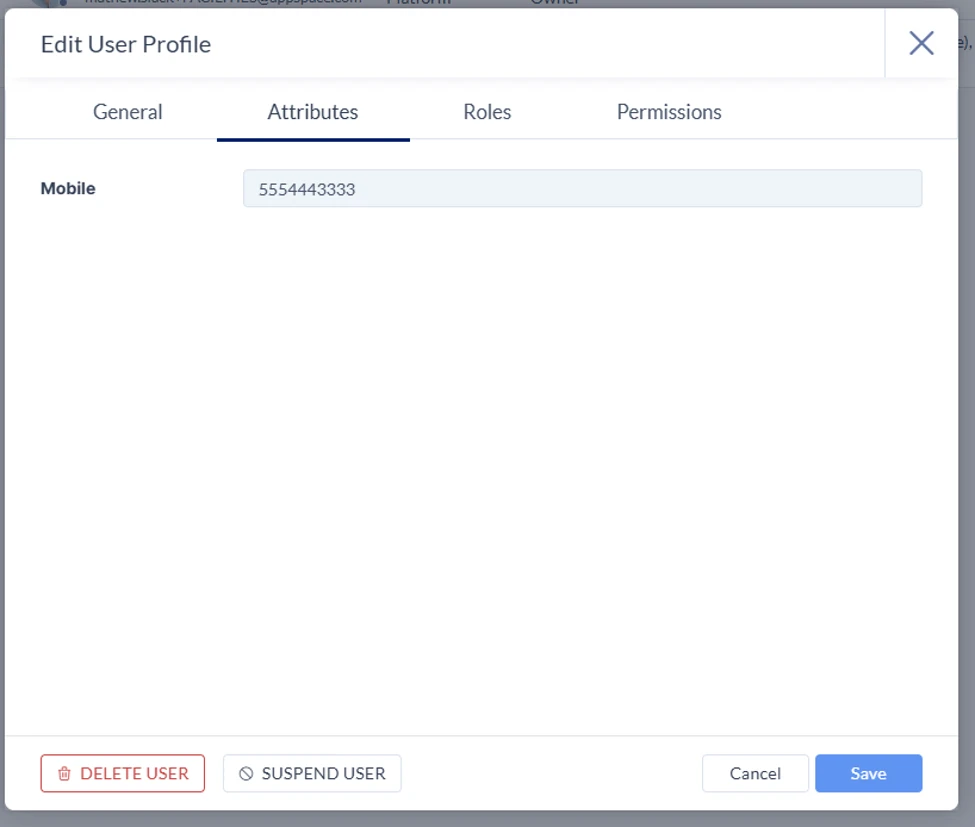
If the attribute does not appear, verify that the identity provider mapping and Appspace property name match exactly.