





Use Microsoft Entra ID to authenticate Appspace users with SAML 2.0 Single Sign-On (SSO).
This guide walks through creating the Appspace enterprise application in Entra ID, configuring the required SAML claims, and connecting the identity provider to Appspace.
Before you begin
- Sign in to Appspace with an Account Owner account.
- Make sure you have permission to create and configure enterprise applications in Microsoft Entra ID.
- Decide whether users will sign in with SSO only or with SSO or Appspace Credentials.
Important: If you are configuring SSO without automated provisioning, the user must already exist in Appspace. The user's email address, first name, and last name must match the corresponding identity provider record, and the user must have the appropriate Appspace permissions and licenses.
Configure SSO in Appspace
- In Appspace, go to Users.
- Select Settings > Account Authentication.
- Select Single Sign-On (SSO).
- Choose either SSO only or SSO or Appspace Credentials.
- Keep this page open. You will use the Appspace Assertion URL when configuring Entra ID.
Create the Appspace application in Entra ID
- Sign in to Microsoft Entra ID.
- Go to Enterprise applications.
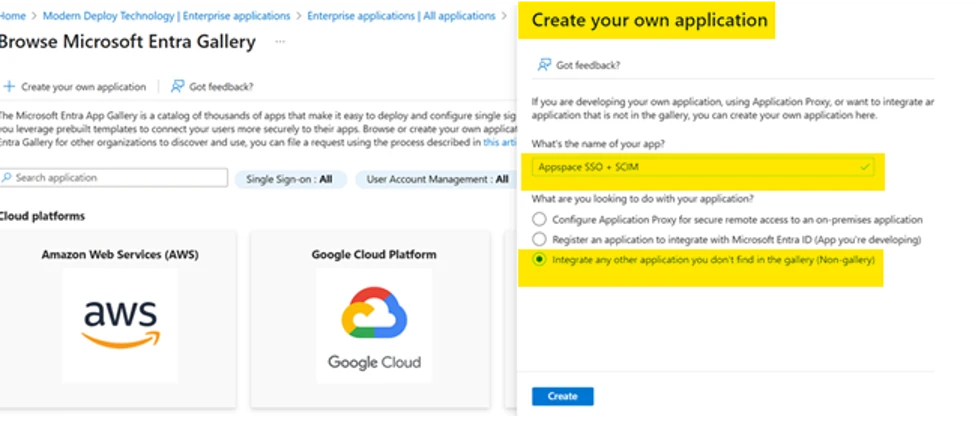
- Select New application.
- Select Create your own application.
- Enter a name for the application, such as Appspace SSO. If you also plan to configure SCIM provisioning, you can use a name such as Appspace SSO + SCIM.
- Select Integrate any other application you don't find in the gallery (Non-gallery).
- Create the application.
Choose whether assignment is required
Entra ID can require users to be explicitly assigned to the Appspace application before they can sign in.
This setting is separate from SCIM provisioning. SCIM determines which users and groups are created in Appspace, while Entra ID application assignment can determine who is allowed to authenticate.
Requiring assignment can be useful for:
- Staged rollouts
- Role-based access
- Audit and compliance requirements
Configure SAML
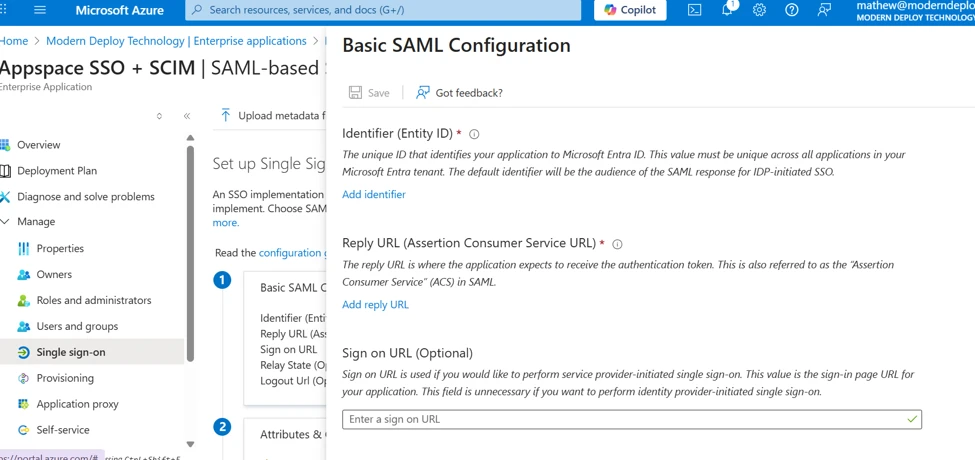
- Open the Appspace enterprise application in Entra ID.
- Go to Single sign-on.
- Select SAML.
- Configure the Identifier (Entity ID) as https://cloud.appspace.com.
- For the Reply URL, enter the Assertion URL shown on the Appspace Account Authentication page.
Configure attributes and claims
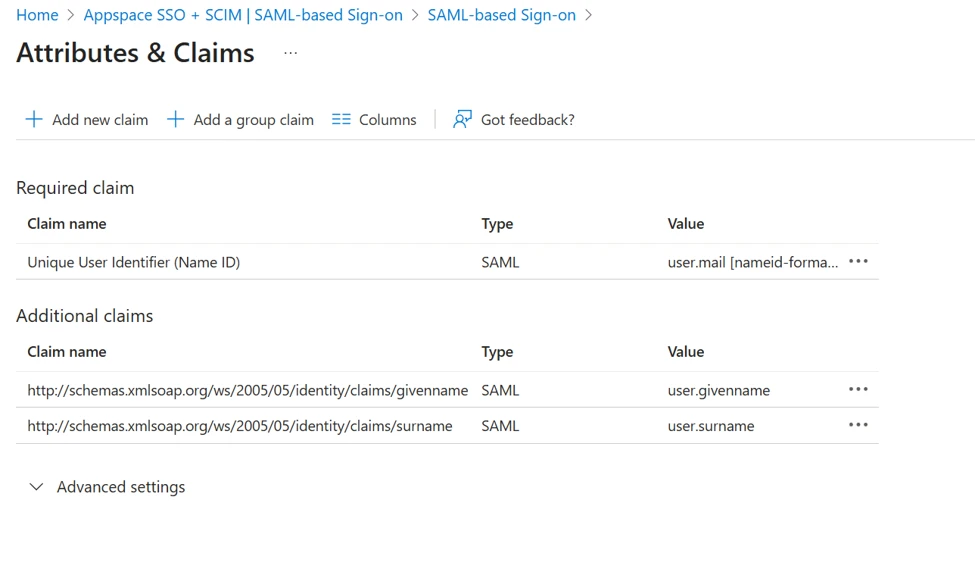
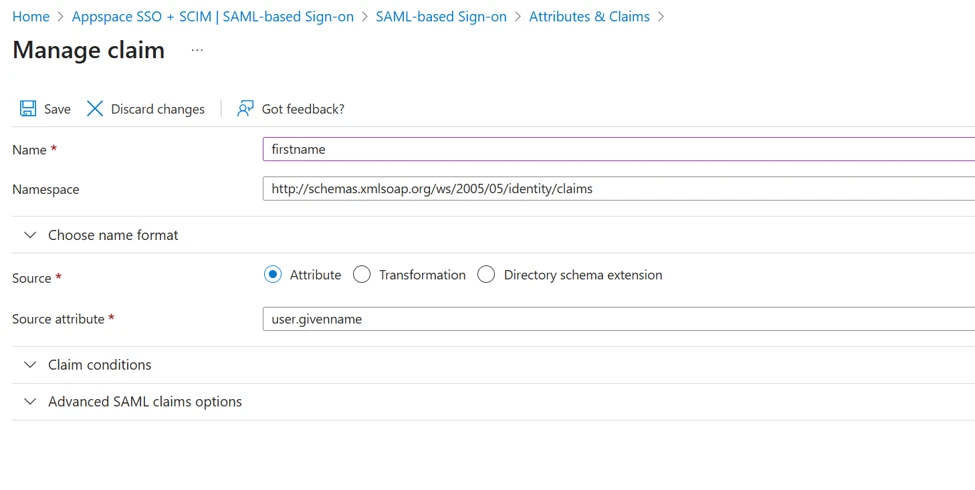
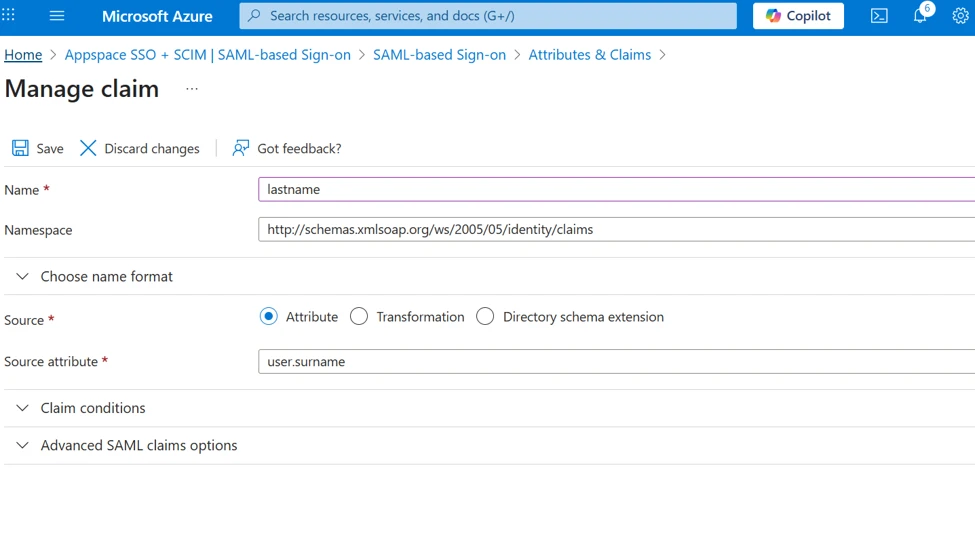
Configure the following SAML claims so user information matches the Appspace user record:
| Claim | Entra ID value |
| firstname | user.givenname |
| lastname | user.surname |
| Unique User Identifier | user.mail |
- In Entra ID, edit Attributes & Claims.
- Set the Unique User Identifier to user.mail.
- Map the user's given name to firstname.
- Map the user's surname to lastname.
Download the Federation Metadata XML
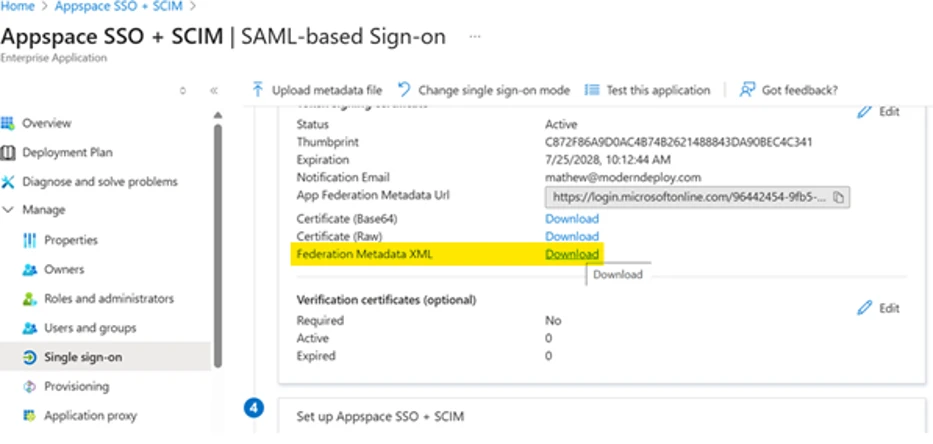
- Return to the SAML configuration page in Entra ID.
- Locate the SAML certificate section.
- Download the Federation Metadata XML file.
Connect Entra ID to Appspace
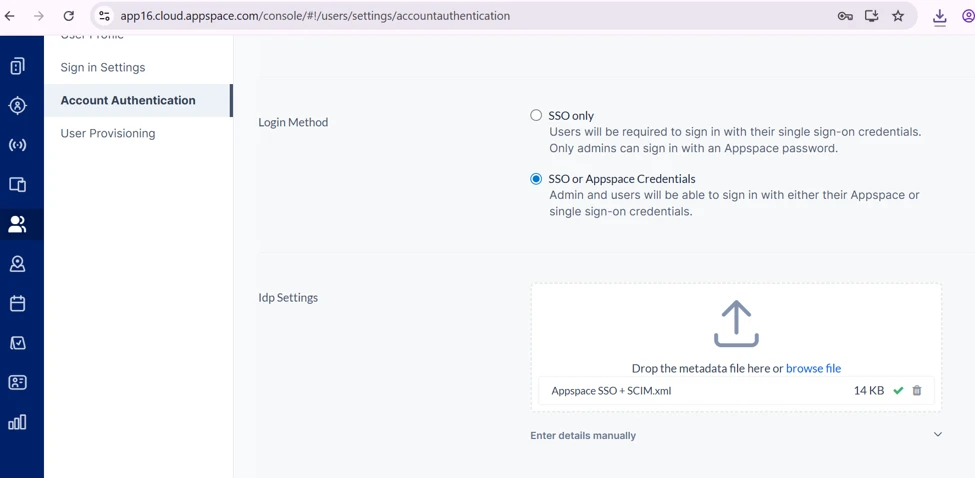
- Return to Users > Settings > Account Authentication in Appspace.
- Scroll to the identity provider configuration.
- Upload the Federation Metadata XML file you downloaded from Entra ID.
- Confirm that Appspace indicates the file was successfully uploaded.
Test the configuration
- Return to the Appspace enterprise application in Entra ID.
- Use the SAML sign-in test.
- Verify that an assigned user can successfully authenticate to Appspace.
If you also want Entra ID to automatically create, update, deactivate, and organize Appspace users, continue with Configure User and Group Provisioning with Microsoft Entra ID.