




Note:
Brand Center is currently available as a Limited Release and may not be enabled for all customers. General availability will be announced in a future release.
Brand Center in Appspace provides a centralized location to configure and manage your organization’s visual identity. Administrators can define brand logos, colors, fonts, and interface styling for supported Employee Communications experiences.
Configured brand assets are also available in supported content creation workflows, helping content creators use approved logos, colors, and fonts consistently.
Note:
The following cards currently inherit brand settings from the default brand to provide a consistent experience across the platform:
-
Announcement Card
-
AI Generate Card
-
Room Booking Card
-
Schedule Board Card
Important:
- A total of 4 cards currently inherit brand settings from the default brand.
- The Desk Booking Card theme does not inherit brand settings from the default brand.
- Brand inheritance applies to newly created cards only; existing cards are unaffected.
- Announcement Card: Brand settings from the default brand are inherited by the Announcement Card and all of its themes when a new card is created.
-
Options configured in the Visitor Kiosk Card’s Design section override settings inherited from the Brand Centre.
Field Mappings and Card Details
This table shows how brand settings from the default brand map to fields in the inheriting cards (Announcement Card, AI Generate Card, Room Booking Card, and Schedule Board Card).
| Card Field Mapping | Announcement Card | AI Generate Card | Room Booking Card | Schedule Board Card | Visitor Kiosk Card |
|---|---|---|---|---|---|
| Background | Yes | Yes | Yes | Header Background Color or Image | Background Color |
| Accent | No | No | No | No | Button Color |
| Text | Headline Summary | Headline Summary | No | Header Title Table Text Color | Text Color, Button Text Color |
| Fonts - Header | Headline | Topic Headline | No | No | No |
| Fonts - Body | Summary | Summary | No | No | No |
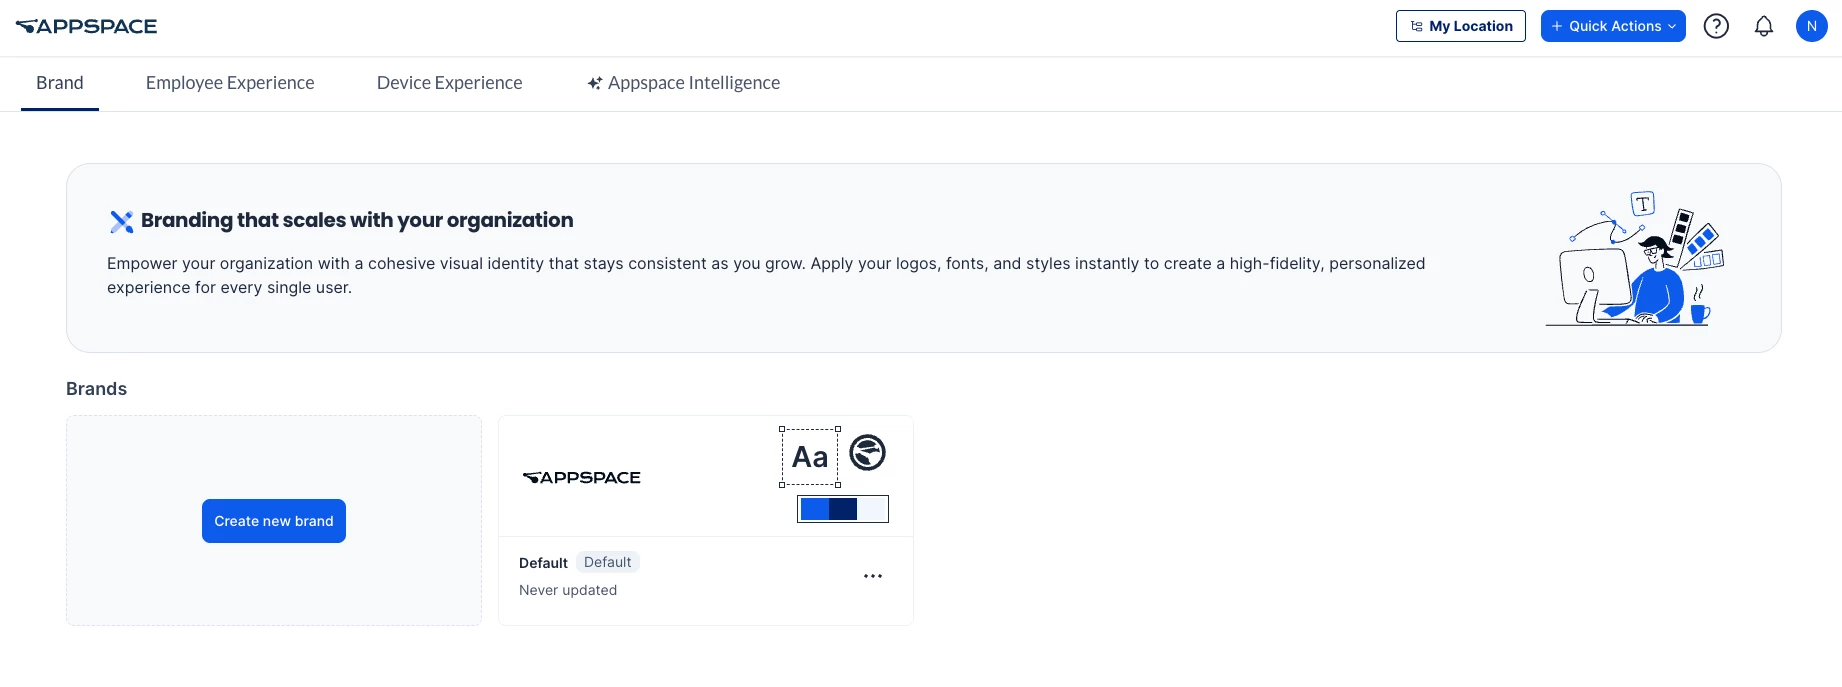
This article outlines the configuration steps for Brand Center settings.
Prerequisites
-
Account Owner permissions are required to configure Brand Center settings.
Create a Brand
-
Log in to the Appspace console.
-
Click the ☰ Appspace menu.
-
Select Settings > Configuration.
-
Click the Brand tab.
-
Click Create new brand.
The Configure Brand panel is displayed.
-
In the Name field, enter a name for the brand.
-
In the Logos section, configure the following:
-
Dark – Upload or select an SVG or PNG logo. The recommended size is 200px x 80px.
-
Light – Upload or select an SVG or PNG logo. The recommended size is 200px x 80px.
-
Icon – Upload or select an SVG or PNG icon. The recommended size is 80px x 80px.
-
-
In the Design section, configure the following:
-
Accent – Sets the primary color for branding elements, including buttons and links.
-
Dark – Sets the secondary color for branding and UI elements.
-
Light – Sets a light tint for subtle brandable UI elements.
-
Extended Palette – Defines additional colors used to brand the app.
-
Data Visualization Palette – Defines colors available for data visualization and supported color selection options.
-
-
In the Typography section, configure the following:
-
Headers – Select a font for headings, or click Upload font to upload a custom font.
-
Body – Select a font for body text, or click Upload font to upload a custom font.
-
-
In the User Interface section, configure the following:
-
Background
-
Background Color – Sets the primary surface color behind components and content.
-
-
Links
-
Default Color – Sets the primary color for text-based links.
-
Hover Color – Sets the color for text-based links when hovered.
-
Link Style – Select how links are displayed.
-
-
Navigation
-
Navigation Background – Sets the background color of the navigation bar.
-
Default Color – Sets the default color of navigation links.
-
Hover & Active Color – Sets the color of navigation links when hovered or selected.
-
-
Border Radius
-
Buttons – Adjust the slider to define the button corner radius in pixels.
-
Avatars – Select Round, Rounded Corners, or Square.
-
Page Components – Select Rounded Corners or Square.
-
-
-
In the Devices section, configure the following:
-
Card Theme Palette – Select the Dark, Light, or Custom card theme palette.
-
Post Device Template > Post Type – Select:
-
Text Only
-
Image
-
Multiple Media
-
Event
-
Story
-
-
Note:
Device settings are system-wide and are currently sourced only from the default brand.
-
Click Save.
Manage Brands
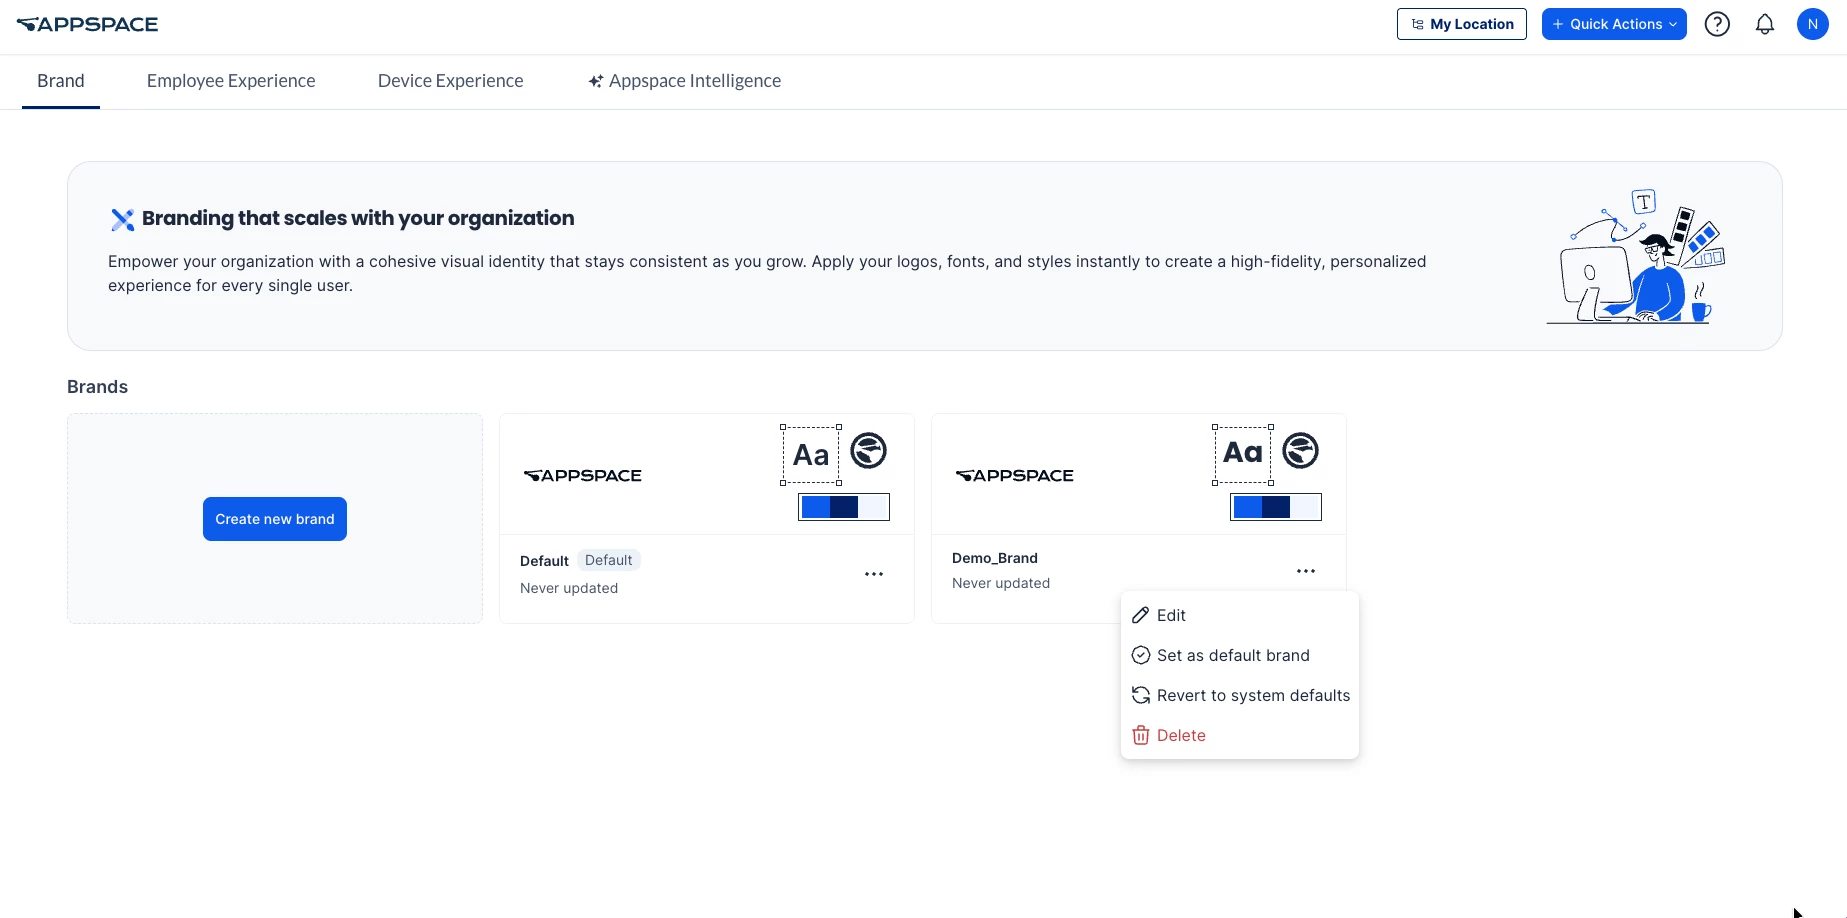
Use the Brand tab to edit an existing brand, set a brand as the default, restore the system default settings, or delete a brand.
-
Log in to the Appspace console.
-
Click the ☰ Appspace menu.
-
Select Settings > Configuration.
-
Click the Brand tab.
-
Locate the brand you want to manage.
-
Click the ellipsis (•••) menu on the brand card.
-
Select one of the following options:
-
Edit – Opens the Configure Brand panel. Update the required settings, then click Save.
-
Set as default brand – Sets the selected brand as the default brand.
-
Revert to system defaults – Restores the brand configuration to the system default settings.
-
Delete – Deletes the selected brand.
-