
Content at the Speed of Thought: Appspace AI for Signage
Appspace AI empowers you to create professional, on-brand signage content without the need for designers, expensive stock photos, or complex software. By automatically adhering to your brand's unique colors, fonts, style and tone of voice, the AI ensures consistent alignment with your identity. Just describe what you need, and AI generates it — ready to display in seconds. Here's how to get started.
What Appspace AI Does
Appspace AI turns your ideas into finished content using these core capabilities:
- Generate Cards — Type what you want to announce, pick a style, and get a branded graphic ready for your screens
- Generate Images — Describe a scene and create custom visuals without stock photo libraries
- Smart Text — Get help writing captions, articles, or announcements in your company's voice
- Card Editor AI — Use AI within any existing card to generate or refine headlines, summaries, images, and articles
- Translation Control — Add multilingual translations to AI cards and configure which languages display per location or device, including the ability to exclude English entirely
Perfect for: Safety alerts, event announcements, employee spotlights, policy reminders, celebration posts, or any message that needs to get on screens fast.
What This Guide Covers
- Enabling AI features
- Selecting AI providers for content features
- Adding company context for brand alignment
- Configuring image generation guidelines
- Creating AI-generated cards for digital signage
- Generating custom images
- Configuring translation languages for AI cards
- Tips for better results
Prerequisites
- Account Owner or Portal Administrator role — Required to enable AI features
- Platform license — Required for users who will create AI content
Step One: Enable AI (Admin Only)
Before anyone can use AI features, an Account Owner or Portal Administrator needs to turn them on.
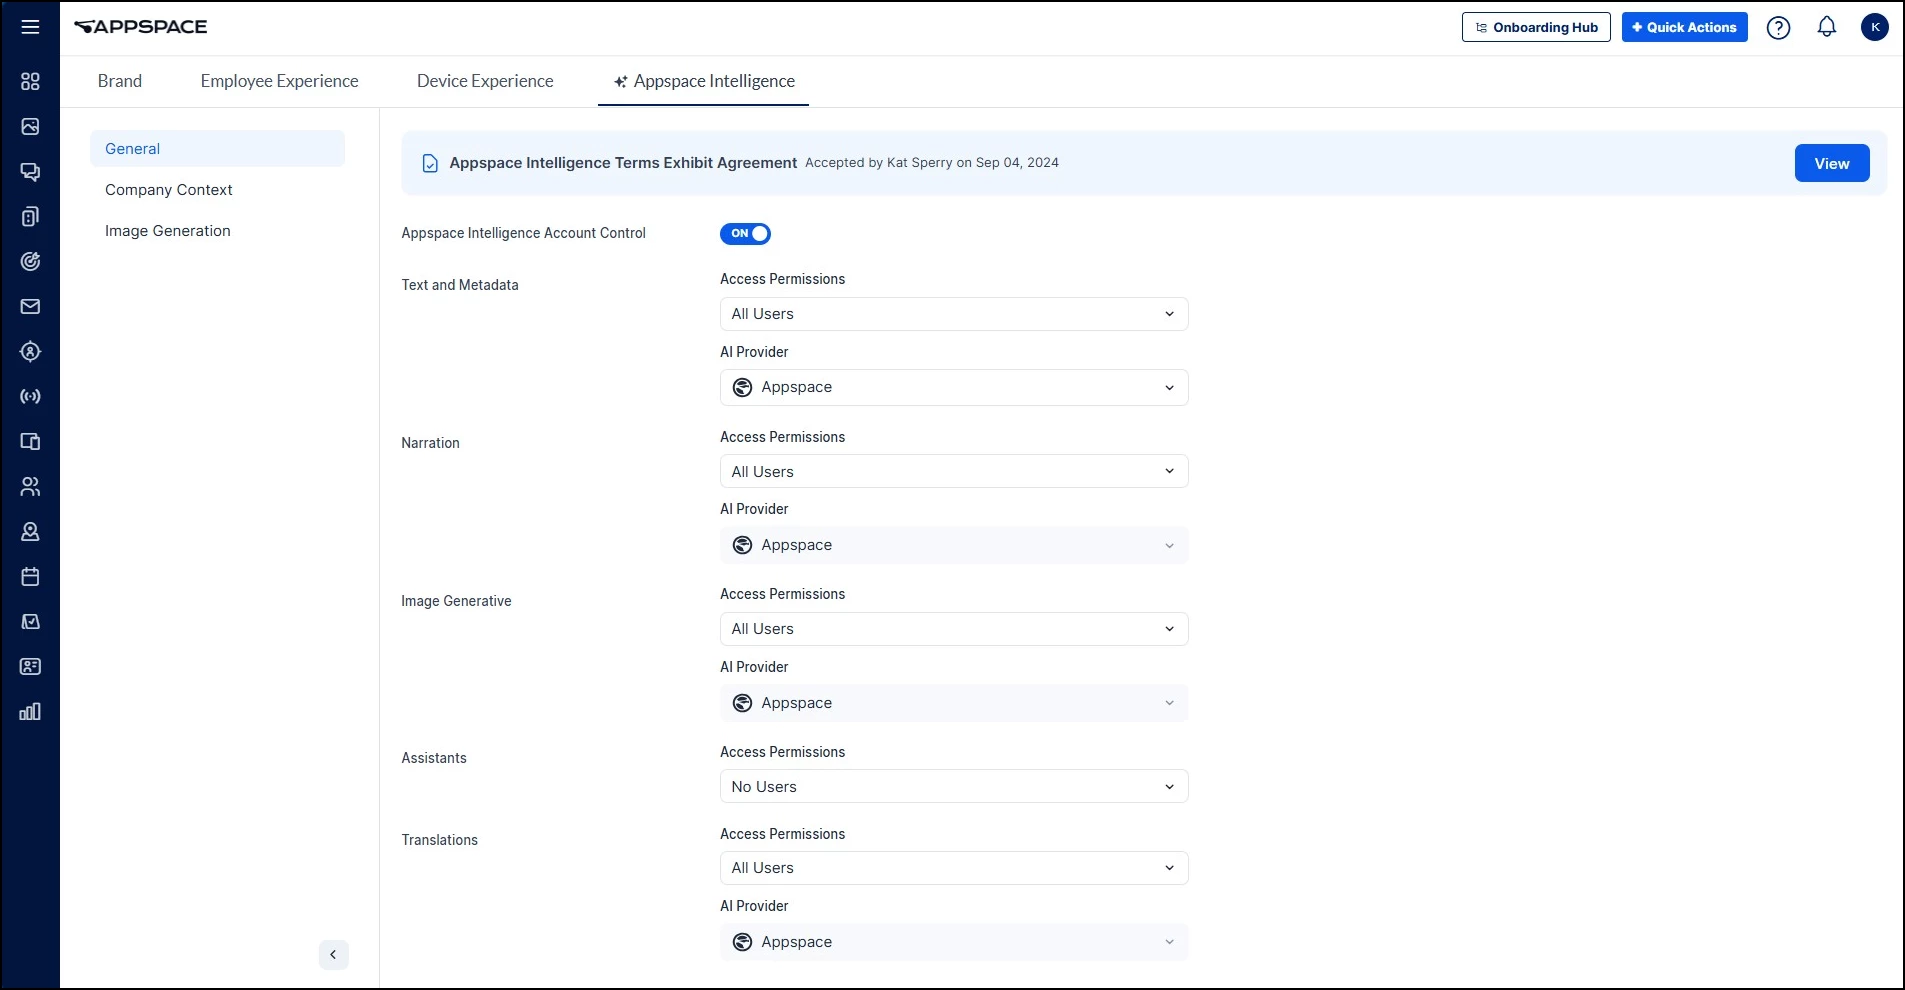
- Go to Settings > App Configuration > Appspace Intelligence.
- Review and accept the Appspace Intelligence Terms Exhibit Agreement (first time only).
- Toggle Appspace Intelligence Account Control to ON.
- The settings page displays five feature categories, each with its own Access Permissions and AI Provider dropdowns. For AI-generated signage content, configure the following categories:
- Text and Metadata — Powers AI text generation for cards, captions, and announcements
- Image Generative — Powers AI image creation
- Translations — Powers AI translation for multilingual cards
- For each relevant category, set Access Permissions to control who can use that feature:
- All Users — Everyone with a Platform license can create AI content
- Publishers and Account Owners Only — Limit to content creators
- Specific Users, Groups or Locations — Control access by team or department
- For each relevant category, select your preferred AI Provider (Appspace, Azure, or Google). You can assign different providers to different categories based on your organization's preferences.
- Click Save.
Note: The fifth category, Assistants, controls Conversational AI and custom AI Assistants. It is not required for digital signage content creation.
Step Two: Configure AI Guidelines (Admin Only — Optional but Recommended)
Help Appspace AI create content that sounds and looks like your brand by providing context in two areas, both found under Settings > Configuration > Appspace Intelligence.
Company Context
- Select Company Context from the left navigation.
- Enter your Company Background — a brief description of your mission, values, and culture.
- Enter your Tone of Voice — how you communicate (professional, casual, inspirational, etc.). You can use the AI sparkle button within either field to help draft your context.
Example: “We’re a healthcare organization focused on patient safety and staff wellbeing. Our tone is warm, professional, and supportive.”
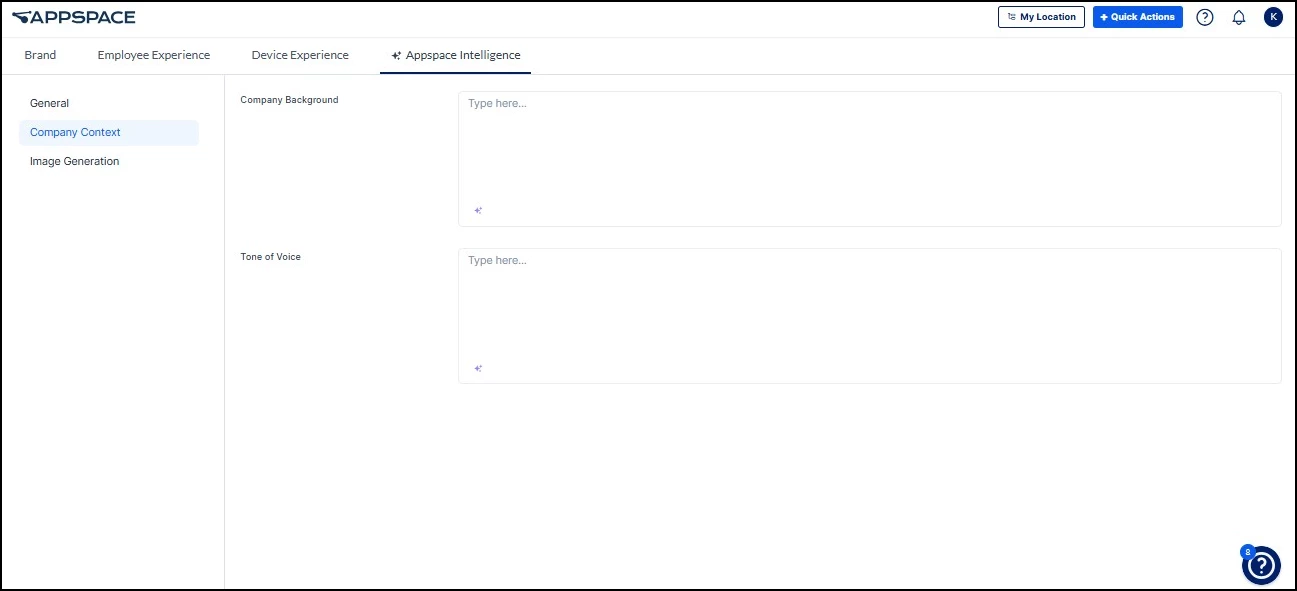
Image Generation
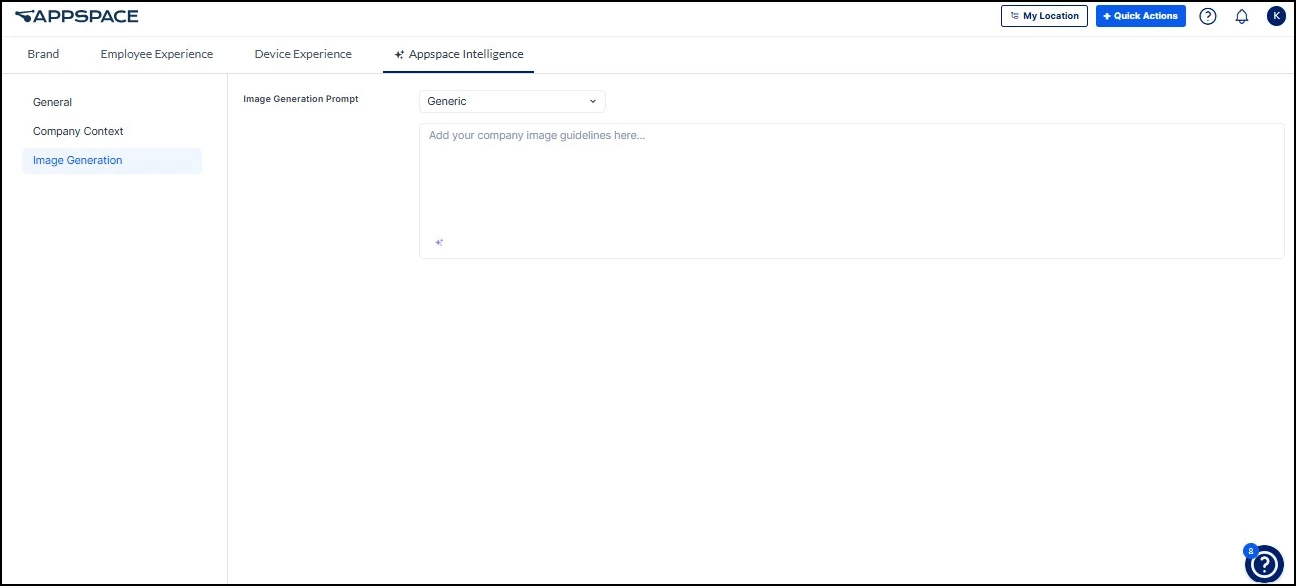
- Select Image Generation from the left navigation.
- In the Image Generation Prompt dropdown, select a content type: Generic or Cards (Signage) for Digital Signage.
- Enter your image guidelines for that content type in the text field. Use the AI sparkle button to help draft guidelines if needed.
- Repeat for each content type you want to configure.
Example: “Use bright, natural lighting with diverse people in modern workplace settings. Avoid staged or overly corporate-looking photos. Prefer warm tones such as amber and terracotta rather than cool blues or grays.”
Step Three: Create Your First AI Card
Requires: AI Generative enabled in Appspace Intelligence settings.
Now the fun part — creating content without design skills.
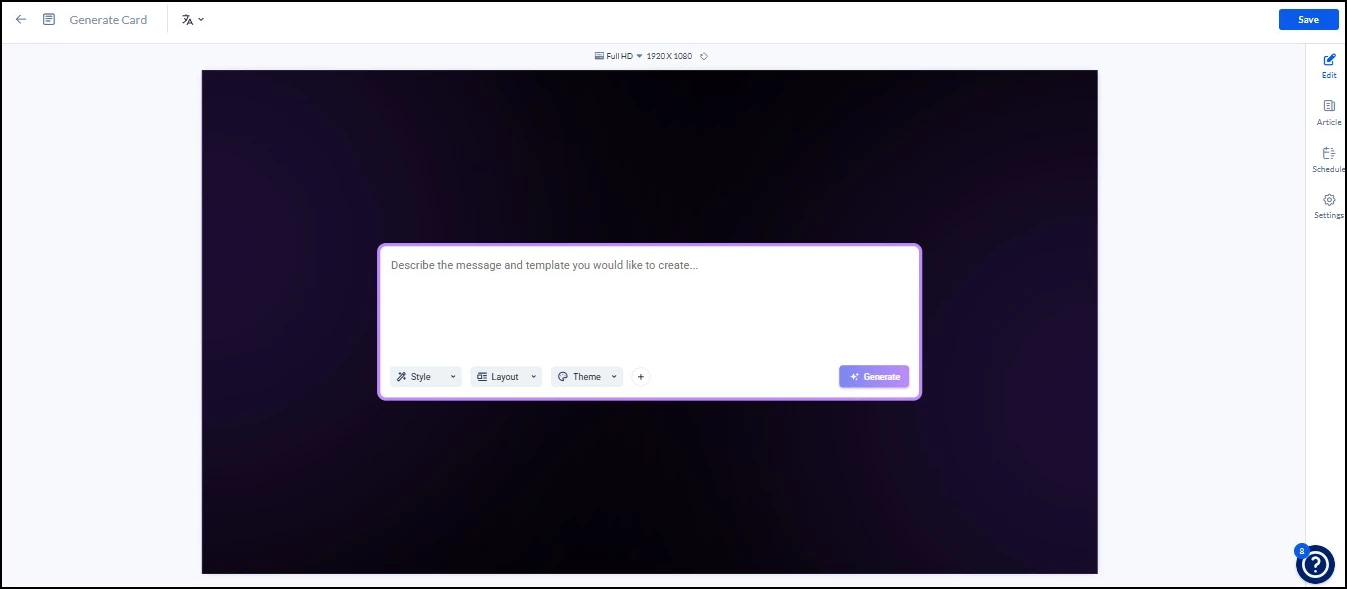
- Click +Quick Action > Create Card. Alternatively, click into the Library and folder you want the card in, click the +Create dropdown, then Generate Card.
- Give it a title (this becomes your filename).
- Describe what you want:
- "Create a safety reminder about wearing hard hats in the warehouse"
- "Announce the summer BBQ on Friday at noon in the courtyard"
- "Celebrate Sarah from HR for 10 years of service"
- Choose your visual preferences:
- Style — Realistic, Abstract, Minimalistic, Pop Art, etc.
- Layout — Text only, media background, split screen, etc.
- Theme — Light, Dark, or Branded
- You can also upload any media you would like to include in the template.
- Click Generate.
- Review the result. You can ask the AI to regenerate the card, edit the prompt, or create a new card.
- When satisfied, click Save.
- Add to a channel and publish to your screens.
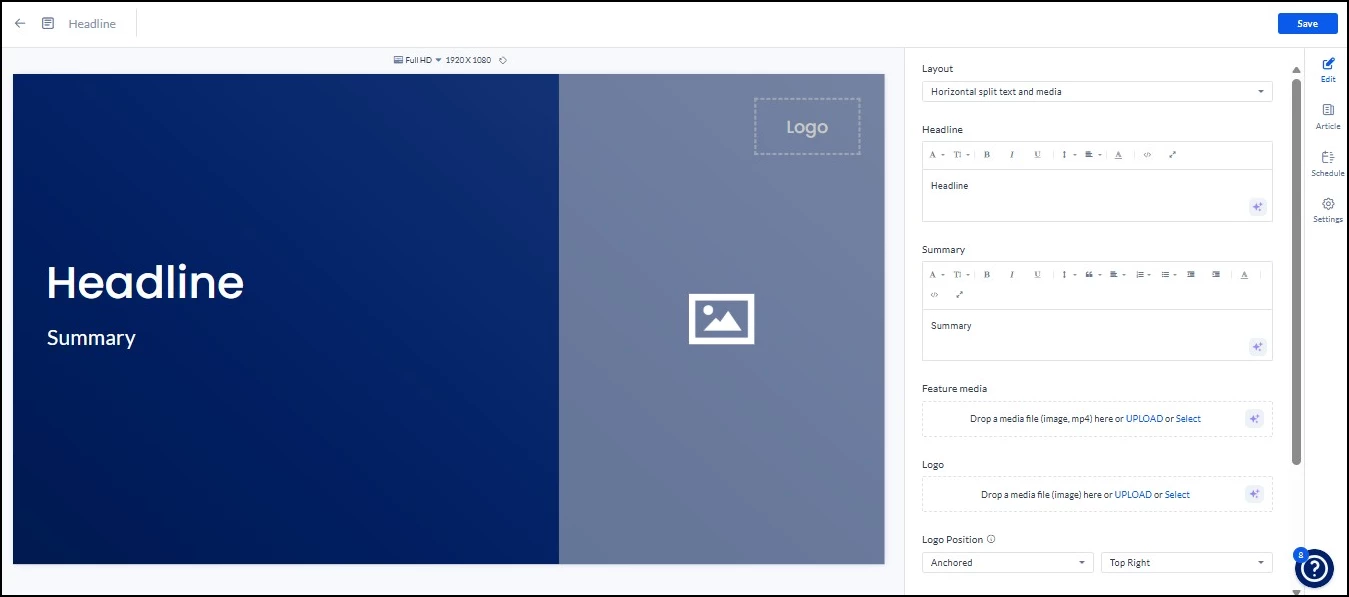
Step Four: Using AI in the Card Editor
Requires: AI Generative enabled in Appspace Intelligence settings.
Already have a card and just need to improve one element? You don't need to generate a whole new card. AI is available directly inside the Card Editor for any existing card.
In the Card Editor, you can use AI to generate or refine content in individual fields — headlines, summaries, images, articles, and captions — without rebuilding the entire card.
To use AI in the Card Editor:
- Go to the Edit or Article window of your card.
- Click the sparkle button at the bottom right of the input field where you want to generate content.
- Enter a descriptive prompt and click Generate.
- For text options, you can ask the AI to change the tone, simplify the writing, or make it shorter or longer.
- For image options, the AI will generate an image based on the text in your headline and summary. You can then edit the prompt, style, tools, and colors or regenerate the image.
- Once satisfied, click Insert.
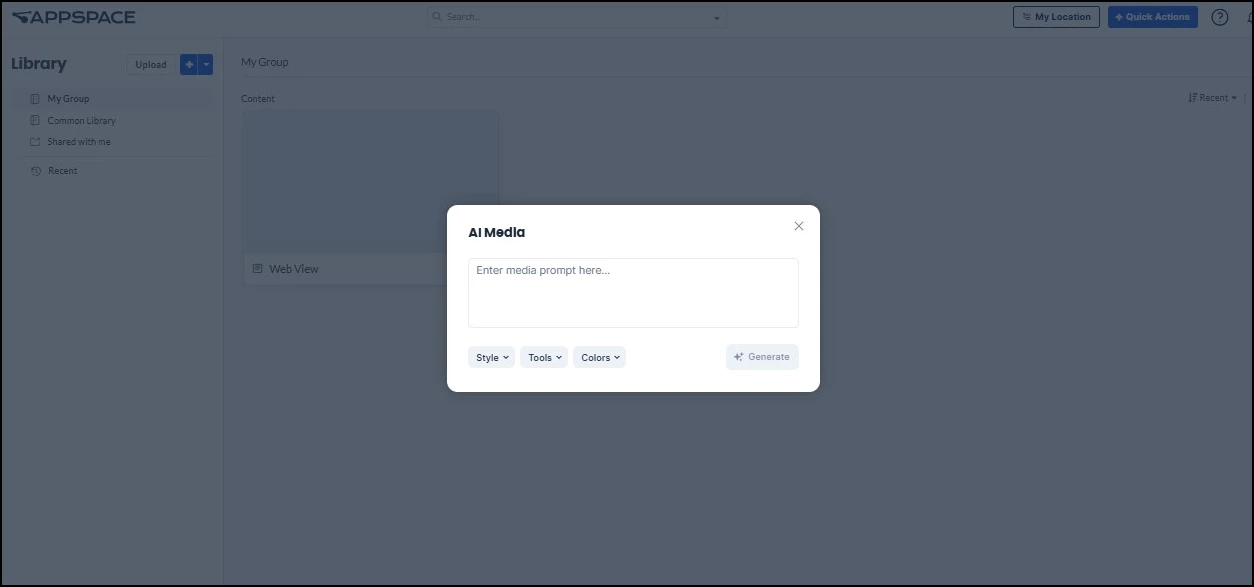
Step Five: Generate Custom Images
Requires: AI Generative enabled in Appspace Intelligence settings.
Need a specific visual but don't have the photo? Generate it.
- Go to Library > +Create > Generate Media.
- Describe what you want to see:
- "Professional warehouse worker wearing safety gear"
- "Modern office break room with people chatting"
- "Abstract tech background with blue and green colors"
- Click Generate.
- Refine using tools:
- Style options — Corporate, Artistic, Illustration, Vector art
- Editing tools — Remove background, brighten, zoom, blur
- Color adjustments — Apply color schemes or go black & white
- Click Add to library when ready.
- Use in cards, channels, or posts.
Step Six: Adding Translations to AI Cards
Requires: AI Translations enabled in Appspace Intelligence settings (for Part A). Part B is a device/location configuration and does not require an AI capability toggle.
AI cards can be automatically translated into any language available in Appspace. This is a two-part process: first, add translations to the card itself, then configure which language each device displays.
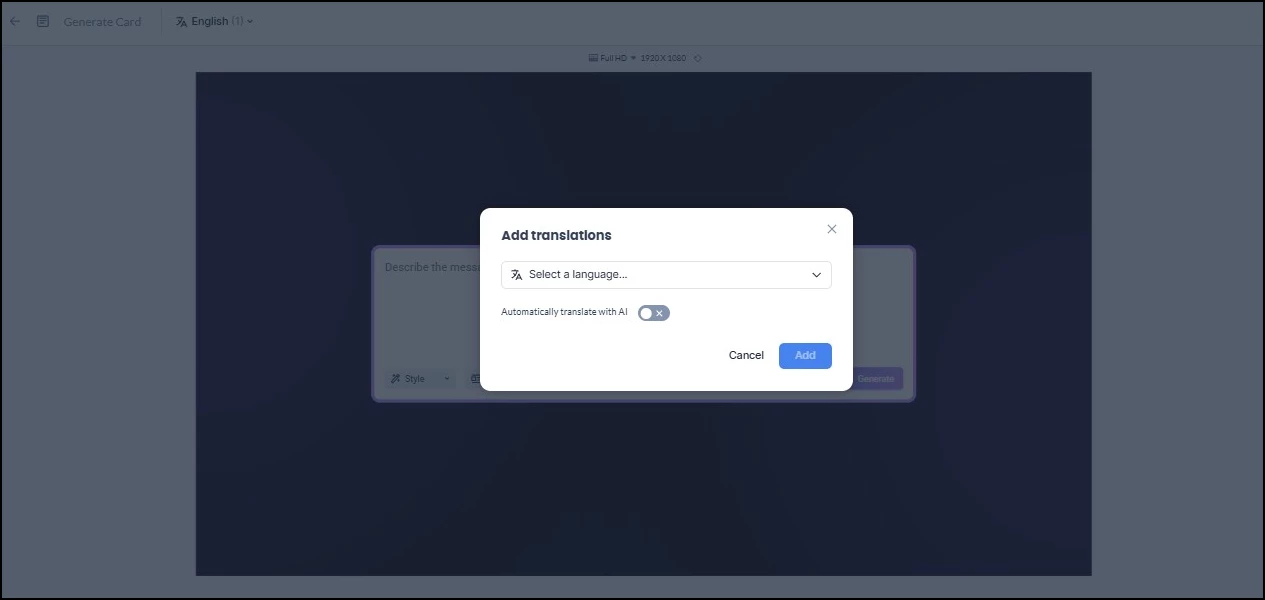
Part A: Translate the Card Content
To add translations to an AI card:
- At the top of the AI card, click the languages dropdown.
- Click Select default language and choose your default language from the dropdown.
- Click Save.
- Click the languages dropdown again and select +Add translations.
- In the Add translations window, choose the languages you want to add from the Select a language dropdown.
- Toggle on Automatically translate with AI to enable Appspace to translate your AI card into the selected languages.
- Click Add.
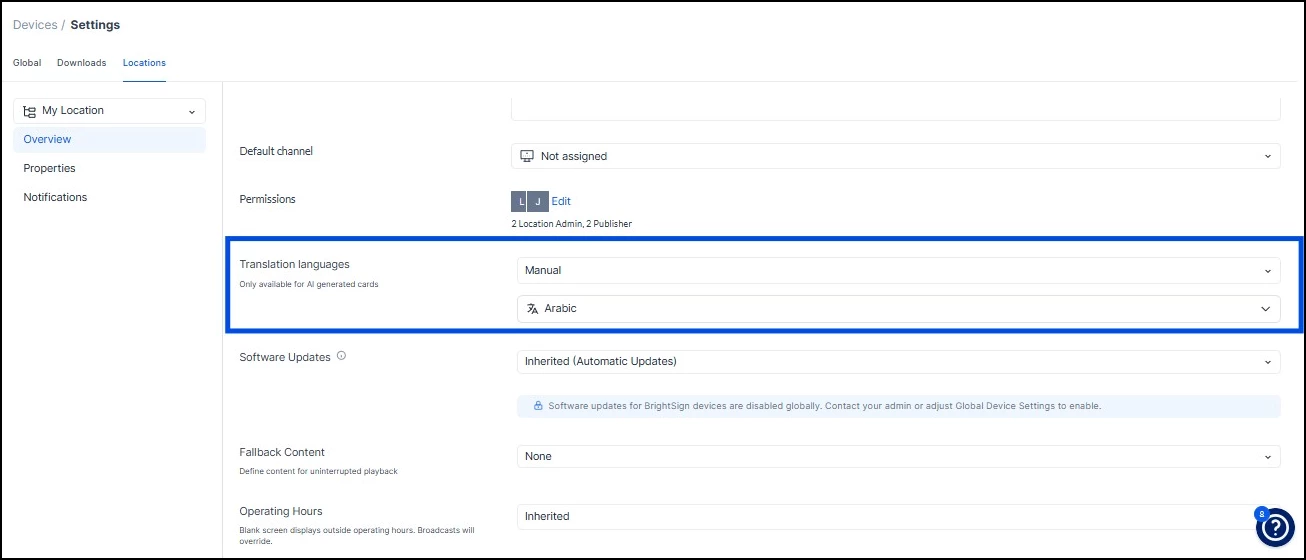
Part B: Configure Which Language Each Device Displays
Once your card has multiple translations, the language that displays on each device is determined by the translation language settings configured for that device's location. This means you can publish one channel with one card to multiple devices, and each device displays the correct language for its audience.
To configure which languages display:
- Navigate to Devices > Settings > Locations.
- Select the location you want to configure.
- In the location properties, select the languages that should display on devices at that location. English can be deselected if your audience at that location does not need it.
- At least one language must remain selected at all times. If you click Unselect All, the system automatically reverts to English as the default.
- Click Save.
Translation languages can also be configured at the individual device level, allowing different devices in the same location to display content in different languages.
Example: Your organization creates a single AI card with both English and Arabic translations. The card is added to one channel, and that channel is published to two devices. Device A is in a building configured for English — it displays the English version. Device B is in a building configured for Arabic — it displays the Arabic version. Same channel, same content, different languages based on location settings.
Note: Translation language configuration currently applies to AI card types only. Support for non-AI card types is planned for a future release.
Real-World Examples
Scenario 1: Last-Minute Safety Alert
Old way: Email designer, wait for mockup, revise, wait again, publish tomorrow.
With AI: Type "Remind employees about wet floor safety," generate card, publish in 2 minutes.
Scenario 2: Monthly Employee Spotlight
Old way: Hunt for stock photos, struggle with design software, spend 30 minutes per card.
With AI: Generate professional cards for all spotlights in under 10 minutes total.
Scenario 3: Event Announcement Without Photos
Old way: Search stock photo sites, download watermarked images, settle for generic.
With AI: Describe your event, generate custom visuals that match your brand.
Scenario 4: Multilingual Signage Across Locations
Old way: Create separate cards for each language, manage multiple channels, manually assign each to the right device.
With AI: Create one card, add translations with a click, publish one channel — each device displays the right language automatically based on its location settings.
Tips for Better Results
Writing Effective Prompts
- Be specific: "Safety reminder about forklift operations" beats "safety message"
- Include context: "Casual Friday BBQ announcement with summer vibes" gives AI direction
- Mention your audience: "Message for warehouse employees" vs. "Message for executives"
Making AI Work for Signage
- Use Branded theme to match your company colors automatically
- Choose Media Background or Spotlight layouts for screens with high visual impact
- Pick Minimalistic or Vector styles for clean, readable signage
- Generate multiple versions and test which gets attention
- Use the Card Editor AI to refine individual elements on existing cards rather than regenerating the entire template
- Set up translation languages per location or device before publishing multilingual content — this ensures each audience sees the right language automatically without creating separate channels
Quick Reference
| What You Need | Use This | Time Savings |
|---|---|---|
| Announcement graphic | Generate Card | 15-30 minutes |
| Improve an existing card | Card Editor AI (sparkle button) | 5-15 minutes |
| Custom image/photo | Generate Image | 10-20 minutes |
| Caption or article text | Ask AI (in any text field) | 5-10 minutes |
| Multiple language versions | AI Translation + location/device language settings | Hours per language |
Bottom Line: Appspace AI removes the biggest bottleneck in workplace communications: waiting for design resources. Turn on AI, describe what you need, and get professional content on screens in minutes instead of days.
- Setup time: 5-10 minutes to enable
- First content creation: 2-5 minutes
- Ongoing: Create content as fast as you can type
No design degree required.