
Appspace Orchestration for Digital Signage: User Guide
Introduction
This guide provides information on configuring, setting up prerequisites for, and properly using Appspace Orchestration. This feature empowers organizations to enrich and publish data from disparate sources to various endpoints, including digital signage. It is designed to solve the challenge of sharing information consistently across multiple platforms.
Key Benefits
Using Appspace Orchestration with Digital Signage offers the several benefits
- Effortless Creation: Automatically converts raw data into screen-ready content without the need for manual formatting.
- Professional Consistency: Ensures a consistent, on-brand look across every screen by applying standard templates to data.
- Relevant Messaging: Delivers content needed by specific locations and audiences to boost engagement.
What This Guide Covers
This guide will cover the following topics:
- Configuring a Passport
- Configuring Connectors
- Mapping content data properties
- Defining the Connector output
Prerequisites
Before you can use Appspace Orchestration for Digital Signage, you must meet these requirements:
- A platform license
- Account Owner role
- Signage devices installed and registered
- Appropriate permissions in third-party platforms for integrations
Step One: Configure a Passport
Appspace Orchestration relies on an active Passport to connect third-party services (most commonly Publishing or Library Passports like SharePoint) to Appspace.
- Open the Admin Console’s navigation panel and navigate to Integrations > Passports.
- Under the Passport tab, select +Create Passport.
- Choose a third-party platform from the list and click Connect.
- Follow the authentication workflow for the specific platform to sign in and provide necessary access.
- Once authentication is complete, the Passport will appear under the Passports tab.
Step Two: Configure Connectors
Connectors facilitate content sharing by managing flow and automating content creation from third-party systems.
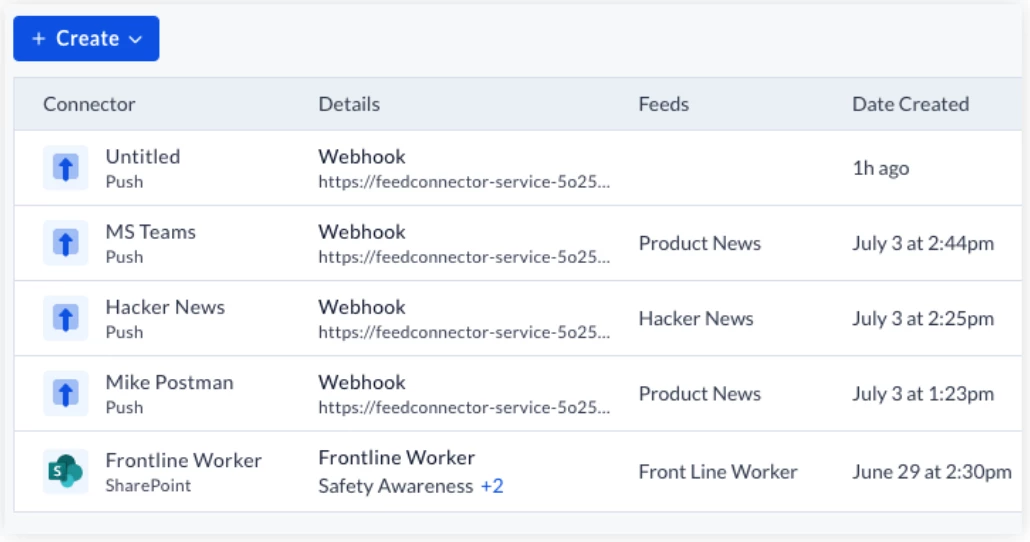
- Open the Admin Console’s navigation panel and go to Integrations > Connectors.
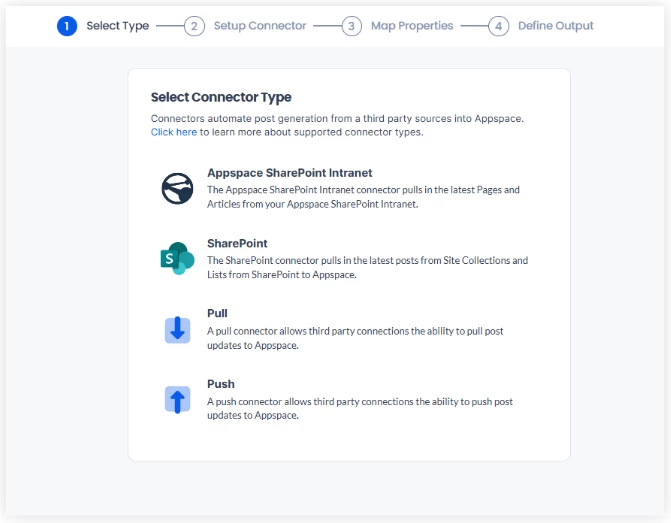
- Click +Create and select a connector type. Available types include:
- Appspace SharePoint Intranet: Pulls Pages and Articles into defined feeds.
- SharePoint: Pulls recent content from Site Collections and Lists.
- Pull: Pulls content from a URL at a specific interval.
- Push: Pushes content from a URL whenever new content is added.
- Enter a Name for the connector and select an active Passport.
- Choose the source (e.g., SharePoint Site and Lists) and click Next.
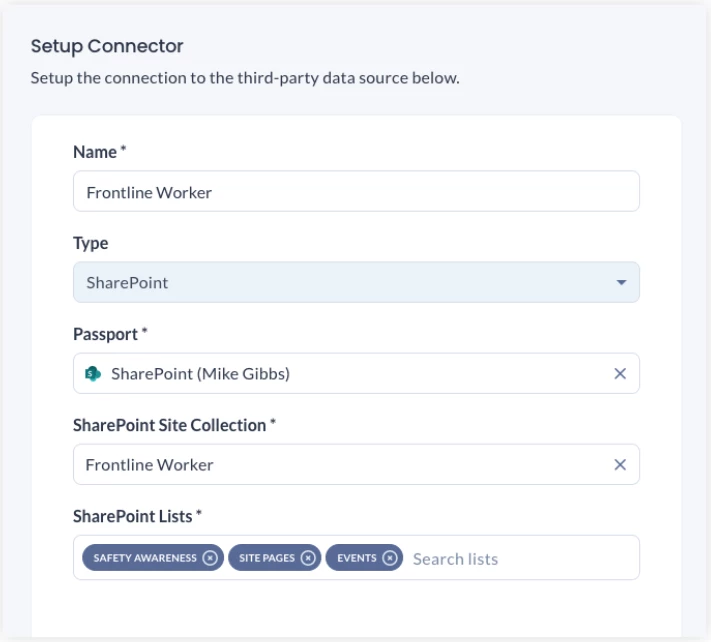
Setting Up a SharePoint Connector
- Select SharePoint as the Connector Type (not Appspace SharePoint Intranet).
- In the Setup Connector window, enter a Name.
- Under Passport, select an existing passport or create a new one.
- Note: You must use the manage site permissions option. The standard SharePoint card passport is not compatible with this connector.
- Choose the source SharePoint Site and select one or more Lists to import content from.
- Once you are done, click Next.
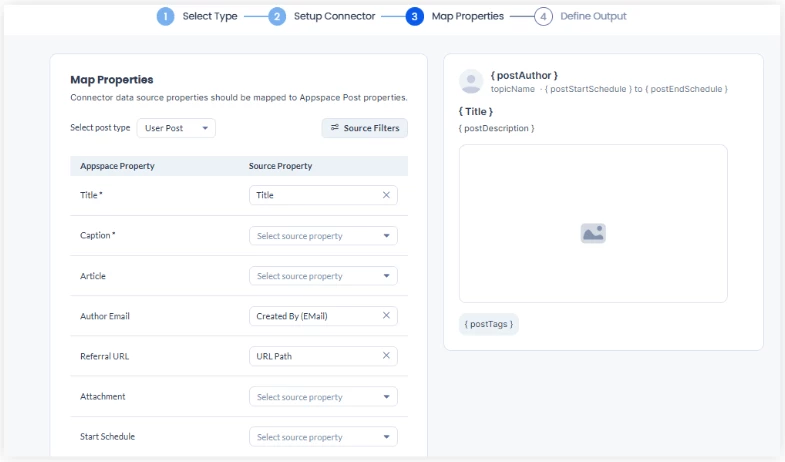
Step Three: Map Content Data Properties
Properties are specific details (title, caption, etc.) that define how data translates into Appspace content.
- Select a Post Type (e.g., User Posts, Event Posts, Page, or Stories).
- Map each Appspace Property to the corresponding Source Property.
- Review the data in the preview and click Save.
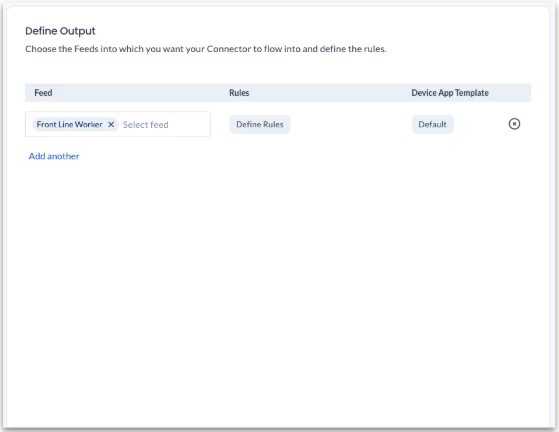
Step Four: Define the Connector Output
Finalize the setup by establishing rules and selecting target feeds.
- In the Output tab, click +Add and select one or more channels for content publication.
- Select the card template the content will use.
- Click Define Rule to set inclusion/exclusion criteria for specific feeds.
- Click Save.
Examples of Rule Conditions
Defined rules determine which content is distributed to specific target feeds.
Use Case | Property | Operator | Value |
|
Priority Messaging: High-priority announcements
| Featured
| Equals
| True
|
|
Tag-Based Segmentation: Routing based on tags
| Tags
| Contains
| Safety
|
|
Content Timeliness: Excluding items without end dates
| End Schedule
| Is Empty
| N/A
|
|
Source Routing: Isolating a specific SharePoint list
| SharePoint List
| Contains
| IT Alerts
|