
Connect, Discover, and Personalize Your Workforce Directory: A Guide to Employee Profile Enhancements
Employee Profiles in Appspace have been expanded to give administrators more control over what profile information is captured, how it is displayed, and how employees can use it to find and connect with colleagues. With new input types, configurable sidebar layouts, and filtering across custom fields, organizations can move beyond basic contact details and build richer, more useful employee directories.
Key Benefits
Enhanced Employee Profiles help your organization:
- Capture Richer Employee Information — Profiles support expanded details beyond basic contact info, including roles, expertise, skills, and interests, giving employees a more complete view of their colleagues
- Customize Layouts and Fields — Admins can define custom profile sections and layouts using input types like Selection Lists, Dates, and Paragraph Text, enabling each organization to represent their people data in ways that match their culture and operational needs
- Enable Targeted Communications — New custom field types are supported in Audience Builder, enabling targeted announcements, recognition campaigns, and communications based on employee attributes. For more information, see the Audience Builder guide.
What This Guide Covers
This guide walks you through the following:
- Understanding what changed with enhanced Employee Profiles
- Creating custom profile fields with new input types
- Configuring the profile sidebar layout, categories, widgets, and filters
- Updating and viewing enhanced profiles as an employee
Prerequisites
Before configuring enhanced Employee Profiles, ensure the following:
- Account Owner or Location Admin Role — You must be assigned the Account Owner or Location Admin role to access User Profile settings and configure profile fields and layouts. Employees can always edit their own profile information but cannot change the profile layout.
- People Directory Configured (if applicable) — If your organization syncs user data from an external source such as Microsoft Entra ID, ensure your People Directory provider is configured under Users > Settings > People Directory. Note that configuring the People Directory is separate from SCIM provisioning. To use SCIM as a field source in Phase 1, your SCIM integration must also be set up under Users > Settings > User Provisioning.
What Changed: Enhanced Employee Profiles
Previously, profile fields were limited to text and number input types, which restricted formatting, filtering, and the ability to ensure consistency across your directory. With this enhancement, administrators can now create fields with structured input types, configure how profile information is displayed, and give employees a more complete picture of their colleagues.
These enhancements focus on two core areas:
- Expanded Profile Fields — New input types allow you to capture more detailed and varied information about each employee, and new custom field types are supported in Audience Builder for targeted communications.
- Configurable Profile Layouts — Admins can control which fields, categories, and widgets appear on the profile sidebar, and in what order.
The sections below walk through each phase of the setup process: creating a profile field, configuring the sidebar layout, and viewing the results on employee profiles.
Phase 1: Creating a Custom Profile Field
Custom profile fields allow you to capture information specific to your organization (such as certifications, skills, languages, or project assignments) that goes beyond the default system fields.
To create a new profile field:
- Navigate to Users > Settings > User Profile.
- Click the + ADD button at the top of the field list.
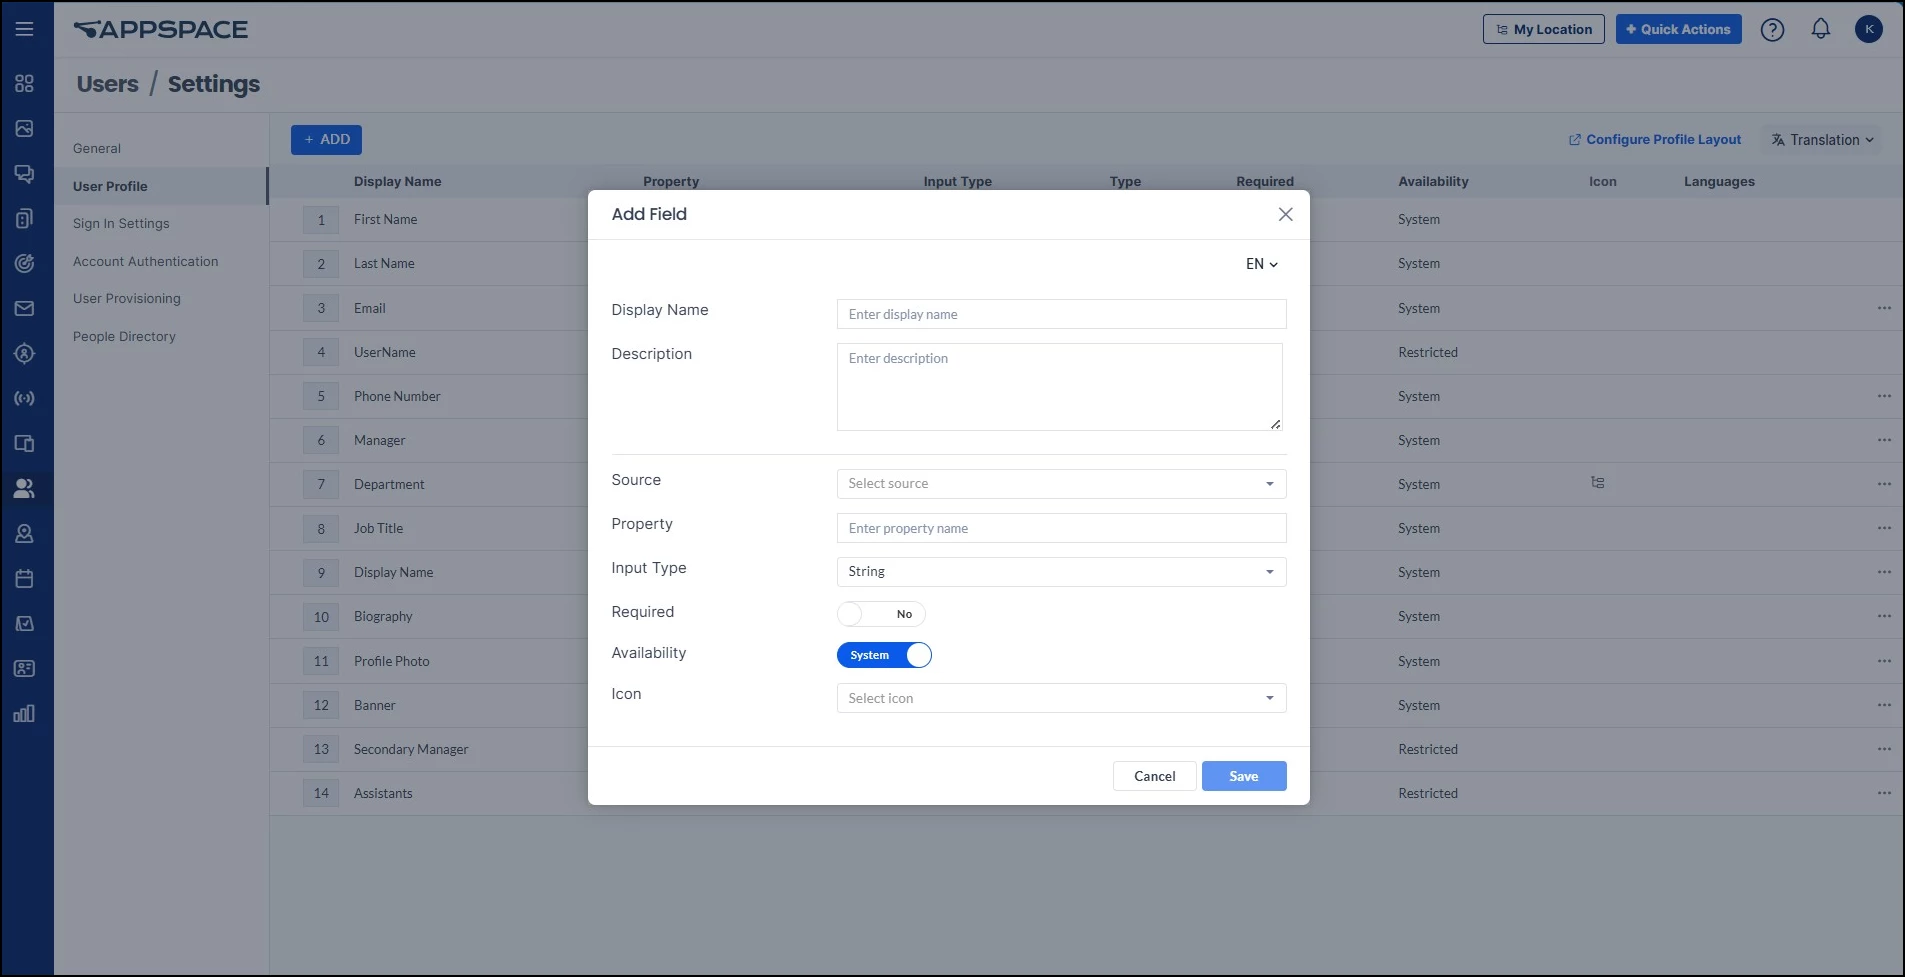
- In the Add Field dialog, configure the field using the settings described below.
The Add Field dialog includes the following settings:
- Description — An optional description for the field.
- Source — Determines who can populate the field. Options include User (employee edits it themselves), Admin (only administrators can set the value), and SCIM (populated automatically from your identity provider).
- Property — The internal property name for the field (e.g., “certifications”). Property names must be all lowercase with no spaces.
- Input Type — The type of data the field accepts. Options include Number, String, Paragraph Text, Date, Selection List, Email, URL, and Phone.
- Required — Whether the field must be filled in.
- Availability — Whether the field is visible system-wide or restricted.
- Icon — An optional icon displayed alongside the field on the profile.
Depending on the input type you select, additional settings may appear. For example, selecting Selection List adds fields for Mode, Options (where you define the list of available choices), and a Users can add custom options toggle. When this toggle is enabled, employees can add their own entries via type-ahead search, and new entries are appended to the list automatically.
Once you have configured all settings, click Save to create the field. The new field is automatically added to the profile sidebar and is ready for use.
You can edit a field or update its settings at any time by returning to Users > Settings > User Profile and clicking the three-dot menu (…) next to the field.
Example: To create a Certifications field, set the Property to “certifications,” the Input Type to “Selection List,” the Source to “User,” and define the available options (e.g., WHMIS, Health and Safety, First Aid, Forklift, Industrial Skills). Employees will then be able to select their certifications from the list on their own profile.
Phase 2: Configuring the Profile Sidebar
The Profile Sidebar controls how profile information is organized and displayed to employees. After creating a custom field, you can configure where it appears in the sidebar, group it into categories, and enable it as a filter in the People Directory.
Note: New fields are added to the sidebar by default. Use the configuration steps below to organize them, add categories, and enable filtering.
Accessing the Sidebar Configuration
There are two ways to access the profile layout configuration:
- Navigate to Settings > Configuration > Employee Experience > User Profile and click the Configure button next to Profile Sidebar.
- Navigate to Users > Settings > User Profile and click the Configure Profile Layout link in the top-right area of the page.
Organizing the Sidebar
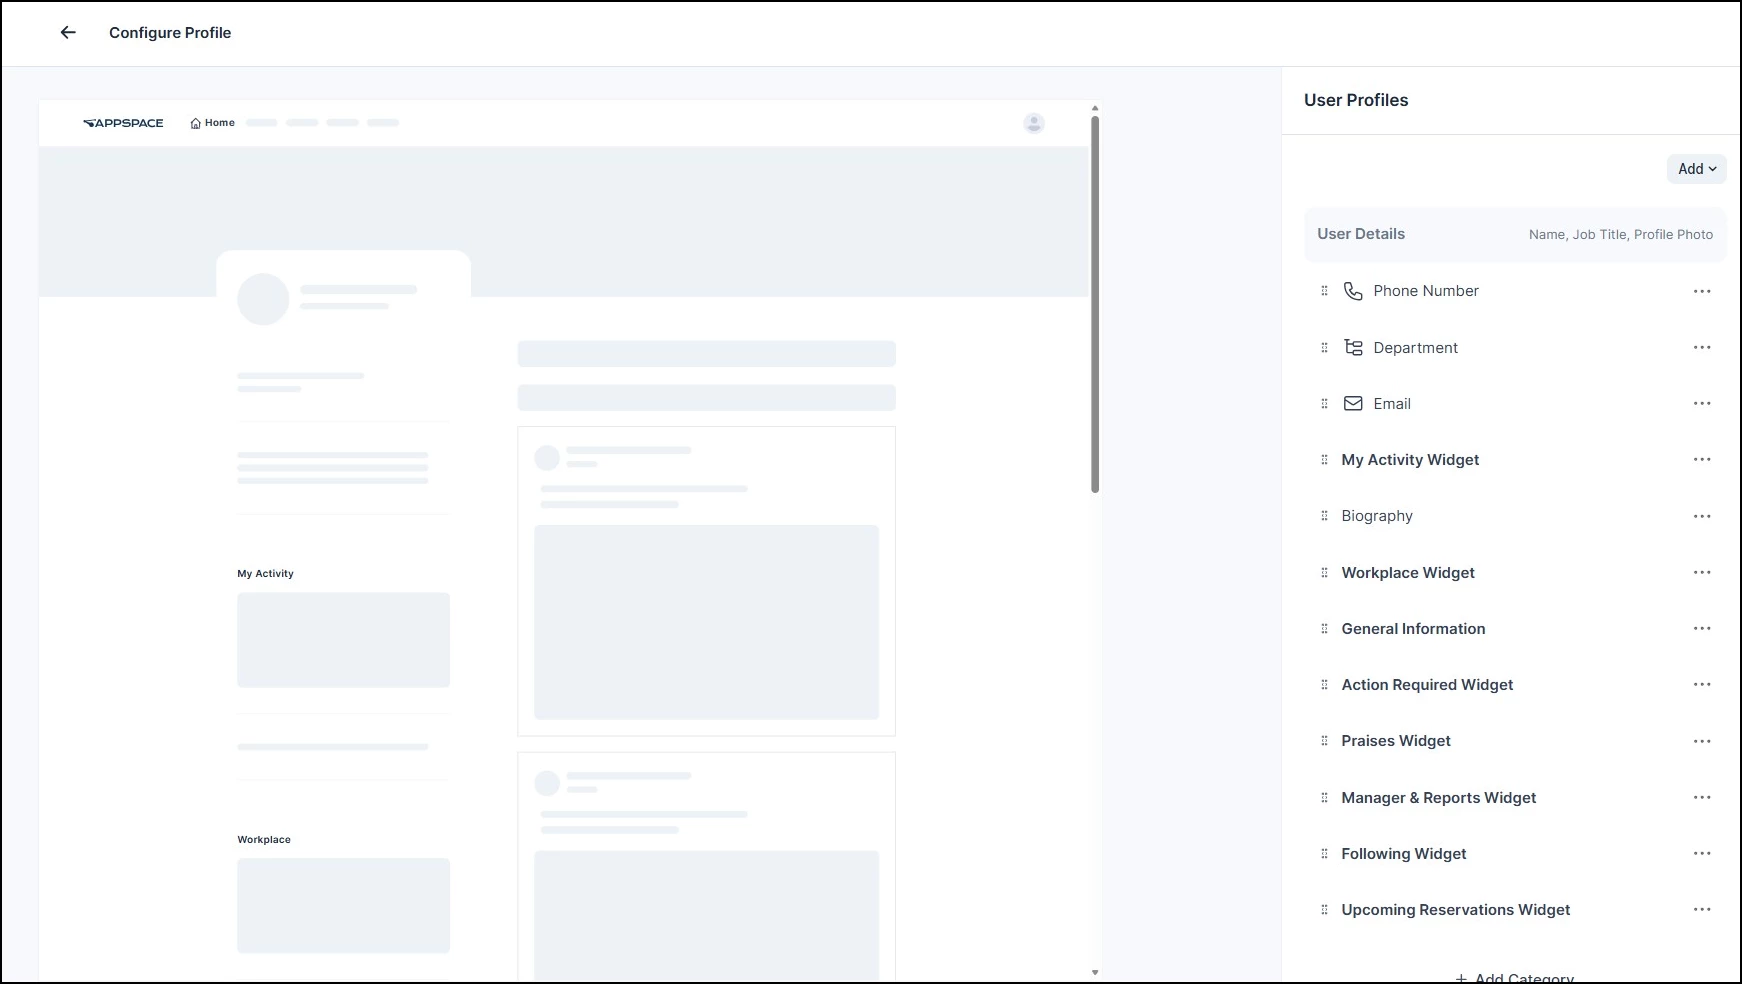
The Configure Profile panel provides a visual preview of the profile layout on the left and a sortable list of profile elements on the right. From here you can:
- Reorder items — Drag and drop fields, widgets, and categories to change their order on employee profiles.
- Add categories — Click + Add Category to create a new grouping for related fields. For example, you might create a “Certifications & Skills” category and place your custom fields inside it.
- Add fields to categories — Place your newly created custom fields into the appropriate category and drag them to the desired position.
- Enable filtering — Edit a field and make it available as a People filter in the People Directory. Once enabled, the field will appear immediately as a filter option in the People Directory. However, individual filter values will not appear until at least one user has added that option to their profile. This filtering capability is also available in Search and the Search Assistant.
- Save — Click Save to apply your changes to the profile layout.
You can return to the Configure Profile panel at any time to adjust the layout, reorder items, or add and remove fields and widgets.
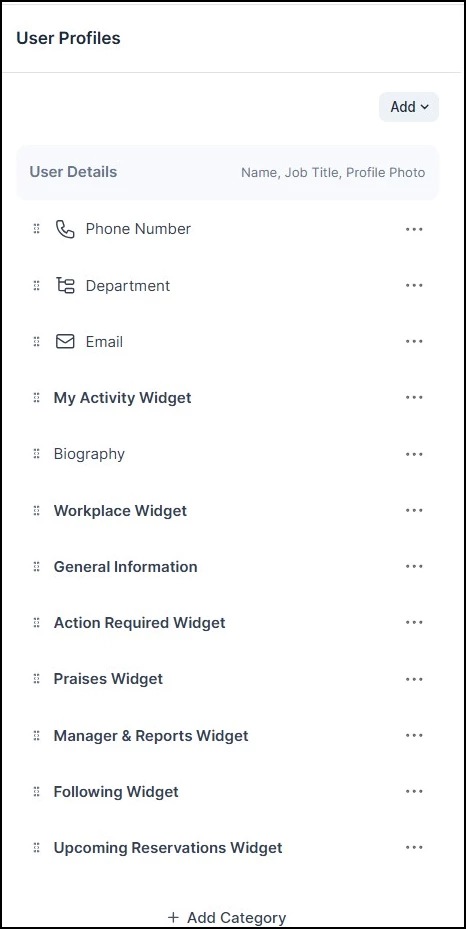
Managing Profile Widgets
Profile-specific widgets live in the sidebar by default. These widgets are specific to employee profiles and are separate from general widgets used elsewhere in Appspace. The default profile widgets include:
- Action Required Widget — Displays tasks and actions assigned to the employee that need attention.
- Workplace Widget — Shows the employee's workplace location and office details.
- My Activity Widget — Displays the employee's recent activity across the platform.
- Praises Widget — Shows recognition and praise the employee has received from colleagues.
- Manager & Reports Widget — Displays the employee's manager and direct reports.
- Following Widget — Shows the spaces and topics the employee is following.
- Upcoming Reservations Widget — Displays the employee's upcoming room and desk reservations.
You can remove widgets from the sidebar or add them back at any time through the Configure Profile panel.
Phase 3: Updating and Viewing Enhanced Profiles
Once a custom field has been created and the sidebar is configured, employees can update their own profiles with the new information. All employees can edit their own profile data; only administrators can change the profile layout.
Updating Profile Information
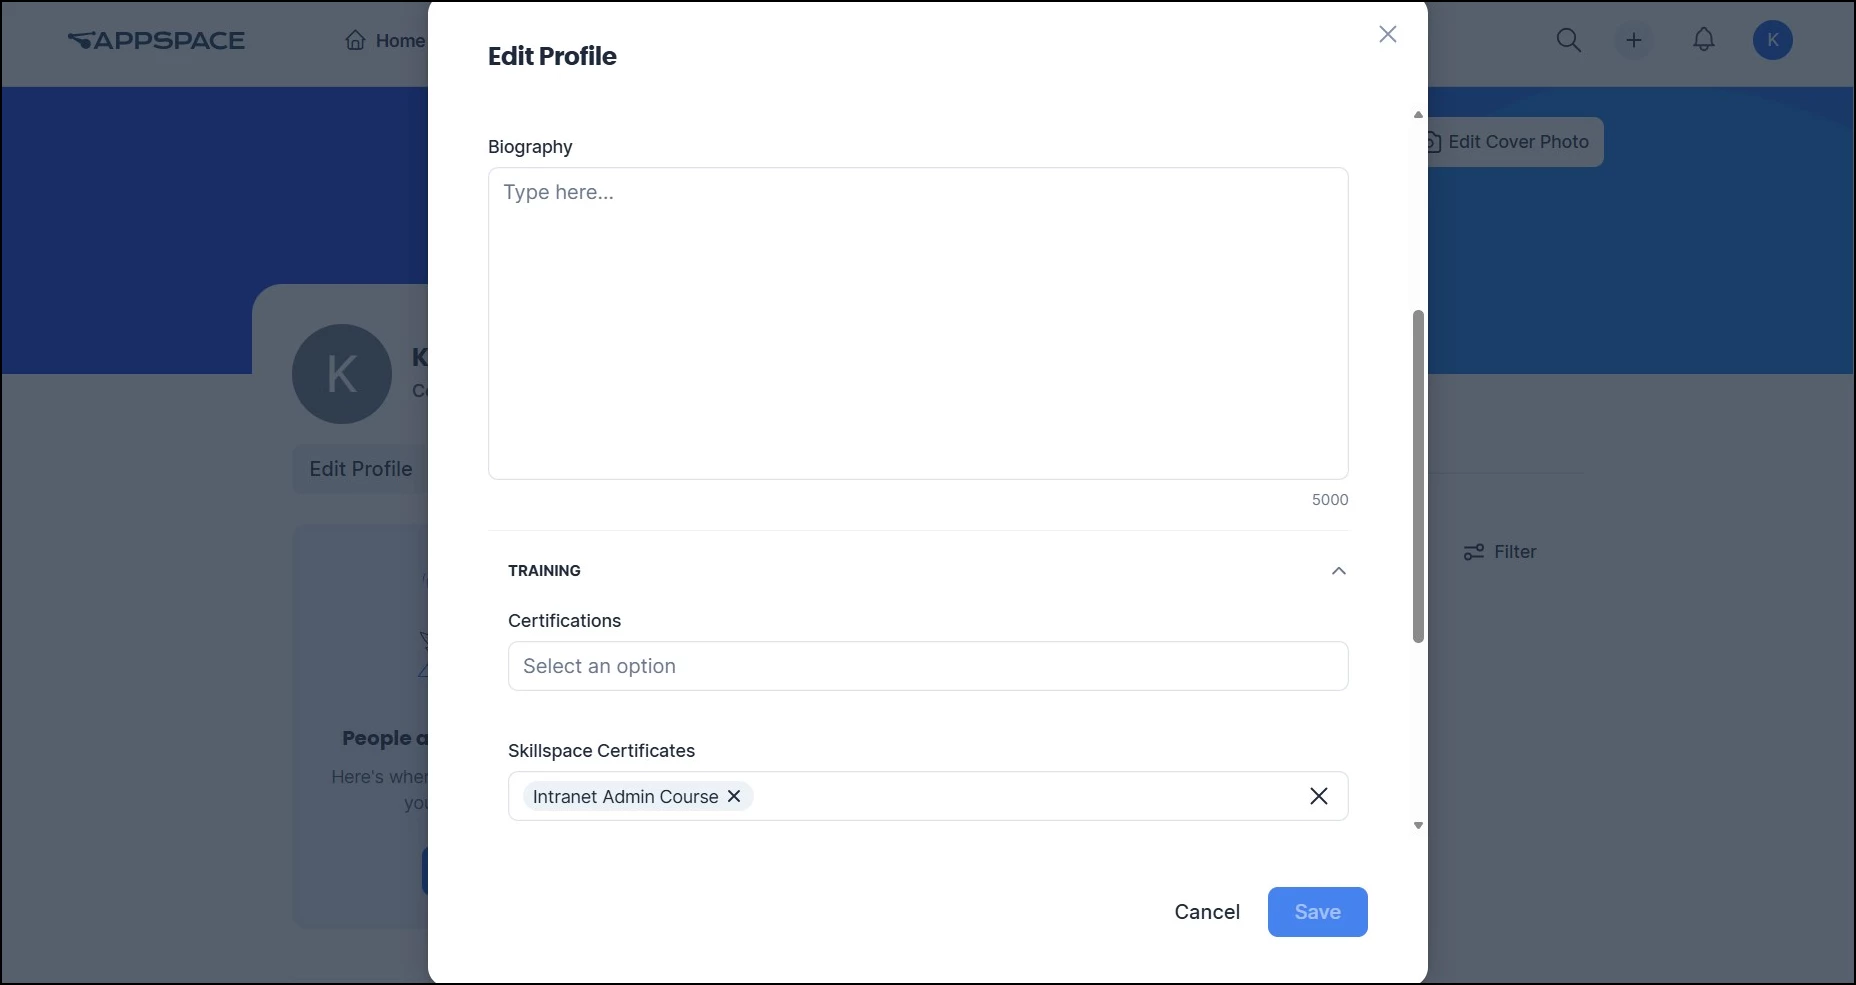
Employees can edit their profile to add information for any user-editable custom fields:
- Navigate to your profile page.
- Click Edit to enter edit mode.
- Locate the new custom field (e.g., “Certifications”) and add the relevant information.
- Save your changes.
The updated information will appear on the employee's profile sidebar in the location configured by the admin.
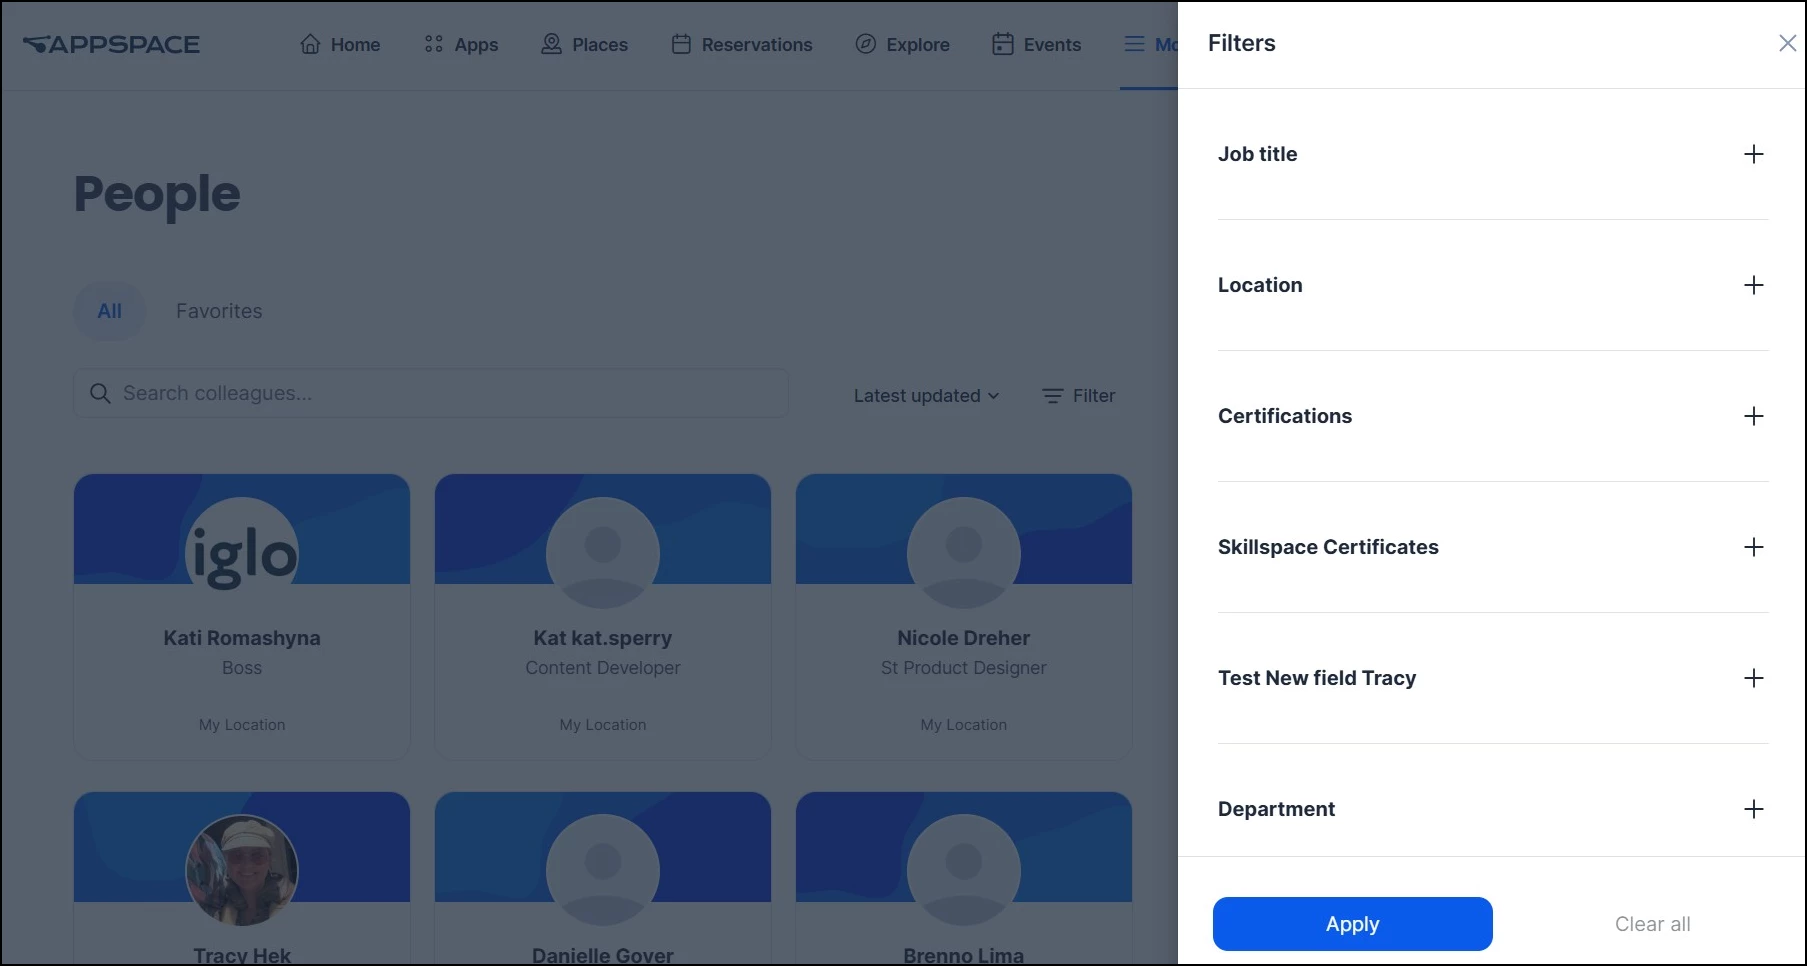
Discovering Colleagues with Filters
If an admin has enabled filtering for a custom field, the field will appear as a filter option in the People Directory right away. However, individual filter values only appear once at least one user has added that option to their profile. For example, if the “Certifications” field has filtering enabled but no employees have selected “First Aid” yet, that option will not appear in the filter list. Once an employee adds “First Aid” to their profile, it becomes available as a filter for all users.
This filtering capability also extends to Search and the Search Assistant, so employees can discover colleagues with specific attributes from multiple entry points across the platform.
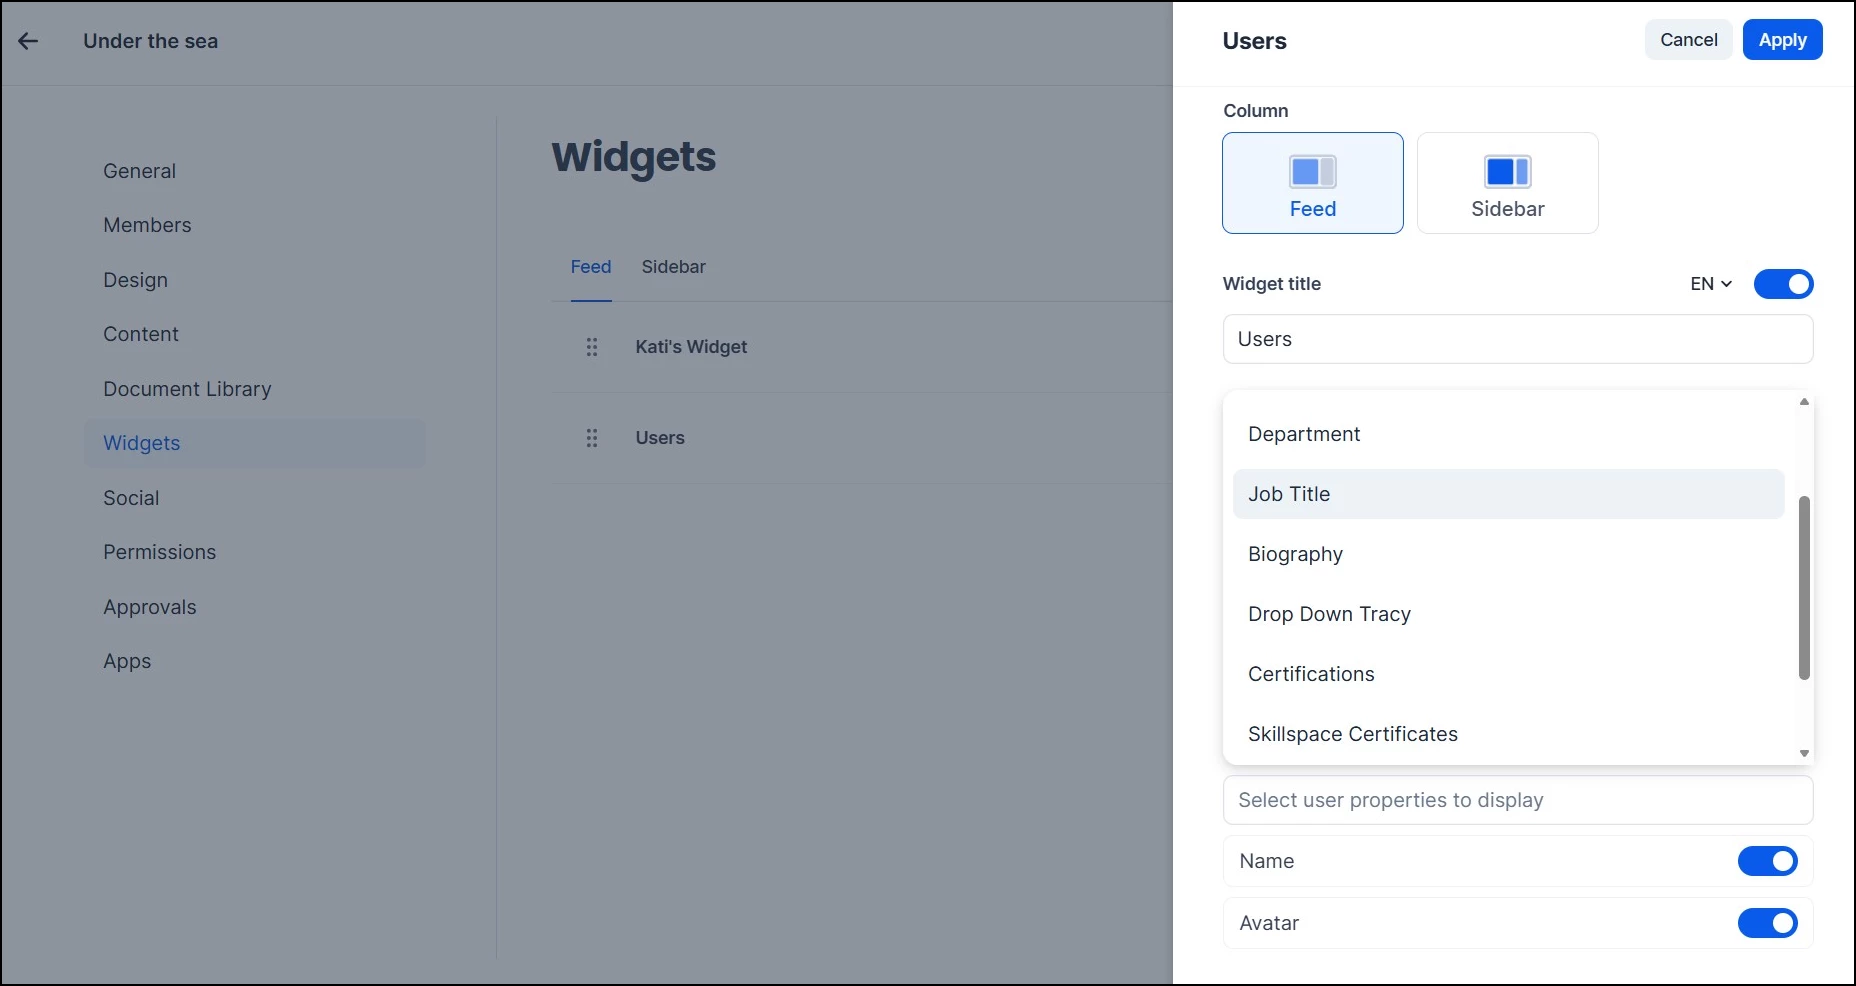
How Profile Enhancements Affect the Users Widget
Custom profile fields created through the steps above are also available in the Users Widget for Spaces. When configuring a Users Widget, admins can choose to display any profile field (including custom fields like Certifications) alongside the users shown in the widget. This means the profile data you configure carries through to other areas of the platform, giving employees consistent and contextual information wherever they encounter colleague profiles.
!-->!-->!-->!-->!-->!-->