
This article reviews the steps to enable and configure wireless PEAP/MSCHAPv2 for BrightSign devices.
Related Cases
- AE-6245: BrightSign Wireless Configuration Help
File Configuration
If there is no input capability in the Appspace console for configuring wireless settings, we must configure the wireless card manually.
On the SD card in the /scripts/ folder, you’ll find the config-init.brs file. The fields of the config file for wireless mimic the following:
setupParams.setupWireless = false

setupParams.wirelessParams = {}

setupParams.wirelessParams.ssid = ""

setupParams.wirelessParams.passphrase = ""

setupParams.wirelessParams.useDHCP = true

setupParams.wirelessParams.timeServer = ""

setupParams.wirelessParams.proxySpec = ""

setupParams.wirelessParams.bypassProxyHosts = []
The resulting configuration parameters will most likely look like this:
setupParams.setupWireless = true

setupParams.wirelessParams = {}

setupParams.wirelessParams.ssid = "My-Network"

setupParams.wirelessParams.passphrase = "My-Network-Password"

setupParams.wirelessParams.username = "wifi username"
setupParams.wirelessParams.useDHCP = true

setupParams.wirelessParams.timeServer = "pool.ntp.org"

setupParams.wirelessParams.proxySpec = "proxy.server.com:1234"

setupParams.wirelessParams.bypassProxyHosts = []
Steps to Deploy the Autorun
- Download new autorun.zip
 (2.20 and above).
 - Uncompress (unzip) the file.
- Locate the config-init.brs file under the scripts folder.
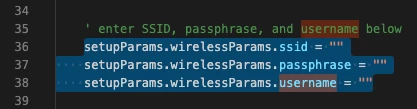
- Open config-init.brs and edit the SSID, passphrase, and username as shown below:
- It should look like this after entering the true wireless configuration:
setupParams.wirelessParams.ssid = "wifi ssid"
setupParams.wirelessParams.passphrase = "wifi password"
setupParams.wirelessParams.username = "wifi username" - Set setupParams.setupEthernet = false.
- Once you are done with the changes, save the file.
- Recompress (zip) all the files (avoid nesting).
- Rename the zipped file to autorun.zip.
- Type the IP address (where the device is located) followed by :8080 to access the BrightSign diagnostic web server (e.g., 172.18.20.210:8080).
- Navigate to the diagnostics tab, look for disable autorun, and select disable.
- Wait for the device to reboot whilst it disables autorun.
- Once the device is up, navigate back to the BrightSign diagnostic web server.
- Navigate to the diagnostics tab and select storage formatting.
- Within the storage formatting pop-up window, select sd under the storage field and FAT32 under the file system field.
- Select format.
- Navigate to the sd tab. At this point, you should see that all the files have been removed from the sd storage.
- Under upload files to /sd, select browse, select the autorun.zip file that was produced in step 9, and then select upload files.
- Once complete, navigate to the control tab and search for the reboot player option. Select reboot.
- The device will reboot and initialize with the new autorun.zip file, and the wireless configuration will be set accordingly.
For Appspace App 2.6+ and Firmware v8.4.10+, skip the following PEAP/MSCHAPv2 Step
Once these are configured, we must now add additional lines to the config file that match the wireless network security protocol in use.
Add the below lines of code inside the ConfigureNetwork function just above ok = nc.Apply() line (line 107).
nc.SetWiFiIdentity("user@brightsign-example.com")

nc.SetWiFiPassphrase("password")

nc.SetWiFiClientCertificate("")   'Add cert file here if you need it

nc.SetWiFiPrivateKey("")

nc.SetWiFiEapTlsOptions("")

Resource: Other wireless protocol types and further details are listed here (TKIP/CCMP/WPA/WPA-Ent), BrightSign roNetworkConfiguration: PEAP/MSCHAP.