


The Quick Reservation widget allows administrators to provide employees with a streamlined way to reserve workspace resources directly from the Employee Experience Home page.
Depending on how the widget is configured, employees can reserve Desks, Rooms, and Parking resources, apply supported filters, and complete a reservation without opening the full reservation workflow.
This article provides administrators with instructions for adding and configuring the Quick Reservation widget in an Employee Experience Home theme. To view how to create a reservation using the Quick Reservation widget, refer to the Reserve a Workspace Using the Quick Reservation Widget article.
Contents:
Prerequisites
Before configuring the Quick Reservation widget:
-
Ensure the required workspace resources have been created and configured. Refer to the Configure and Manage Workspace & Desk Reservations - Resource Creation article.
-
Ensure the applicable reservation settings and rules have been configured for the resources. Refer to the Configure and Manage Workspace & Desk Reservations - Resource Rules article
-
Ensure you have the appropriate permissions to create or edit Employee Experience themes. Refer to the Configure Employee Experience Themes article.
Add the Quick Reservation Widget
Perform the following steps to add and configure the Quick Reservation widget:
-
Log in to the Appspace Console.
-
Click the ☰ Appspace menu and select Settings > Configuration.
-
Select the Employee Experience tab, then click Themes from the side panel.
-
Select an existing location-based theme for editing, or click + Create to create a new theme and proceed to its editing page.
-
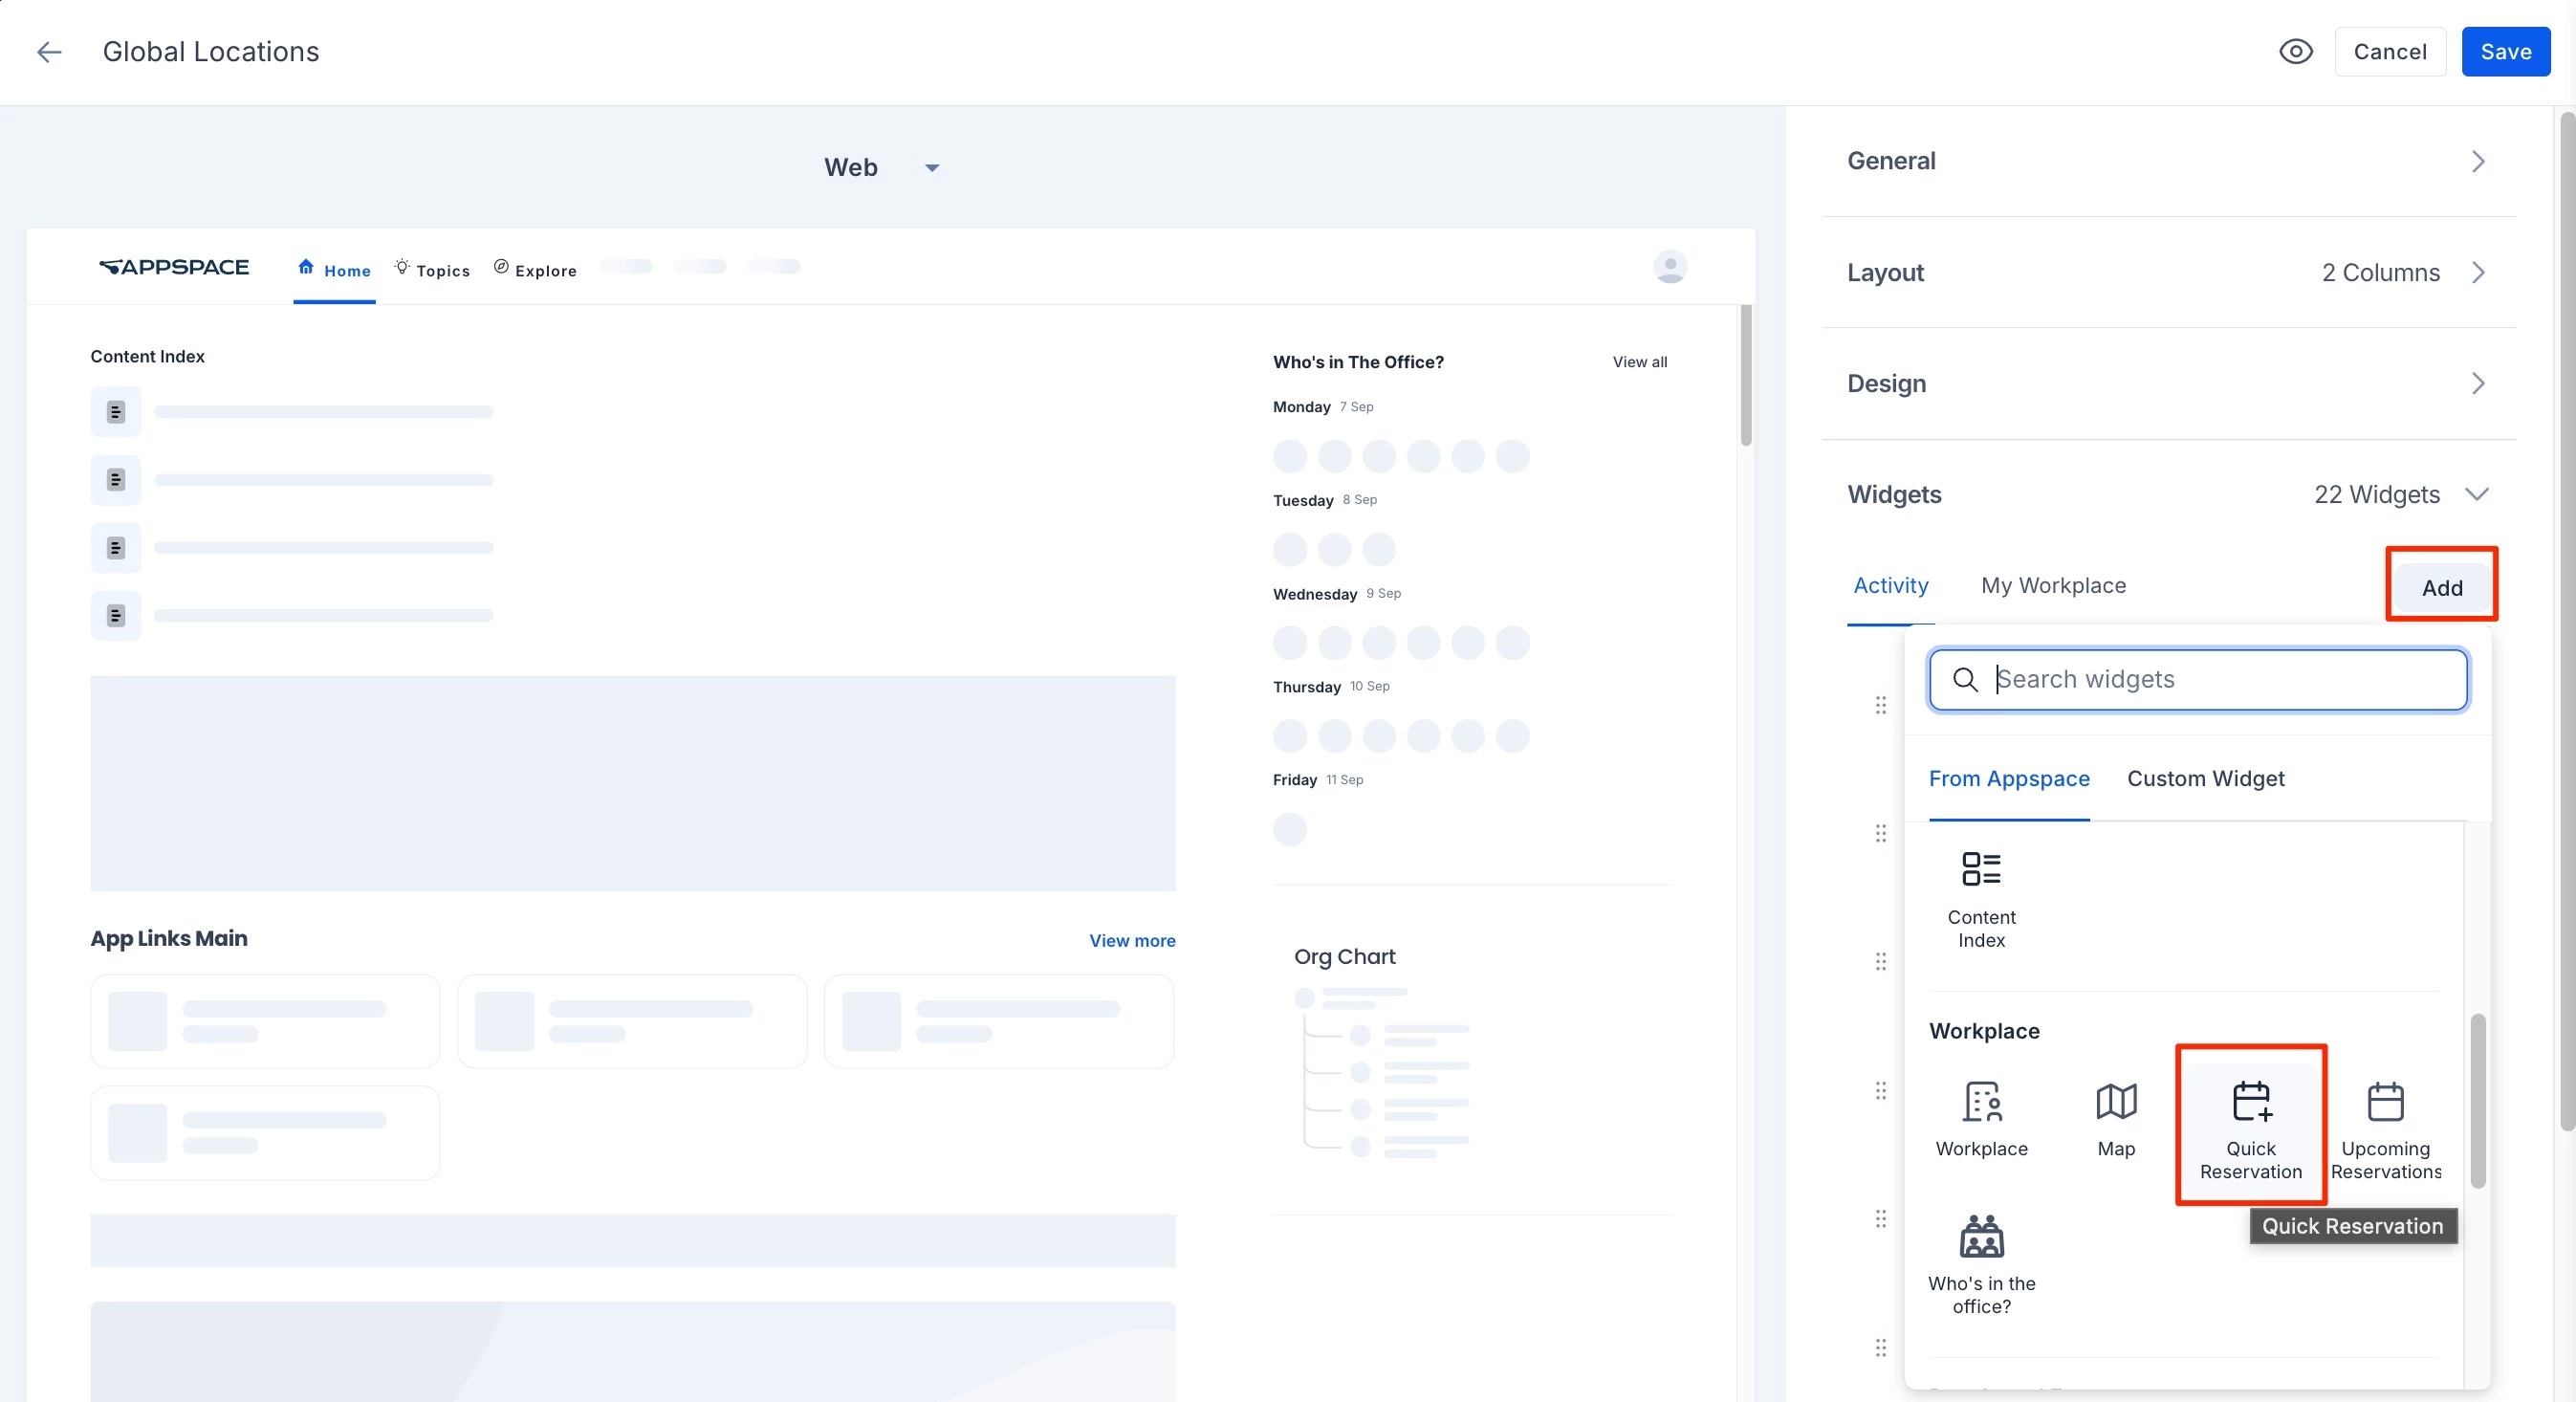
From the options on the right, select and expand the Widgets section, and click Add.
-
In the widgets window, scroll down to the Workplace section, and select Quick Reservation.
-
Configure the widget settings as required by following the steps in the section below.
-
Click Apply to add the widget to the theme.
-
Click Save to save the theme.
-
The widget is now available in the Home page of the Employee Experience. Employees can perform workspace reservations using the widget through the steps in the Reserve a Workpace Using the Quick Reservation Widget article.
Configure Quick Reservation Widget Settings
-
Configure the following settings:
-
Column – Select the Home layout column in which the widget is displayed. Quick Reservation supports the available columns in one-, two-, and three-column web layouts.
-
Widget Title – Enter the title displayed for the widget. The title supports a maximum of 30 characters. Select a language from the language menu to configure translated titles. English is selected by default.
-
Workspace Types – Select one or more workspace types that employees can reserve from the widget. The searchable multi-select field supports:
-
Desks
-
Rooms
-
Parking
All workspace types are selected by default. Parking resources may be configured as a subtype of Spaces or a subtype of POI.
-
-
Default Workspace Type – Select the workspace type displayed by default when the widget supports multiple workspace types. When the selected Workspace Types are changed, the Default Workspace Type is updated.
-
Workspace Visibility – Control whether additional types of restricted workspaces can appear in the Quick Reservation resource list:
-
Show workspaces requiring approval
-
Show workspaces with checkpoints
-
Show workspaces with services
When these settings are not enabled, the widget displays the standard resource list without workspaces that require approval, checkpoints, or services. Enabling one or more options keeps the standard resources available and also includes resources that match any of the enabled visibility options.
-
-
Reservation Name – Select how reservation names are generated:
-
Inherit from Settings – Uses the configured reservation naming settings.
-
Organizer Name – Uses the organizer’s first and last name.
-
Organizer Email – Uses the organizer’s email address.
-
Custom – Uses a custom reservation name entered by the administrator. The custom value defaults to Quick Reservation. The custom text field is displayed only when this option is selected.
-
-
Reservation Duration Filters – Control whether the following additional duration values are available to employees:
-
Show All Day option – Disabled by default. Enable this setting to display All Day in the widget's Duration menu. When disabled, All Day is hidden. If the global Reservation Duration is set to All Day while this setting is disabled, Quick Reservation defaults the duration to 1 hour.
-
Show Office Hours option – Disabled by default. Enable this setting to display Office Hours in the widget's Duration menu. When disabled, Office Hours is hidden. If the global Reservation Duration is set to Office Hours while this setting is disabled, Quick Reservation defaults the duration to 1 hour.
-
-
Advanced Filters – Configure Allow filtering by capacity to control whether employees can filter rooms by capacity. This setting is Off by default. When enabled, the Capacity field is available when Room is the selected workspace type. Capacity filtering is not displayed or applied to Desk or Parking workspace types.
-
Show widget border – Controls whether a border is displayed around the widget. This setting is Off by default.
-
-
Click Apply to save the Quick Reservation widget settings.
-
Use the widget's drag-and-drop handle to change its position within the Home layout. Use the widget's ellipsis menu and select Delete to remove it.
-
Click Save to save the theme.
Edit the Quick Reservation Widget
To update an existing Quick Reservation widget:
-
Log in to the Appspace Console.
-
Click the ☰ Appspace menu and select Settings > Configuration.
-
Select the Employee Experience tab, then click Themes from the side panel.
-
Open the Employee Experience theme containing the widget.
-
Locate the Quick Reservation widget in the Widgets section.
-
Click the widget entry to open its configuration panel.
-
Update the required settings.
-
Click Apply. Click Save to save the theme.
The configuration panel displays the widget's current settings when it is opened for editing.
Reorder or Remove the Quick Reservation Widget
Use the drag-and-drop handle on the widget entry to change its display order within the Home layout.
To remove the widget:
-
Open the widget's ellipsis menu.
-
Select Delete.
-
Click Save to save the updated theme.
Preview the Quick Reservation Widget
Use the theme preview to verify how the Quick Reservation widget appears before saving or publishing the theme.
The preview reflects the configured:
-
Workspace Types.
-
Default Workspace Type.
-
Capacity setting.
-
Widget position.
-
Widget sequence.
-
Supported Home layout.
The Quick Reservation widget automatically adjusts its display for supported one-, two-, and three-column web layouts.