



Control Who Reserves Which Workspaces: A Guide to Resource Permissions
Resource permissions control which employees or user groups can reserve a specific workspace. These permissions affect reservation availability in the Employee Experience and are separate from administrative permissions used to configure resources in the Appspace Console.
Key Benefits
This article provides the following benefits:
- Restricted reservation access: Limit sensitive or specialized rooms and spaces to approved audiences.
- Group-based administration: Grant access to user groups instead of maintaining long individual user lists.
- Clear separation of duties: Keep employee booking access distinct from administrator rights to edit the resource.
What This Guide Covers
This guide covers the following topics:
- Understanding reservation access permissions
- Opening a resource’s permission settings
- Adding users or groups
- Testing the Employee Experience
- Maintaining access
Prerequisites
Before you begin, confirm the following requirements:
- Administrative access: You need a Platform license and an Account Owner or authorized Location Admin role for the target resource.
- Configured users or groups: Create the users and User Groups that should receive reservation access.
- Configured resource: The room, desk, space, or other supported resource must exist and be connected to Space Reservation.
Understanding Resource Permissions
Reservation Access versus Administration
- Reservation access: Determines whether an employee can see or reserve the resource in the Employee Experience.
- Administrative permission: Determines whether an administrator can edit the resource, rules, map placement, or other settings in the Console.
| Important: Granting permission to reserve a resource does not make a user an administrator. Likewise, a content or device role does not automatically grant employee booking access. |
Adding Permission
Step One: Open the Resource
1. Open Reservations in the Appspace Console.
2. Select Resources.
3. Use the location hierarchy or search to find the resource.
4. Open the resource’s edit view.
Step Two: Open Permission Settings
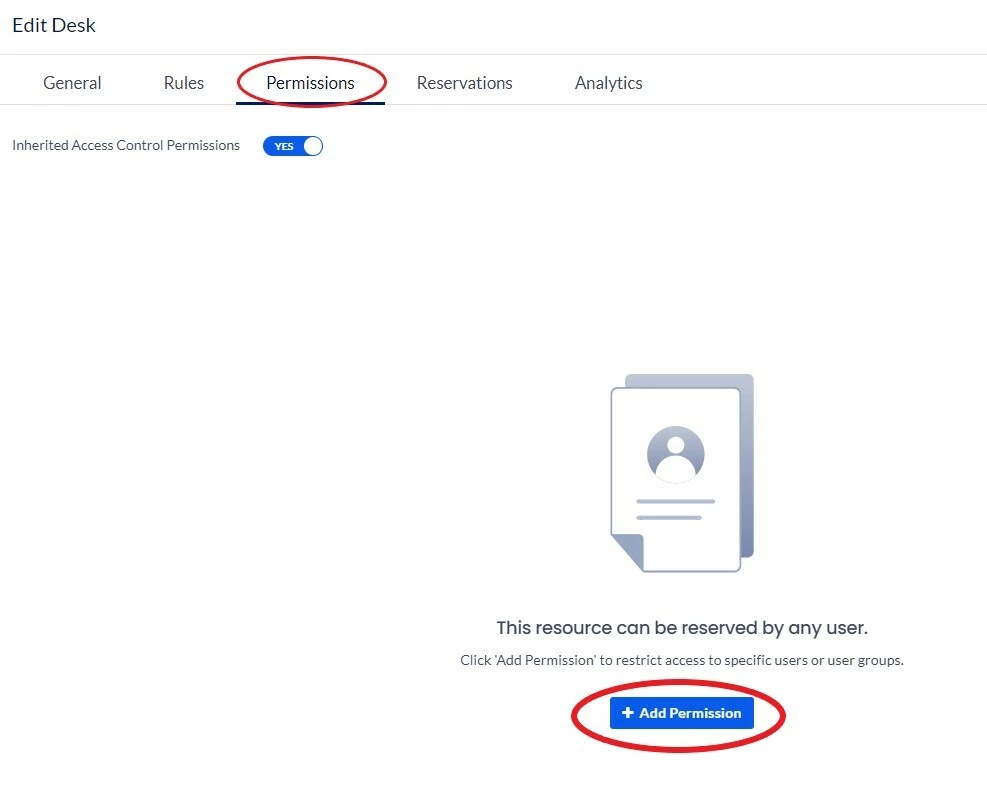
Open the tab or panel labeled Permissions, Access Permissions, or the current equivalent in your environment.
Step Three: Add Users or Groups
1. Select Add Permission or the equivalent action.
2. Search for the user or User Group.
3. Select the intended audience.
4. Apply or save the permission.
5. Repeat for each additional audience.
Testing the Result
Step Four: Verify Employee Access
1. Sign in as a user who should have access.
2. Open Places and search for the resource.
3. Confirm that the resource is visible and reservable during eligible times.
4. Repeat with a user who should not have access.
5. Review any reservation rules that could also affect availability.
| Troubleshooting: If a permitted user cannot reserve the resource, check location access, licenses, User Group membership, resource rules, calenda r-provider availability, and the effective permission scope. |
Ongoing Maintenance
Step Five: Review Permissions
Review restricted-resource access on a regular schedule. Remove users and groups that no longer require access and document the business owner for each restricted resource.