Delegates: User Guide
Introduction
This guide provides information on configuring, setting up prerequisites for, and properly using the Delegates feature. This feature is intended for administrative staff who manage schedules on behalf of others. It allows authorized Delegates to book and coordinate reservations in Appspace Workspace for those users.
Key Benefits
Using the Delegates feature offers several benefits:
- M365 Delegate Sync: Mirrors Microsoft permissions, permitting authorized Delegates to manage only the appropriate reservations.
- Full Reservation Control: Ensures all meeting logistics and changes can proceed without the host present.
- Clear Attribution: Logs all Delegate actions as performed “on behalf of” another, maintaining transparency and audit integrity.
What This Guide Covers
This guide will cover the following topics:
- Creating a delegation passport
- Assigning Delegate permissions as a User
- Managing reservations as a Delegate
Prerequisites
Before you can use the Delegates feature, you need to meet the following requirements:
- You must have a platform license (to configure passports and settings).
- You must have an Account Owner role (Location Admins can also configure the passport but may not be able to configure delegate settings).
- You must have a Premium license (to act as a Delegate).
Delegate Configuration
Step One: Configuring the Delegation Passport
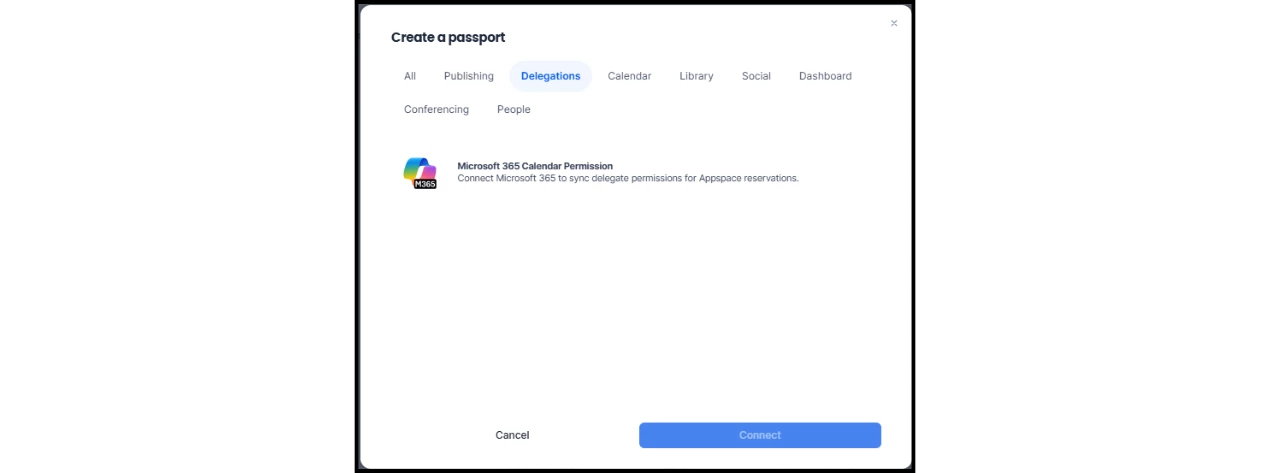
A key requirement, the Microsoft 365 Calendar Permission Passport simplifies setup by syncing delegate permissions with a user’s Microsoft 365 Calendar. Account Owners and Location Admins can create this integration in the Admin Console.
To configure the passport:
- Go to Integrations > Passports.
- Under the Passports tab, click +Create Passport.
- In the window that appears, select the Delegations category and choose Microsoft 365 Calendar Permission.
- Note: This is different from the Microsoft 365 Calendar Passport, which is used for syncing calendar resources.
- Click Connect and authenticate into Microsoft.
Step Two: Enabling Delegate Permissions
Once the delegation passport is created, you can then enable delegate permissions within the Reservations module.
To enable delegate permissions:
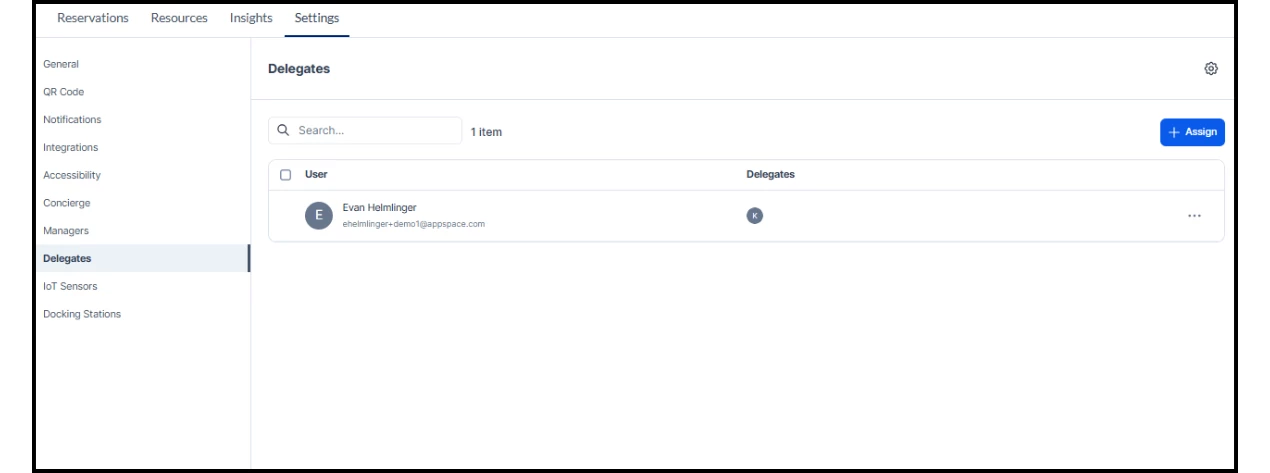
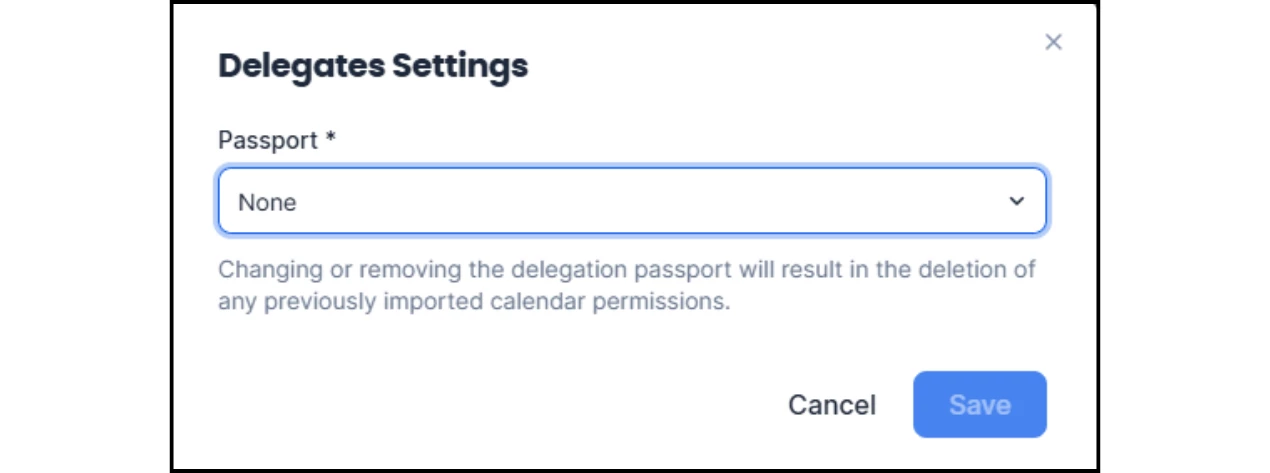
- Go to Reservations > Settings > Delegates.
- Click the gear icon to open the delegate settings.
- From the dropdown menu that appears, select the delegate passport.
- Click Save.
Step Three: Assigning Delegates
To assign one or more delegates to a user:
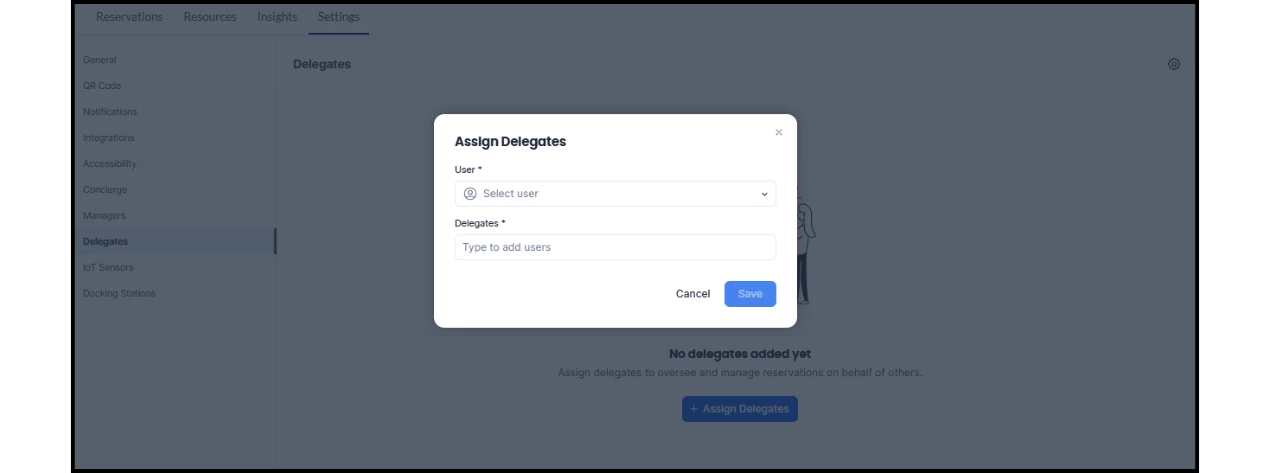
- Go to Reservations > Settings > Delegates.
- Click the +Assign Delegates button.
- In the User field, enter the name or email of the meeting organizer (e.g., a company leader, event host, or main presenter).
- Note: Users already assigned as meeting organizers are marked with a check and cannot be selected.
- In the Delegates field, enter the name or email of each user who will act as a delegate for the meeting organizer. You can add multiple users.
- Click Save.
Reservation Management
Step One: Navigating to the My Delegations Dashboard
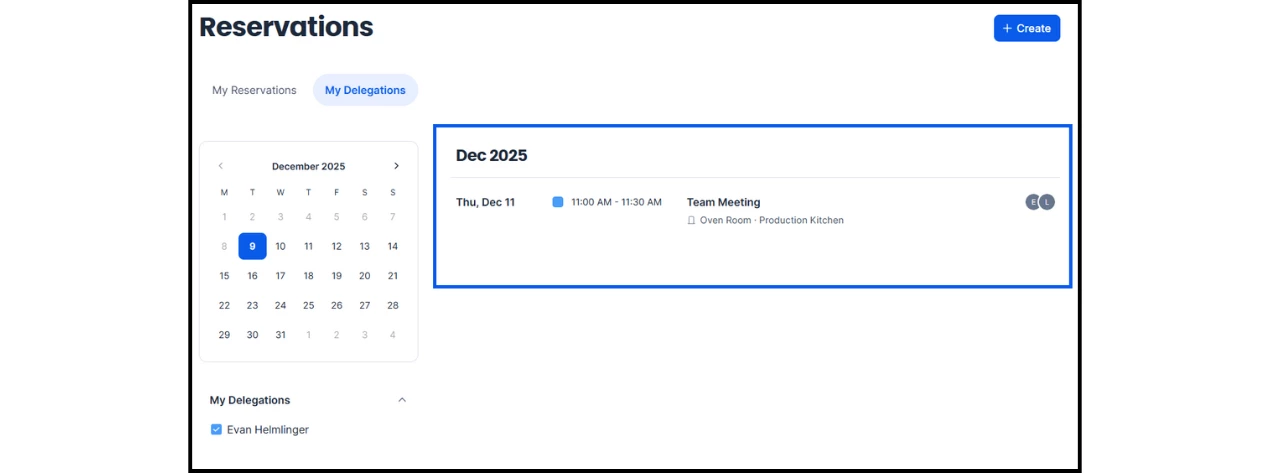
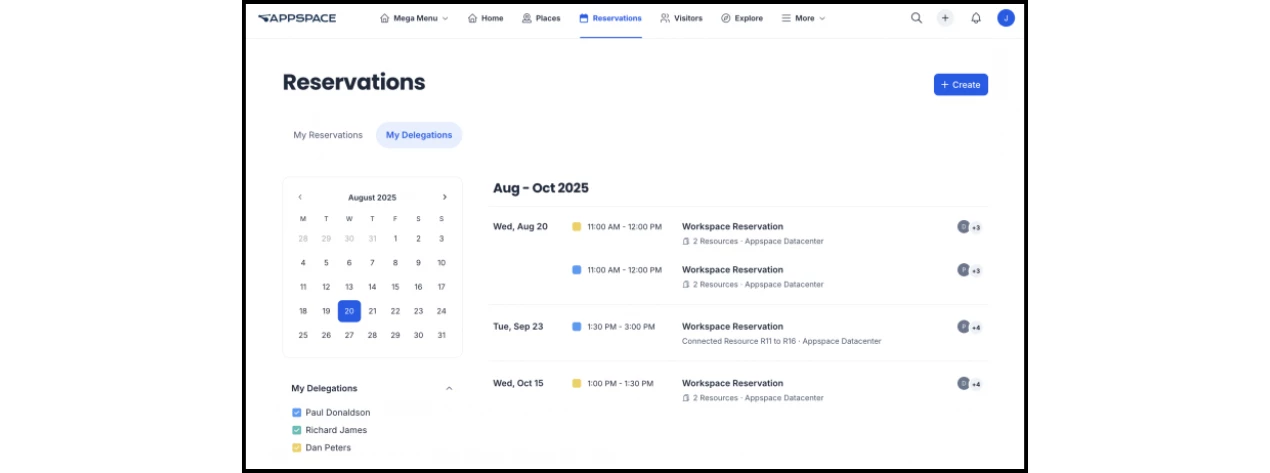
As a Delegate, you can view, book, and manage reservations on behalf of others from the My Delegations dashboard in the Appspace Employee View.
To access My Delegations:
- Click into the Reservations module within the Employee View.
- Select the My Delegations tab to view current and future reservations for the users for whom you are a delegate.
- Check or uncheck the boxes beside each user’s name to view or hide reservations.
Step Two: Making Reservations as a Delegate
To create a new reservation on behalf of another user:
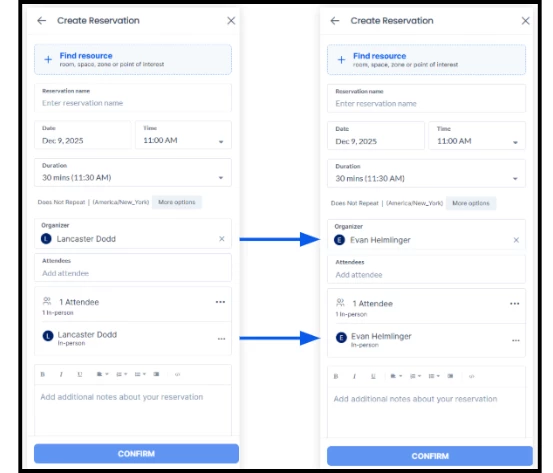
- Click the +Create button in the top-right corner of the My Delegations dashboard.
- The Create Reservation panel will appear with the Delegate’s name pre-populated.
- Change the meeting organizer and update the attendees to the appropriate users.
- Once the details are complete, click Confirm to schedule the reservation.
Step Three: Editing Reservations as a Delegate
To edit an existing reservation on behalf of another user:
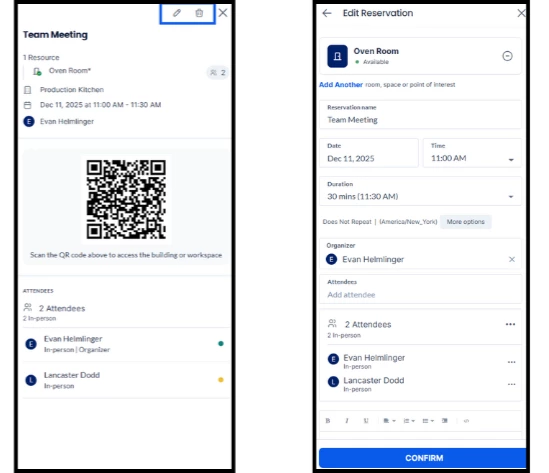
- Click the reservation name listed within the My Delegations dashboard.
- A panel with the reservation’s details will appear.
- Select the Edit icon (top-right corner) to view the Edit Reservation panel.
- Make any changes to the reservation and click Confirm.
- Alternatively, select the Delete icon to remove the reservation from calendars.