
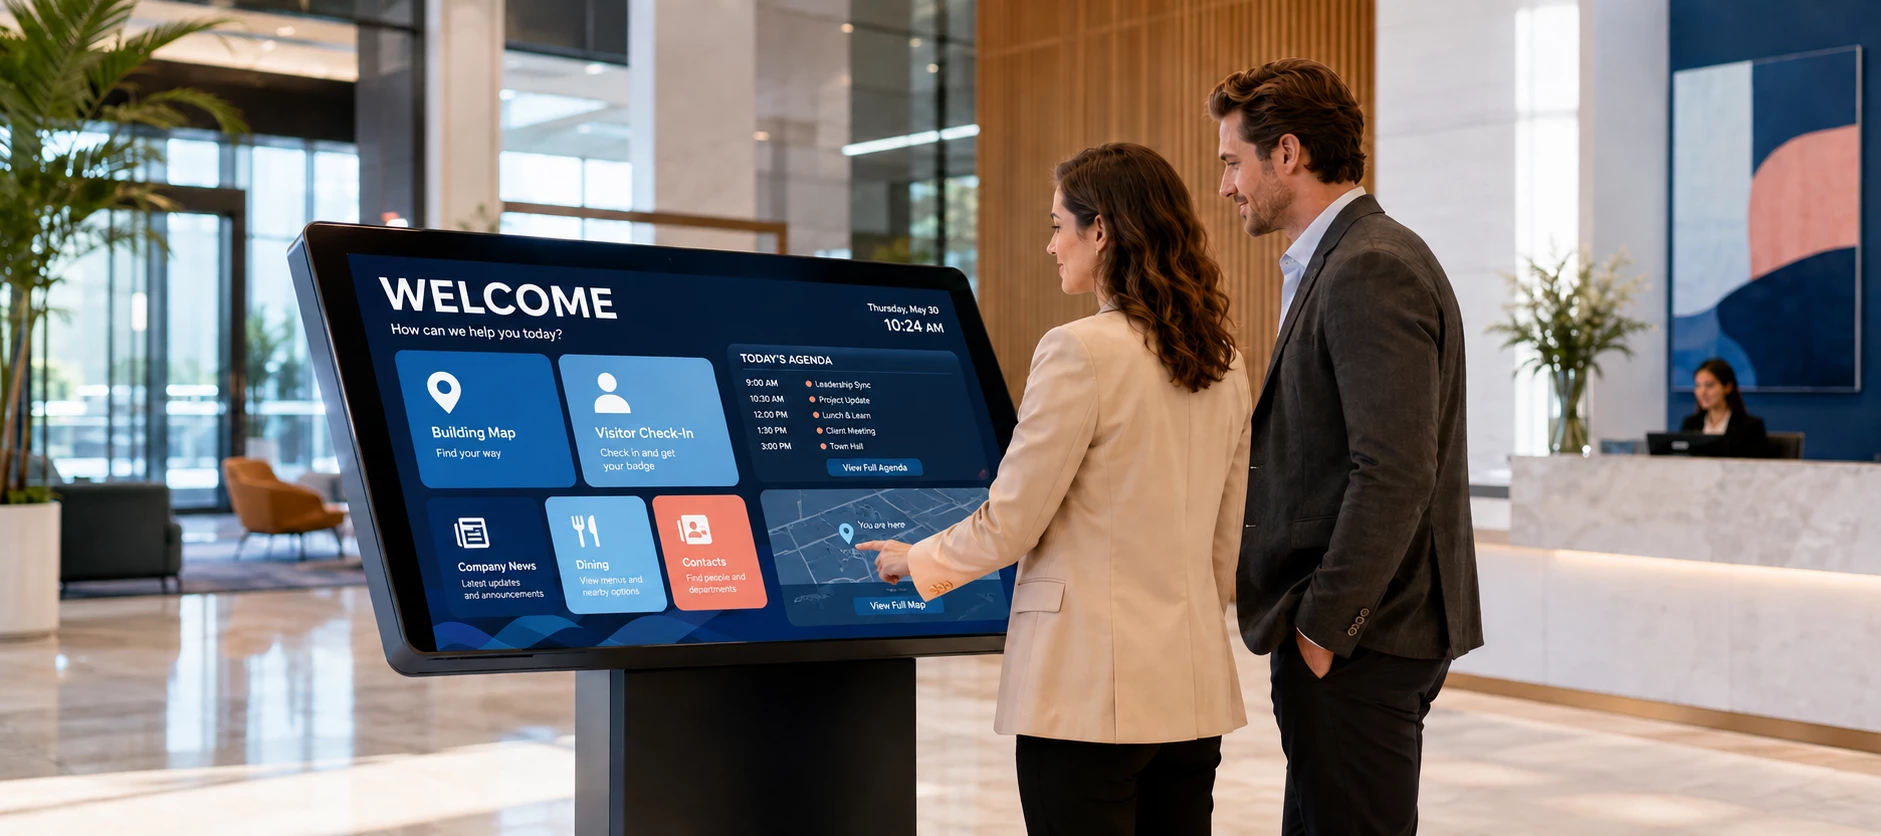




Create a more helpful and engaging arrival experience by combining welcome content, workplace information, navigation, and visitor registration within an interactive Advanced Channel.
This Corner Session demonstrates how reusable cards, Multi-Zone Channels, media zones, layouts, and action items can work together to create a centralized visitor experience.
What Can You Include?
Your visitor experience can provide quick access to information such as:
- Personalized welcome content — Display the visiting company’s name, meeting agenda, date, time, or other arrival details.
- Company news — Share announcements or other organizational content.
- Building information — Help visitors understand available amenities and workplace resources.
- Maps and wayfinding — Allow visitors to explore floors, locate rooms, and get directions.
- Local dining recommendations — Display nearby restaurants with addresses, phone numbers, and QR codes linking to menus or websites.
- Important contacts — Provide a directory containing names, email addresses, phone numbers, and office locations.
- Visitor registration — Provide access to the visitor registration or reservation workflow.
Build the Experience with Reusable Content
Start by creating the individual cards and images that will appear throughout the experience. AI-assisted content creation can help you quickly develop card layouts from simple prompts.
For example, you might ask AI to create a visitor welcome card containing:
- A field for the visiting company’s name
- The meeting agenda
- The date and time
- Navigation buttons
After adjusting the fonts, colors, fields, and layout, save the card as a template. You can then reuse it for future visitors by updating the information in a single card.
Tip: Review AI-generated information before publishing it. Confirm that addresses, phone numbers, links, QR codes, and other local details are current and accurate.
Organize the Content in a Multi-Zone Channel
A Multi-Zone Channel gives you the flexibility to create custom layouts for the home screen and each destination within the interactive experience.
- Create a new Multi-Zone Channel.
- Design the home screen and add the primary navigation options.
- Create a separate layout for each destination, such as Company News, Building Map, Where to Eat, Important Contacts, or Visitor Registration.
- Add media zones to each layout to define where its content will appear.
- Give every zone a clear and unique name so it is easy to identify when configuring actions.
Connect the Screens with Action Items
Action items turn the channel into an interactive experience. Each navigation button can be configured to open its corresponding layout.
- The Map button opens the building map and wayfinding layout.
- The Where to Eat button opens the local dining layout.
- The Company News button opens the latest company content.
- The Visitor Registration button opens the registration experience.
- The Home button returns the visitor to the main welcome screen.
When the same navigation controls are needed on multiple layouts, add the existing widget containing those action items instead of rebuilding the navigation each time. This helps create a more consistent experience and simplifies future updates.
Choose the Right Content for Each Section
Different Appspace content types can support different parts of the experience. A contact directory, for example, could be presented through a custom AI-generated card, a spreadsheet-based card, or another supported content format.
Restaurant recommendations can rotate automatically, or visitors can be given controls to move through them manually. Maps can also provide floor-to-floor navigation, directions, and access to reservable resources when those capabilities are configured.
Visitor List Considerations
A visitor registration list is not currently published to digital signage as a native list. If you already have an appropriate list that is approved for display, you may be able to present it as separate content within the channel.
Before displaying visitor information, confirm that the content follows your organization’s privacy and security requirements.
Create an Experience That Fits Your Workplace
The example shown in this Corner Session is only a starting point. You can change the visual design, rearrange the layouts, add or remove features, and select the content types that best support your visitors.
By building the experience with reusable cards, layouts, widgets, and action items, you can create an interactive welcome screen that is easy to maintain and update as visitor needs change.