
See What's Scheduled Across Your Screens: A Guide to the Digital Signage Content Calendar
The Digital Signage Content Calendar gives Administrators and Publishers a visual overview of scheduled content, live playback, and upcoming expirations across your signage network. Access it from Channels > Calendar in the left navigation. The calendar displays content in a weekly or monthly view with color-coded indicators so you can quickly distinguish between scheduled, live, and expiring content at a glance. This guide walks you through common scenarios for putting it to use.
Note: The Content Calendar currently supports Playlist Channels and only displays content with a defined start date. Content published immediately without a scheduled date will not appear on the calendar. Additionally, content must be individually scheduled — folder-level playout properties do not populate the calendar, even if dates are configured at the folder level. For scheduling Intranet content such as Posts, Stories, and Pages, see the Intranet Content Calendar guide for Employee Comms.
Key Benefits
- Visual Scheduling Overview — See your entire signage content timeline in a clear, color-coded calendar format across weekly or monthly views
- Proactive Expiration Management — Catch content that's about to expire before it drops off your screens, preventing gaps in your signage rotation
- Targeted Filtering — Filter by location, device, channel, or status to quickly find exactly the content you need without scrolling through everything
Prerequisites
- Appspace Platform License — Required to access the Content Calendar
- Account Owner, Location Admin, or Publisher Role — Required permissions to view and manage scheduled signage content
- Playlist Channels Configured — The Content Calendar currently displays content scheduled to Playlist Channels
Understanding the Calendar Interface
Before diving into scenarios, here's a quick overview of the calendar layout and controls.
Navigate to Channels > Calendar in the left sidebar. The calendar opens in Week view by default, showing the current week with days displayed as columns.
Calendar Views
Use the dropdown in the top-right corner to switch between views:
- Week — Displays seven days at a time. Best for reviewing what's playing right now and what's coming up in the short term.
- Month — Shows the full month at a glance. Useful for identifying gaps, overlaps, or heavy scheduling periods.
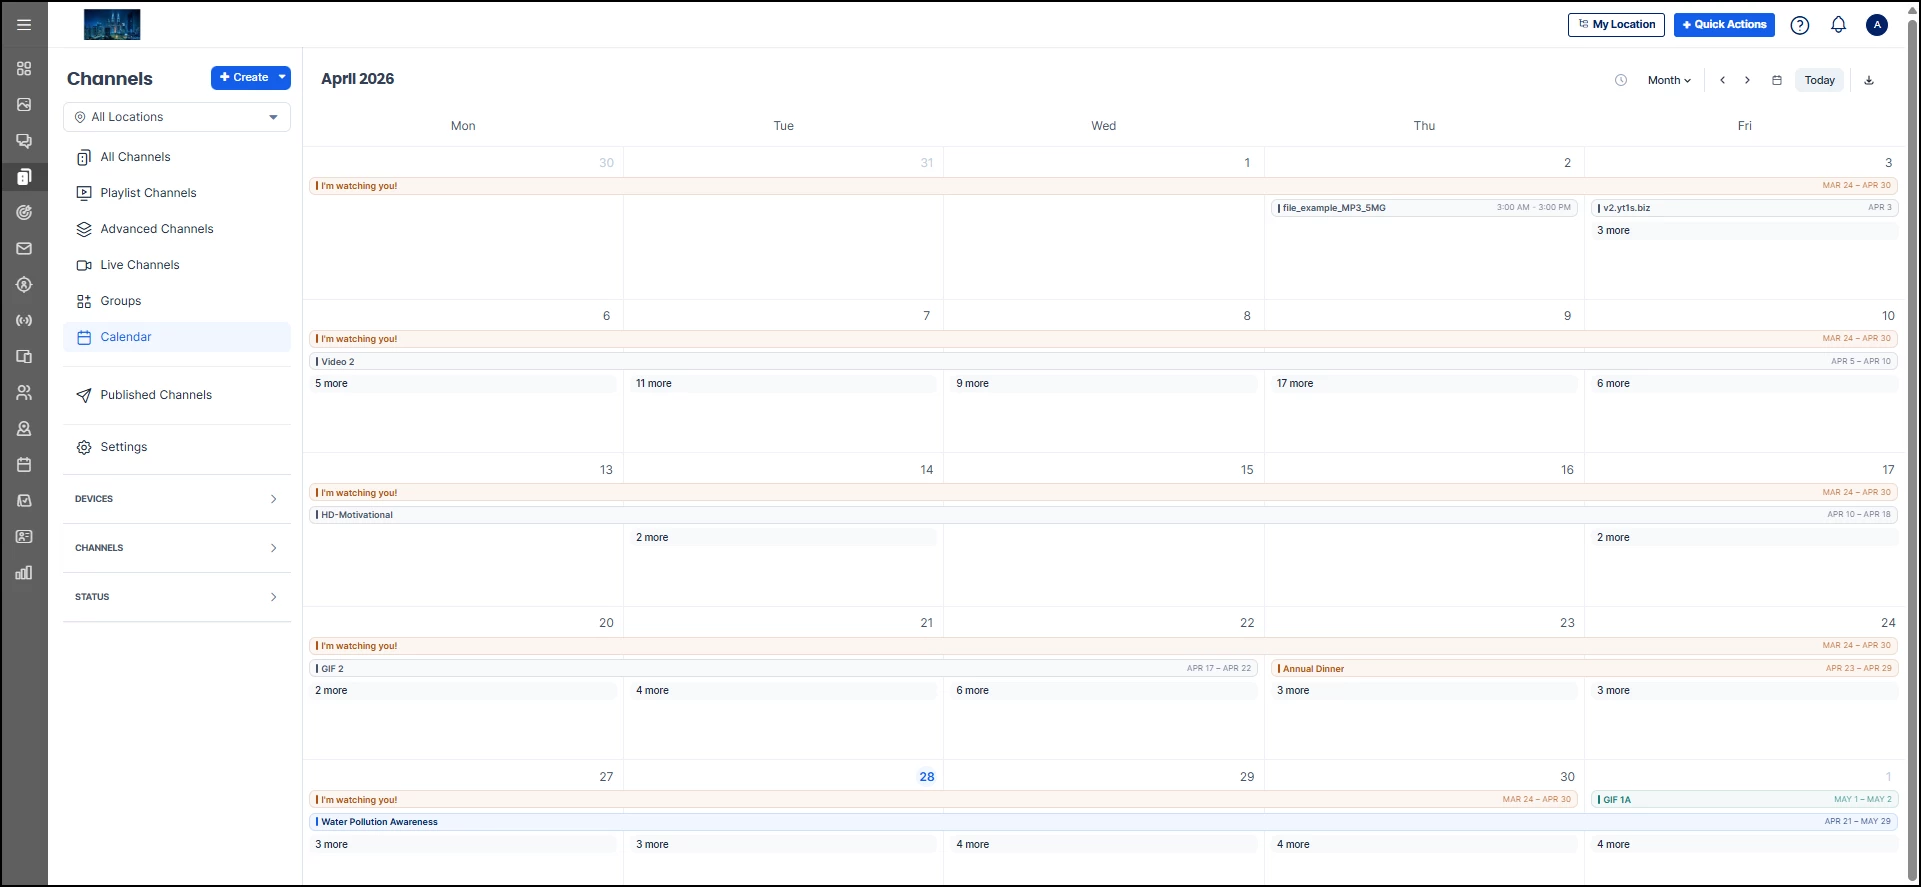
Navigation Controls
The top-right toolbar includes:
- Back and Forward Arrows — Move to the previous or next week or month.
- Today Button — Jump back to the current date at any time.
- Download — Export the current calendar view as an .xlsx spreadsheet for offline review or sharing with stakeholders.
Color-Coded Status Indicators
Content on the calendar is color-coded by lifecycle status so you can quickly assess what needs attention. Hover over any item to see its date range displayed in the status color.
- Scheduled — Content that has been published but is not yet live. It will begin playing on its scheduled start date. If content is scheduled without an end date, it will appear as a single-day entry on the calendar rather than spanning across multiple days, so it is recommended to always set both a start and end date for accurate calendar visibility.
- Live (Active) — Content currently playing on devices. This status appears as “Active” in the Status filter.
- Expiring Soon — Content approaching its expiration date. Review these items to decide whether to extend, replace, or let them expire on schedule.
Note: The Status filter also includes an Expired option, which lets you view content that has already passed its expiration date. This is useful for reviewing what recently dropped off your screens and deciding whether any of it should be rescheduled.
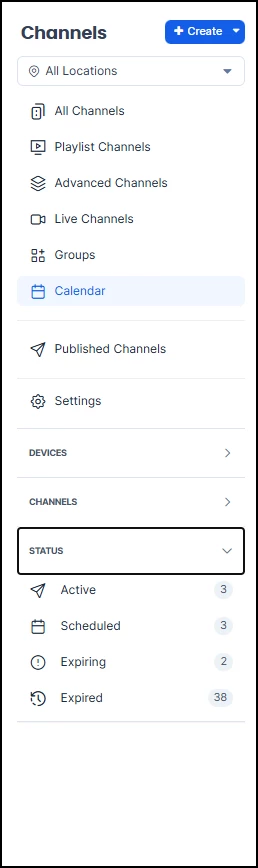
Filters
The left sidebar includes collapsible filter sections to narrow what the calendar displays:
- Locations — Scope the calendar to a specific location using the All Locations dropdown at the top of the left sidebar. This is essential for multi-site management.
- Devices — Filter by specific devices to see only the content playing on those screens.
- Channels — Filter by channel to see content published to specific Playlist Channels.
- Status — Filter by lifecycle status (Scheduled, Active, Expiring, Expired) to focus on content in a particular stage.
Scenario 1: “I need to see what's playing across my screens this week.”
The situation: It's Monday morning and you want a quick overview of what's currently running on your signage network: what's live, what's about to start, and whether anything needs immediate attention.
How to handle it: Go to Channels > Calendar. The calendar opens in Week view by default, showing the current week. Look for color-coded indicators: live content will be highlighted so you can see what's actively playing, scheduled items show what's queued up, and any expiring-soon flags tell you what needs a decision before it drops off. Click any item to open its detail panel, where you can see the content preview, channel, and scheduled dates.
If you manage multiple locations, use the Locations filter to scope the view to a specific building or site. This gives you a focused snapshot without the noise of your entire network.
Scenario 2: “I need to plan signage content around an upcoming event.”
The situation: Your organization has a product launch, company all-hands, or seasonal campaign coming up in two weeks, and you need to make sure your signage schedule supports it. You want the right content going live at the right time with nothing conflicting.
How to handle it: Switch to Month view to look ahead to the event dates. Check what's already scheduled during that window. If existing content would compete for screen time or conflict with the event messaging, click the item on the calendar to open its detail panel. From there, you can adjust the start and end dates directly and click Save, or click Edit to open the full content editor for broader changes.
This is also a good time to use the Channels filter to narrow the view to the specific Playlist Channels where event content will be published. That way you're only looking at the screens that matter for this particular campaign.

Scenario 3: “I need to catch content that's about to expire on my displays.”
The situation: You want to make sure no screens go dark or show stale content because something expired without anyone noticing. This is especially important for lobby displays, visitor-facing screens, or any high-visibility signage.
How to handle it: Open the calendar and expand the Status filter in the left sidebar. Select Expiring to isolate only the content that's approaching its expiration date. The calendar will highlight these items so you can review each one. Click an item to open its detail panel, where you can extend its end date directly and click Save, or click Edit to open the content editor if you need to make other changes.
For a broader look, switch to Month view with the Expiring filter active. This shows you everything that will expire over the coming weeks, giving you enough lead time to plan replacements rather than reacting to gaps after they happen.
You can also switch the Status filter to Expired to review content that has already dropped off your screens. This is helpful for identifying items that should be rescheduled or replaced with updated versions.
Scenario 4: “I need to check what's scheduled on specific devices.”
The situation: A facilities manager asks what's currently showing on the lobby displays, or you need to verify that a particular set of screens is running the correct content for a client visit or executive tour.
How to handle it: In the calendar, expand the Devices filter in the left sidebar and select the specific device or devices you want to inspect. The calendar will update to show only content scheduled to those screens.
This is useful for troubleshooting (“Why is that screen showing the wrong thing?”) as well as for proactive verification before important visits. Combine the device filter with the Status filter to see, for example, only live content on a particular device right now.
Scenario 5: “I need to see what's playing on a specific channel.”
The situation: You manage several Playlist Channels (maybe one for corporate announcements, another for break room entertainment, and a third for safety messaging) and you want to check the schedule for just one of them.
How to handle it: Expand the Channels filter in the left sidebar and select the Playlist Channel you want to review. The calendar updates to show only content published to that channel, making it easy to see whether the schedule is balanced, if there are any gaps, or if content is stacking up too heavily on certain days.
This is particularly helpful when coordinating with different content owners. If the safety team manages one channel and the marketing team manages another, each team can filter to their own channel and plan independently without being distracted by each other's schedules.
Tips for Getting the Most Out of the Calendar
Build a weekly review habit. Set aside 10 minutes at the start of each week to open the calendar, review what's live and expiring, and flag anything that needs attention. A quick weekly check prevents most content gaps before they happen.
Use Month view for planning, Week view for execution. Month view is best for spotting gaps, overlaps, and scheduling patterns. Week view is best for confirming what's playing right now and making day-to-day adjustments.
Combine filters for precision. Don't just filter by one dimension. Combine Device + Status to see what's expiring on lobby screens, or Channel + Status to see what's scheduled for your safety channel. The filters work together to give you exactly the view you need.
Use the Location filter for multi-site management. If you manage signage across multiple buildings or campuses, the Locations dropdown at the top of the sidebar lets you scope the entire calendar to a single site. This is essential for location-specific reviews.
Plan around events early. When you know a company event, product launch, or seasonal campaign is coming, switch to Month view to look ahead. It's much easier to rearrange content two weeks out than to scramble the day before.
Remember: only scheduled content appears. Content published immediately without a defined start date will not show on the calendar. If you want content to appear in the calendar view, make sure to set a scheduled start date when publishing.
!-->!-->!-->!-->!-->!-->!-->!-->