




The Microsoft PowerPoint Card displays presentations stored in Microsoft OneDrive or SharePoint through an authorized Microsoft 365 Drive Passport.
This article provides Communicators with instructions to create and manage Microsoft PowerPoint Cards, including selecting a presentation, configuring slide playback, and updating card settings.
Prerequisites
- A Microsoft 365 account with access to the required OneDrive or SharePoint presentation.
- A Microsoft PowerPoint presentation stored in Microsoft OneDrive or SharePoint.
- The presentation URL from OneDrive or SharePoint.
- Account Owner permissions to configure passports from Integrations > Passports.
- Author, Publisher, or Account Owner permissions to create and manage cards.
Authenticate and Configure a Microsoft 365 Drive Passport
Follow these instructions to connect a Microsoft 365 account and configure a Microsoft 365 Drive Passport.
- Log in to the Appspace console.
- Click the ☰ Appspace menu, and then click Integrations.
- Click the Passports tab, and click the +ADD button.
- Select the Microsoft 365 Drive passport.
-
In the Permission field, select the required permission type:
-
Delegated permissions – Uses the access permissions of the user authenticating the passport.
-
Application permissions – Uses tenant-wide admin consent and does not depend on a specific user login.
-
- In the Drive Resources Scope field, select the resources scope:
- OneDrive
- SharePoint
- OneDrive and SharePoint
Note:
Select the resource scope that corresponds to the location of the PowerPoint presentations that will be used. A passport configured for OneDrive supports OneDrive presentation URLs, while a passport configured for SharePoint supports SharePoint presentation URLs. A passport configured for both supports either URL type.
- Once done, click CONNECT. Authenticate the passport and grant the required permissions to access the Microsoft 365 account. You may be required to sign in with your Microsoft 365 credentials if you are currently signed out.
Note:
Microsoft Entra administrators can review the Appspace Drive Application and its granted Microsoft Graph permissions under Enterprise applications.
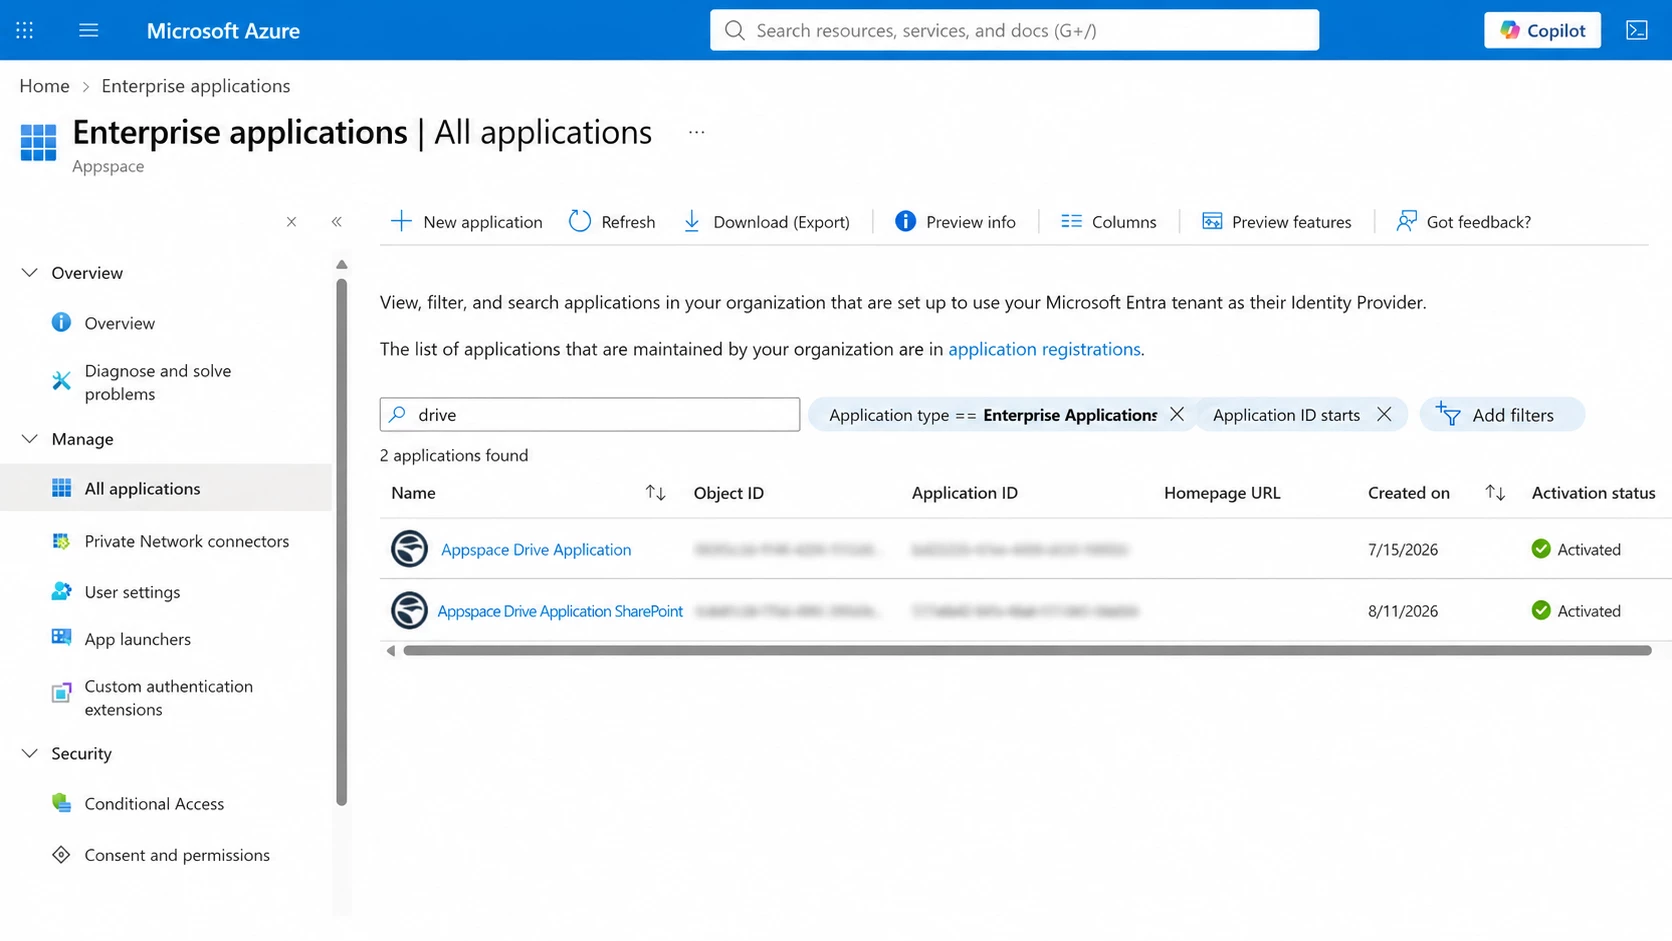
The Appspace Drive Application appears in the Microsoft Entra enterprise applications list.
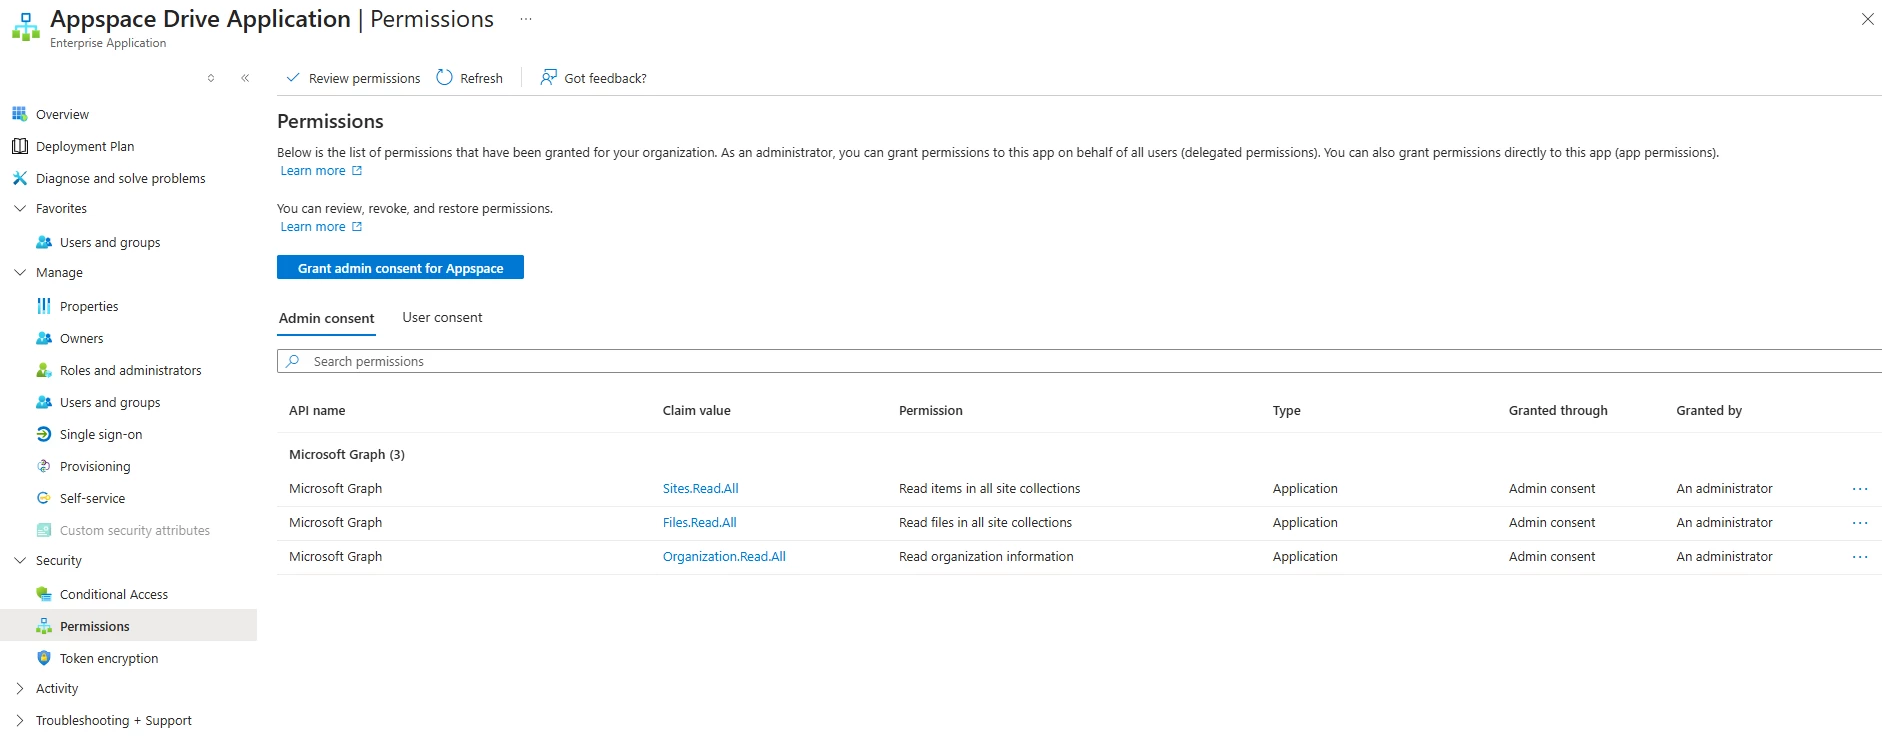
The Permissions page displays the Microsoft Graph permissions granted to the Appspace Drive Application through administrator consent. - Follow the on-screen instructions to continue configuring the Microsoft 365 Drive Passport.
- Once authenticated, in the Account Settings tab, configure and review the passport settings:
-
In the Name field, enter a descriptive name that identifies the user and the configured drive resource. Using a descriptive name is strongly recommended so users can identify the correct passport when creating a Microsoft PowerPoint Card.
Recommended naming convention:
[User Name] - [Drive Type]Examples:
John Smith - OneDriveJohn Smith - SharePointJohn Smith - OneDrive and SharePoint
- View the Account ID of the passport.
- View the Platform Usages granted to the passport.
- View the App Permissions granted to the passport.
- View and refresh the Status of the passport.
- Remove the passport, by clicking the Remove Account button.
-
- In the Permissions tab, you may grant the following users or user groups permission to view or edit this passport configuration at any time:
- Click +Add to browse users and user groups.
- In the Browse Users and User Groups page, you may do the following:
- Search or select the user(s) or user group(s) from the list, once done select, click Add.
- Proceed to grant either Can Manage or Can View permissions.
- You may also view or remove the user(s) or user group(s) that have already been granted permissions, by clicking the delete icon.
-
Proceed to the Create and Configure a Microsoft PowerPoint Card section.
Create and Configure a Microsoft PowerPoint Card
Follow these instructions to create a card that displays a PowerPoint presentation.
- Log in to the Appspace console.
- Use one of the following methods to start creating the card:
- Click + Quick Action from the Appspace menu bar, and select Create Card.
- Click Library from the ☰ Appspace menu, and open the library or folder where you want to create the card. Click + Create, and select Card.
- Create and add the card directly to an existing channel. Refer to Add Content to Playlist Channels.
- Under the Feeds heading, locate and select the Microsoft PowerPoint card template.
Important:
If no Microsoft 365 Drive Passport is available, click Set Up a New Passport and follow the instructions in the Authenticate and Configure a Microsoft 365 Drive Passport section.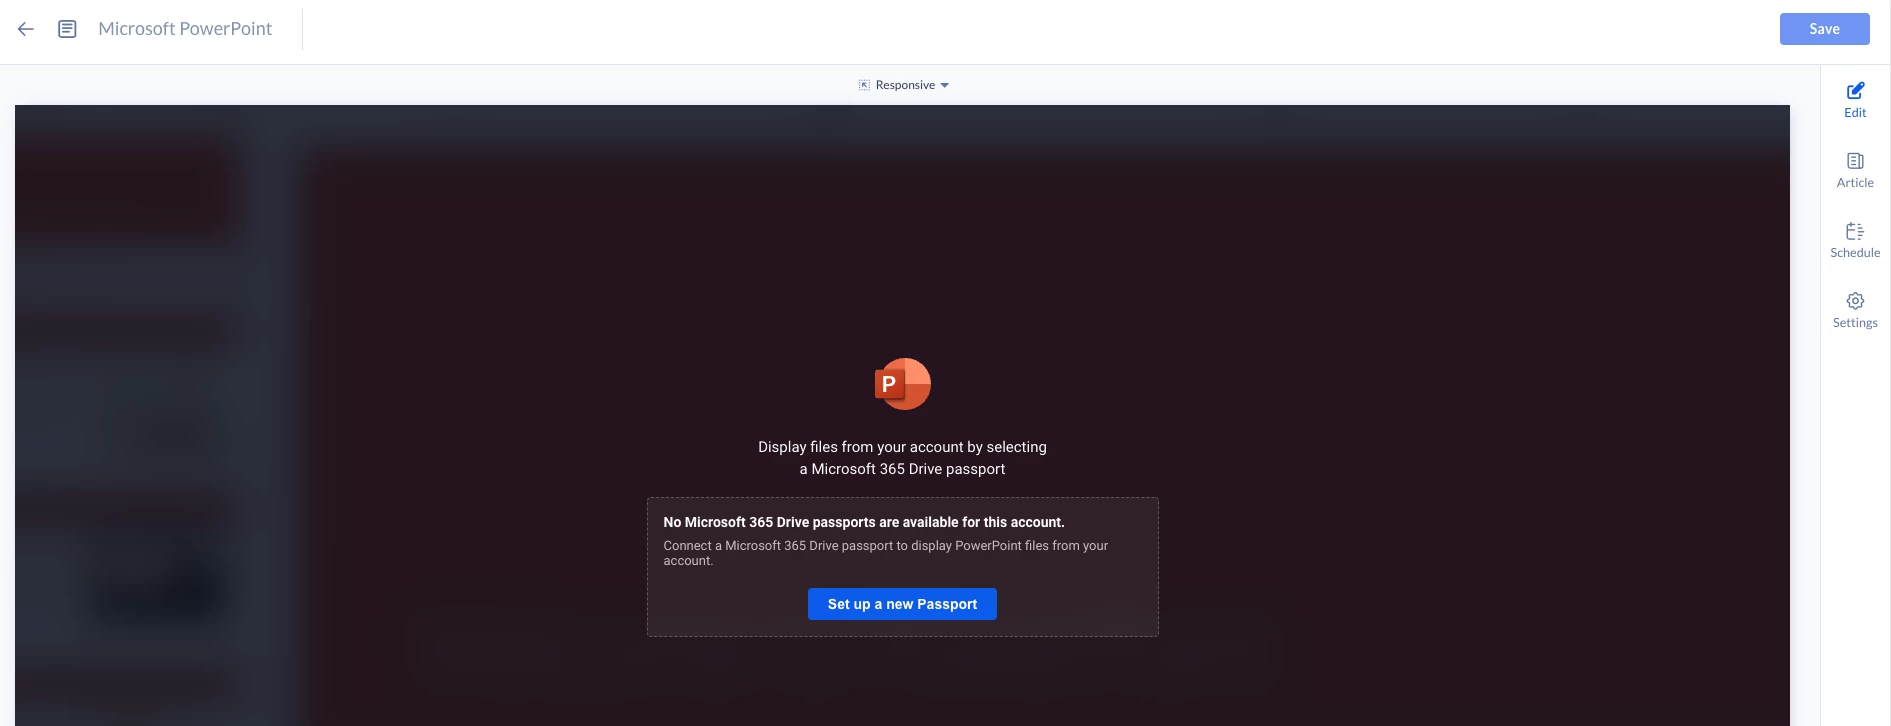
- Select an authorized Microsoft 365 Drive Passport from the passport list.
- Paste a valid OneDrive or SharePoint presentation URL into the Presentation URL field.
Note:
Enter a presentation URL that matches the access configured for the selected Microsoft 365 Drive Passport. Use a OneDrive URL for a passport configured for OneDrive and a SharePoint URL for a passport configured for SharePoint. A passport configured for both supports either URL type. - Confirm the presentation selection.
- Review the presentation in Preview mode.
- Update the card name, if required.
-
In the Edit tab:
-
Click Slide Duration to configure the slide playback interval.
Note:
The default interval between slides is eight seconds. When Manual is selected, user input, such as a mouse action, is required to navigate between slides, use the laser pointer, or jump to a specific slide. - Click the back arrow on the left side of the slide preview to return to the passport and presentation selection page.
-
-
In the Article tab:
- Include an Article or Caption to accompany the content item when being displayed on mobile apps, tablets, and other social collaboration apps.
- Enter a Referral Link to link more information to the content.
- In the Schedule tab:
- You may add the content to a channel by selecting the channel from the Add to channel drop-down menu, or leave it unassigned to be added later.
- When the content is assigned to a channel, the SCHEDULING and DISPLAY PROPERTIES options are displayed. Refer to the Configure Content Playback Properties: Dayparting, Frequency, Scheduling, in a Playlist Channel article for detailed configuration instructions.
- In the Settings tab:
- The Name field will be auto-populated to match the Title of the content which will also act as the filename for the content. If left empty the Name and Title will default to ‘Microsoft PowerPoint’.
- Select the Content Category from the drop-down menu to match the focus of the message, or leave it at the default content category.
- Enter any relevant Tags for the content. (Optional)
- Select a folder for the content in the Library Location drop-down menu to change the default folder location.
- Select an expiry date for the content from the Auto Delete Content from Library drop-down menu. (Optional)
- Upload an image to be used as the Thumbnail for the content.
- Click SAVE.
- Proceed to the edit section below to add the card to a channel, preview the card, or view analytics once available.
Edit a Microsoft PowerPoint Card
The instructions below show you how to edit a Microsoft PowerPoint card.
- Log in to your Appspace console.
- Click Library from the ☰ Appspace menu, and select a library or folder containing the content you wish to edit.
- Select the Microsoft PowerPoint Card to edit, and select the desired tab to edit or view.
- In the Edit, Article, and Settings tabs:
- You may edit the content the same way as it was configured. For detailed instructions on how to do this, please refer to the Create and Configure section above.
- In the Preview tab:
- Preview how the content is displayed on your device.
- In the Channels tab:
- You may add the content to a channel by selecting the channel from the Add to channel drop-down menu or leave it unassigned for later.
- When the content is assigned to a channel, the SCHEDULING and DISPLAY PROPERTIES options are displayed. Refer to the Configure Content Playback Properties: Dayparting, Frequency, Scheduling, in a Playlist Channel article for detailed configuration instructions.
- In the Analytics tab:
- View the individual content analytics in this tab. For more information, please refer to the Individual Content Analytics section of the Analytics article.
- In the Edit, Article, and Settings tabs:
- Click SAVE.
Technical Limitations
- PowerPoint file updates: Appspace polls OneDrive and SharePoint for changes at five-minute intervals. Updates saved to the source PowerPoint file are reflected on the Microsoft PowerPoint Card within five minutes.
- Static slide rendering: Appspace renders PowerPoint slides as static image snapshots. Therefore:
- Embedded video and audio content is not rendered or played on the Microsoft PowerPoint Card.
- PowerPoint animations and slide transition effects are not supported.