




The AI Generate Card, part of the Appspace Cards framework and powered by Appspace Intelligence, introduces a streamlined approach to visual content creation by transforming text prompts into professionally styled cards within seconds.
With support for multiple layout options, visual styles, themes, and design tools, the AI Generate Card is well-suited for corporate announcements, digital signage, internal campaigns, and workplace updates. Generated cards can be further customized by editing text, images, and layers directly in the editor.
This article provides instructions for creating, configuring, and editing AI Generate Cards in Appspace.
Prerequisite
- An Account Owner, Publisher, or Author permissions that have been assigned Platform User licenses.
- Supported Device for display or on the Employee App. Please refer to our Supported Appspace Cards article for compatible devices.
- Refer to the AI Generated Card Release Notes for details on known issues.
Note:
In the 2603.0.0 release, Library design tools are enabled by default for the AI Generate Card, including improved Stack and Unstack controls.
Create and Configure Generate Card
The instructions below allow you to create Generate card.
- Log in to your Appspace console.
- To create this card, select one of the following options:
- Click +Quick Action from the Appspace menu bar on the top right, and select Create Card
- Click Library from the ☰ Appspace menu, and select a library or folder you wish to create the content in. Click +CREATE, and select Card.
- To create and add the card directly to an existing channel, refer to Add Content to Playlist Channels.
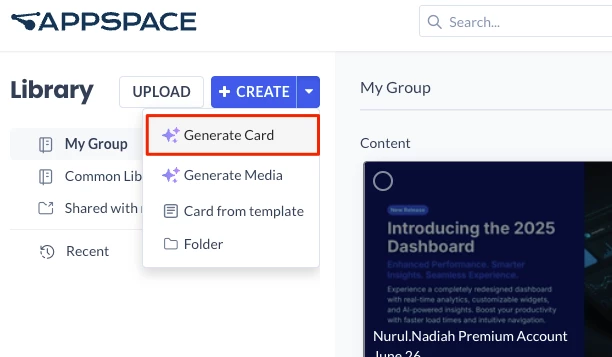
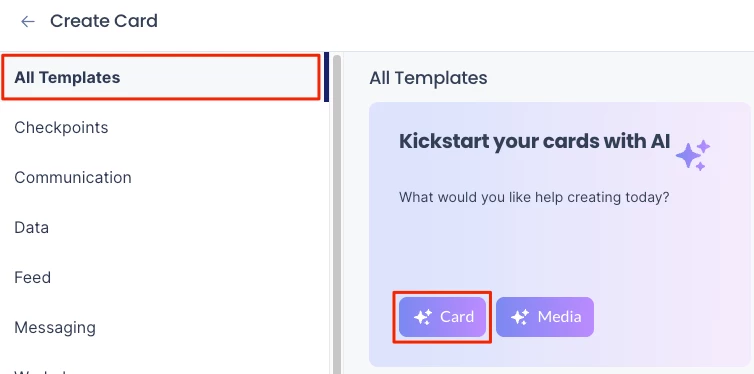
- There are two ways to use AI Generate Card:
- From the Library, click the Create dropdown menu and select Generate Card.
- From the Library, select Create and then choose All Templates. Under “Kickstart your cards with AI,” select Card.
Important
If you are unable to locate the content, try using either the Search bar, the Order by, or Filter icon to narrow down the content that you are looking for.
- From the Library, click the Create dropdown menu and select Generate Card.
- Enter the Title of the content as this will also act as the filename for the content. This is a mandatory field.
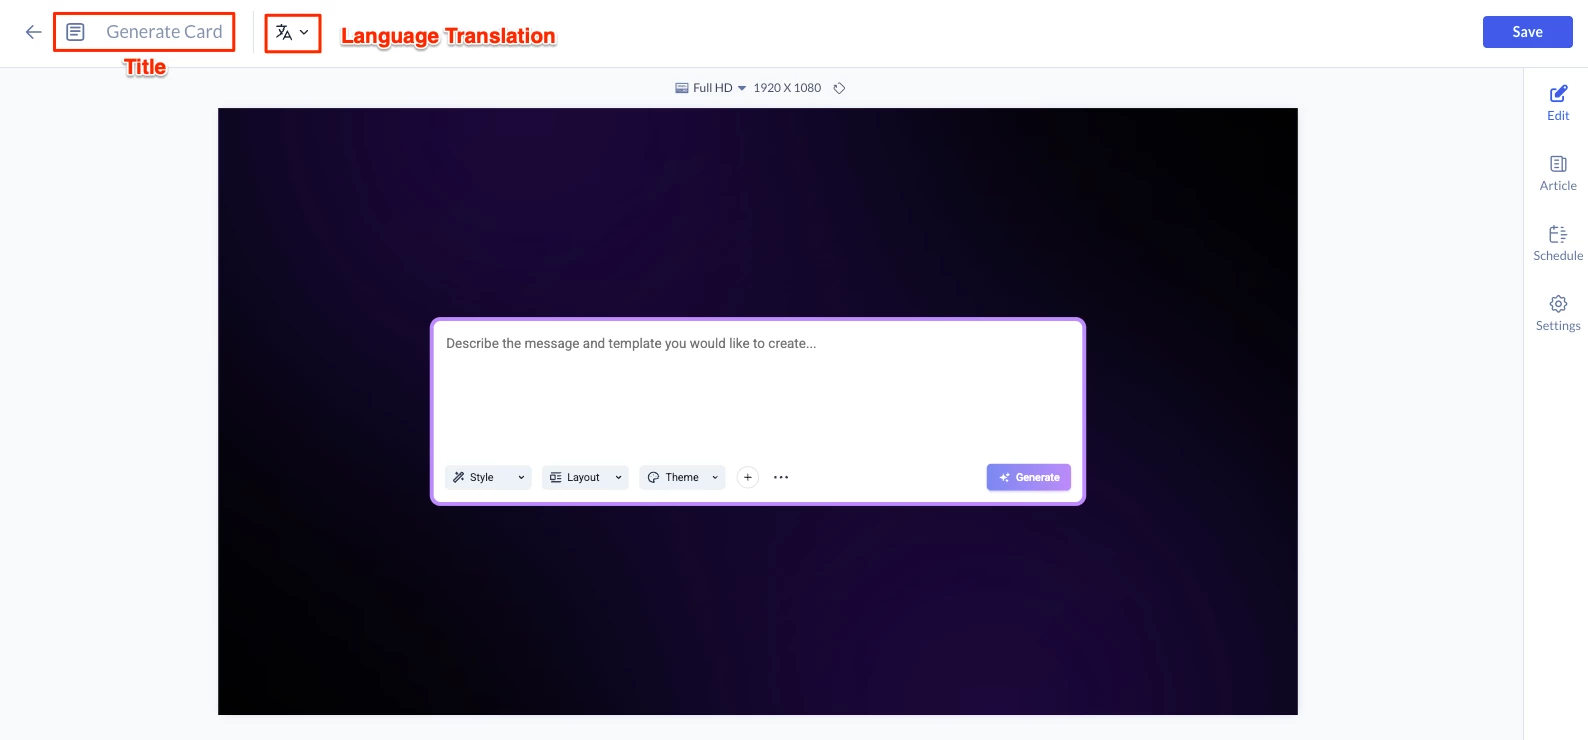
- Click the Language icon > + Select default language.
- In the Select Default Language window, choose your desired language from the drop-down list. A total of 33 languages are available:
- Arabic
- Bulgarian
- Catalan
- Czech
- Danish
- German
- Greek
- English (Default)
- Spanish
- Spanish (Latin America)
- Finnish
- Canadian French
- Hindi
- Hungarian
- Italian
- Japanese
- Korean
- Lithuanian
- Latvian
- Norwegian
- Dutch
- Polish
- Portuguese
- Portuguese (Brazil)
- Romanian
- Slovak
- Serbian
- Swedish
- Thai
- Turkish
- Simplified Chinese
- Traditional Chinese
Notes:
When multiple languages are selected for a location, the card displays translations in rotation. For example, if English, Spanish, and French are selected, loop 1 shows English, loop 2 shows Spanish, loop 3 shows French, and loop 4 returns to English.
- Once done click Save.
- In the Edit tab:
- Describe the message and template you want to create.
- Click the Style option to choose a design style:
- Realistic
- Abstract
- Minimalistic
- Macro
- Vector
- Flat
- Pop Art
- Fantasy
- Pattern
- Surrealism
- Line Art
- Watercolor
- Click the Layout option to choose a design style:
- Text Only
- Media Background
- Split Media
- Media Sidebar
- Media Top
- Media Bottom
- Spotlight
- Gallery Grid
- Click the Theme option to choose a design style:
- Light
- Dark
- Branded
- Click the + upload image button to upload desires image.
- Once done click Generate.
- Once the card is generated, the design tools are displayed in the editor. You can use these tools to add or update text, images, and layers in the card design.
- In the design tools, you may do the following:
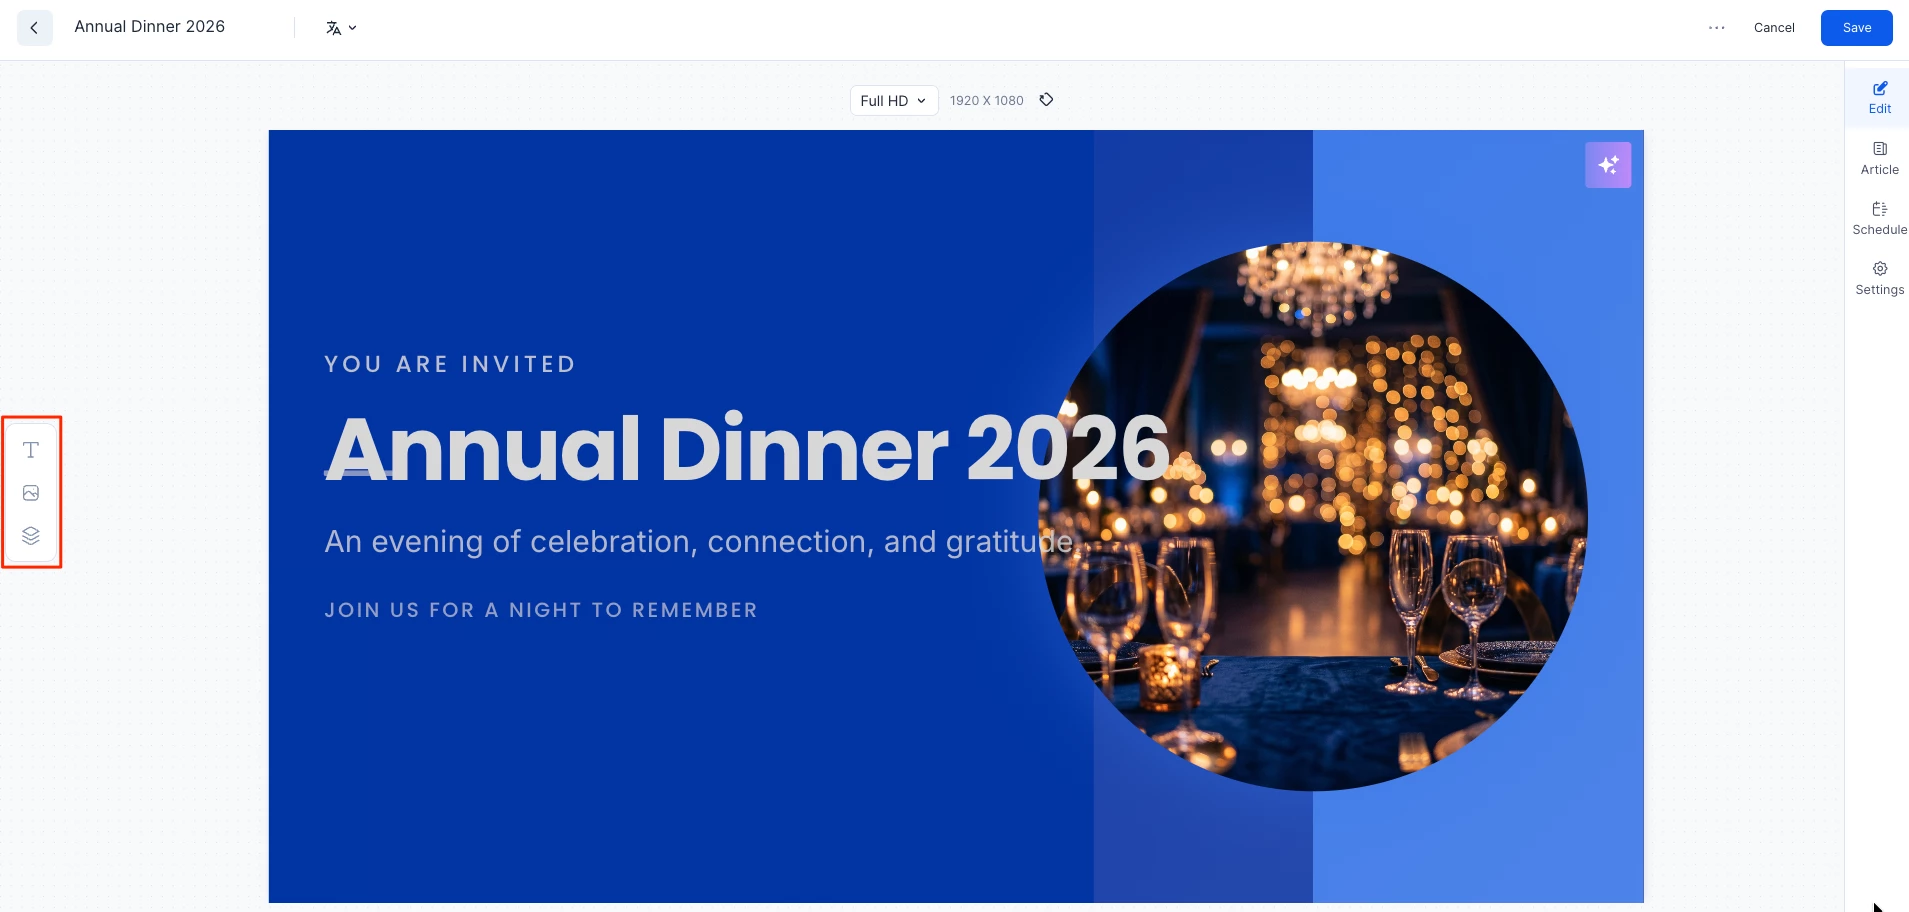
- Text - Add a text box, title, headline, subheadline, body text, overline, or overline pill.
- Images - Upload an image, select an image from the library, or generate AI media.
- Layers - View and manage the arrangement of design elements on the card, such as text, images, and stacked or unstacked objects.
Note: You can update text and images using the design tools or directly from the editor canvas. Hover over the text or image you want to change, then select the available editing option.
- In the Article tab:
- Include an Article or Caption to accompany the content item when it is displayed on mobile apps, tablets, and other social collaboration platforms. You can also use Ask AI to automatically generate this text.
- Enter a Referral Link to link more information to the content.
- In the Schedule tab:
- You may add the content to a channel by selecting the channel from the Add to channel drop-down menu, or leave it unassigned to be added later.
- When the content is assigned to a channel, the SCHEDULING and DISPLAY PROPERTIES options are displayed. Refer to the Configure Content Playback Properties: Dayparting, Frequency, Scheduling, in a Playlist Channel article for detailed configuration instructions.
- In the Settings tab:
- The Name field will be auto-populated to match the Title of the content which will also act as the filename for the content. This is a mandatory field.
- Select the Content Category from the drop-down menu to match the focus of the message, or leave it at the default content category.
- Enter any relevant Tags for the content. (Optional)
- Select a folder for the content in the Library Location drop-down menu to change the default folder location.
- Select an expiry date for the content from the Auto Delete Content from Library drop-down menu. (Optional)
- Upload an image to be used as the Thumbnail for the content.
- Select Download to download the generated card as a ZIP file.
- Select Delete to delete the card.
- Once done, click SAVE.
- In order to display the Generate Card, proceed to add the card to a playlist channel, and publish the playlist channel.
Edit Generate Card
The instructions below show you how to edit an Generate card.
- Log in to your Appspace console.
- Click Library from the ☰ Appspace menu, and select a library or folder containing the content you wish to edit.
- Select and click the Generate card to edit, and select the desired tab to edit or view.
- In the Edit, Article, and Settings tabs:
- You may edit the content the same way as it was configured. For detailed instructions on how to do this, please refer to the Create and Configure Generate Card section above.
- In the Preview tab:
- Preview how the content is displayed on your device.
- In the Channels tab:
- You may add the content to a channel by selecting the channel from the Add to channel drop-down menu, or leave it unassigned to be added later.
- When the content is assigned to a channel, the SCHEDULING and DISPLAY PROPERTIES options are displayed. Refer to the Configure Content Playback Properties: Dayparting, Frequency, Scheduling, in a Playlist Channel article for detailed configuration instructions.
- In the Analytics tab:
- View the individual content analytics in this tab. For more information, please refer to the Individual Content Analytics section of the Analytics article.
- In the Edit, Article, and Settings tabs:
- Once done, click SAVE.