


Welcome to your Appspace trial
Let’s get started
This guide is designed to help you see results quickly.
We’ll walk you through set-up and branding, how to manage users, create content and distribute it everywhere with one click, and how to use insights to boost performance.
You’ll get clear, practical instructions to guide you through your 30-day trial and show you the real value of Appspace.
What’s included in your trial?
You have full access to try it all:
- Appspace AI: Create content faster with AI writing and image generation
- Free analytics: Track engagement with Appspace Insights
- Large-scale testing: Invite up to 500 users.
- Digital Signage: Register up to 25 devices
Customer success: Real-world impact
Here’s how one organization transformed its communications with Appspace – from fragmented tools and missed messages to a connected, engaged workforce.
Bringing The Skills Center community together
Your step-by-step guide
Step 1: Get started with Appspace
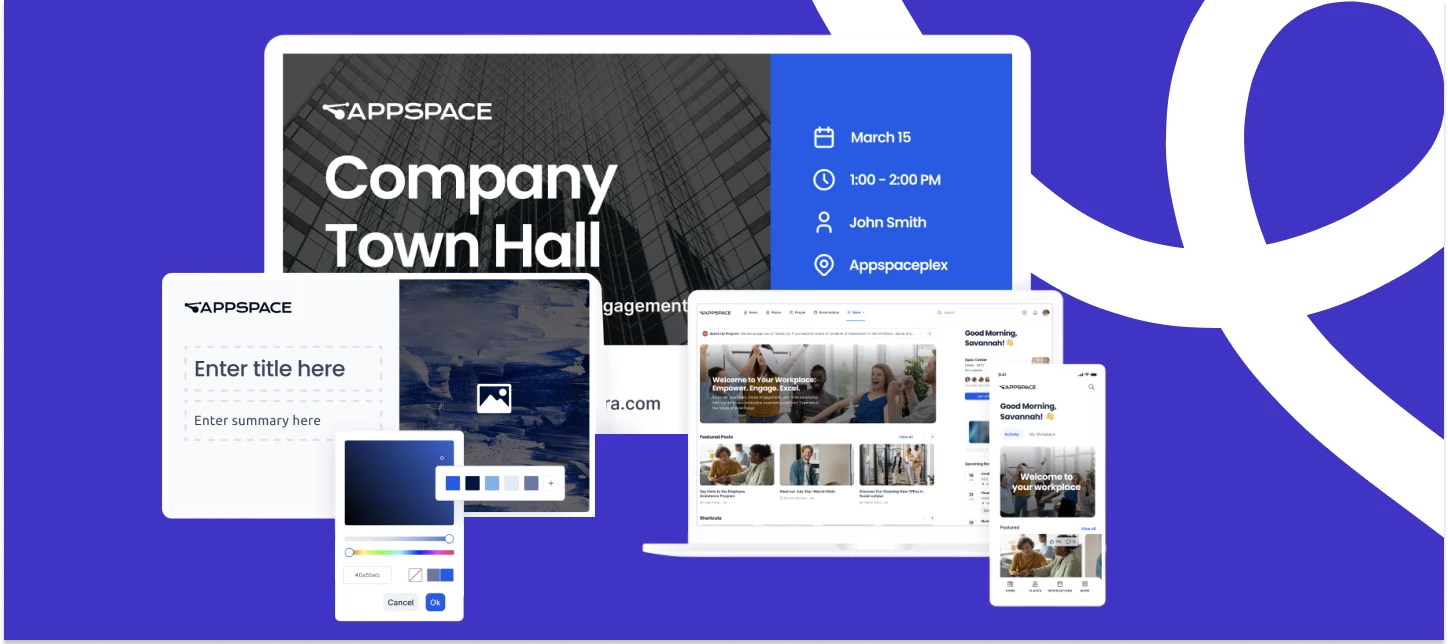
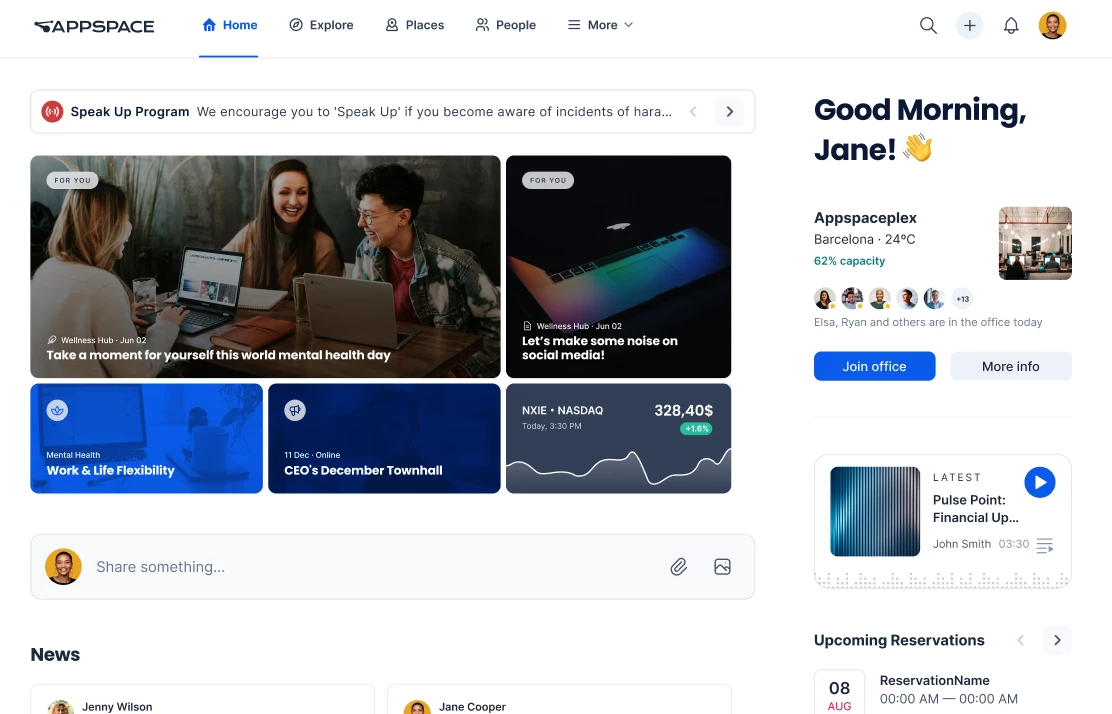
With Appspace, you can create and publish employee communications across every channel – intranet, mobile, email, and digital signage – all from one platform.
Before you invite your team, take a few minutes to set up the basics. It’ll make everything easier later, and your workspace will look and feel on-brand from day one.
How to get started with your 30-day trial
- Learn the basics
Start with a quick intro to Appspace.
How to: Let’s begin - Take a tour
Learn how to navigate and find what you need.
How to: Get around the platform - Apply your brand
Add your logo and brand colors.
How to: Brand the console - Understand the location hierarchy
Learn how locations help users see the right experience by office or region.
How to: Understand the location hierarchy - Create locations
Set up your locations now so it’s easy to add users later.
How to: Create locations for your users
Pro tip: This setup only takes a few minutes, and it’ll save you time later.
Step 2: Invite your team
Your trial is off to a great start. Now it’s time to invite a few teammates so you can test Appspace together.
Step 2 is simple: Add the right people, set access, and organize users so your messages reach the right audience.
How to bring in your teammates
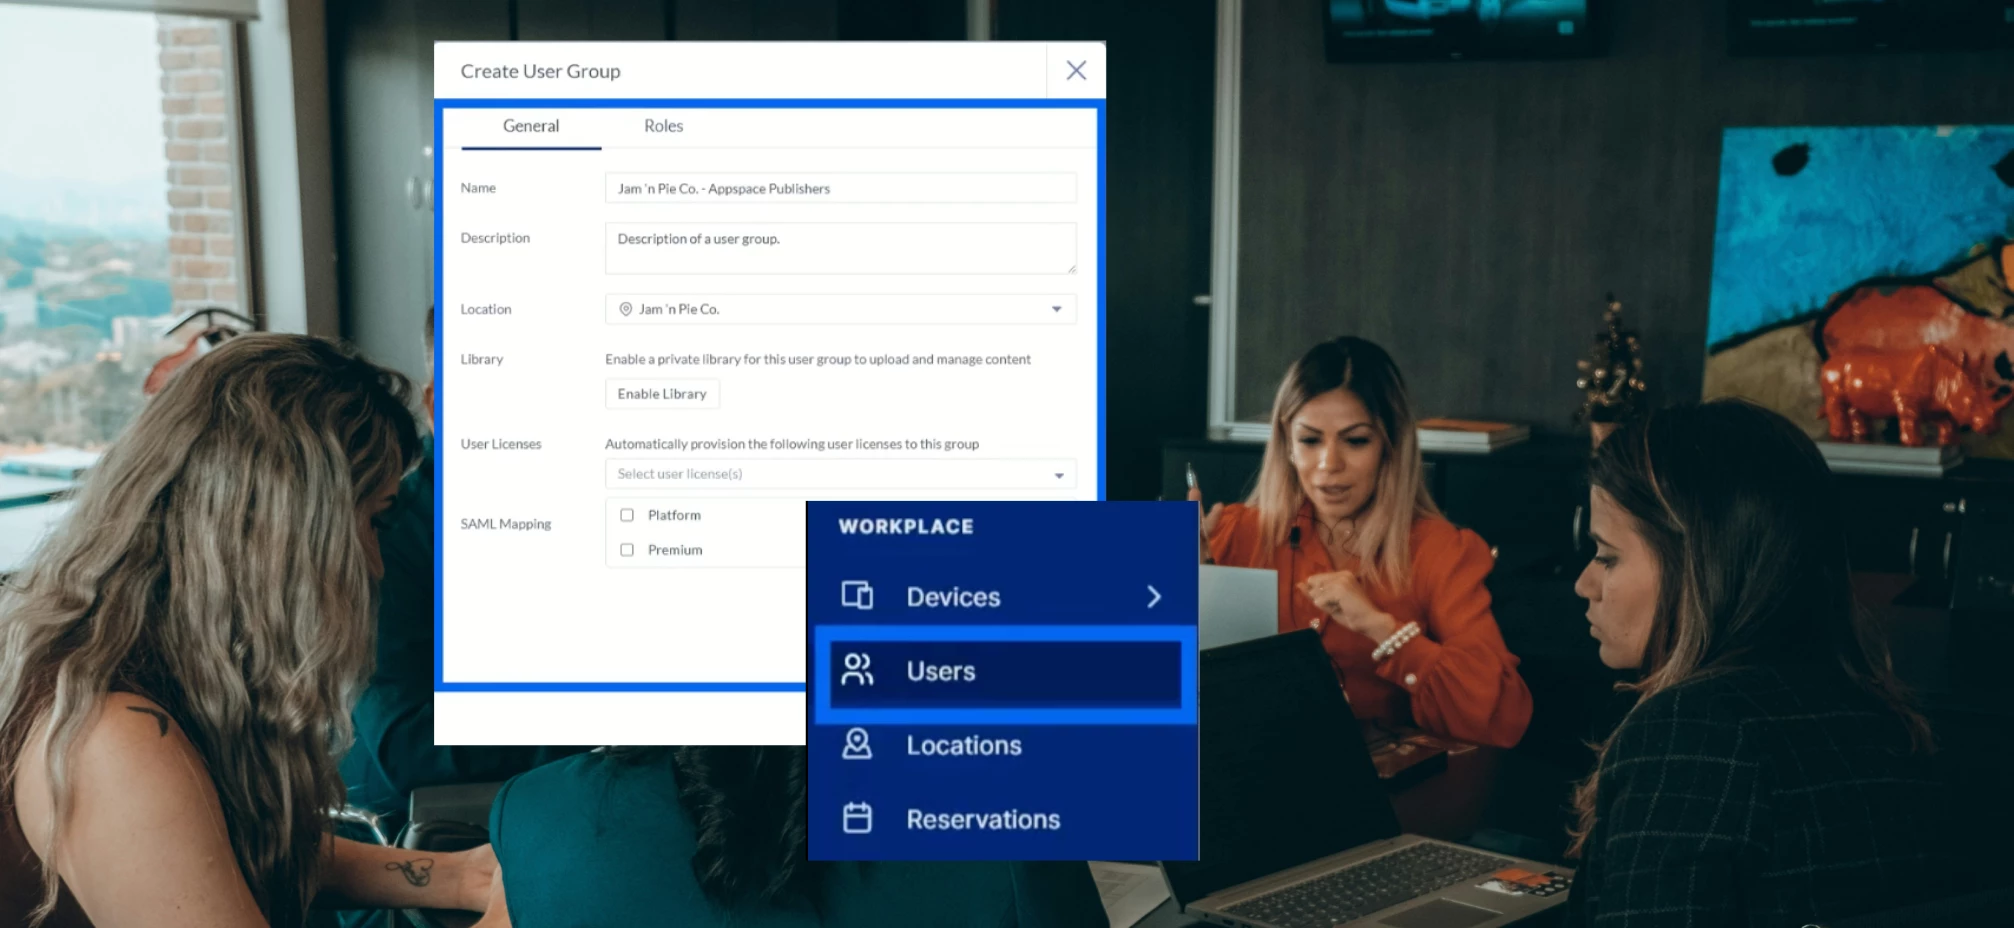
- Understand user roles and permissions
Choose who can create, publish, and manage content.
How to: Understand user roles and permissions - Assemble your core team
Start with a small group (usually IT, HR, and Comms) to test how things work before you roll it out to everyone. - Create and manage user groups
Group people by department or location so targeting is quick and easy.
How to: Create and manage user groups - Build your user base
Bring in the people who will actively test, create, and share feedback during your trial.
How to: Invite users and assign locations, roles, and permissions - Create audiences for smarter targeting
Send the right message to the right people – without extra noise.
How to: Create audiences
Pro tip: Set roles and groups now so content stays organized as you add more users.
Step 3: Create your first content (plus AI tips)
Now that you’re set up and your team is on board, it’s time to start creating.
Appspace makes it easy to create, organize, and publish content fast – without needing a design team or extra tools. With templates and AI, you can share updates across your intranet, mobile app, and screens in just a few clicks.
How to start creating content
- Organize your assets
Upload and organize images, videos, and documents in the Appspace Library.
How to: Understand the Library | Manage the Library - Create or upload content
Try adding a few files and creating a simple post to get started.
How to: Create or upload content and Create a quick post - Build your content structure
Use Channels, Communities, and Topics to keep content easy to find.
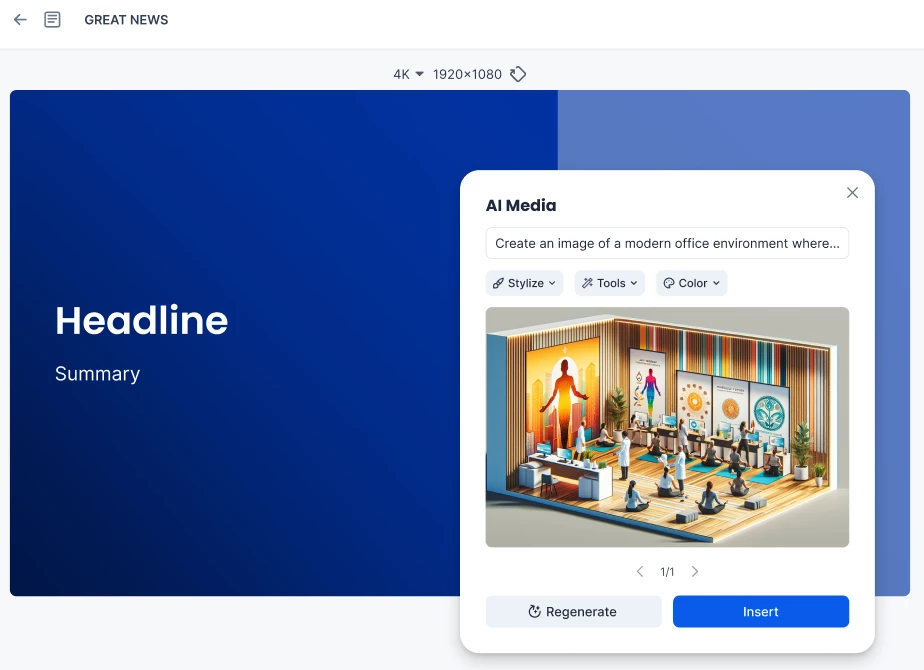
How to: Understand Spaces - Try Appspace AI
Use AI to draft content and generate visuals faster.
How to: Use Appspace AI - Use templates for digital signage
Start with a template to create clean, professional announcements.
Take a look: Browse pre-installed templates - Customize your home banner
Make the experience feel simple and branded.
How to: Configure home banner - Add app links
Add quick links so employees can easily access key tools.
How to: Add essential app links
Pro tip: If you haven’t invited users yet, do that first so you have real people ready to see and test your content.
Step 4: Publish across channels
You’ve created content – now it’s time to publish it. With Appspace, you can share updates across mobile, intranet, and workplace screens in just a few clicks.
Appspace allows you to reach your team wherever they work. By connecting your digital signage, mobile devices, and employee apps, you ensure that important updates are seen instantly, fostering a more connected and informed workplace culture.

How to start sharing content
- Connect a screen
From lobby monitors to meeting rooms, see how your messages look in the real world.
How to: Connect Devices - Publish to a screen
Push your branded Channels to office TVs, lobby displays, and other devices.
How to: Publish Channels to Devices - Go mobile
Download the Appspace App for iOS or Android to see how your team can access content on the go.
How to: Configure the Mobile App - Launch your first broadcast
Send an important update across multiple channels at once.
How to: Utilize Broadcasts - Drive engagement
Use Events and Polls so employees can respond – not just read.
How to: Create an Event Post and Create a Poll - Support culture
Recognize and celebrate team members with Send Praise and Social Reactions.
How to: Configure Social Reactions and Send Praise
Pro tip: You can also create newsletters and professional emails right in Appspace. Schedule sends, target specific audiences, and keep everyone in the know.
Step 5: Measure what’s working
You’ve created content, shared it, and engaged your team. Now it’s time to see what worked. Appspace Insights helps you track engagement so you can improve what you send next and prove your impact.

How to get started with analytics and reporting
- View everything in one dashboard
See performance across intranet, mobile, messaging, and screens.
How to: Analytics Module Overview - Review engagement metrics
Track opens, clicks, and views – and learn what content performs best. Access the Content Analytics dashboard or ask the AI Insights Assistant for quick answers.
Try questions like:- “What was our most engaging content last month?”
- “Which departments interact most with mobile updates?”
- “Are any locations underperforming on digital signage?”
- “What was employee sentiment around our last town hall?”
- Monitor your screens
See which digital signage devices are active and how your content is performing.
How to: Create and schedule device reports - Prove your ROI
Generate reports to share results and show value clearly.
How to: Sign in and create your first report.
Pro tip: Use the AI Insights Assistant to pull specific trend reports in seconds, letting you focus on strategy rather than spreadsheets.
Step 6: Save your work
When your trial ends, you’ll need to act to save everything you’ve created - your data, content, and setup - otherwise it will be removed.
Upgrade today and keep:
- Pages, Topics, Channels, and Communities
- Uploaded content and templates
- Users, groups, and audiences
- Engagement data and analytics
No reset, No rework, Just keep building.
Contact sales to continue and keep access.
Why move to a paid account?
When you move from trial to a paid plan, you can:
- Keep everything you’ve built
Save your work and keep your content, users, and data exactly as-is – no rework, no starting over. - Unlock premium content
Access professionally designed templates that help every message look polished, consistent, and on-brand. - Reach everyone
Add more users so every teammate – remote, deskless, or in-office – stays connected. - Get priority support
Connect faster with Appspace product experts to keep things running smoothly and reduce downtime. - Expand your storage
Create richer content with more videos, visuals, and dynamic presentations – without worrying about space limits.
It’s a simple process to upgrade. Contact Sales today and we’ll help you preserve everything you’ve built and keep the momentum going.